


关于代理如何获取客户端真实IP的配置: http://www.example.com/static/index.html
dev开发环境举例:www.example.com(代理)–>proxy.example.com(代理) –> proxy.data.example.com
默认获取客户端IP地址的变量: $remote_addr
client_ip: 10.19.136.119 --> www_ip:10.19.97.21 --> proxy_ip:10.19.97.22 --> proxy_data:10.19.97.22标准请求:

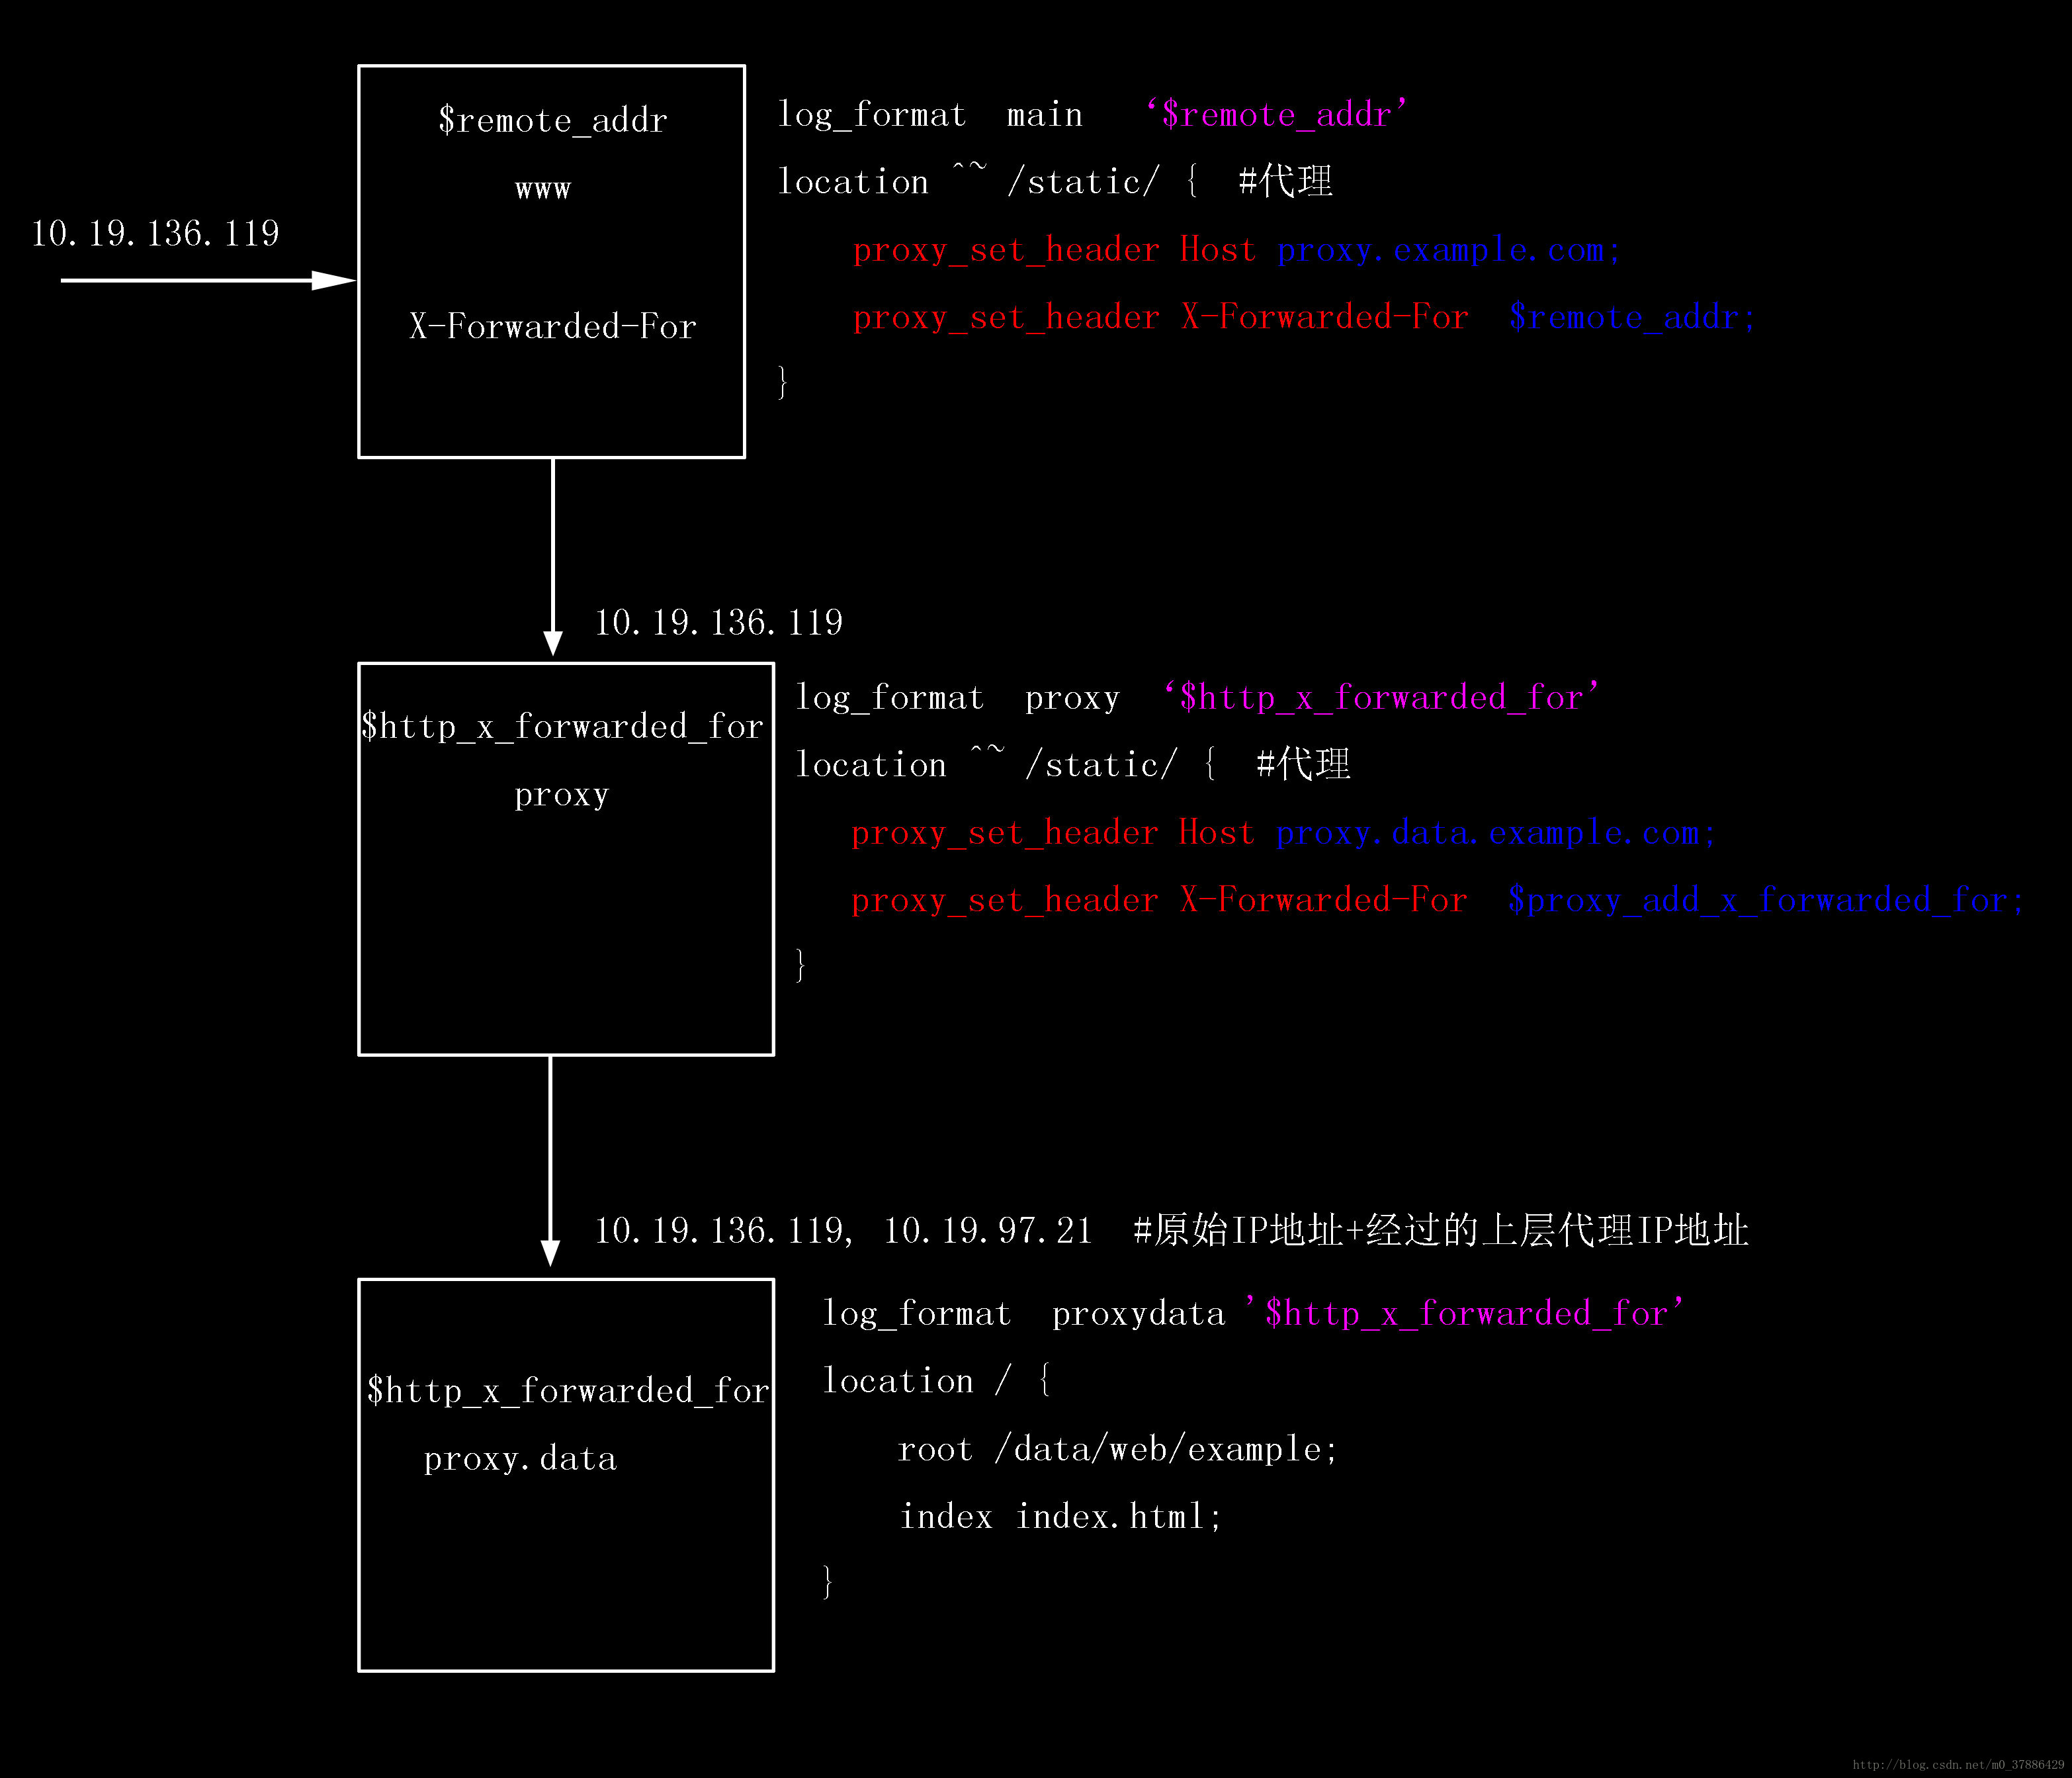
log_format  main  '$remote_addr
location ^~ /static/ {  #代理
    proxy_set_header Host proxy.example.com;
    proxy_set_header X-Forwarded-For  $remote_addr;
 }


log_format  proxy ‘$http_x_forwarded_for’
location ^~ /static/ {  代理
    proxy_set_header Host proxy.data.example.com;
    proxy_set_header X-Forwarded-For  $proxy_add_x_forwarded_for;
}


log_format  proxydata '$http_x_forwarded_for’
location / {
    root /data/web/example;
    index index.html;
}
实例1:通过nginx获取客户端真实IP的方法
1、确认nginx的 http_realip_module 模块已安装。
检查模块是否安装:
/usr/local/sbin/nginx -V | grep http_realip_module如果没有,重新下载编译nginx
#编译nginx
./configure --user=www --group=www --prefix=/usr/local/nginx --with-http_stub_status_module \
--with-http_ssl_module --with-http_realip_module
make
make install
kill -USR2 `cat /usr/local/nginx/logs/nginx.pid`
2、修改Nginx的配置文件
在 location / {}中添加以下内容:

set_real_ip_from ip_range1;
set_real_ip_from ip_range2;
...
set_real_ip_from ip_rangex;
real_ip_header    X-Forwarded-For;
注意:这里的ip_range1,2,…指的是高防IP的回源IP地址(如果高防IP后还有WAF、CDN,则需要写WAF、CDN的回源IP地址,即需要写离源站最近的一层七层代理的回源IP段),需要添加多条。
3、修改日志记录格式 log_format
log_format一般在nginx.conf中的HTTP配置中:

log_format  main  '$http_x_forwarded_for - $remote_user [$time_local] "$request" ' '$status $body_bytes_sent "$http_referer" ' '"$http_user_agent" ';
添加x-forwarded-for字段,替换原本的remote-address。

4、重启nginx
实例2:通过tomcat获取客户端真实IP的方法
开启 Tomcat 的 X-Forwarded-For 功能可获取客户端真实IP。
在 tomcat/conf/server.xml 文件中,修改 AccessLogValve 日志记录功能:
<Valve className="org.apache.catalina.valves.AccessLogValve" directory="logs"
prefix="localhost_access_log." suffix=".txt"
pattern="%{X-FORWARDED-FOR}i %l %u %t %r %s %b %D %q %{User-Agent}i %T" resolveHosts="false"/>
实例3:通过apache获取客户端真实IP的方法
1、安装 Apache 的 mod_rpaf 第三方模块
#获取模块方法,请参考 https://github.com/gnif/mod_rpaf/?spm=5176.7740535.2.7.ShST7K
tar zxvf mod_rpaf-0.6.tar.gz
cd mod_rpaf-0.6
/usr/local/httpd/bin/apxs -i -c -n mod_rpaf-2.0.so mod_rpaf-2.0.c
2、修改Apache配置信息/usr/local/httpd/conf/httpd.conf,在最末尾添加以下内容
LoadModule rpaf_module modules/mod_rpaf-2.0.so
RPAFenable On
RPAFsethostname On
RPAFproxy_ips ip地址
RPAFheader X-Forwarded-For
**注意:**RPAFproxy_ips ip地址,这个IP地址不是负载均衡提供的公网IP,具体IP需要查看Apache日志获得。通常会有2个IP,都需要写入。)
3、修改完成后,重启 Apache
4、样例
LoadModule rpaf_module modules/mod_rpaf-2.0.so
RPAFenable On
RPAFsethostname On
RPAFproxy_ips 1.1.1.1 2.2.2.2
RPAFheader X-Forwarded-For


 1605
1605

 被折叠的 条评论
为什么被折叠?
被折叠的 条评论
为什么被折叠?
 到【灌水乐园】发言


