


支付宝电脑网站支付
准备工作
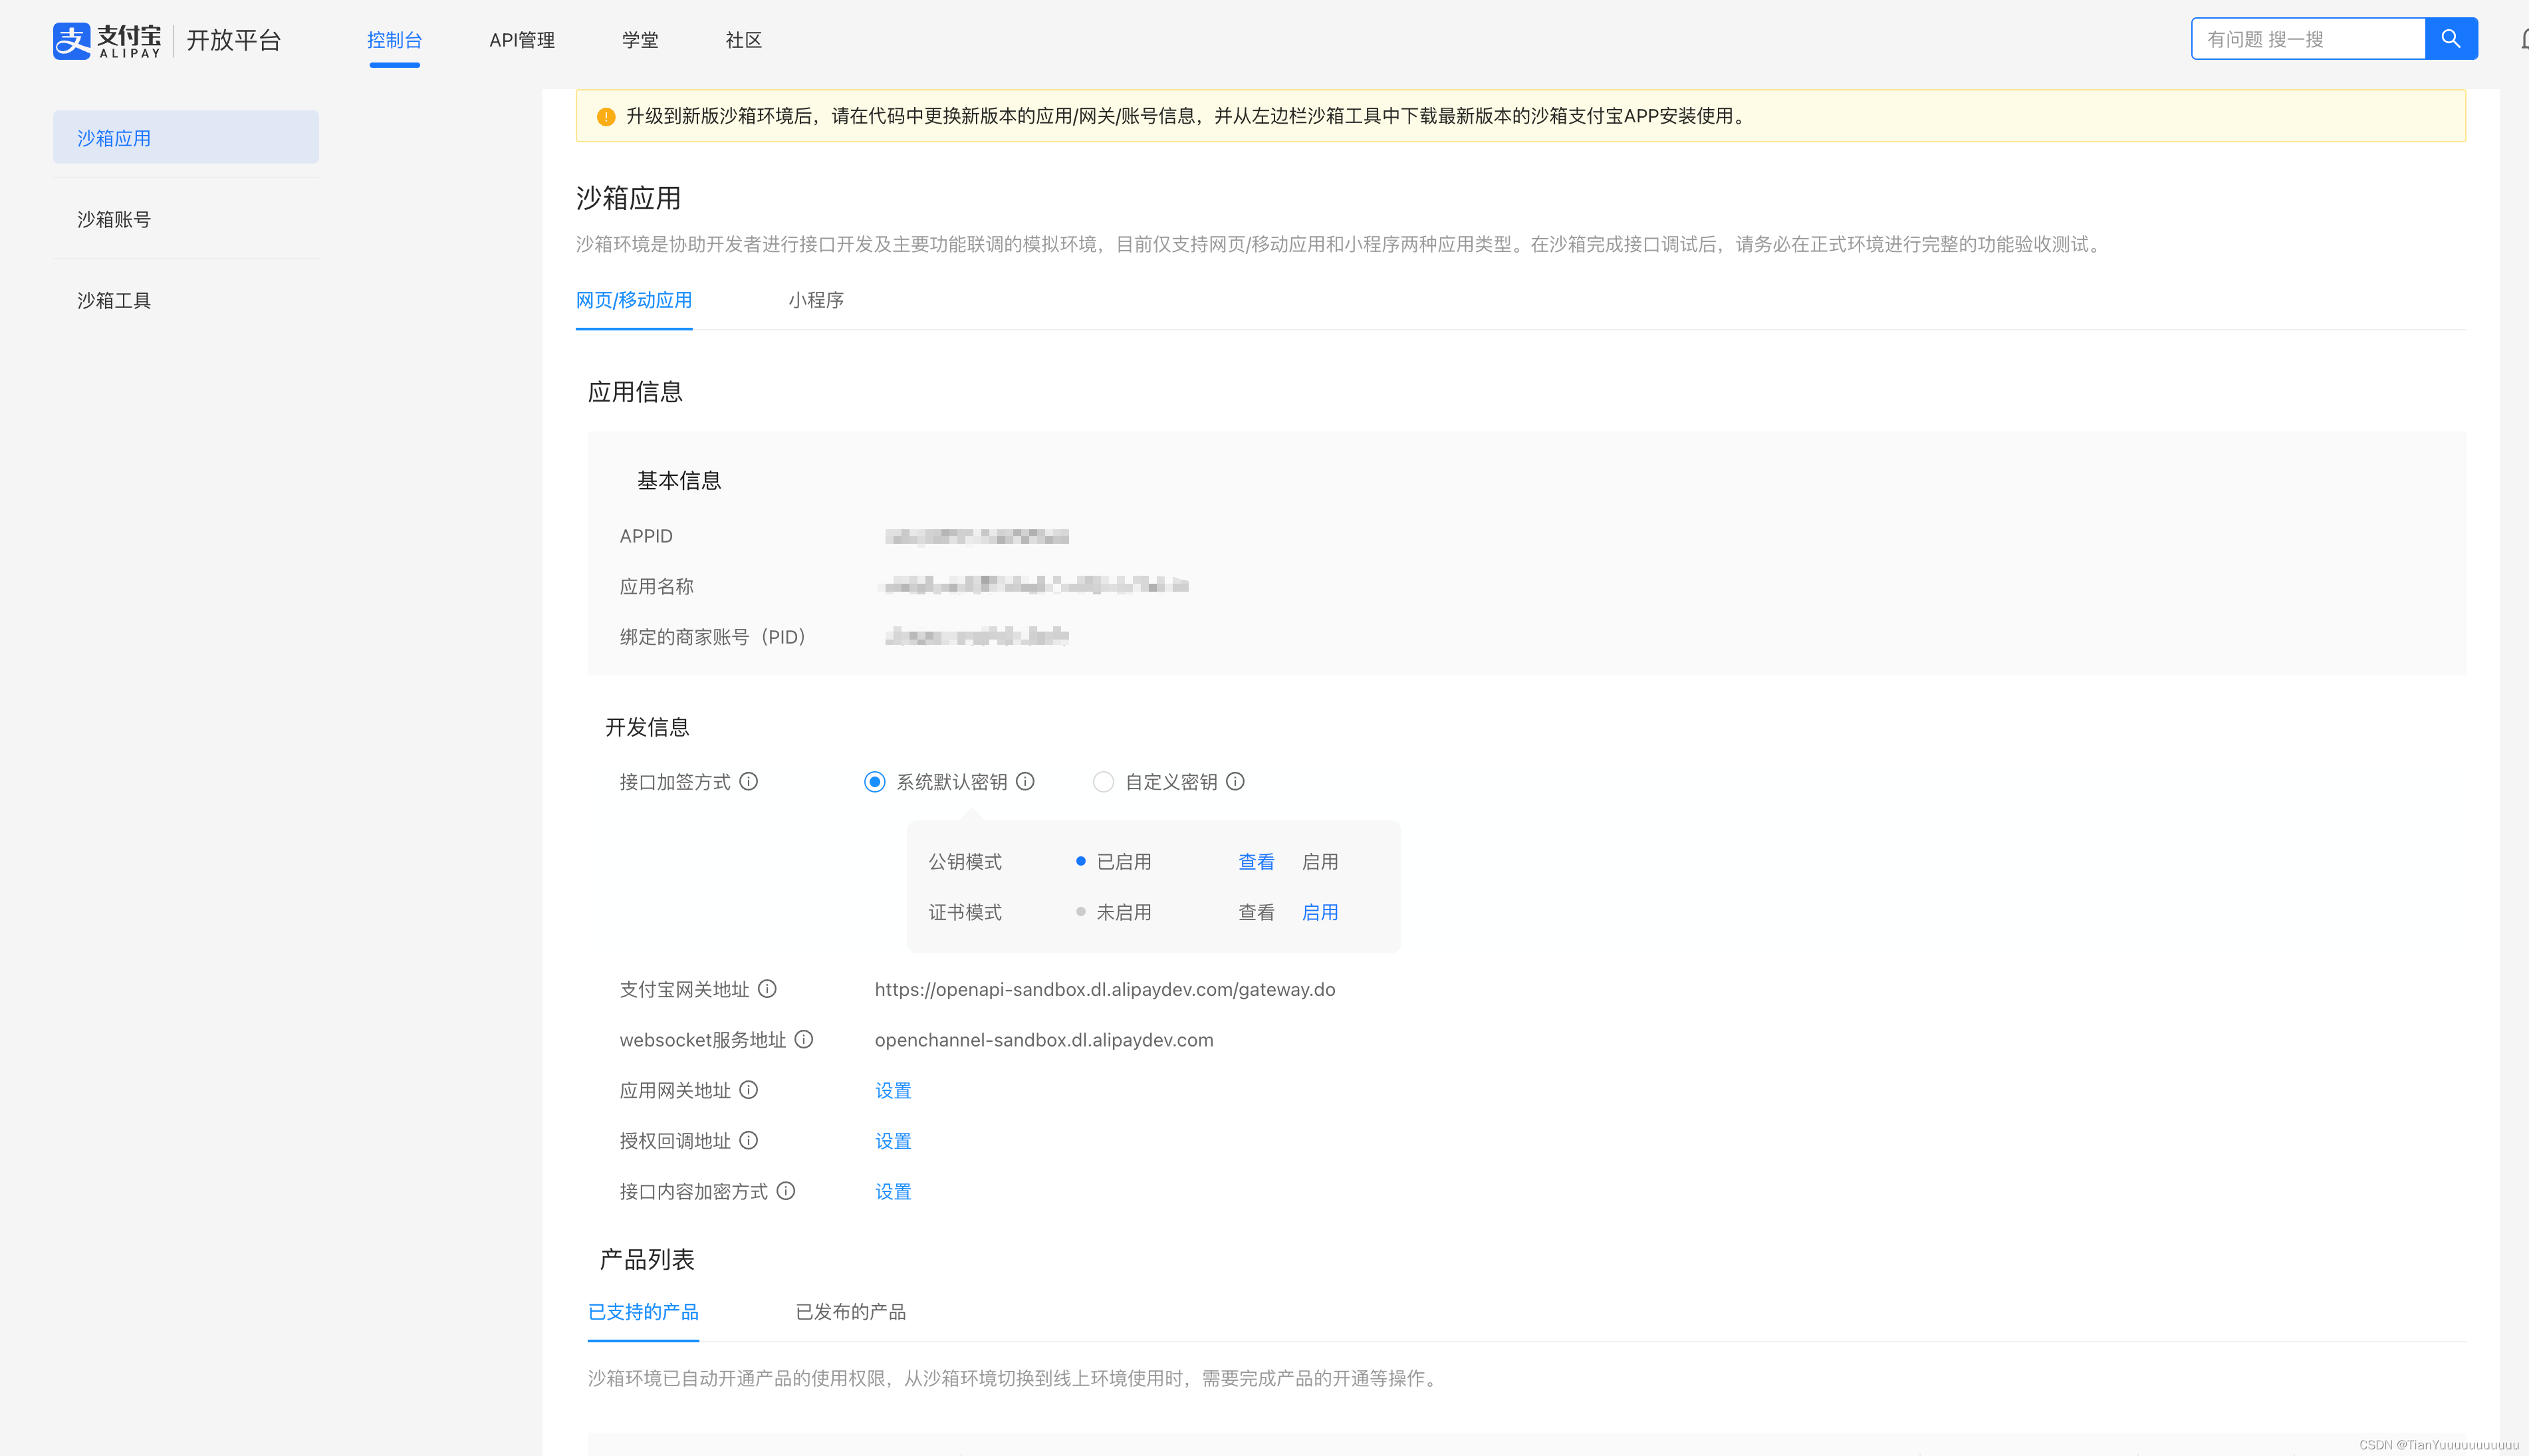
首先需要在支付宝开放平台登录并点击控制台选择开发工具沙箱

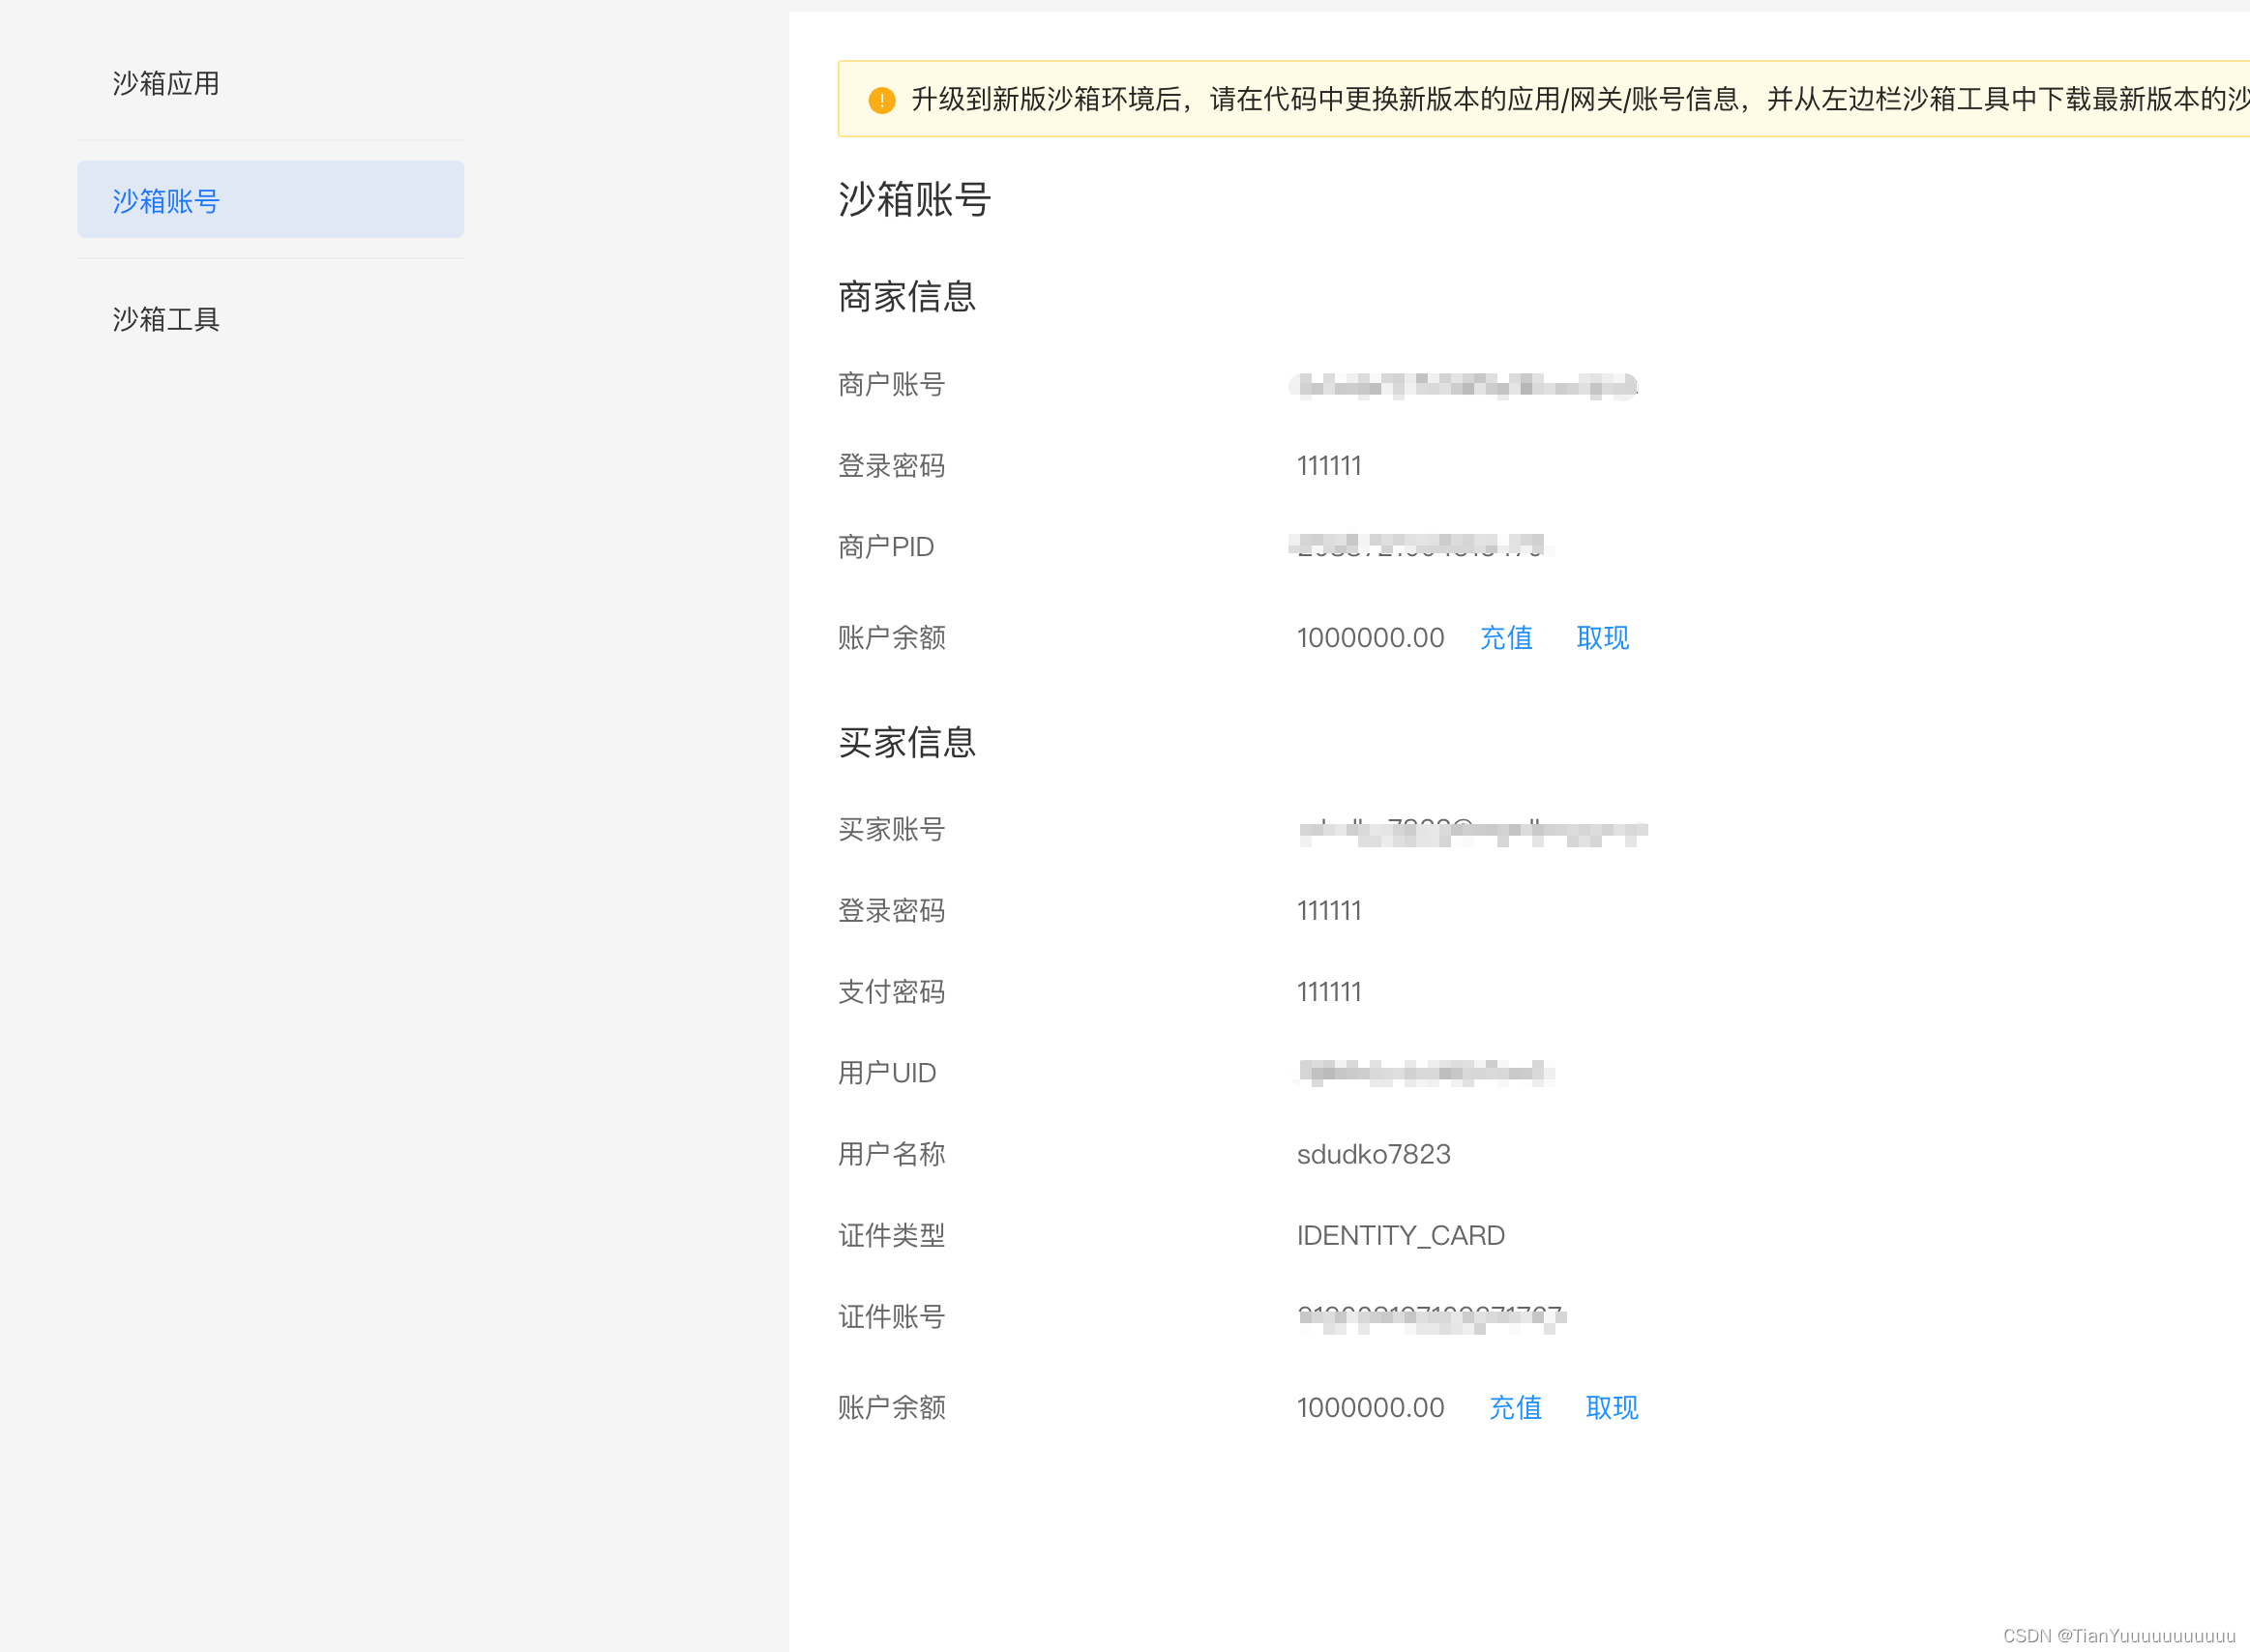
这个时候就可以看到自己的APPID 和自己的沙箱账号 后面使用沙箱工具登录支付测试使用
开发工作
Jar包引入
        <dependency>
            <groupId>com.alipay.sdk</groupId>
            <artifactId>alipay-sdk-java</artifactId>
            <version>4.34.0.ALL</version>
        </dependency>
后端代码
PaymentParam
@Data
public class PaymentParam {

    /**
     * 跳转路径
     */
    private String returnUrl;

    /**
     * 订单号
     */
    private String outTradeNo;

    /**
     * 支付金额
     */
    private BigDecimal totalAmount;

    /**
     * 商品名称
     */
    private String subject;

    /**
     * 支付类型 手机:QUICK_WAP_WAY 电脑:FAST_INSTANT_TRADE_PAY
     */
    private String productCode;


}
PaymentController
/**
 * 支付接口
 */
@Controller
@Api(tags = "PaymentController", description = "支付接口")
@RequestMapping("/aliyun/pay")
public class PaymentController {

    //appid
    private final String APP_ID = "APPID";
    //应用私钥
    private final String APP_PRIVATE_KEY = "应用私钥";
    private final String CHARSET = "UTF-8";
    // 支付宝公钥
    private final String ALIPAY_PUBLIC_KEY = "支付宝公钥";
    //这是沙箱接口路径
    private final String GATEWAY_URL ="https://openapi-sandbox.dl.alipaydev.com/gateway.do";
    private final String FORMAT = "JSON";
    //签名方式
    private final String SIGN_TYPE = "RSA2";
    //支付宝异步通知路径,付款完毕后会异步调用本项目的方法,必须为公网地址
    private final String NOTIFY_URL = "http://IP/aliyun/pay/yibu";
    //支付宝同步通知路径,也就是当付款完毕后跳转本项目的页面,可以不是公网地址
    private final String RETURN_URL = "http://IP/entertainment/payment";


    @ApiOperation(value = "支付宝支付")
    @RequestMapping(value = "/payZFB", method = RequestMethod.POST)
    @ResponseBody
    public CommonResult<String> payZFB(@RequestBody PaymentParam paymentParam) throws AlipayApiException {
        AlipayClient alipayClient = new DefaultAlipayClient(GATEWAY_URL, APP_ID, APP_PRIVATE_KEY, FORMAT, CHARSET, ALIPAY_PUBLIC_KEY, SIGN_TYPE);
        AlipayTradePagePayRequest request = new AlipayTradePagePayRequest();
        //异步接收地址,仅支持http/https,公网可访问
        request.setNotifyUrl("");
        //同步跳转地址,仅支持http/https
        request.setReturnUrl(paymentParam.getReturnUrl());
        JSONObject json = new JSONObject();
        json.put("outTradeNo", paymentParam.getOutTradeNo());
        String params = json.toString();
        /******必传参数******/
        JSONObject bizContent = new JSONObject();
        //商户订单号,商家自定义,保持唯一性
        bizContent.put("out_trade_no", paymentParam.getOutTradeNo());
        //支付金额,最小值0.01元
        bizContent.put("total_amount", paymentParam.getTotalAmount());
        //订单标题,不可使用特殊符号
        bizContent.put("subject", paymentParam.getSubject());
        //电脑网站支付场景固定传值FAST_INSTANT_TRADE_PAY
        bizContent.put("product_code", paymentParam.getProductCode());
        //支付宝请求的传值 可以在req中获取
        bizContent.put("body", params);
        /******可选参数******/
        request.setBizContent(bizContent.toString());
        AlipayTradePagePayResponse response = alipayClient.pageExecute(request);
        return CommonResult.success(response.getBody());
    }


}
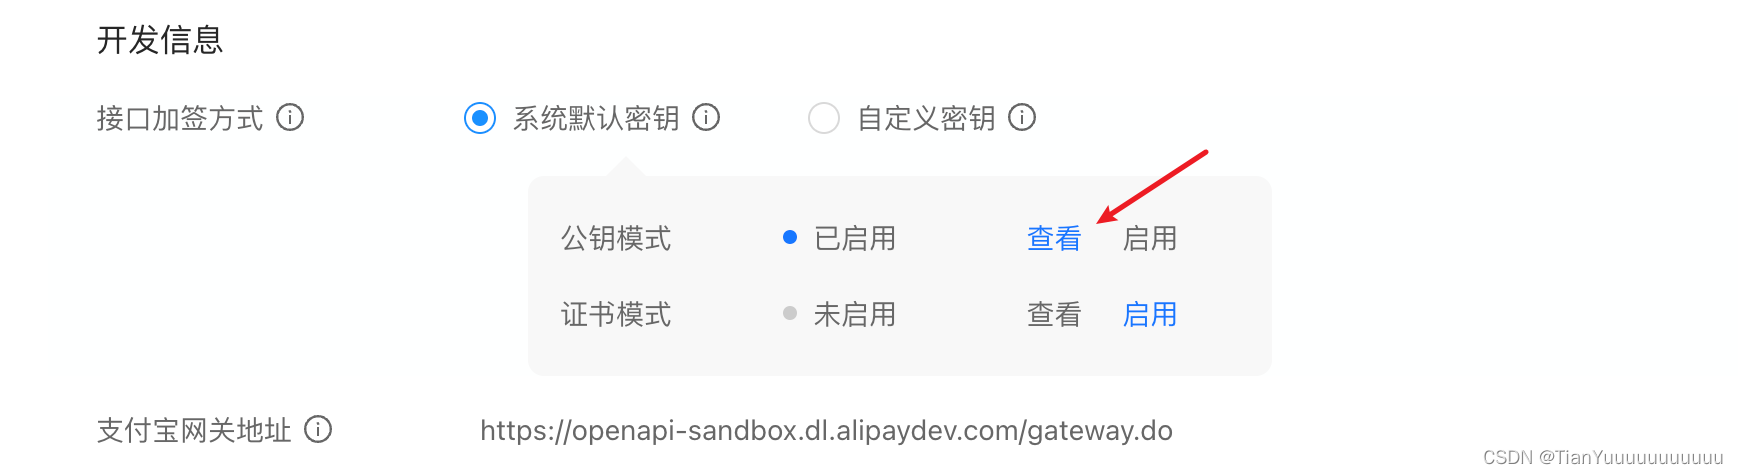
应用私钥和支付宝公钥获取方式
点击查看复制对应的参数
前端代码
<template>
  <el-card class="box-card">
    <ul class="msg-box">
      <li>
        <h4>我要支付</h4>
      </li>
      <li>
        <h4 style="margin-bottom: 15px;">支付金额</h4>
        <el-radio-group v-model="amountVal" @change="amountChange">
          <el-radio border :label="''+ 100">充值100</el-radio>
          <el-radio border :label="''+ 500">充值500</el-radio>
          <el-radio border :label="''+ 1000">充值1000</el-radio>
          <el-radio border :label="''+ 2000">充值2000</el-radio>
          <el-radio border :label="''+ 5000">充值5000</el-radio>
          <el-radio border :label="''">自定义</el-radio>
        </el-radio-group>
      </li>
      <li>
        <h4 style="margin-bottom: 15px;">支付方式</h4>
        <el-radio-group v-model="rechargeParams.paymentType" @change="paymentTypeChange">
          <el-radio border :label="''+ 1">支付宝</el-radio>
          <el-radio border :label="''+ 0">微信</el-radio>
        </el-radio-group>
      </li>
      <li>
        <h4 style="margin-bottom: 15px;">支付金额</h4>
        <el-input :disabled="disabled" clearable v-model="rechargeParams.totalAmt" placeholder="请输入金额" style="width: 150px;"></el-input>
      </li>
    </ul>
    <div style="text-align: center; margin-top: 30px;">
      <el-button type="primary" @click="surePay">确认支付</el-button>
    </div>
  </el-card>
</template>

<script>
import {payZFB} from "../../../api/payment";
export default {
  data() {
    return {
      amountVal: '',
      disabled: false,
      // 同步跳转页面地址
      returnUrl:'http://localhost:8090/#/entertainment/payment',
      //充值参数
      rechargeParams: {
        "totalAmt": '', //金额
        "paymentType": "0", //支付方式[0:微信,1:支付宝,2:余额,3:活动]
        "transType": "0" //交易类型[0:充值,1:消费]
      }
    }
  },
  methods: {
    //充值金额
    amountChange(val) {
      this.rechargeParams.totalAmt = val;
      if (val === '') {
        this.disabled = false
      } else {
        this.disabled = true
      }
    },
    //支付方式
    paymentTypeChange(val) {
      this.rechargeParams.paymentType = val
    },
    //确认支付
    async surePay() {
      if (this.rechargeParams.totalAmt === '') {
        this.$message.warning('请输入金额');
        return;
      }
      if (this.rechargeParams.paymentType === '0') {

      } else if (this.rechargeParams.paymentType === '1') {
        let praem = {
          // 生成一个随你的订单号 方便测试
          outTradeNo:this.getProjectNum() + Math.floor(Math.random() * 10000),
          // 传递支付金额
          totalAmount:this.rechargeParams.totalAmt,
          // 传递同步跳转地址
          returnUrl:this.returnUrl,
          // 商品名称
          subject:'支付金额',
          // 支付类型
          productCode:'FAST_INSTANT_TRADE_PAY'
        }
        payZFB(praem).then(code => {
          if (code.code === 200) {
            // 支付方式跳转
            this.$message.success('支付宝支付')
            const payDiv = document.getElementById('payDiv');
            if (payDiv) {
              document.body.removeChild(payDiv);
            }
            const div = document.createElement('div');
            div.id = 'payDiv';
            div.innerHTML = code.data;
            document.body.appendChild(div);
            document.getElementById('payDiv').getElementsByTagName('form')[0].submit();
          }
        })
      }
    },
    // 获取当前日期的方法
    getProjectNum () {
      const projectTime = new Date() // 当前中国标准时间
      const Year = projectTime.getFullYear() // 获取当前年份 支持IE和火狐浏览器.
      const Month = projectTime.getMonth() + 1 // 获取中国区月份
      const Day = projectTime.getDate() // 获取几号
      var CurrentDate = Year
      if (Month >= 10) { // 判断月份和几号是否大于10或者小于10
        CurrentDate += Month
      } else {
        CurrentDate += '0' + Month
      }
      if (Day >= 10) {
        CurrentDate += Day
      } else {
        CurrentDate += '0' + Day
      }
      return CurrentDate
    }
  }
}
</script>

<style scoped>
/* 信息列表样式 */
.msg-box > li {
  list-style: none;
  border-bottom: 1px solid #c5c5c5;
  padding: 20px 10px;
}
</style>
实现效果
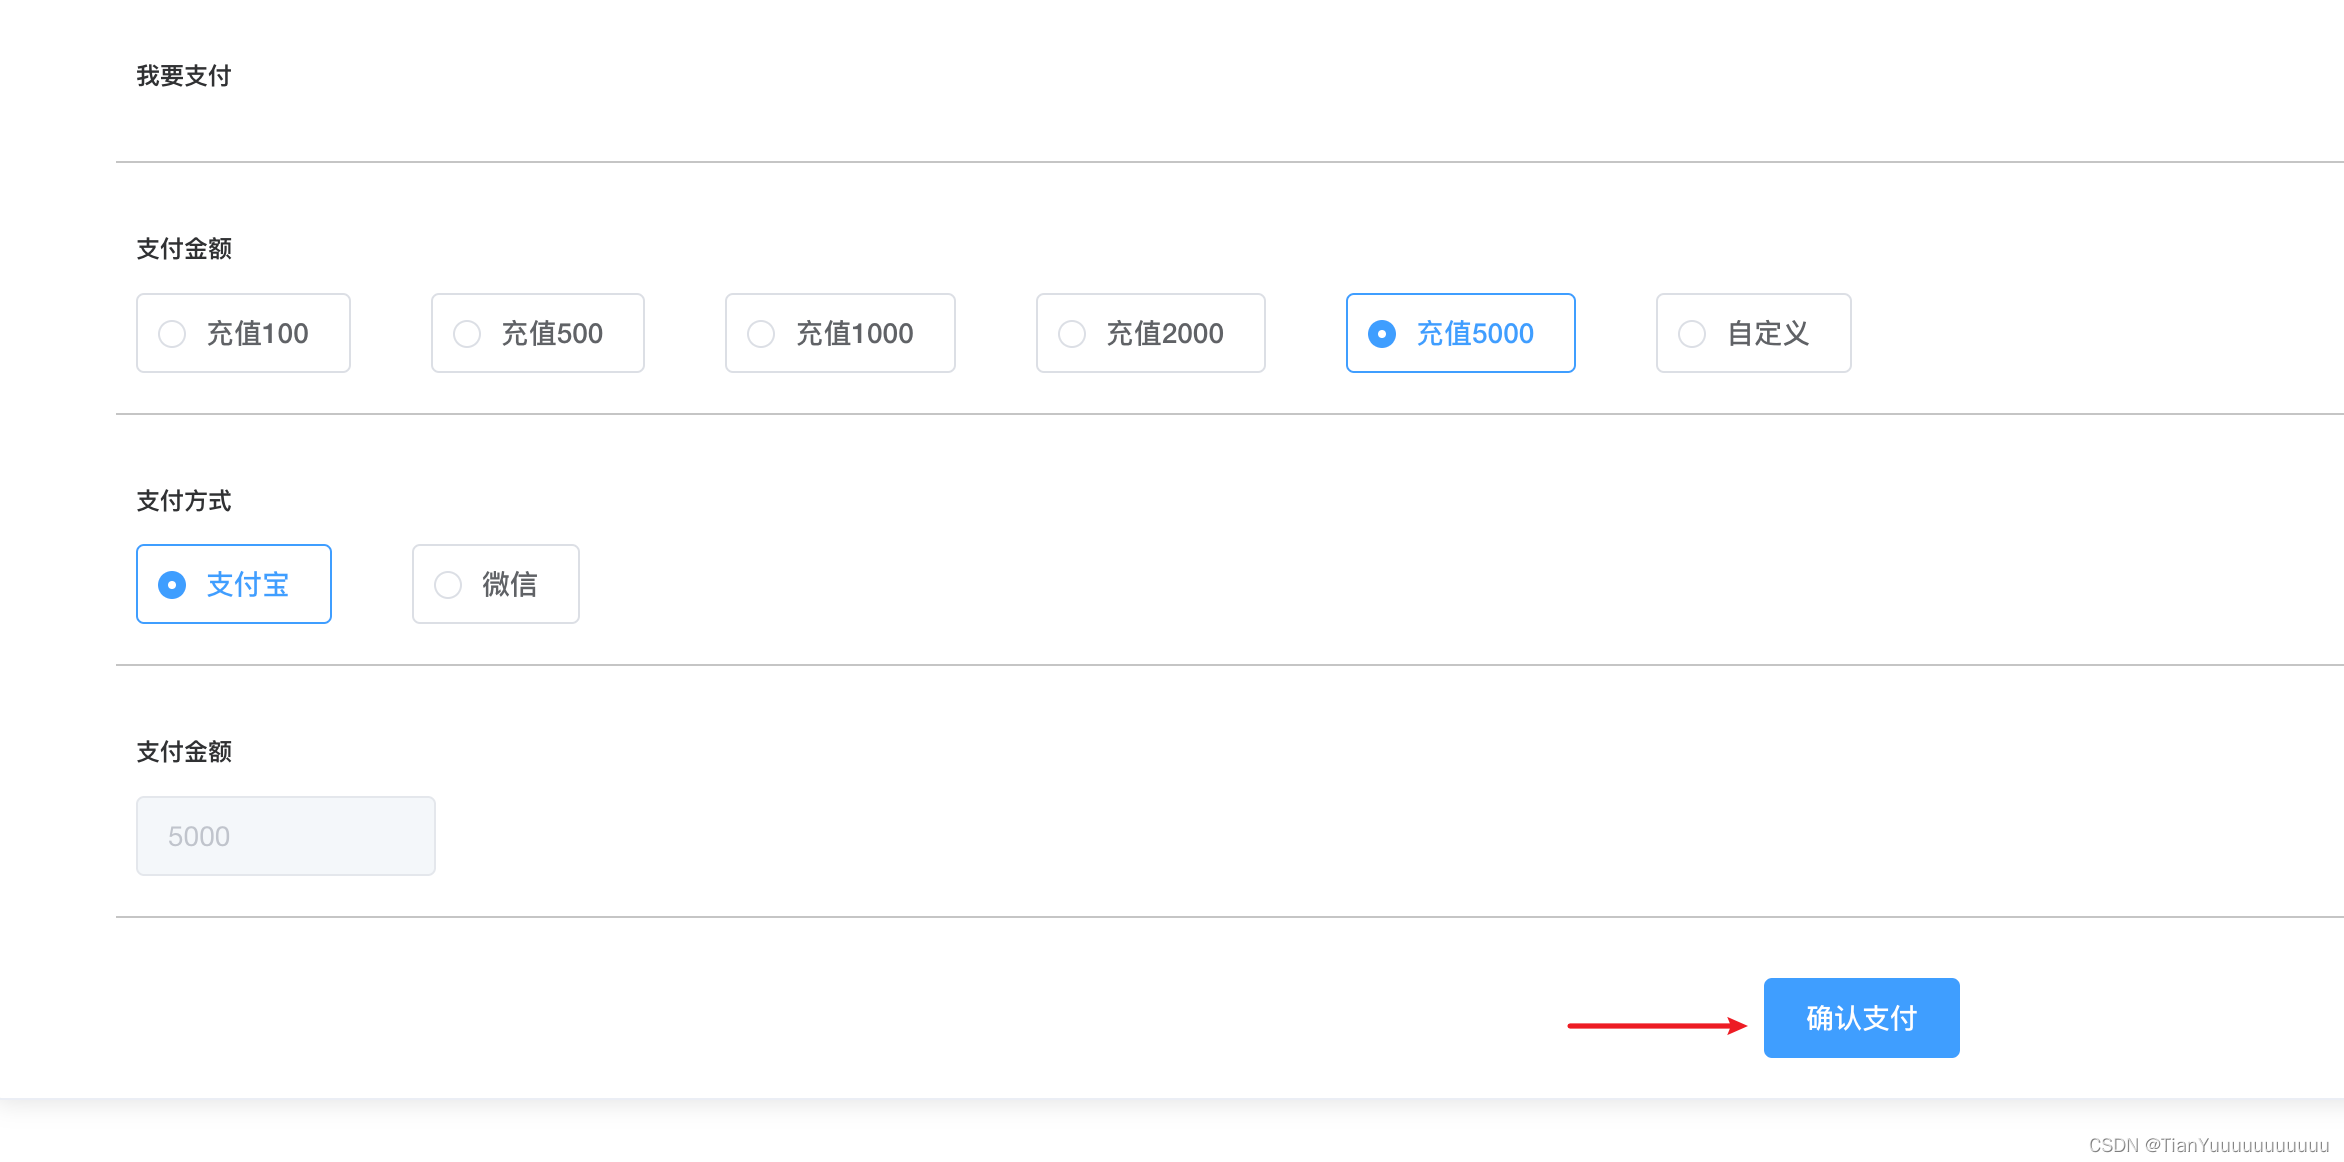
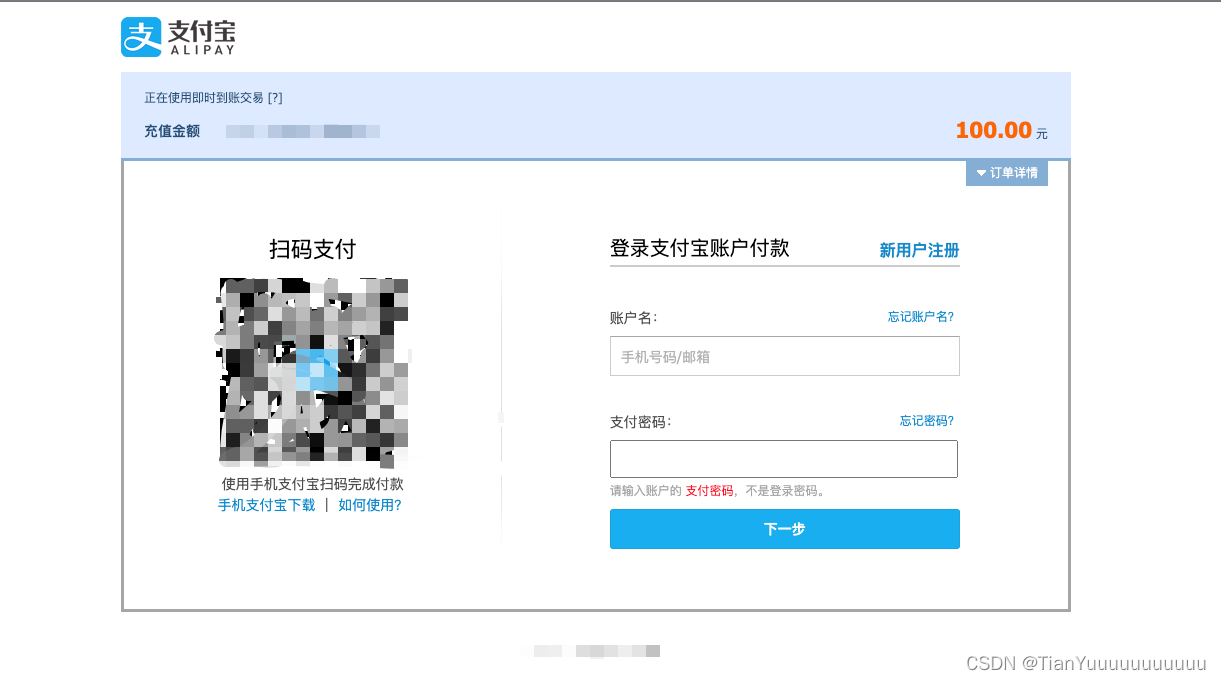
这里输入你的沙箱账号或者使用沙箱工具扫码支付 支付成功后 页面会根据你指定的returnUrl 跳转
后期发布异步回调功能
ps:一只小菜鸟 一直在学习 从未敢停止


 707
707

 被折叠的 条评论
为什么被折叠?
被折叠的 条评论
为什么被折叠?
 到【灌水乐园】发言


