


图标库地址
https://github.com/oblador/react-native-vector-icons
步骤一:下载图标库
//要是安装报错,就再执行一次
 npm install --save react-native-vector-icons

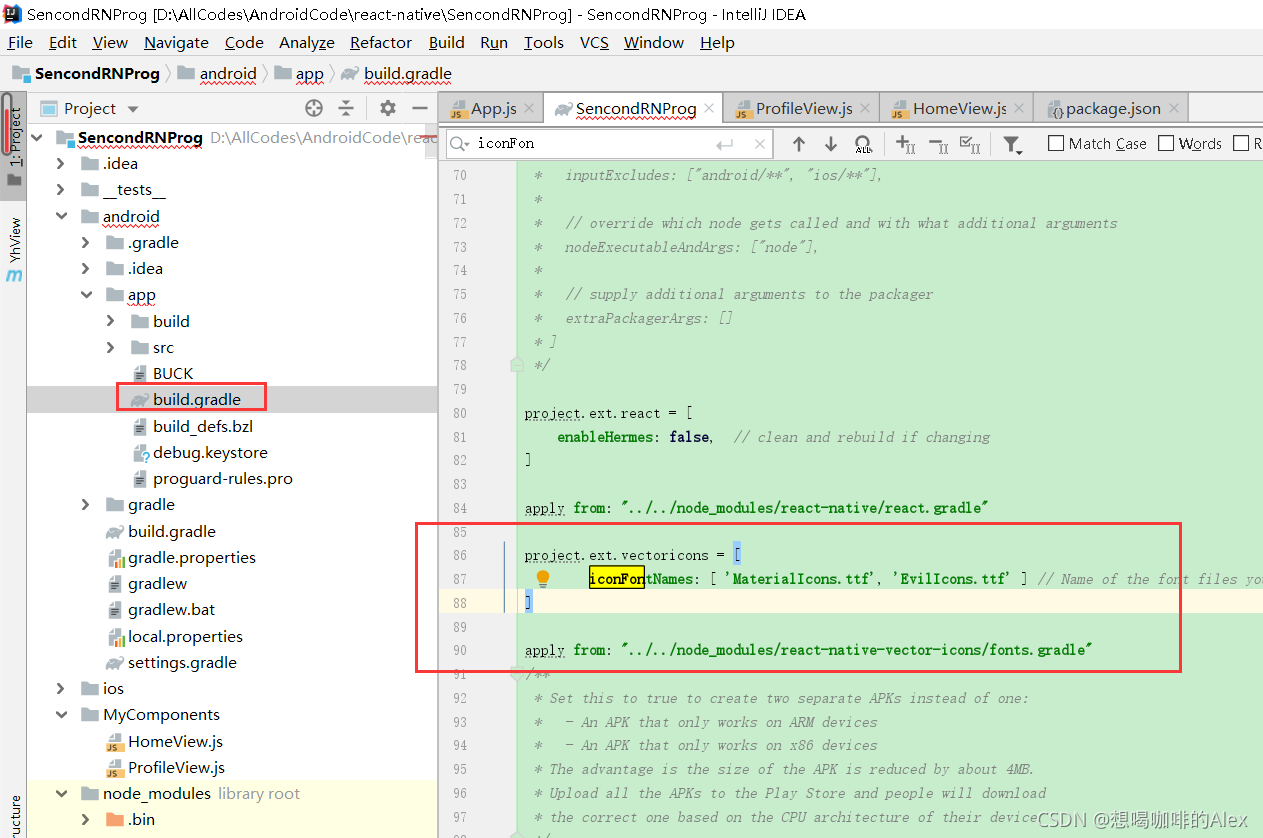
步骤二:在android/app/build.gradle引入配置
project.ext.vectoricons = [
    iconFontNames: [ 'MaterialIcons.ttf', 'EvilIcons.ttf' ] // Name of the font files you want to copy
]

apply from: "../../node_modules/react-native-vector-icons/fonts.gradle"
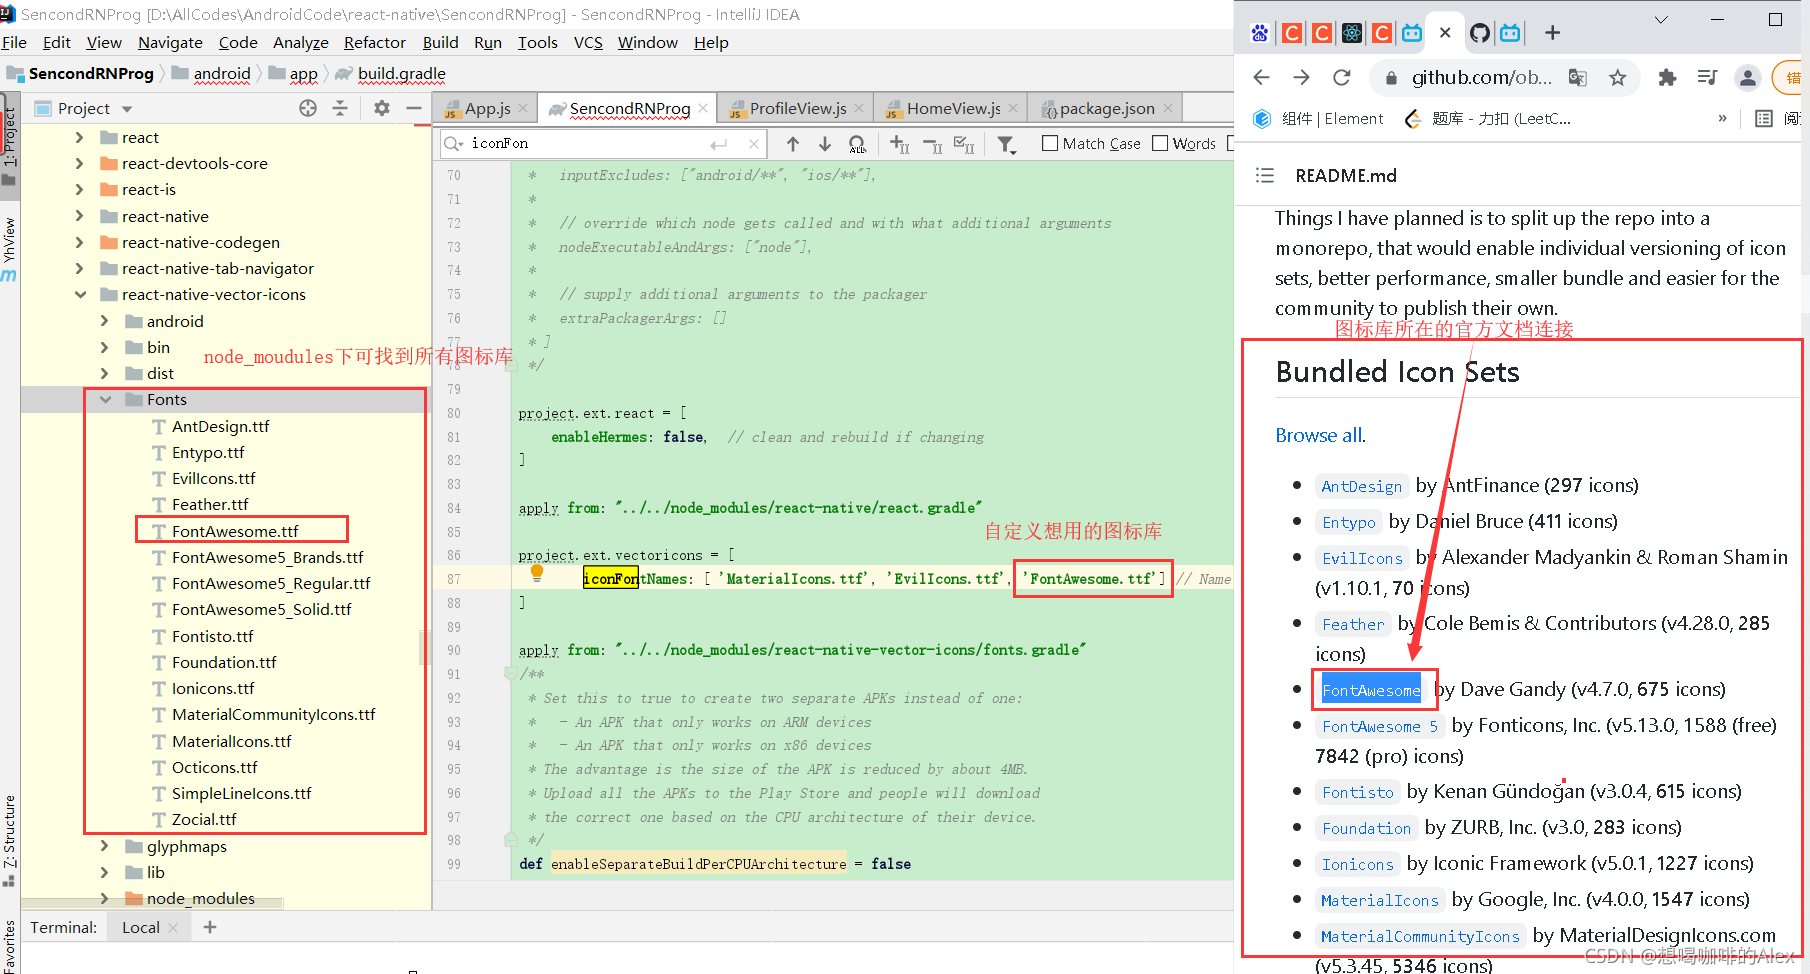
步骤三:自定义要使用的图标库
'FontAwesome.ttf'
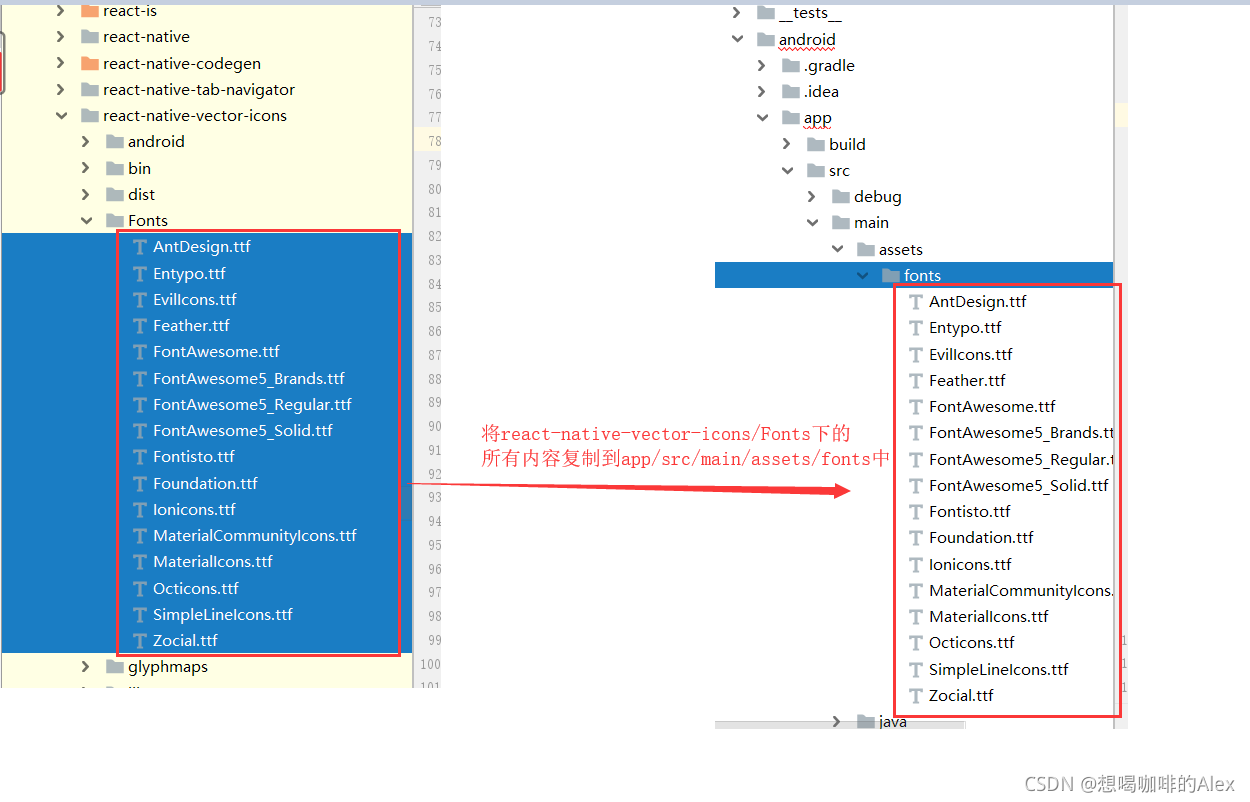
步骤四:在android/app/src/main下手动创建/assets/fonts目录,然后根据下面图标操作
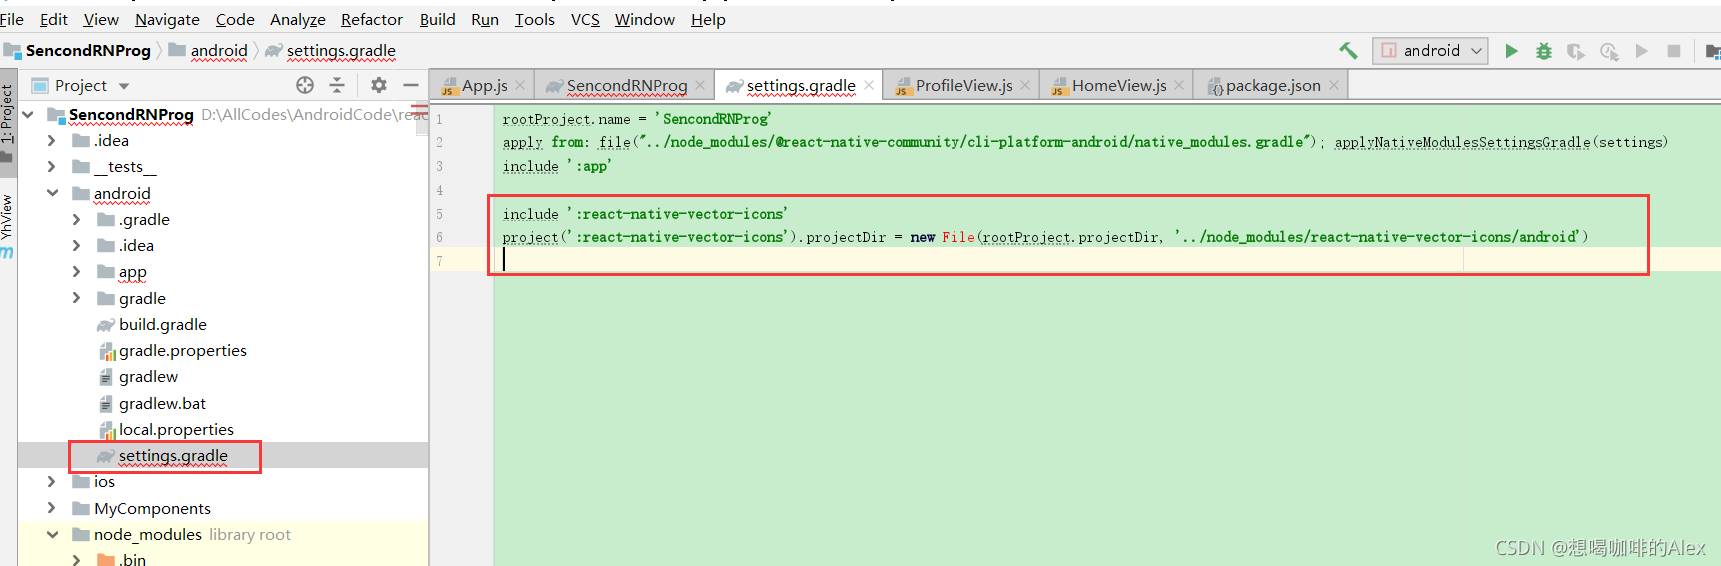
步骤五:在android/settings.gradle文件中加入以下两句话
include ':react-native-vector-icons'
project(':react-native-vector-icons').projectDir = new File(rootProject.projectDir, '../node_modules/react-native-vector-icons/android')
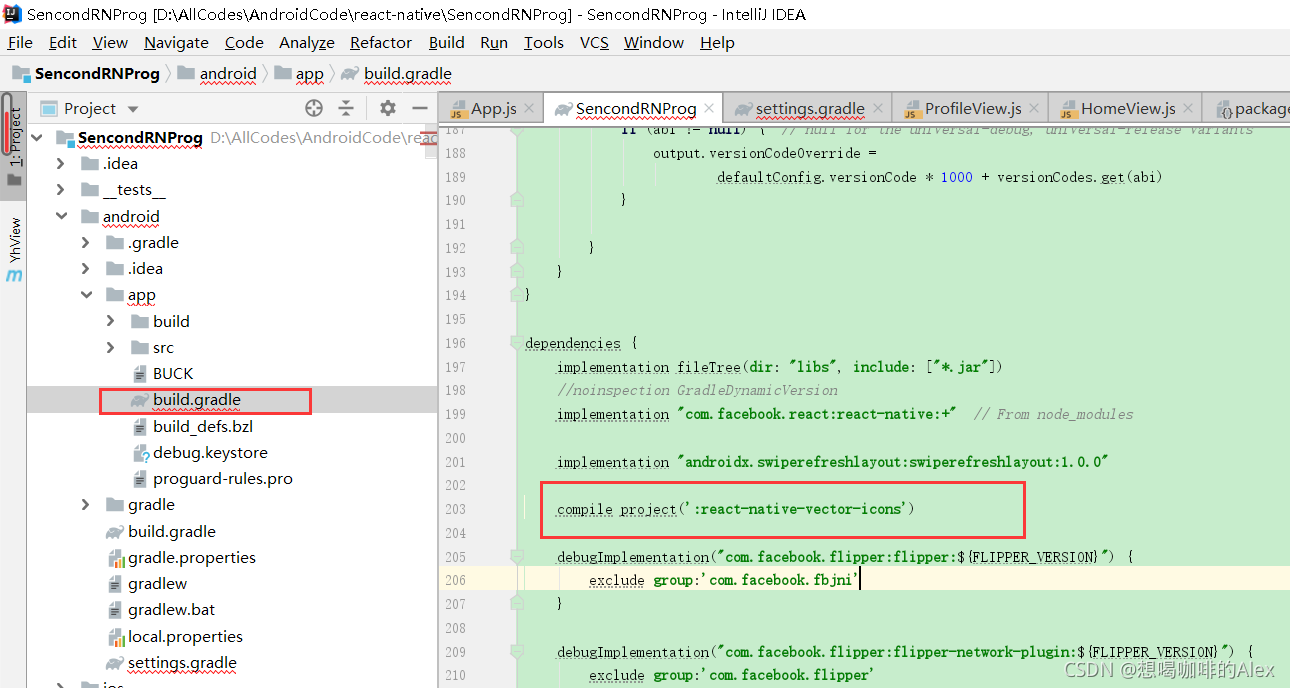
步骤六:在android/app/build.gradle 中添加以下配置
compile project(':react-native-vector-icons')
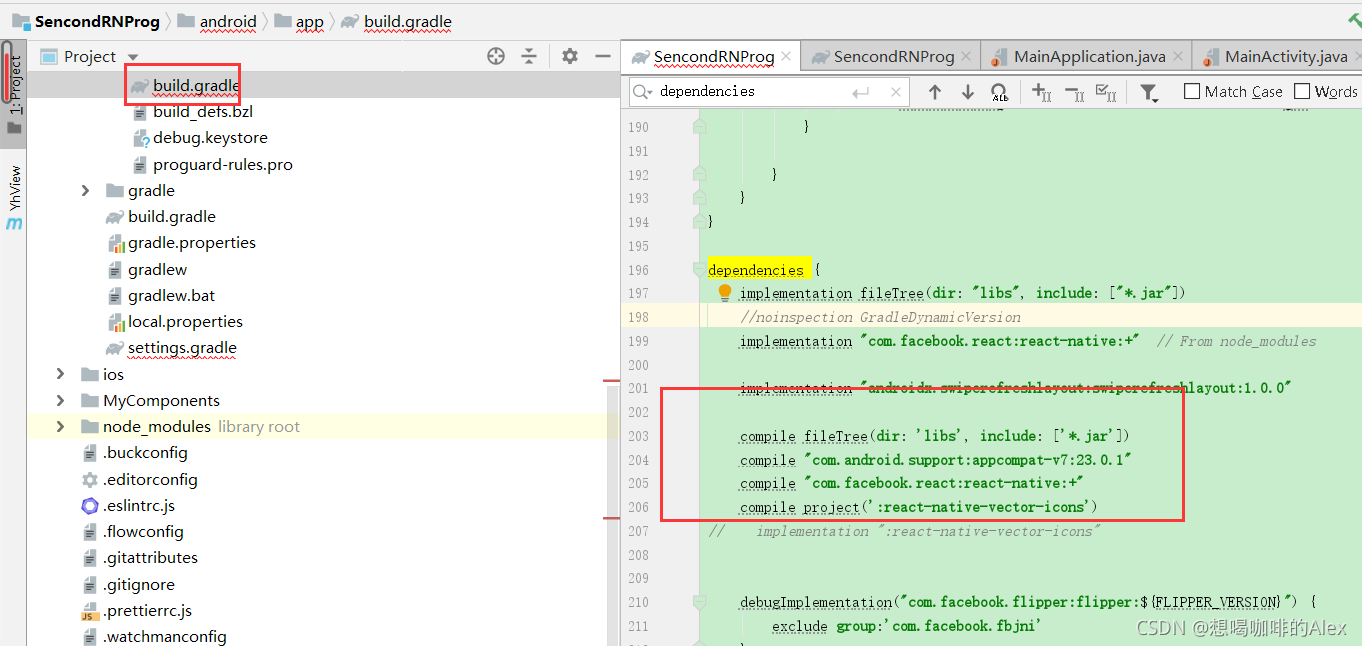
下面这个看下就行了,不需要管,只是做下记录
//将github步骤这些全写进文件也没问题。当我项目启动时报错,也写过这个。但后面删掉多余的似乎也不影响项目
    compile fileTree(dir: 'libs', include: ['*.jar'])
    compile "com.android.support:appcompat-v7:23.0.1"
    compile "com.facebook.react:react-native:+"
    compile project(':react-native-vector-icons')
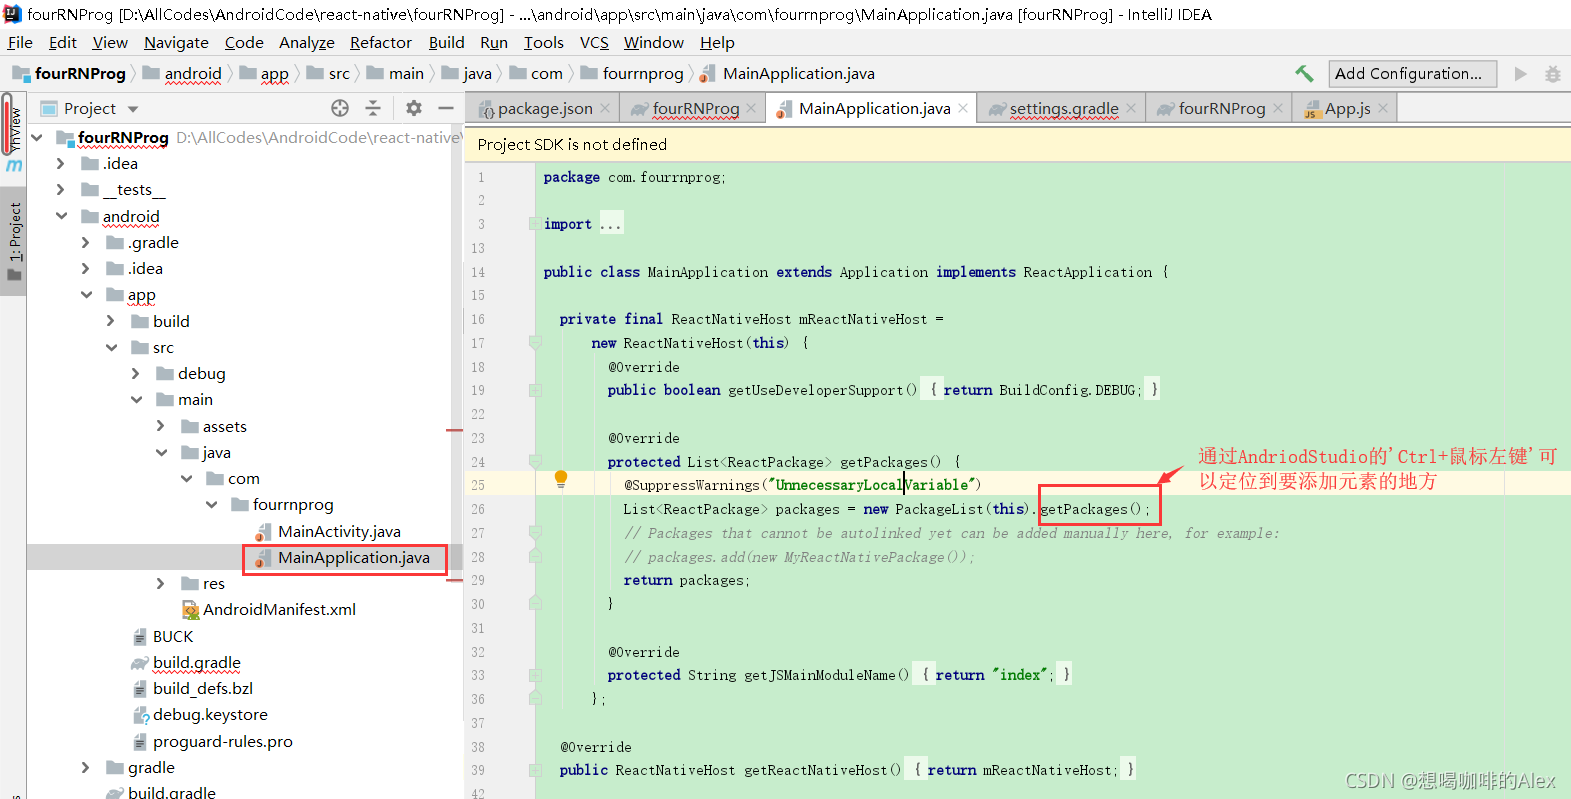
步骤七:添加VectorIconsPackage
使用AndroidStudio可以通过android/app/src/main/java/com/sencondrnprog/MainApplication.java类的getPackages方法定位到PackageList.java类
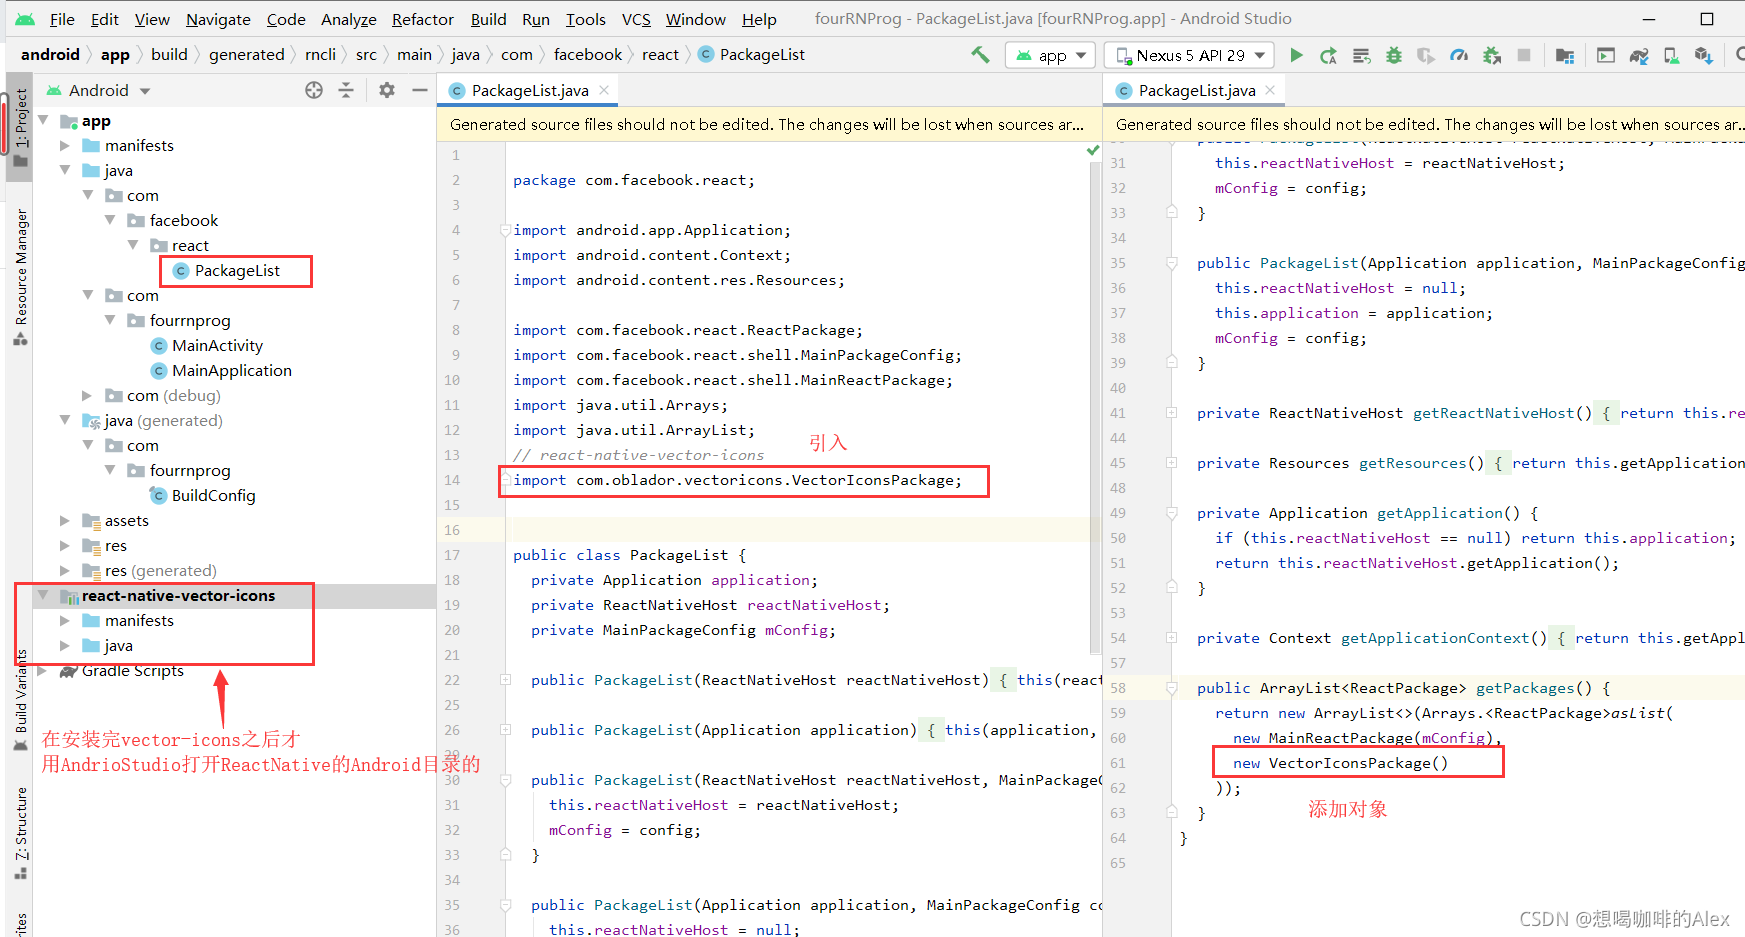
// react-native-vector-icons
import com.oblador.vectoricons.VectorIconsPackage;


new VectorIconsPackage()
步骤八:修改完文件后,要重新打包编译
//打包编译
react-native run-android

//运行
react-native start
图标使用
//导入
import Icon from 'react-native-vector-icons/FontAwesome';


//在使用的地方用标签声明即可
const myIcon = <Icon name="rocket" size={30} color="#900" />;
例如以下例子:
App.js
//在RN中只能用.js作为组件的后缀名,不能使用.jsx
import React,{Component} from 'react';

//View组件负责布局,就好比网页中的div元素
import {View , //用于布局,相当于div
  Text , //文本组件,所有文本都需要放在这里面
  StyleSheet
} from 'react-native';

import TabNavigator from 'react-native-tab-navigator';
import Icon from 'react-native-vector-icons/FontAwesome';
import HomeView from './MyComponents/HomeView'
import ProfileView from './MyComponents/ProfileView'

//类的常量
const styles = StyleSheet.create({
  container: {
    flex: 1, //需要View组件撑满全屏Tab才能展示出来
  },
})

export default class App extends Component{
  //constructor推荐写出来
  constructor(props){
    super(props);
    this.state = {
      selectedTab: 'home', //默认选中的tab。用来控制TabNavigator的selected属性
    };
  }
  render(){
    return <View style={styles.container}>
      <TabNavigator>
        {/*HomeView的Tab栏*/}
        <TabNavigator.Item
            selected={this.state.selectedTab === 'home'}
            title="HomeTabName"
            renderIcon={() => <Icon name="home" size={30} color="#900" />}
            // renderSelectedIcon={() => <Image source={{uri:'https://www.baidu.com/img/flexible/logo/pc/result.png'}} />}
            // badgeText="1"
            onPress={() => this.setState({ selectedTab: 'home' })} /*点击tab时的事件*/
        >
          <HomeView></HomeView>
        </TabNavigator.Item>


        {/*Profile的Tab栏*/}
        <TabNavigator.Item
            selected={this.state.selectedTab === 'profile'}
            title="ProfileTabName"
            renderIcon={() => <Icon name="rocket" size={30} color="#900" />}
            // renderSelectedIcon={() => <Image source={{uri:'https://www.baidu.com/img/flexible/logo/pc/result.png'}} />}
            // renderBadge={() => <CustomBadgeView />}
            onPress={() => this.setState({ selectedTab: 'profile' })}
        >
          <ProfileView></ProfileView>
        </TabNavigator.Item>
      </TabNavigator>
    </View>
  }

}


 1万+
1万+


 被折叠的 条评论
为什么被折叠?
被折叠的 条评论
为什么被折叠?
 到【灌水乐园】发言


