


注解开发mybatis
开发流程
1、引入MyBatis依赖(maven下的springboot添加如下坐标即可)
POM.xml
<dependency>
			<groupId>org.mybatis.spring.boot</groupId>
			<artifactId>mybatis-spring-boot-starter</artifactId>
			<version>2.2.2</version>
		</dependency>

		<dependency>
			<groupId>mysql</groupId>
			<artifactId>mysql-connector-java</artifactId>
			<scope>runtime</scope>
		</dependency>
还推荐使用lomback
可以加快实体类的开发
<dependency>
			<groupId>org.projectlombok</groupId>
			<artifactId>lombok</artifactId>
			<optional>true</optional>
</dependency>
2.配置核心配置文件,由于我们使用的是springboot,配置文件使用application.yml/properties即可(此处我们使用application.yml )
# 数据库地址
datasource:
  url: localhost:3306/springbootdb

spring:
  datasource: # 数据库配置
    driver-class-name: com.mysql.cj.jdbc.Driver
    url: jdbc:mysql://${datasource.url}?useSSL=false&useUnicode=true&characterEncoding=utf-8&allowMultiQueries=true&autoReconnect=true&failOverReadOnly=false&maxReconnects=10
    username: root
    password: password
#    hikari:
#      maximum-pool-size: 10 # 最大连接池数
#      max-lifetime: 1770000

mybatis:
  # 指定别名设置的包为所有entity
  type-aliases-package: com.itcodai.course10.entity
  configuration:
    map-underscore-to-camel-case: true # 驼峰命名规范
  mapper-locations: # mapper映射文件位置
    - classpath:mapper/*.xml
目录结构

3.开发实体类(entity/domain)
此处使用了lomback
常用注解
get,set方法。
@Data
有参构造方法
@AllArgsConstructor
无参构造方法
@NoArgsConstructor
package cn.javaobject.mybatis.domain;

import lombok.AllArgsConstructor;
import lombok.Data;
import lombok.NoArgsConstructor;

@Data
@AllArgsConstructor
@NoArgsConstructor

public class User {
    private String userId;
    private String userName;
    private String password;


}
4.根据实体类建表(也可以用工具自动生成)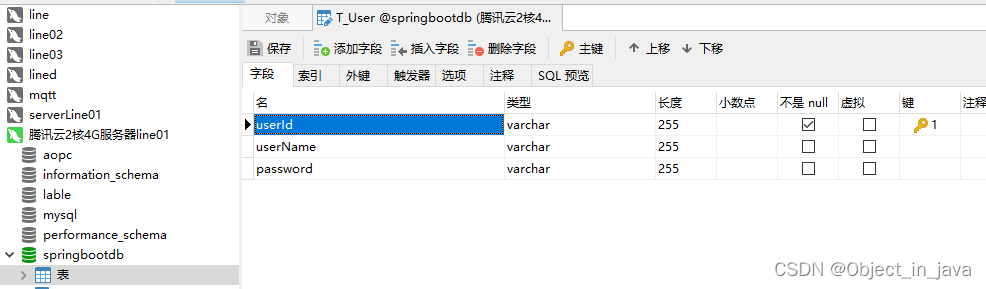
5.创建Servie接口,完成预期功能的接口。
package cn.javaobject.mybatis.service;

import cn.javaobject.mybatis.domain.User;

import java.util.List;

public interface UserService {

    List<User> getAll();

    User getUserByName(String name);

    User getUserById(String id);

    User getUserByIdAndName(String id,String name);

    boolean UserSignIn (String userName,String password);

}
6.创建Dao包:创建Mapper类,完成该映射文件
这就是ORM的体现之一(将sql语句绑定接口,同时用@Mapper注解将该接口交给IOC容器管理,方便后期UserServiceImpl(UserService的实现类)完成service服务层代码的编写)。
注意使用el表达式,当sql语句中的值和方法参数不符时,可以使用注解@Param
package cn.javaobject.mybatis.dao;

import cn.javaobject.mybatis.domain.User;
import org.apache.ibatis.annotations.Mapper;
import org.apache.ibatis.annotations.Param;
import org.apache.ibatis.annotations.Select;
import org.springframework.stereotype.Repository;

import java.util.List;

@Mapper
@Repository
public interface UserMapper {

    @Select("select * from T_User")
    List<User> getAll();

    @Select("select * from T_User where userId = #{userId}")
    User getUserById(String userId);

    @Select("select * from T_User where userName = #{userName}")
    User getUserByName(String userName);

    @Select("select * from T_User where userId = #{userId} userName=#{userName}")
    User getUserByIdAndName(@Param("userId") String Id, @Param("userName") String name);

    @Select("select count(*) from T_User where userName = #{userName} and password = #{password}")
    Integer UserSignIn(/*@Param("userName") */String userName,/*@Param("password")*/ String password);

}
7.最后完成service服务层 实现类XXXimpl,就可以使用了。
使用@Service注解,将自己注入容器。方便Controller层调用。
package cn.javaobject.mybatis.service.impl;

import cn.javaobject.mybatis.dao.UserMapper;
import cn.javaobject.mybatis.domain.User;
import cn.javaobject.mybatis.service.UserService;
import org.apache.ibatis.annotations.Select;
import org.springframework.stereotype.Service;

import javax.annotation.Resource;
import java.util.List;

@Service
public class UserServiceImpl implements UserService {
    @Resource
    private UserMapper userMapper;

    @Override
    public List<User> getAll() {
        return userMapper.getAll();
    }

    @Override
    public User getUserByName(String name) {
        return null;
    }

    @Override
    public User getUserById(String id) {
        return userMapper.getUserById(id);
    }

    @Override
    public User getUserByIdAndName(String id, String name) {
        return userMapper.getUserByIdAndName(id,name);
    }

    @Override
    public boolean UserSignIn(String userName, String password) {
        return userMapper.UserSignIn(userName,password) == 1;
    }


}
Controller类
package cn.javaobject.mybatis.controller;

import cn.javaobject.mybatis.domain.User;
import cn.javaobject.mybatis.service.UserService;
import org.springframework.web.bind.annotation.PathVariable;
import org.springframework.web.bind.annotation.RequestMapping;
import org.springframework.web.bind.annotation.RestController;

import javax.annotation.Resource;
import java.util.List;

@RestController
public class Controller_db {
    @Resource
    private UserService userService;

    @RequestMapping("/getUserById/{id}")
    public User getUser(@PathVariable String id) {
        return userService.getUserById(id);
    }

    @RequestMapping("/getall")
    public List<User> getAll() {
        return userService.getAll();
    }

    @RequestMapping("/getUserByIdAndName/{id}/{name}")
    public User getUserByIdAndName(@PathVariable String id,@PathVariable String name){
        return userService.getUserByIdAndName(id,name);
    }

    @RequestMapping("/SignIn/{userName}/{password}")
    public String UserSignIn(@PathVariable String userName, @PathVariable String password){
        boolean isOk = false;
        isOk = userService.UserSignIn(userName,password);

        if(isOk == true){
            return "successfully SignIn ! name:" + userName;
        }
        else
            return "failure";
    }

}
如果不是springboot的话(没有了IOC容器加载service类),则进行如下步骤,也应用到了ORM的思想。
初始化SessionFactory(MyBatis最核心的一个对象:会话工厂)
作用是:读取配置文件、加载Mapper映射,同时也为我们后期的处理做好前期的准备
利用SqlSession对象操作数据
Sqlsession是由SessionFactory这个对象进行创建的,每一个SqlSession对象我们形象的可以把它看成是一个数据库连接Connection
有什么问题可以评论区留言。还有很多优质文章,欢迎关注。


 2346
2346


 被折叠的 条评论
为什么被折叠?
被折叠的 条评论
为什么被折叠?
 到【灌水乐园】发言


