


功能需求:
列表进行批量查询,需要对输入的值做提交校验,分三种情况:
若部分字符串有误,部分字符串需要变更字体颜色做提示,再次点击确认则对部分正确数据执行批量查询
若全部数据有误则变更字体颜色做提示,再次点击确认查询为空
若全部数据正确则直接执行批量查询
需要变更字体颜色做提示的情况分三种:
一种为重复数据
一种为未通过校验数据
一种为既没有通过校验又重复的数据
知识点:
contenteditable:contenteditable为true可编辑元素内容
实现:
<el-button type="primary" :size="$formSize" @click="handleBatchQuery">批量查询</el-button>
<!--批量查询-->
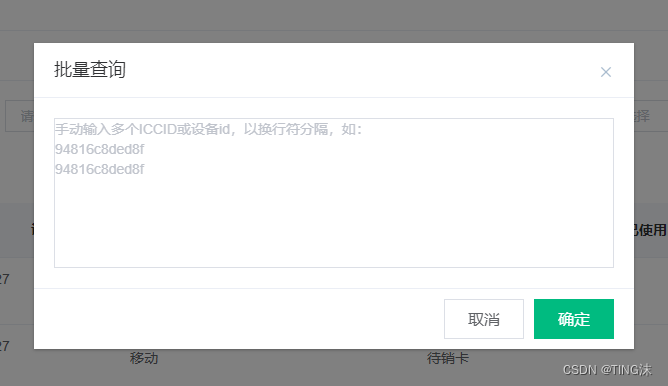
<el-dialog title="批量查询" :visible.sync="batchQuery" width="600px">
<div v-if="batchQuery" id="editor" class="editor" ref="editor" contenteditable="true" @click="showInput=true">
<span v-if="!showInput" class="uninput">
手动输入多个ICCID或设备id,以换行符分隔,如:<br/>
94816c8ded8f<br/>
94816c8ded8f
</span>
</div>
<div slot="footer" class="dialog-footer">
<el-button @click="cancelQuery">取消</el-button>
<el-button type="primary" @click="submitQuery">确定</el-button>
</div>
</el-dialog>
import request from "@/utils/request";
export default {
  data(){
    return{
      searchForm:{}
      batchQuery:false,
      showInput:false,
      queryInput:'',
      oldQueryInput:[],
      resultList:[],
      once:false,
    }
  },
  methods:{
    //批量查询
    handleBatchQuery(){
      this.showInput=false
      this.batchQuery=true
      this.queryInput=undefined
      this.searchForm.batchStr=undefined //查询条件
      this.oldQueryInput=[]
      this.once=false
    },
    //取消批量查询
    cancelQuery(){
      this.showInput=false
      this.batchQuery=false
      this.queryInput=undefined
      this.searchForm.batchStr=undefined
      this.oldQueryInput=[]
      this.once=false
      this.$refs.editor.innerHTML=''
    },
    //提交批量查询
    submitQuery(){
      //无填写内容有提示语时确认
      if(this.$refs.editor.innerHTML.indexOf('手动输入多个ICCID或设备id')!=-1){
        this.handleQuery()
        this.batchQuery=false
        return
      }

      this.queryInput=this.$refs.editor.innerText.split(/[(\r\n)\r\n]+/).filter(item=>item)

      //填写内容超过100条时确认
      if(this.queryInput.length>100){
        this.$message.warning('批量查询数据数量不能超过100条')
        this.batchQuery=true
        this.once=false
        return
      }

      //无填写内容无提示语时确认
      if(this.queryInput.length===0){
        this.handleQuery()
        this.batchQuery=false
        return
      }

      let batchList=this.queryInput
      if(!this.once){
        this.oldQueryInput=this.queryInput
      }else{
        this.oldQueryInput=Array.from(new Set(this.oldQueryInput.filter(item=>!this.resultList.includes(item))))
      }
      let batchStr=this.oldQueryInput.join(',');

      //联调校验接口
      request({
        url: `接口路径`,
        method: 'post',
        data: {
          batchStr:batchStr
        },
      }).then((res) => {
        if (res.code === "200") {
          this.resultList=res.data || []
          this.once=true

          if(this.resultList.length===0){
            this.batchQuery=false
            this.searchForm.batchStr=this.oldQueryInput.join(',');
            this.handleQuery()
            this.$refs.editor.innerHTML=''
            this.showInput=false
          }else{
              this.batchQuery=true
              let repeat=[]
              for (let i = 0; i < batchList.length; i++) {
                if (batchList.indexOf(batchList[i]) !== i) {
                  repeat.push(batchList[i]);
                }
              }

              batchList=batchList.map(item=>{
                if(repeat.includes(item)&&!this.resultList.includes(item)){
                  return item=`<div style="color:red">${item+',数据重复'}</div>`
                }else if(this.resultList.includes(item)&&!repeat.includes(item)){
                  return item=`<div style="color:red">${item+',无结果'}</div>`
                }else if(repeat.includes(item)&&this.resultList.includes(item)){
                  return item=item=`<div style="color:red">${item+',无结果且数据重复'}</div>`
                }else{
                  return item=`<div>${item}</div>`;
                }
              })

              this.$refs.editor.innerHTML=batchList.join('\n')
            }
        }
      })
    },
  }
}
.editor{
  width: 100%;
  height: 150px;
  overflow: auto;
  border: 1px solid #dcdfe6;
}
.uninput{
  color: #dcdfe6;
  color: #c0c4cc;
  line-height: 20px;
}
效果:

当文字颜色变更提示后,再次点击确认后只会查询正确的(包含数据重复的)数据


 264
264


 被折叠的 条评论
为什么被折叠?
被折叠的 条评论
为什么被折叠?
 到【灌水乐园】发言


