


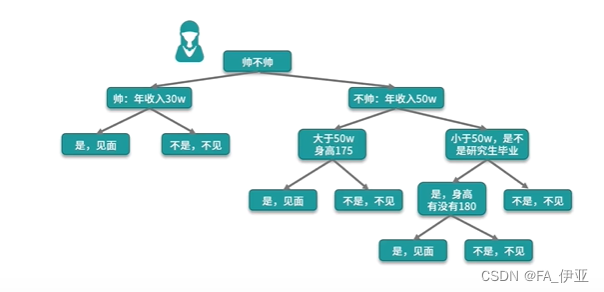
决策树:女神使用的约会策略
算法原理:在已知的条件中,选取一个条件作为树根,然后再看是否还需要其他判断条件,如果需要的话,继续构建一个分支来判断第二个条件,以此类推,最终形成的这棵树上,所有的叶子节点都是要输出的类别信息,所有的非叶子节点都是特征信息。
如何选择一个特征作为根节点?
下一个决策又该选取哪个特征作为节点?
决策树算法使用信息增益的方法来衡量一个特征和特征之间的重要性
几个版本的决策树的比较

算法优点:非常直观,可解释极强;预测速度比较快;既可以处理离散值也可以处理连续值,还可以处理缺失值;
算法缺点:
容易过拟合;
两种解决办法

需要处理样本不均衡的问题;样本的变化会引发树结构巨变;
继续优化:

实例体会
from sklearn import datasets
from sklearn.tree import DecisionTreeClassifier #引入决策树算法包
import numpy as np #支持大量的维度数组与矩阵运算

#引入画图相关的包
from IPython.display import Image
from sklearn import tree
#dot是一个程序化生成流程图的简单语言
import pydotplus
import matplotlib.pyplot as plt

np.random.seed(0)#保证我们每次产生的随机数是一样的
iris = datasets.load_iris()#获取鸢尾花数据集
x = iris.data ##数据部分
y = iris.target ##类别部分

#从150条数据中选140条作为训练集,10条作为测试集。permutation接收一个数作为参数(这里为数据集长度150),产生一个0-149乱序一维数组
indices = np.random.permutation(len(x))#permutation排列,既可以对list,也可以对矩阵
x_train = x[indices[:-10]] #:从第一项到倒数第十个数
x_test = x[indices[-10:]] #-10:取后10组数
y_train = y[indices[:-10]]
y_test = y[indices[-10:]]

#设置树的最大深度为4
clf = DecisionTreeClassifier(max_depth=4)
clf.fit(x_train, y_train.astype('int'))


dot_data = tree.export_graphviz(clf, out_file=None,
                                feature_names = iris.feature_names,
                                class_names = iris.target_names,
                                filled=True, rounded=True,
                                special_characters=True)
graph = pydotplus.graph_from_dot_data(dot_data)
Image(graph.create_png())
fig = plt.figure(figsize=(25,20))
_ = tree.plot_tree(
    clf,
    feature_names=iris.feature_names,
    class_names=iris.target_names,
    filled=True
)

# Save picture
fig.savefig("decistion_tree.png")

y_predict = clf.predict(x_test)
score = clf.score(x_test, y_test,sample_weight=None)
print('y_Test')
print(y_test)
print('y_Predict')
print(y_predict)
print('Accuracy: ',score)
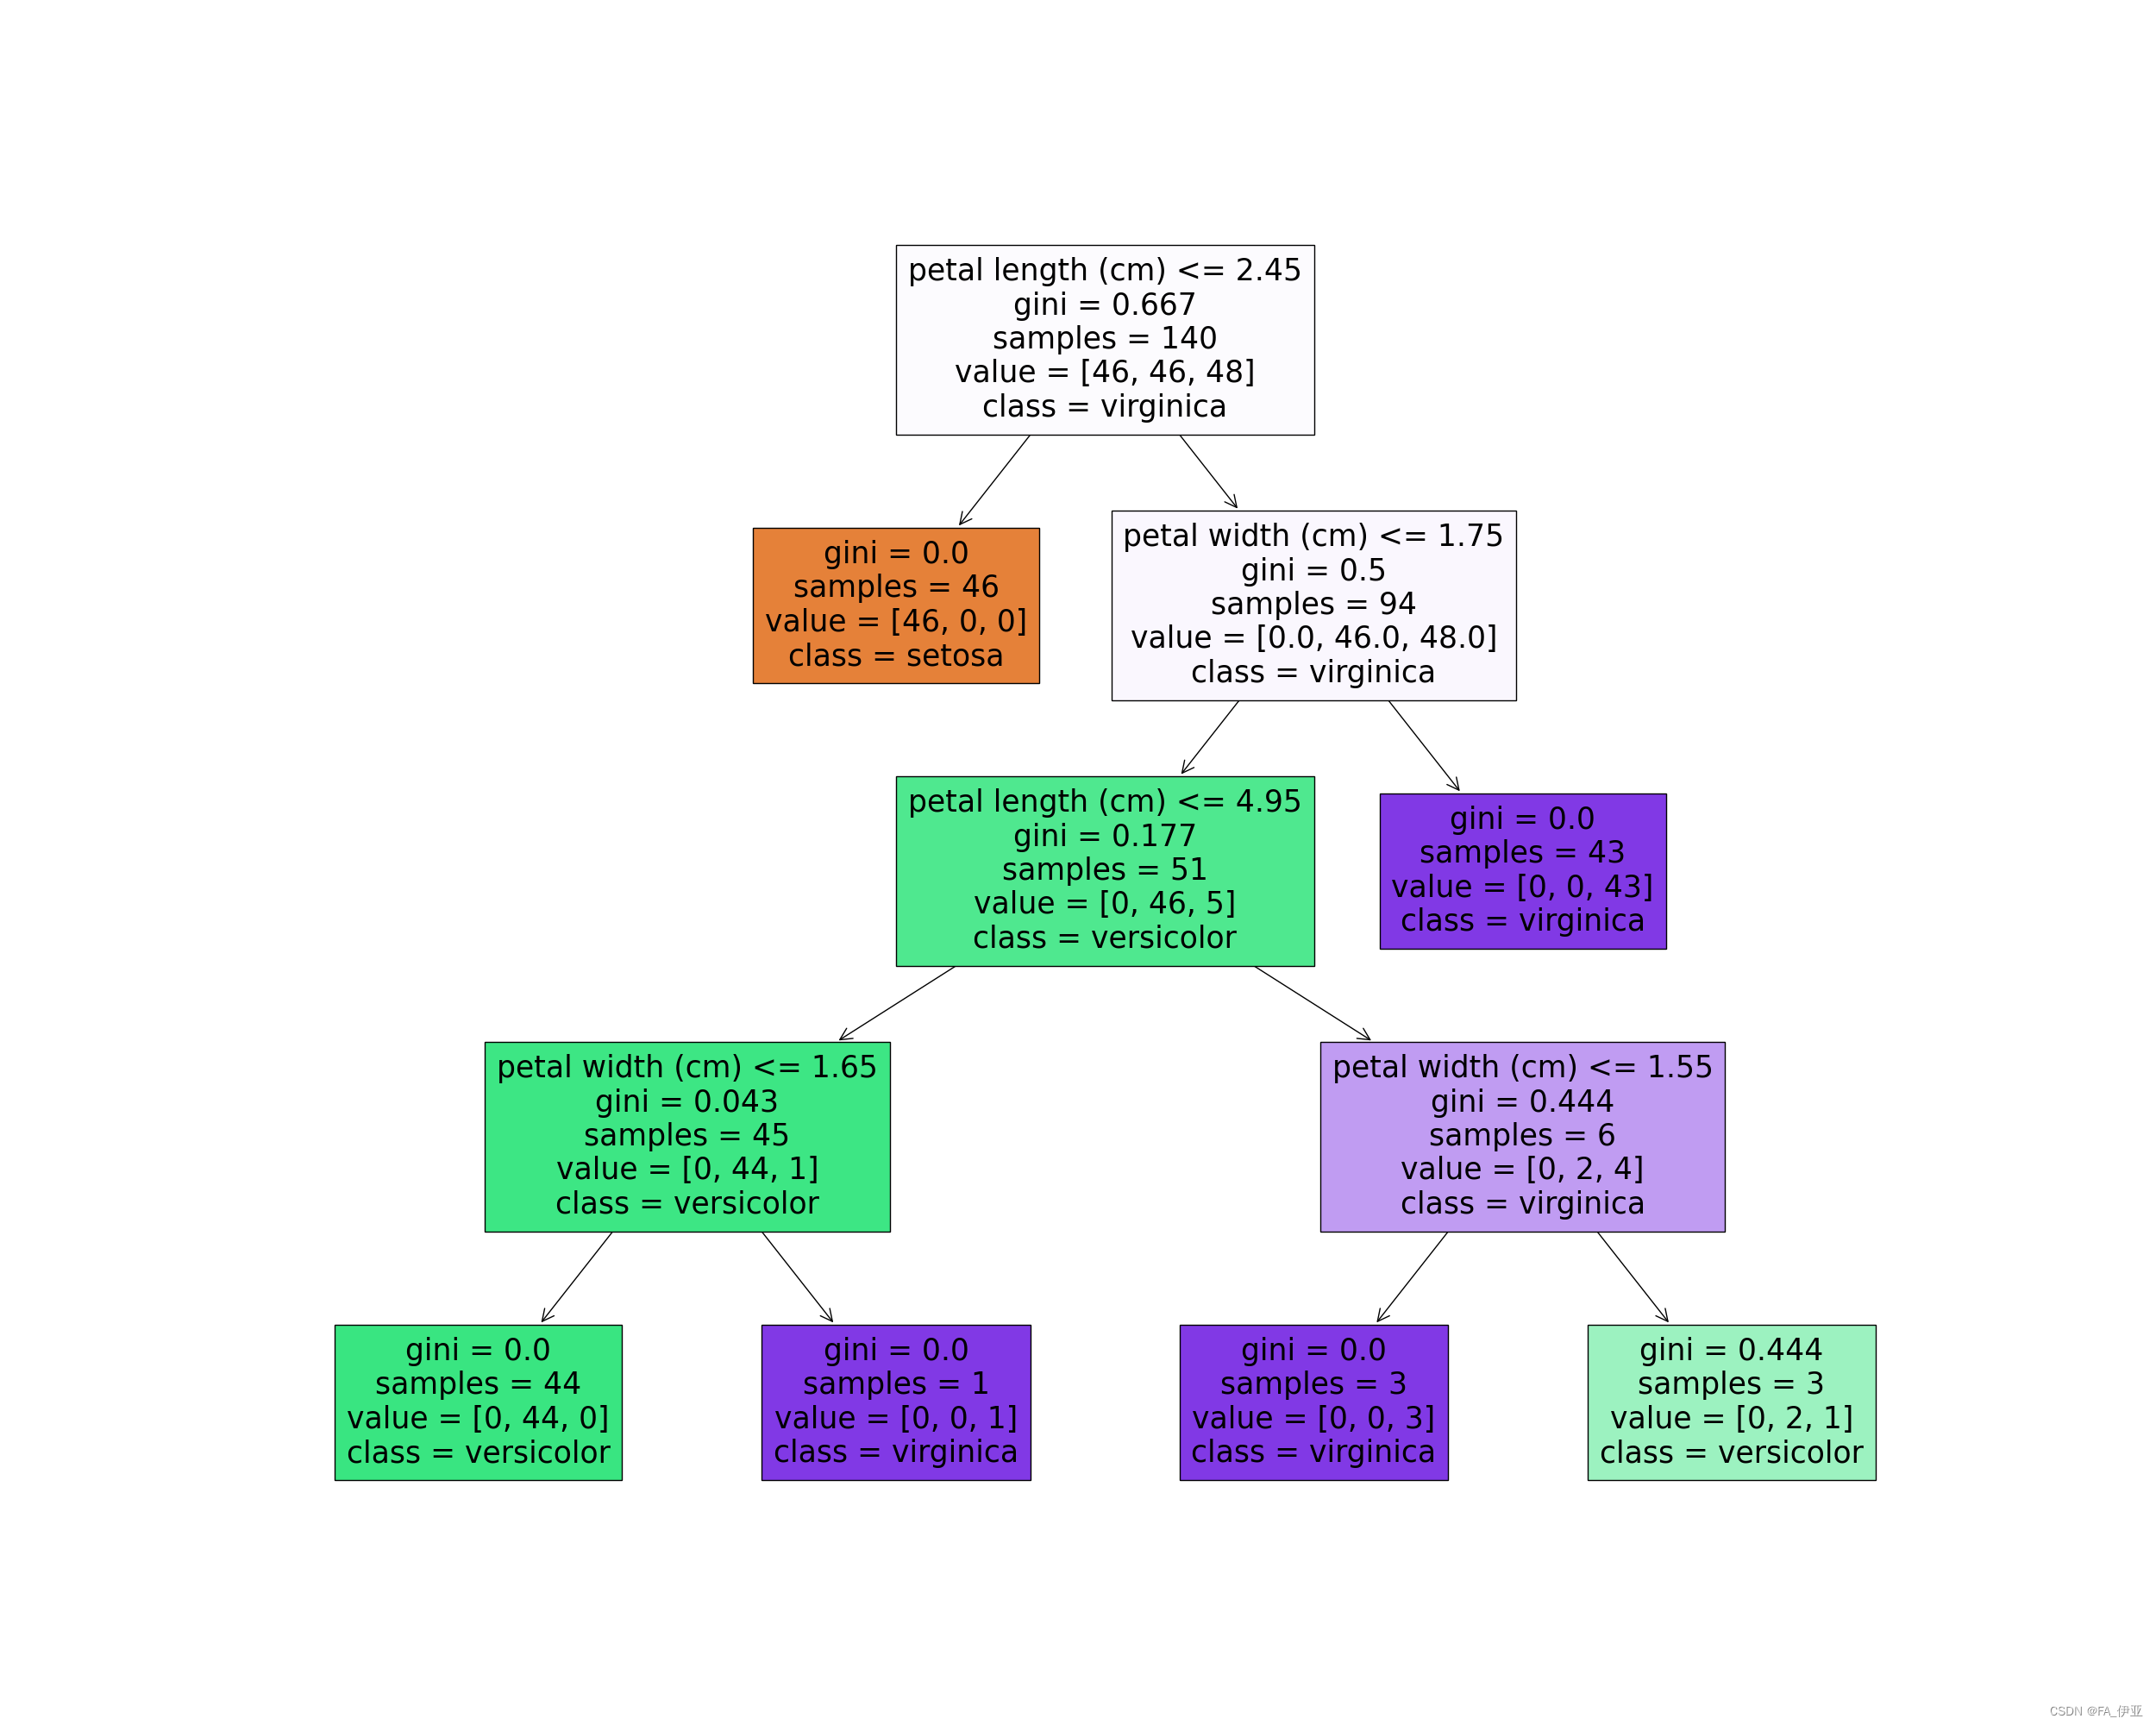
decistion_tree.png
可能会遇到的问题:


 2万+
2万+


 被折叠的 条评论
为什么被折叠?
被折叠的 条评论
为什么被折叠?
 到【灌水乐园】发言


