


文章目录
- 双向数据绑定
- 事件绑定传参
- 事件修饰符
- 数组语法
- v-if 和 v-for结合使用
- 循环分支
- 选项卡
- 计算器
- 轮播图
- component
- 局部组件
- 子组件向父组件传值
- 组件props属性
- 组件传值
- props 属性
- props 类型传值 string,Number object 数组 对象 传值方式
- props福组件传值
- 插槽
- 插槽用法
- 购物车
- 前后端交互
- 基于Promise处理ajax
- Promise 常用 API
- Promise常用API-对象方法
- Fetch API 基本用法
- Fetch API 调用接口传递参数
- Fetch响应结果的数据格式
- axios请求
- axios 响应结果与全局配置
- axios拦截器
- async/await 处理异步操作:
- async/await处理多个异步任务
- 模拟路由
- 02.vue-router的基本使用
- 03.路由重定向(1)
- 路由嵌套
- 动态路由
- 动态路由
- 命名路由
- 什么是“跨源”
- 编程式导航
- 登录功能实现、
- 退出
- 登录 login
- 主页,通过接口获取菜单数据
- 首页 welcome
- 用户管理/用户列表 users
- 权限管理/角色列表 roles
- 权限管理/权限列表 rights
- 商品分类 /categories
- 分类参数 params
- 商品列表 /goods
- 商品列表 /goods/add
- 订单列表/order
- 订单统计 / Report
- router/index
- plugins/element.js
- main
- 项目打包上线
- 1.项目优化
- 2.添加进度条
- 3.根据报错修改代码
- 4.执行build
- 5.生成打包报告
- 6.修改webpack的默认配置
- 7.加载外部CDN
- 8.定制首页内容
- 9.路由懒加载
- 10.项目上线
双向数据绑定
<!DOCTYPE html>
<html lang="en">
<head>
    <meta charset="UTF-8">
    <meta http-equiv="X-UA-Compatible" content="IE=edge">
    <meta name="viewport" content="width=device-width, initial-scale=1.0">
    <title>Document</title>
</head>
<body>
    <!-- vue双向数据绑定 数据改变视图也会跟着改变
    M model 模板所写的html V view 视图页面 VM  view-model 视图模型逻辑
    如何数据改变页面跟着改变 View-Model用到  DOMListenrs 事件监听 我们是看不见的,我们用到了 v-model='双向数据绑定'
    Model-View Data Bindings 数据绑定 把数据填充到页面
    -->
    <div id="app">
       <p>{{msg}}</p>
       <input type="text" v-model='msg'>
    </div>
   <script src="../vue/vue.js"></script>
    <script>
      let vm = new Vue({
          el:"#app",
          data:{
              msg:"Vue !"
          }
      })
    </script>
</body>
</html>
事件绑定传参
<!DOCTYPE html>
<html lang="en">
<head>
    <meta charset="UTF-8">
    <meta http-equiv="X-UA-Compatible" content="IE=edge">
    <meta name="viewport" content="width=device-width, initial-scale=1.0">
    <title>Document</title>
</head>
<body>
    <div id="app">
        <h1>{{msg}}</h1>
        <!-- 函数绑定 -->
        <button v-on:click='add'>++</button>
        <!--  函数调用-->
        <button @click='aff(123,456,$event)'>--</button>
        <!-- 事件传参 形参 -->
    </div>
    <script src="../vue/vue.js"></script>
    <script>
        let vm = new Vue({
            el:"#app",
            data() {
                return {
                    msg: 0
                }
            },
           methods: {
               add: function(){
                   this.msg++
               },
               aff(p,a,event){//实参接受参数值
                   console.log(p,a)
                   console.log(event.target.innerHTML)
                   this.msg--
               }
           },
        })
    </script>
</body>
</html>
事件修饰符
<!DOCTYPE html>
<html lang="en">
<head>
    <meta charset="UTF-8">
    <meta http-equiv="X-UA-Compatible" content="IE=edge">
    <meta name="viewport" content="width=device-width, initial-scale=1.0">
    <title>Document</title>
</head>
<body>
    <div id="app">
      <div>{{sum}}</div>
      <div v-on:click='handle0'>
          <button v-on:click.stop="handle1">点击1</button>
      </div>
      <div><a href="http://www.baidu.com" v-on:click.prevent='handle'>百度</a></div>
    </div>
    <script src="../辛巴的2020年Vue/vue/vue.js"></script>
    <script>
      let vm = new Vue({
          el:"#app",
          data:{
              sum:0
          },
          methods: {
            handle0: function(){
                this.sum++
            },
            handle1:function(event){
                //阻止冒泡
                // event.stopPropagation();
            },
            handle(){

            }
          }
      })
    </script>
</body>
</html>
数组语法
<!DOCTYPE html>
<html lang="en">

<head>
    <meta charset="UTF-8">
    <meta http-equiv="X-UA-Compatible" content="IE=edge">
    <meta name="viewport" content="width=device-width, initial-scale=1.0">
    <title>Document</title>
    <style lang="">
        .active {
            width: 100px;
            height: 100px;
            background: teal;
        }

        .error{
            background: wheat;
        }

        .bese{
            font-size: 20px;
        }

        .test{
            color: blue;
        }
    </style>
</head>

<body>
    <!-- 数组语法 <div v-bind:class='[ activeClass,errorClass ]'></div>
    1.在标签中定义v-bind:class='[ activeClass,errorClass ]'参数控制数据
    2.data:{activeClass: 'active'} 变量名的参数控制页面样式变化
    3.@click='handle' 函数 控制this指向修改 变量名的值为空 在class里面的类名也为空 消失没有
    4.样式绑定 通过 activeClass 变量名 的值 active修改页面状态样式变化
    5.总结 :数组语法 v-bind:class='[ activeClass,errorClass ]' 格式 通过 activeClass 变量名 的值 active修改页面状态样式变化
    对象绑定 v-bind:class='{ active : isActive,isError }' 格式 通过 isActive 修改 值来改变样式页面值的变化 -->
    <!-- 样式
    1.对象绑定数组绑定可以结合使用 v-bind:class='[ activeClass,errorClass ,{test: isTest}]'
    2.class绑定的值可以简化操作  arrClass arrClass:['active','error'],
    3.默认的class如何处理默认的不会覆盖会保留 objClass: {  active: true,error: true  }
    -->
    <div id="app">
        <div v-bind:class='[ activeClass,errorClass ,{test: isTest}]' >Vue</div>
        <div v-bind:class='arrClass'></div>
        <div v-bind:class='objClass'></div>
        <div class="base" v-bind:class='objClass'></div>
        <button @click='handle'>点击</button>
    </div>
    <script src="../vue/vue.js"></script>
    <script>
        let vm = new Vue({
            el: "#app",
            data: {
                activeClass: 'active',
                errorClass: 'error',
                isTest:true,
                arrClass:['active','error'],
                objClass: {
                    active: true,
                    error: true
                }
            },
            methods: {
                handle() {
                    // this.activeClass = ' ',
                    //     this.errorClass = ' ',
                        this.isTest = !this.isTest
                        this.objClass.error = false
                }
            },
        })
    </script>
</body>

</html>
v-if 和 v-for结合使用
<!DOCTYPE html>
<html lang="en">
<head>
    <meta charset="UTF-8">
    <meta http-equiv="X-UA-Compatible" content="IE=edge">
    <meta name="viewport" content="width=device-width, initial-scale=1.0">
    <title>Document</title>
</head>
<body>
    <!-- v-for循环遍历对象
    遍历对象 有三个参数  v-for='(value,key,index) in obj' 分别代表 值 名字 下标
    v-if和v-for结合
    v-if和v-for 结合使用 v-if='符合条件的显示在页面,对应的是,v,k,i 三个值的条件其中一个' -->
    <div id="app">
       <div v-if='v===12' v-for='(v,k,i) in obj'>{{v}} --- {{k}} --- {{i}}</div>
    </div>
   <script src="../vue/vue.js"></script>
    <script>
      let vm = new Vue({
          el:"#app",
          data:{
              obj:{
                  uname: 'list',
                  age: 12,
                  gender: 'male'
              }
          }
      })
    </script>
</body>
</html>
循环分支
<!DOCTYPE html>
<html lang="en">
<head>
    <meta charset="UTF-8">
    <meta http-equiv="X-UA-Compatible" content="IE=edge">
    <meta name="viewport" content="width=device-width, initial-scale=1.0">
    <title>Document</title>
</head>
<body>
    <!-- v-if 控制元素是否渲染到
    v-show控制元素是否显示隐藏 -->
    <div id='app'>
        <div v-if='score>=90'>优秀</div>
        <div v-else-if='score<90 && score>=80'>良好</div>
        <div v-else-if='score<80 && score>60'>一般</div>
        <div v-else>比较差</div>
        <div v-show='flag' >v-show 显示、隐藏</div>
        <button v-on:click='handle'>显示、隐藏</button>
        <ul>
            <li v-for='(item,i) in list' >{{i}} {{item}}</li>
        </ul>
    </div>
    <script src="../vue/vue.js"></script>
    <script>
        let vm = new Vue({
            el:"#app",
            data: {
                score : 59.9,
                flag:true,
                list:['VUE','REACT','ANGLA']
            },
            methods: {
                handle: function(){
                    this.flag = !this.flag
                }
            },
        })
        let obj = {
            uname : 'list',
            age : 12,
            gender : 'male'
        }
        for(let key in obj){
            console.log(key,obj[key])
        }
    </script>
</body>
</html>
选项卡
<!DOCTYPE html>
<html lang="en">
<head>
    <meta charset="UTF-8">
    <meta http-equiv="X-UA-Compatible" content="IE=edge">
    <meta name="viewport" content="width=device-width, initial-scale=1.0">
    <title>Document</title>
    <style>
        ul,li,div,img{
            margin: 0;
            padding: 0;
            list-style: none;
        }

        .text{
            display: flex;
            justify-content: space-around;
            width: 740px;
            height: 30px;
            align-content: center;
            line-height: 30px;
        }

        .text_li{
            flex-direction: row;
            width: 30%;
            background: #4daf133d;
            height: 30px;
            text-align: center;
        }

        .content{
            width: 30%;
            justify-content: space-around;
            align-content: center;
            margin: 13px;
        }

        .conte{
            width: 740px;
            display: flex;

        }

        .content img{
            width: 100%;
        }

        .active{
            height: 30px;
            background: rgba(72, 146, 115, 0.603);
            color:red;
        }

        .active>img{
            border: 4px solid teal;
            width: 100%;
        }

        [v-cloak]{
            display: none;
        }
    </style>
</head>
<body>
    <!-- 选项卡
    数据定义在 data 里 v-for ""循环遍历到页面 点击事件函数通过传值的方式,触发 他的下标和当前项初始值为 0 点击当前项的第零项等于他的被点击选中的下标其中之一
    选中的当前项为0 当前项==下标的值也为0
    图片也是一样的 选中的当前项为0 当前项==下标的值也为0    被点击的当前项变化下标也跟着变化 -->
    <div id="app" v-cloak>
       <ul class="text">
           <li class="text_li" @click='handle(i)' :class='currenIndex == i? "active":" " ' v-for="(item,i) in listImg">{{item.name}}</li>
       </ul>
       <div class="conte">
        <div class="content" @click='handle(i)' :class='currenIndex == i? "active":" " ' v-for='(item,i) in listImg'><img :src="item.img" alt=""></div>
       </div>
    </div>
   <script src="../vue/vue.js"></script>
    <script>
      let vm = new Vue({
          el:"#app",
          data:{
              currenIndex:0,
              i:'',
              listImg:[
                  {
                      img:"https://ss2.bdstatic.com/70cFvnSh_Q1YnxGkpoWK1HF6hhy/it/u=2116458706,2867015108&fm=26&gp=0.jpg",
                      name:'马龙.白兰度'
                  },
                  {
                      img:"https://ss1.bdstatic.com/70cFuXSh_Q1YnxGkpoWK1HF6hhy/it/u=3912400485,812789412&fm=26&gp=0.jpg",
                      name:"奥黛丽.赫本"
                  },
                  {
                      img:"https://ss0.bdstatic.com/70cFvHSh_Q1YnxGkpoWK1HF6hhy/it/u=341197941,39760083&fm=26&gp=0.jpg",
                      name:"纪梵希"
                  }
              ]
          },
          methods: {
              handle: function(i){
                  this.currenIndex = i
              }
          },
      })
    </script>
</body>
</html>
计算器
<!DOCTYPE html>
<html lang="en">
<head>
    <meta charset="UTF-8">
    <meta http-equiv="X-UA-Compatible" content="IE=edge">
    <meta name="viewport" content="width=device-width, initial-scale=1.0">
    <title>Document</title>
</head>
<body>
    <div id="app">
        vue 核心 数据驱动  组件化
       1. v-model: 数据双向绑定 每个属性 上 的 值 使他们数据数据改变值也会跟着 改变
       2. 在 data 中定义每个值 初始值 为 空/0
       3. 点击计算 @click/v-on:click switch语法 判断 加减乘除 给他们每个值加上this指向 data中定义的数据 转成Number数字类型的 (不然会字符串两两相加)
        <input type="number" v-model='a'>
        <select v-model='opct'>
            <option value="-">-</option>
            <option value="+">+</option>
            <option value="/">/</option>
            <option value="*">*</option>
        </select>
        <input type="munder" v-model='b'> = <input v-model='c' type="number">
        <button @click='handle'>计算</button>
    </div>
    <script src="../vue/vue.js"></script>
    <script>
        let vm = new Vue({
            el: "#app",
            data: {
                a: '',
                b: '',
                opct: '+',
                c: ''
            },
            methods: {
                handle: function () {
                    switch (this.opct) {
                        case '+':
                            this.c = parseInt(this.a) + parseInt(this.b)
                            break;
                        case '-':
                            this.c = parseInt(this.a) - parseInt(this.b)
                            break;
                        case '*':
                            this.c = parseInt(this.a) * parseInt(this.b)
                            break;
                        case '/':
                            this.c = parseInt(this.a) / parseInt(this.b)
                            break;
                    }
                }
            },
        })
    </script>
</body>

</html>
轮播图
<!DOCTYPE html>
<html lang="en">
<head>
    <meta charset="UTF-8">
    <meta http-equiv="X-UA-Compatible" content="IE=edge">
    <meta name="viewport" content="width=device-width, initial-scale=1.0">
    <title>Document</title>
    <style>
        div,ul,li,img{
            margin: 0;
            padding: 0;
            list-style: none;
        }

        .ary{
            width: 400px;
            height: 240px;
            display: none;
        }

        .ary img{
            width: 100%;
        }

        .active{
            display: block;
        }
    </style>
</head>
<body>
    <div id="app">
        <ul>
            <li  v-for='(item,i) in listImg' class='ary' :class='{active:i === currentIndex}'><img :src="item.img" alt=""></li>
        </ul>
    </div>
    <script src="../vue/vue.js"></script>
    <script>
        let vm = new Vue({
            el:"#app",
            data() {
                return {
                    currentIndex:0,//下标为0  第一个
                    i:'',
                    timer:null,
                    listImg:[
                        {
                            img:"https://img1.baidu.com/it/u=1381721447,4031318601&fm=26&fmt=auto&gp=0.jpg"
                        },
                        {
                            img:"https://img0.baidu.com/it/u=1146214500,542465652&fm=26&fmt=auto&gp=0.jpg"
                        },
                        {
                            img:"https://img2.baidu.com/it/u=276481631,2238054324&fm=26&fmt=auto&gp=0.jpg"
                        },
                        {
                            img:"https://img0.baidu.com/it/u=2673151521,1735341985&fm=26&fmt=auto&gp=0.jpg"
                        }
                    ]
                }
            },
            mounted() {
                this.run()//调用函数
            },
            methods: {
                run(){//定义一个函数
                    setInterval(() => {//设置一个计时器
                    this.currentIndex++;//让下标每加一秒都更新一次下标
                    if(this.currentIndex === this.listImg.length) this.currentIndex = 0 //判断当前项 的下标值 等于 他自身数组的长度 循环一遍后初始值为 0 回到第一张图片
                },1000)
                }
            }
        })
    </script>
</body>
</html>
component
<hr style=" border:solid; width:100px; height:1px;" color=#000000 size=1">

```html
    <!DOCTYPE html>
    <html lang="en">
    <head>
        <meta charset="UTF-8">
        <meta http-equiv="X-UA-Compatible" content="IE=edge">
        <meta name="viewport" content="width=device-width, initial-scale=1.0">
        <title>Document</title>
        <script src="../vue/vue.js"></script>
    </head>
    <body>
        <div id="app">
            <!-- 最外层是大的div 组件 里面存放我们小的组件 -->
            <button-counter></button-counter>
            <button-counter></button-counter>
            <button-counter></button-counter>
            <!-- 复制三分 分开组件之间互不影响 独立的 -->
            <!-- <HelloWorld></HelloWorld>  报错
             如果使用驼峰命名组件 那么在使用组件的时候 只能在 ‘字符串中使用’在普通标签模板中必须使用短横线  首字母小写中间短横线    注意
            -->
            <hello-world></hello-world>
        </div>
        <script>
            Vue.component('HelloWorld',{//   我们再来注册一个组件 Vue组件component注册 组件名称开头首字母大写 驼峰命名法    二,
                data: function() { //里面定义数据  必须是一个函数
                    return{  //在 component 必须return 否则报错
                        msg:'HelloWorld'
                    }
                },
                template:'<div>{{msg}}</div>'
            })
            Vue.component('button-counter',{//注册component组件 实例名字 写在页面   一,
                data: function () {//存放数据的   在component 中必须是一个函数       注意1.
                    return {      //在 component 必须return 否则报错          注意
                        count:0  //我们定义的数据
                    }
                },
                // template:'<button @click="count++">点击++ {{count}}</button>',
                // template:'<button @click="handle">点击++ {{count}}</button>',  // 每个元素div是独立的 <div><button @click="handle">点击++ {{count}}</button></div>  注意2.
                template:   `
                <div>
                    <button @click="handle">点击++ {{count}}</button>
                    <button>测试123</button>
                    <HelloWorld></HelloWorld>
                    </div>
                `,                                                           // 代码太多拥挤可以用模板字符串提高可读性 看起来更美观 组件模板内容可以使用 模板字符串 ES6 语法 注意3.
                methods:{//定义函数方方法
                    handle: function () { // 写入函数名称
                        // this.count++ ,  //this.count++ 是调用这个函数本身 对外层的 count数据++
                        this.count += 2 //每次加2
                    }
                }
            });

            let vm = new Vue({//一定要 定义vue 初始化 不然找不到无法显示
                el:"#app",// 找到声明的 Vue  组件名称
                data:{

                }
            })
        </script>
    </body>
    </html>
局部组件
<!DOCTYPE html>
<html lang="en">
<head>
    <meta charset="UTF-8">
    <meta http-equiv="X-UA-Compatible" content="IE=edge">
    <meta name="viewport" content="width=device-width, initial-scale=1.0">
    <title>Document</title>
    <script src="../vue/vue.js"></script>
</head>
<body>
    <div id="app">
        <hello-world></hello-world>
        <hello-tom></hello-tom>
        <hello-jerry></hello-jerry>
        <test-com></test-com>
    </div>
    <script>
        /*
            可以通过对象的方式注册  多个组件  但式只能在 ‘父组件中使用在别的地方不能使用’  除此之外自定义指令自定义过滤器存在同样特性
            局部注册组件 只能在父组件中使用 在别的地方时报错的
        */
        Vue.component('test-com',{
            template:'<div>Test-com <hello-world></hello-world></div>'   //注意
        })
        let HelloWorld = { //局部注 册 组件   1.
            data:function(){ // 数据 函数体
                return{ //在 component 中必须使用 return
                    msg:'HelloWorld'
                }
            },
            template:`<div>{{msg}}</div>`   //渲染文本
        }
        let HelloTom = { //局部注 册 组件   1.
            data:function(){ // 数据 函数体
                return{ //在 component 中必须使用 return
                    msg:'HelloTom'
                }
            },
            template:`<div>{{msg}}</div>`   //渲染文本
        }
        let HelloJerry = { //局部注 册 组件   1.
            data:function(){ // 数据 函数体
                return{ //在 component 中必须使用 return
                    msg:'HelloJerry'
                }
            },
            template:`<div>{{msg}}</div>`   //渲染文本
        };

        let vm = new Vue({ //注册vue
            el:"#app",// 找到 渲染DOM
            data:{ //定义数据 源头

            },
            components:{  // 局部组件使用方式 只能在父组件中使用在别的地方是用不了的
                'hello-world':HelloWorld,
                'hello-tom':HelloTom,
                'hello-jerry':HelloJerry
            }
        })
    </script>
</body>
</html>
子组件向父组件传值
<!DOCTYPE html>
<html lang="en">

<head>
    <meta charset="UTF-8">
    <meta http-equiv="X-UA-Compatible" content="IE=edge">
    <meta name="viewport" content="width=device-width, initial-scale=1.0">
    <title>Document</title>
    <script src="../vue/vue.js"></script>
</head>
   <!-- 子组件传值- 基本用法
        props 传递数据原则: 单向流数据 -->
<body>
    <div id="app">
        <div :style='{fontSize: fontSize + "px"}'>{{pmsg}}</div>
        <menu-item :parr='parr' @enlarge-text='handle($event)'></menu-item>

    </div>
    <script>
        // 子组件通过自定义事件向父组件传递信息                     1.
        // <button v-on:click="$emit('enlarge-text')">扩大字体</button>
        // 父组件监听子组件事件                                   2.
        // <menu-item v-on:enlarge-text='fontSize += 0.1'></menu-item>
        // 子组件通过 定义事件父组件传递信息
        //<button v-on:click='$emit('enlatge-text',0.1)'></button>
        // 父组件监听子组件的事
        //<menu-item v-on:enlarge-text='fontSize += $event'></menu-item>
        Vue.component('menu-item', {
            props: ['parr'],
            template: `
            <div>
              <ul>
                <li  v-for='(item,index) in parr'>{{item }}</li>
              </ul>
              <button @click="parr.push('lemon')">点击</button>
              <button @click="$emit('enlarge-text',5)">扩大父组件中字体大小</button>
              <button @click="$emit('enlarge-text',10)">扩大父组件中字体大小</button>
            </div>
            `
        })
        let vm = new Vue({
            el: "#app",
            data() {
                return {
                    pmsg:'子组件向父组件传递值',
                    parr: ['HUAWEI', 'Apple'],
                    fontSize:10 //我们在这里定义字体大小
                }
            },
            methods: {
                handle(val){
                    //扩大字体大小
                    this.fontSize += val;//函数内容 每次 + 5
                }
            },
        })
    </script>
</body>
</html>
组件props属性
<!DOCTYPE html>
<html lang="en">
<head>
    <meta charset="UTF-8">
    <meta http-equiv="X-UA-Compatible" content="IE=edge">
    <meta name="viewport" content="width=device-width, initial-scale=1.0">
    <title>Document</title>
    <script src="../vue/vue.js"></script>
</head>
<body>
    <div id="app">
        <div>{{pmsg}}</div>
        <menu-item :menu-title='ptitle'></menu-item>
    <!-- 传值类型 可以是 字符串  小写短横线 如果是’驼峰就会报错‘  2.
      注意  在props中使用 驼峰形式模板中需要短横线  字符串形式模板中没有这个限制-->
    </div>
    <script>
        Vue.component('third-com',{ //定义组件
            props:['testTile'], //组件传值   在props中使用 驼峰形式模板中需要短横线  字符串形式 1.
            template:'<div>{{testTile}}</div>' //
        })
        Vue.component('menu-item',{
            props:['menu-Title'], //props 传递 他是一个数组类型 可以是驼峰 或者 字符串类型
            template:'<div>{{menuTitle}}<third-com testTile="hello"></third-com></div>' //传递的值可以是字符串类型
        })
        let vm = new Vue({
            el:"#app",
            data() {
                return {
                   pmsg:'父组件中内容',
                   ptitle:'动态绑定' //定义传递的值
                }
            },
        })
    </script>
</body>
</html>
组件传值
1.组件内部通过 props 接受传递的值
Vue.component('menu-item',{
props:['title'],
template:`<div></div>`
})
2. 父组件通过属性将值传递给组件
<menu-item title="来自父组件的数据"></menu-item>
<menu-item :title="title"></menu-item>
<!DOCTYPE html>
<html lang="en">
<head>
    <meta charset="UTF-8">
    <meta http-equiv="X-UA-Compatible" content="IE=edge">
    <meta name="viewport" content="width=device-width, initial-scale=1.0">
    <title>Document</title>
    <script src="../vue/vue.js"></script>
</head>
<body>
    <div id="app">
        <div>{{pmsg}}</div>
        <menu-item title="来自父组件值"></menu-item>
        <menu-item :title="ptitle" content='hello'></menu-item>
        <menu-item :title="ptitle" content='hello'></menu-item>
    </div>
    <script>
        Vue.component('menu-item',{
            props:['title','content'],//  传值 通过 props title
            data:function() {
                return {
                    msg:'子组件本身数据'
                }
            },
            template:'<div>{{msg + "----" + title + "----" + content}}</div>'
        });
        let vm = new Vue({
            el:"#app",
            data:{
                pmsg:"父组件内容",
                ptitle:'动态绑定属性'
            }
        })

    </script>
</body>
</html>
props 属性
<!DOCTYPE html>
<html lang="en">
<head>
    <meta charset="UTF-8">
    <meta http-equiv="X-UA-Compatible" content="IE=edge">
    <meta name="viewport" content="width=device-width, initial-scale=1.0">
    <title>Document</title>
    <script src="../vue/vue.js"></script>
</head>
<body>
    <div id="app">
        <div>{{pmsg}}</div>
        <menu-item :menu-title='ptitle'></menu-item>
    <!-- 传值类型 可以是 字符串  小写短横线 如果是’驼峰就会报错‘  2.
      注意  在props中使用 驼峰形式模板中需要短横线  字符串形式模板中没有这个限制-->
    </div>
    <script>
        Vue.component('third-com',{ //定义组件
            props:['testTile'], //组件传值   在props中使用 驼峰形式模板中需要短横线  字符串形式 1.
            template:'<div>{{testTile}}</div>' //
        })
        Vue.component('menu-item',{
            props:['menu-Title'], //props 传递 他是一个数组类型 可以是驼峰 或者 字符串类型
            template:'<div>{{menuTitle}}<third-com testTile="hello"></third-com></div>' //传递的值可以是字符串类型
        })
        let vm = new Vue({
            el:"#app",
            data() {
                return {
                   pmsg:'父组件中内容',
                   ptitle:'动态绑定' //定义传递的值
                }
            },
        })
    </script>
</body>
</html>
props 类型传值 string,Number object 数组 对象 传值方式
props福组件传值
<!DOCTYPE html>
<html lang="en">
  <head>
    <meta charset="UTF-8" />
    <meta http-equiv="X-UA-Compatible" content="IE=edge" />
    <meta name="viewport" content="width=device-width, initial-scale=1.0" />
    <title>Document</title>
    <script src="../vue/vue.js"></script>
  </head>
  <body>
    <div id="app">
      <div>{{pmsg}}</div>
      <menu-item :pstr="pstr" :pum="12" :pboo="true" :parr='parr' :pobj="pobj"></menu-item>
      <!-- 将值 渲染到页面                       3.  -->
    </div>
    <script>
      Vue.component("menu-item", {
        props: ["pstr", "pum", "pboo","parr","pobj"], //将值传递给  props  2.
        template:`
            <div>
                <div>{{pstr}}</div>
                 <div>{{pum}}</div>
                 <div>{{pboo}}</div>
                 <ul>
                    <li :key="index" v-for="(item,index) in parr">{{item}}</li>
                </ul>
                <ul>
                    <li :key="obj" v-for="(item,obj) in pobj">{{item}}</li>
                </ul>
            </div>  `
      });
      let vm = new Vue({
        el: "#app",
        data() {
          return {
            pmsg: "父组件内容",
            pstr: "hello", //string  要穿的值  1.
            parr: ["apple", "orange", "banner"], //数值类型
            pobj:{
                name:'list',
                age:16
            }
          };
        },
      });
    </script>
  </body>
</html>
插槽
<!DOCTYPE html>
<html lang="en">
<head>
    <meta charset="UTF-8">
    <meta http-equiv="X-UA-Compatible" content="IE=edge">
    <meta name="viewport" content="width=device-width, initial-scale=1.0">
    <title>Document</title>
    <script src="../vue/vue.js"></script>
</head>
<body>
    <div id="app">
        <alert-box>有bug发生</alert-box>
        <alert-box>有bug发生</alert-box>
        <alert-box></alert-box>
        <!-- 插槽内容 -->
    </div>
    <script>
        Vue.component('alert-box',{
            template:`
            <div>
            <strong>ERROR:</strong>
            <slot>默认内容</slot>
        </div>
            `
        })
        let vm = new Vue({
            el:"#app",
            data() {
                return {

                }
            },
        })
    </script>
</body>
</html>
插槽用法
<!DOCTYPE html>
<html lang="en">
<head>
    <meta charset="UTF-8">
    <meta http-equiv="X-UA-Compatible" content="IE=edge">
    <meta name="viewport" content="width=device-width, initial-scale=1.0">
    <title>Document</title>
    <script src="../vue/vue.js"></script>
</head>
<body>
    <div id="app">
      <base-layder>
        <p slot="header">头部</p>
        <p>内容1</p>
        <p>内容2</p>
        <p slot='footer'>底部</p>
      </base-layder>

      <base-layder>
        <template slot='header'>
            <p>1</p>
            <p>2</p>
        </template>
        <p>内容1</p>
        <p>内容2</p>
        <template slot='footer'>
            <p>1</p>
            <p>2</p>
        </template>
    </base-layder>
    </div>
    <script>
        Vue.component('base-layder',{
            template:`<div>
                <header>
            <slot name='header'></slot>
        </header>
        <main>
            <slot></slot>
        </main>
        <footer>
            <slot  name='footer'></slot>
        </footer>
                </div>`
        })
        let vm = new Vue({
            el:"#app",
            data() {
                return {

                }
            },
        })
    </script>
</body>
</html>
购物车
<!DOCTYPE html>
<html lang="en">
<head>
    <meta charset="UTF-8">
    <meta http-equiv="X-UA-Compatible" content="IE=edge">
    <meta name="viewport" content="width=device-width, initial-scale=1.0">
    <title>Document</title>
    <style>
            .container {
    }
    .container .cart {
      width: 400px;
      margin: auto;
    }
    .container .title {
      background-color: lightblue;
      height: 60px;
      line-height: 60px;
      text-align: center;
      /*color: #fff;*/
    }
    .container .total {
      background-color: #FFCE46;
      height: 50px;
      line-height: 50px;
      text-align: right;
    }
    .container .total button {
      margin: 0 10px;
      background-color: #DC4C40;
      height: 35px;
      width: 80px;
      border: 0;
    }
    .container .total span {
      color: red;
      font-weight: bold;
    }
    .container .item {
      height: 80px;
      line-height: 80px;
      position: relative;
      border-top: 1px solid #ADD8E6;
    }
    .container .item img {
      width: 70px;
      height: 70px;
      margin: 5px;
    }
    .container .item .name {
      position: absolute;
      width: 90px;
      top: 0;left: 55px;
      font-size: 16px;
    }

    .container .item .change {
      width: 100px;
      position: absolute;
      top: 0;
      right: 50px;
    }
    .container .item .change a {
      font-size: 20px;
      width: 30px;
      text-decoration:none;
      background-color: lightgray;
      vertical-align: middle;
    }
    .container .item .change .num {
      width: 40px;
      height: 25px;
    }
    .container .item .del {
      position: absolute;
      top: 0;
      right: 0px;
      width: 40px;
      text-align: center;
      font-size: 40px;
      cursor: pointer;
      color: red;
    }
    .container .item .del:hover {
      background-color: orange;
    }
    </style>
    <script src="../vue/vue.js"></script>
</head>
<body>
    <div id="app">
        <div class="container">
                 <my-cart ></my-cart>
        </div>
    </div>
    <script>
        var CartTitle = {
            props:['uname'],
            template:`  <div class="title">{{uname}}商品</div>`
        }
        var CartList = {
          props:['list'],
            template:`
            <div>
            <div :key='item.id' v-for='item in list' class='item' >
            <img :src="item.img"/>
            <div class="name">{{item.name}}</div>
            <div class="change">
              <a href="" @click.prevent='sub(item.id)'>-</a>
              <input type="text" class="num" :value='item.num' @blur='changeNum(item.id,$event)' />
              <a href="" @click.prevent='add(item.id)'>+</a>
            </div>
            <div class="del" @click='del(item.id)'>× </div>
          </div>
           </div>
            `,
            methods: {
              changeNum: function(id,event){
                  console.log(id,event.target.value)
                  this.$emit('change-num',{
                    id:id,
                    type:'change',
                    num:event.target.value
                  })
              },
              sub:function(id){
                this.$emit('change-num',{
                  id:id,
                  type:'sub'
                })
              },
              add:function(id){
                this.$emit('change-num',{
                  id:id,
                  type:'add'
                })
              },
              del:function(id){//通过id 传递给父组件
                this.$emit('cart-del',id)
                console.log(id)
              }
            }
        }
        var CartTotal = {
          props:['list'],
            template:`
             <div class="total">
                <span>总价: {{total}}</span>
                <button>结算</button>
            </div>`,
            computed:{
              total: function(){
                let t = 0;//计算总价
                this.list.forEach(item => {
                  t += item.price * item.num;
                })
                return t;
              }
            }
        }
        Vue.component('my-cart',{
            data() {
              return {
                uname:'张三',
                list: [{
                  id: 1,
                  name: 'TCL彩电',
                  price: 1000,
                  num: 1,
                  img: 'https://img2.baidu.com/it/u=3172089882,2709784438&fm=26&fmt=auto'
                },{
                  id: 2,
                  name: '机顶盒',
                  price: 1000,
                  num: 1,
                  img: 'https://img2.baidu.com/it/u=3172089882,2709784438&fm=26&fmt=auto'
                },{
                  id: 3,
                  name: '海尔冰箱',
                  price: 1000,
                  num: 1,
                  img: 'https://img2.baidu.com/it/u=3172089882,2709784438&fm=26&fmt=auto'
                },{
                  id: 4,
                  name: '小米手机',
                  price: 1000,
                  num: 1,
                  img: 'https://img2.baidu.com/it/u=3172089882,2709784438&fm=26&fmt=auto'
                },{
                  id: 5,
                  name: 'PPTV电视',
                  price: 1000,
                  num: 2,
                  img: 'https://img2.baidu.com/it/u=3172089882,2709784438&fm=26&fmt=auto'
                }]
              }
            },
            template:`
            <div class="cart">
              <cart-title :uname='uname'></cart-title>
              <cart-list :list='list' @change-num='changeNum($event)'  @cart-del='delCart($event)'></cart-list>
              <cart-total :list='list'></cart-total>
            </div>
            `,
            components:{
                'cart-title':CartTitle,
                'cart-list':CartList,
                'cart-total':CartTotal
            },
            methods: {
              changeNum:function(val){
                //分为三种情况   输入域变更 加号变更 减号变更
                if(val.type=='change'){
                  console.log(val )
                //根据子组件传递过来的数据更新list
                this.list.some(item=>{
                  if(item.id == val.id){//判断一下传过来的数据和val的相等就是我们要更新改变的数据
                    item.num = val.num;//当前每一项的num数 = val传过来的数据
                    return true;//终止遍历
                  }
                })
                }else if(val.type == 'sub'){
                  //减一
                  this.list.some(item=>{
                  if(item.id == val.id){//判断一下传过来的数据和val的相等就是我们要更新改变的数据
                    item.num -= 1;//当前每一项的num数 = val传过来的数据
                    return true;//终止遍历
                  }
                })
                }else if(val.type == 'add'){
                  //减一
                  this.list.some(item=>{
                  if(item.id == val.id){//判断一下传过来的数据和val的相等就是我们要更新改变的数据
                    item.num += 1;//当前每一项的num数 = val传过来的数据
                    return true;//终止遍历
                  }
                })
                }

              },
              delCart: function(id){
                //根据id删除数据
                let index = this.list.findIndex(item => {
                  return item.id == id;//找到相同元素的id
                })
                //根据索引删除数据
                this.list.splice(index,1)
              }
            },
        })
        let vm = new Vue({
            el:"#app",
            data() {
                return {

                }
            },
        })
    </script>
</body>
</html>
前后端交互
传统形式 URL
格式 schema://host:port/path?query#fragment
host 域名或者IP地址
port 端口http默认端口80可以省略
path 路径 /abc/a/b/c
query 查询参数 uname=list&age=12
fragment 锚点(哈希Hasn)用于某页面进的定位
符合规则URL
http://www.itcast.cn
http://www.itcast.cn/java/web
http://www.itcast.cn/java.web?flag=1
http://www.itcast.cn/java/web?flag=#function
URL地址格式
Restful形式URL
HTTP请求
GET 查询
POST 添加
PUT 修改
DELETE 删除
符合规则的URL地址
http://www.hello.com/books  GET
http://wwww.hello.com/books POST
http://www.hello.com/books123 PUT
http://www.hello.com/books/123 DELETE
基于Promise处理ajax
<!DOCTYPE html>
<html lang="en">
<head>
    <meta charset="UTF-8">
    <meta http-equiv="X-UA-Compatible" content="IE=edge">
    <meta name="viewport" content="width=device-width, initial-scale=1.0">
    <title>Document</title>
</head>
<body>
    <script>
        function queryData(){
            let p = new Promise(function(resolve,reject){
                let xhr = new XMLHttpRequest();
                xhr.onreadystatechange = function(){
                    if(xhr.readyState != 4) return;
                    if(xhr.readyState == 4 && xhr.status == 200){
                        //处理正常
                        resolve(xhr.responseText)
                    }else{
                        reject('错误')
                    }
                };
                xhr.open('get',url);
                xhr.send(null);
            })
            return p;
        }
        queryData('http://localhost3000/data')
        .then(function(data){
            console.log(data)
        },function(info){
            console.log(info)
        })
    </script>
</body>
</html>
Promise 常用 API
- p.then() 异步处理任务正确结果
- p.catch() 异常信息
- p.finally()成功与否都会执行```
queryData()
.then(function(data)){
console.log(data)
})
.catch(function(data){
console.log(data)
})
.finally(function(){
console.log('finished')
}
Promise常用API-对象方法
<!DOCTYPE html>
<html lang="en">
<head>
  <meta charset="UTF-8">
  <title>Document</title>
</head>
<body>

  <script type="text/javascript">
    /*
      Promise常用API-对象方法
    */
    // console.dir(Promise)
    function queryData(url) {
      return new Promise(function(resolve, reject){
        var xhr = new XMLHttpRequest();
        xhr.onreadystatechange = function(){
          if(xhr.readyState != 4) return;
          if(xhr.readyState == 4 && xhr.status == 200) {
            // 处理正常的情况
            resolve(xhr.responseText);
          }else{
            // 处理异常情况
            reject('服务器错误');
          }
        };
        xhr.open('get', url);
        xhr.send(null);
      });
    }

    var p1 = queryData('http://localhost:3000/a1');
    var p2 = queryData('http://localhost:3000/a2');
    var p3 = queryData('http://localhost:3000/a3');
    // Promise.all([p1,p2,p3]).then(function(result){
    //   console.log(result)
    // })
    Promise.race([p1,p2,p3]).then(function(result){
      console.log(result)
    })
  </script>
</body>
</html>
Fetch API 基本用法
<!DOCTYPE html>
<html lang="en">
<head>
  <meta charset="UTF-8">
  <title>Document</title>
</head>
<body>
  <script type="text/javascript">
    /*
      Fetch API 基本用法
    */
    fetch('http://localhost:3000/fdata').then(function(data){
      // text()方法属于fetchAPI的一部分,它返回一个Promise实例对象,用于获取后台返回的数据
      return data.text();
    }).then(function(data){
      console.log(data);
    })
  </script>
</body>
</html>
Fetch API 调用接口传递参数
<!DOCTYPE html>
<html lang="en">
<head>
  <meta charset="UTF-8">
  <title>Document</title>
</head>
<body>
  <script type="text/javascript">
    /*
      Fetch API 调用接口传递参数
    */

    // GET参数传递-传统URL
    // fetch('http://localhost:3000/books?id=123', {
    //   method: 'get'
    // })
    //   .then(function(data){
    //     return data.text();
    //   }).then(function(data){
    //     console.log(data)
    //   });

    // GET参数传递-restful形式的URL
    // fetch('http://localhost:3000/books/456', {
    //   method: 'get'
    // })
    //   .then(function(data){
    //     return data.text();
    //   }).then(function(data){
    //     console.log(data)
    //   });

    // DELETE请求方式参数传递
    // fetch('http://localhost:3000/books/789', {
    //   method: 'delete'
    // })
    //   .then(function(data){
    //     return data.text();
    //   }).then(function(data){
    //     console.log(data)
    //   });

    // POST请求传参
    // fetch('http://localhost:3000/books', {
    //   method: 'post',
    //   body: 'uname=lisi&pwd=123',
    //   headers: {
    //     'Content-Type': 'application/x-www-form-urlencoded'
    //   }
    // })
    //   .then(function(data){
    //     return data.text();
    //   }).then(function(data){
    //     console.log(data)
    //   });

    // POST请求传参
    // fetch('http://localhost:3000/books', {
    //   method: 'post',
    //   body: JSON.stringify({
    //     uname: '张三',
    //     pwd: '456'
    //   }),
    //   headers: {
    //     'Content-Type': 'application/json'
    //   }
    // })
    //   .then(function(data){
    //     return data.text();
    //   }).then(function(data){
    //     console.log(data)
    //   });

    // PUT请求传参
    fetch('http://localhost:3000/books/123', {
      method: 'put',
      body: JSON.stringify({
        uname: '张三',
        pwd: '789'
      }),
      headers: {
        'Content-Type': 'application/json'
      }
    })
      .then(function(data){
        return data.text();
      }).then(function(data){
        console.log(data)
      });
  </script>
</body>
</html>
Fetch响应结果的数据格式
<!DOCTYPE html>
<html lang="en">
<head>
  <meta charset="UTF-8">
  <title>Document</title>
</head>
<body>

  <script type="text/javascript">
    /*
      Fetch响应结果的数据格式
    */
    fetch('http://localhost:3000/json').then(function(data){
      // return data.json();
      return data.text();
    }).then(function(data){
      // console.log(data.uname)
      // console.log(typeof data)
      var obj = JSON.parse(data);
      console.log(obj.uname,obj.age,obj.gender)
    })
  </script>
</body>
</html>
axios请求
<!DOCTYPE html>
<html lang="en">
<head>
  <meta charset="UTF-8">
  <title>Document</title>
</head>
<body>

  <script type="text/javascript" src="js/axios.js"></script>
  <script type="text/javascript">
    /*
      axios请求参数传递
    */
    // axios get请求传参
    // axios.get('http://localhost:3000/axios?id=123').then(function(ret){
    //   console.log(ret.data)
    // })
    // axios.get('http://localhost:3000/axios/123').then(function(ret){
    //   console.log(ret.data)
    // })
    // axios.get('http://localhost:3000/axios', {
    //   params: {
    //     id: 789
    //   }
    // }).then(function(ret){
    //   console.log(ret.data)
    // })

    // axios delete 请求传参
    // axios.delete('http://localhost:3000/axios', {
    //   params: {
    //     id: 111
    //   }
    // }).then(function(ret){
    //   console.log(ret.data)
    // })

    // axios.post('http://localhost:3000/axios', {
    //   uname: 'lisi',
    //   pwd: 123
    // }).then(function(ret){
    //   console.log(ret.data)
    // })
    // var params = new URLSearchParams();
    // params.append('uname', 'zhangsan');
    // params.append('pwd', '111');
    // axios.post('http://localhost:3000/axios', params).then(function(ret){
    //   console.log(ret.data)
    // })

    // axios put 请求传参
    axios.put('http://localhost:3000/axios/123', {
      uname: 'lisi',
      pwd: 123
    }).then(function(ret){
      console.log(ret.data)
    })
  </script>
</body>
</html>
axios 响应结果与全局配置
<!DOCTYPE html>
<html lang="en">
<head>
  <meta charset="UTF-8">
  <title>Document</title>
</head>
<body>
  <script type="text/javascript" src="js/axios.js"></script>
  <script type="text/javascript">
    /*
      axios 响应结果与全局配置
    */
    // axios.get('http://localhost:3000/axios-json').then(function(ret){
    //   console.log(ret.data.uname)
    // })

    // 配置请求的基准URL地址
    axios.defaults.baseURL = 'http://localhost:3000/';
    // 配置请求头信息
    axios.defaults.headers['mytoken'] = 'hello';
    axios.get('axios-json').then(function(ret){
      console.log(ret.data.uname)
    })
  </script>
</body>
</html>
axios拦截器
<!DOCTYPE html>
<html lang="en">
<head>
  <meta charset="UTF-8">
  <title>Document</title>
</head>
<body>

  <script type="text/javascript" src="js/axios.js"></script>
  <script type="text/javascript">
    /*
      axios拦截器
    */
    axios.interceptors.request.use(function(config) {
      console.log(config.url)
      config.headers.mytoken = 'nihao';
      return config;
    }, function(err){
      console.log(err)
    })

    axios.interceptors.response.use(function(res) {
      // console.log(res)
      var data = res.data;
      return data;
    }, function(err){
      console.log(err)
    })
    axios.get('http://localhost:3000/adata').then(function(data){
      console.log(data)
    })
  </script>
</body>
</html>
async/await 处理异步操作:
<!DOCTYPE html>
<html lang="en">
<head>
  <meta charset="UTF-8">
  <title>Document</title>
</head>
<body>
  <script type="text/javascript" src="js/axios.js"></script>
  <script type="text/javascript">
    /*
      async/await 处理异步操作:
      async函数返回一个Promise实例对象
      await后面可以直接跟一个 Promise实例对象
    */
    axios.defaults.baseURL = 'http:localhost:3000';
    // axios.get('adata').then(function(ret){
    //   console.log(ret.data)
    // })

    // async function queryData() {
    //   var ret = await axios.get('adata');
    //   // console.log(ret.data)
    //   return ret.data;
    // }

    async function queryData() {
      var ret = await new Promise(function(resolve, reject){
        setTimeout(function(){
          resolve('nihao')
        },1000);
      })
      // console.log(ret.data)
      return ret;
    }
    queryData().then(function(data){
      console.log(data)
    })
  </script>
</body>
</html>
async/await处理多个异步任务
<!DOCTYPE html>
<html lang="en">
<head>
  <meta charset="UTF-8">
  <title>Document</title>
</head>
<body>

  <script type="text/javascript" src="js/axios.js"></script>
  <script type="text/javascript">
    /*
      async/await处理多个异步任务
    */
    axios.defaults.baseURL = 'http://localhost:3000';

    async function queryData() {
      var info = await axios.get('async1');
      var ret = await axios.get('async2?info=' + info.data);
      return ret.data;
    }

    queryData().then(function(data){
      console.log(data)
    })
  </script>
</body>
</html>
模拟路由
<!DOCTYPE html>
<html lang="en">
  <head>
    <meta charset="UTF-8" />
    <meta name="viewport" content="width=device-width, initial-scale=1.0" />
    <meta http-equiv="X-UA-Compatible" content="ie=edge" />
    <title>Document</title>
    <!-- 导入 vue 文件 -->
    <script src="./lib/vue_2.5.22.js"></script>
  </head>
  <body>
    <!-- 被 vue 实例控制的 div 区域 -->
    <div id="app">
      <!-- 切换组件的超链接 -->
      <a href="#/zhuye">主页</a>
      <a href="#/keji">科技</a>
      <a href="#/caijing">财经</a>
      <a href="#/yule">娱乐</a>

      <!-- 根据 :is 属性指定的组件名称,把对应的组件渲染到 component 标签所在的位置 -->
      <!-- 可以把 component 标签当做是【组件的占位符】 -->
      <component :is="comName"></component>
    </div>

    <script>
      // #region 定义需要被切换的 4 个组件
      // 主页组件
      const zhuye = {
        template: '<h1>主页信息</h1>'
      }

      // 科技组件
      const keji = {
        template: '<h1>科技信息</h1>'
      }

      // 财经组件
      const caijing = {
        template: '<h1>财经信息</h1>'
      }

      // 娱乐组件
      const yule = {
        template: '<h1>娱乐信息</h1>'
      }
      // #endregion

      // #region vue 实例对象
      const vm = new Vue({
        el: '#app',
        data: {
          comName: 'zhuye'
        },
        // 注册私有组件
        components: {
          zhuye,
          keji,
          caijing,
          yule
        }
      })
      // #endregion

      // 监听 window 的 onhashchange 事件,根据获取到的最新的 hash 值,切换要显示的组件的名称
      window.onhashchange = function() {
        // 通过 location.hash 获取到最新的 hash 值
        console.log(location.hash);
        switch(location.hash.slice(1)){
          case '/zhuye':
            vm.comName = 'zhuye'
          break
          case '/keji':
            vm.comName = 'keji'
          break
          case '/caijing':
            vm.comName = 'caijing'
          break
          case '/yule':
            vm.comName = 'yule'
          break
        }
      }
    </script>
  </body>
</html>
02.vue-router的基本使用
<!DOCTYPE html>
<html lang="en">
  <head>
    <meta charset="UTF-8" />
    <meta name="viewport" content="width=device-width, initial-scale=1.0" />
    <meta http-equiv="X-UA-Compatible" content="ie=edge" />
    <title>Document</title>
    <!-- 导入 vue 文件 -->
    <script src="./lib/vue_2.5.22.js"></script>
    <script src="./lib/vue-router_3.0.2.js"></script>
  </head>
  <body>
    <!-- 被 vm 实例所控制的区域 -->
    <div id="app">
      <router-link to="/user">User</router-link>
      <router-link to="/register">Register</router-link>

      <!-- 路由占位符 -->
      <router-view></router-view>
    </div>

    <script>
      const User = {
        template: '<h1>User 组件</h1>'
      }

      const Register = {
        template: '<h1>Register 组件</h1>'
      }

      // 创建路由实例对象
      const router = new VueRouter({
        // 所有的路由规则
        routes: [
          { path: '/user', component: User },
          { path: '/register', component: Register }
        ]
      })

      // 创建 vm 实例对象
      const vm = new Vue({
        // 指定控制的区域
        el: '#app',
        data: {},
        // 挂载路由实例对象
        // router: router
        router
      })
    </script>
  </body>
</html>
03.路由重定向(1)
<!DOCTYPE html>
<html lang="en">
  <head>
    <meta charset="UTF-8" />
    <meta name="viewport" content="width=device-width, initial-scale=1.0" />
    <meta http-equiv="X-UA-Compatible" content="ie=edge" />
    <title>Document</title>
    <!-- 导入 vue 文件 -->
    <script src="./lib/vue_2.5.22.js"></script>
    <script src="./lib/vue-router_3.0.2.js"></script>
  </head>
  <body>
    <!-- 被 vm 实例所控制的区域 -->
    <div id="app">
      <router-link to="/user">User</router-link>
      <router-link to="/register">Register</router-link>

      <!-- 路由占位符 -->
      <router-view></router-view>
    </div>

    <script>
      const User = {
        template: '<h1>User 组件</h1>'
      }

      const Register = {
        template: '<h1>Register 组件</h1>'
      }

      // 创建路由实例对象
      const router = new VueRouter({
        // 所有的路由规则
        routes: [
          { path: '/', redirect: '/user'},
          { path: '/user', component: User },
          { path: '/register', component: Register }
        ]
      })

      // 创建 vm 实例对象
      const vm = new Vue({
        // 指定控制的区域
        el: '#app',
        data: {},
        // 挂载路由实例对象
        // router: router
        router
      })
    </script>
  </body>
</html>
路由嵌套
<!DOCTYPE html>
<html lang="en">
  <head>
    <meta charset="UTF-8" />
    <meta name="viewport" content="width=device-width, initial-scale=1.0" />
    <meta http-equiv="X-UA-Compatible" content="ie=edge" />
    <title>Document</title>
    <!-- 导入 vue 文件 -->
    <script src="./lib/vue_2.5.22.js"></script>
    <script src="./lib/vue-router_3.0.2.js"></script>
  </head>
  <body>
    <!-- 被 vm 实例所控制的区域 -->
    <div id="app">
      <router-link to="/user">User</router-link>
      <router-link to="/register">Register</router-link>

      <!-- 路由占位符 -->
      <router-view></router-view>
    </div>

    <script>
      const User = {
        template: '<h1>User 组件</h1>'
      }

      const Register = {
        template: `<div>
          <h1>Register 组件</h1>
          <hr/>

          <!-- 子路由链接 -->
          <router-link to="/register/tab1">tab1</router-link>
          <router-link to="/register/tab2">tab2</router-link>

          <!-- 子路由的占位符 -->
          <router-view />
        <div>`
      }

      const Tab1 = {
        template: '<h3>tab1 子组件</h3>'
      }

      const Tab2 = {
        template: '<h3>tab2 子组件</h3>'
      }

      // 创建路由实例对象
      const router = new VueRouter({
        // 所有的路由规则
        routes: [
          { path: '/', redirect: '/user'},
          { path: '/user', component: User },
          // children 数组表示子路由规则
          { path: '/register', component: Register, children: [
            { path: '/register/tab1', component: Tab1 },
            { path: '/register/tab2', component: Tab2 }
          ] }
        ]
      })

      // 创建 vm 实例对象
      const vm = new Vue({
        // 指定控制的区域
        el: '#app',
        data: {},
        // 挂载路由实例对象
        // router: router
        router
      })
    </script>
  </body>
</html>
动态路由
<!DOCTYPE html>
<html lang="en">
  <head>
    <meta charset="UTF-8" />
    <meta name="viewport" content="width=device-width, initial-scale=1.0" />
    <meta http-equiv="X-UA-Compatible" content="ie=edge" />
    <title>Document</title>
    <!-- 导入 vue 文件 -->
    <script src="./lib/vue_2.5.22.js"></script>
    <script src="./lib/vue-router_3.0.2.js"></script>
  </head>
  <body>
    <!-- 被 vm 实例所控制的区域 -->
    <div id="app">
      <router-link to="/user/1">User1</router-link>
      <router-link to="/user/2">User2</router-link>
      <router-link to="/user/3">User3</router-link>
      <router-link to="/register">Register</router-link>

      <!-- 路由占位符 -->
      <router-view></router-view>
    </div>

    <script>
      const User = {
        template: '<h1>User 组件 -- 用户id为: {{$route.params.id}}</h1>'
      }

      const Register = {
        template: '<h1>Register 组件</h1>'
      }

      // 创建路由实例对象
      const router = new VueRouter({
        // 所有的路由规则
        routes: [
          { path: '/', redirect: '/user'},
          { path: '/user/:id', component: User },
          { path: '/register', component: Register }
        ]
      })

      // 创建 vm 实例对象
      const vm = new Vue({
        // 指定控制的区域
        el: '#app',
        data: {},
        // 挂载路由实例对象
        // router: router
        router
      })
    </script>
  </body>
</html>
动态路由
<!DOCTYPE html>
<html lang="en">
  <head>
    <meta charset="UTF-8" />
    <meta name="viewport" content="width=device-width, initial-scale=1.0" />
    <meta http-equiv="X-UA-Compatible" content="ie=edge" />
    <title>Document</title>
    <!-- 导入 vue 文件 -->
    <script src="./lib/vue_2.5.22.js"></script>
    <script src="./lib/vue-router_3.0.2.js"></script>
  </head>
  <body>
    <!-- 被 vm 实例所控制的区域 -->
    <div id="app">
      <router-link to="/user/1">User1</router-link>
      <router-link to="/user/2">User2</router-link>
      <router-link to="/user/3">User3</router-link>
      <router-link to="/register">Register</router-link>

      <!-- 路由占位符 -->
      <router-view></router-view>
    </div>

    <script>
      const User = {
        props: ['id'],
        template: '<h1>User 组件 -- 用户id为: {{id}}</h1>'
      }

      const Register = {
        template: '<h1>Register 组件</h1>'
      }

      // 创建路由实例对象
      const router = new VueRouter({
        // 所有的路由规则
        routes: [
          { path: '/', redirect: '/user'},
          { path: '/user/:id', component: User, props: true },
          { path: '/register', component: Register }
        ]
      })

      // 创建 vm 实例对象
      const vm = new Vue({
        // 指定控制的区域
        el: '#app',
        data: {},
        // 挂载路由实例对象
        // router: router
        router
      })
    </script>
  </body>
</html>
<!DOCTYPE html>
<html lang="en">
  <head>
    <meta charset="UTF-8" />
    <meta name="viewport" content="width=device-width, initial-scale=1.0" />
    <meta http-equiv="X-UA-Compatible" content="ie=edge" />
    <title>Document</title>
    <!-- 导入 vue 文件 -->
    <script src="./lib/vue_2.5.22.js"></script>
    <script src="./lib/vue-router_3.0.2.js"></script>
  </head>
  <body>
    <!-- 被 vm 实例所控制的区域 -->
    <div id="app">
      <router-link to="/user/1">User1</router-link>
      <router-link to="/user/2">User2</router-link>
      <router-link to="/user/3">User3</router-link>
      <router-link to="/register">Register</router-link>

      <!-- 路由占位符 -->
      <router-view></router-view>
    </div>

    <script>
      const User = {
        props: ['id', 'uname', 'age'],
        template: '<h1>User 组件 -- 用户id为: {{id}} -- 姓名为:{{uname}} -- 年龄为:{{age}}</h1>'
      }

      const Register = {
        template: '<h1>Register 组件</h1>'
      }

      // 创建路由实例对象
      const router = new VueRouter({
        // 所有的路由规则
        routes: [
          { path: '/', redirect: '/user'},
          { path: '/user/:id', component: User, props: { uname: 'lisi', age: 20 } },
          { path: '/register', component: Register }
        ]
      })

      // 创建 vm 实例对象
      const vm = new Vue({
        // 指定控制的区域
        el: '#app',
        data: {},
        // 挂载路由实例对象
        // router: router
        router
      })
    </script>
  </body>
</html>
<!DOCTYPE html>
<html lang="en">
  <head>
    <meta charset="UTF-8" />
    <meta name="viewport" content="width=device-width, initial-scale=1.0" />
    <meta http-equiv="X-UA-Compatible" content="ie=edge" />
    <title>Document</title>
    <!-- 导入 vue 文件 -->
    <script src="./lib/vue_2.5.22.js"></script>
    <script src="./lib/vue-router_3.0.2.js"></script>
  </head>
  <body>
    <!-- 被 vm 实例所控制的区域 -->
    <div id="app">
      <router-link to="/user/1">User1</router-link>
      <router-link to="/user/2">User2</router-link>
      <router-link to="/user/3">User3</router-link>
      <router-link to="/register">Register</router-link>

      <!-- 路由占位符 -->
      <router-view></router-view>
    </div>

    <script>
      const User = {
        props: ['id', 'uname', 'age'],
        template: '<h1>User 组件 -- 用户id为: {{id}} -- 姓名为:{{uname}} -- 年龄为:{{age}}</h1>'
      }

      const Register = {
        template: '<h1>Register 组件</h1>'
      }

      // 创建路由实例对象
      const router = new VueRouter({
        // 所有的路由规则
        routes: [
          { path: '/', redirect: '/user' },
          {
            path: '/user/:id',
            component: User,
            props: route => ({ uname: 'zs', age: 20, id: route.params.id })
          },
          { path: '/register', component: Register }
        ]
      })

      // 创建 vm 实例对象
      const vm = new Vue({
        // 指定控制的区域
        el: '#app',
        data: {},
        // 挂载路由实例对象
        // router: router
        router
      })
    </script>
  </body>
</html>
命名路由
<!DOCTYPE html>
<html lang="en">
  <head>
    <meta charset="UTF-8" />
    <meta name="viewport" content="width=device-width, initial-scale=1.0" />
    <meta http-equiv="X-UA-Compatible" content="ie=edge" />
    <title>Document</title>
    <!-- 导入 vue 文件 -->
    <script src="./lib/vue_2.5.22.js"></script>
    <script src="./lib/vue-router_3.0.2.js"></script>
  </head>
  <body>
    <!-- 被 vm 实例所控制的区域 -->
    <div id="app">
      <router-link to="/user/1">User1</router-link>
      <router-link to="/user/2">User2</router-link>
      <router-link :to="{ name: 'user', params: {id: 3} }">User3</router-link>
      <router-link to="/register">Register</router-link>

      <!-- 路由占位符 -->
      <router-view></router-view>
    </div>

    <script>
      const User = {
        props: ['id', 'uname', 'age'],
        template: '<h1>User 组件 -- 用户id为: {{id}} -- 姓名为:{{uname}} -- 年龄为:{{age}}</h1>'
      }

      const Register = {
        template: '<h1>Register 组件</h1>'
      }

      // 创建路由实例对象
      const router = new VueRouter({
        // 所有的路由规则
        routes: [
          { path: '/', redirect: '/user' },
          {
            // 命名路由
            name: 'user',
            path: '/user/:id',
            component: User,
            props: route => ({ uname: 'zs', age: 20, id: route.params.id })
          },
          { path: '/register', component: Register }
        ]
      })

      // 创建 vm 实例对象
      const vm = new Vue({
        // 指定控制的区域
        el: '#app',
        data: {},
        // 挂载路由实例对象
        // router: router
        router
      })
    </script>
  </body>
</html>
什么是“跨源”
const url = 'https://www.google.com:3000'
**比如上面的这个 URL,协议是:https,域名是 www.google.com**,端口是[2] 3000。不同源了会怎么样?会有很多限制,比如:
-
Cookie,LocalStorage,IndexDB 等存储性内容无法读取
-
DOM 节点无法访问
-
Ajax 请求发出去了,但是响应被浏览器拦截了
我就想请求个东西,至于吗,为什么要搞个这么个东西限制我?基于安全考虑,没有它,你可能会遇到: -
Cookie劫持,被恶意网站窃取数据
-
更容易受到 XSS,CSRF 攻击
-
无法隔离潜在恶意文件
所以,得有。正是因为浏览器同源策略的存在,你的 Ajax 请求有可能在发出去后就被拦截了,它还会给你报个错
✘ Access to XMLHttpRequest at 'xxx' from origin 'xxx' has been block by CORS,
  policy: No 'Access-Control-Allow-Origin' header is present on the requested resource.

**这玩意儿就是利用了
- 本站的脚本创建一个 元素,src 地址指向跨域请求数据的服务器
- 提供一个回调函数来接受数据,函数名可以通过地址参数传递进行约定
- 服务器收到请求后,返回一个包装了 JSON 数据的响应字符串,类似这样:callback({…})
浏览器接受响应后就会去执行回调函数 callback,传递解析后的 JSON 对象作为参数,这样我们就可以在 callback 里处理数据了。实际开发中,会遇到回调函数名相同的情况,可以简单封装一个 JSONP 函数
function jsonp({ url, params, callback }) {
  return new Promise((resolve, reject) => {
    // 创建一个临时的 script 标签用于发起请求
    const script = document.createElement('script');
    // 将回调函数临时绑定到 window 对象,回调函数执行完成后,移除 script 标签
    window[callback] = data => {
      resolve(data);
      document.body.removeChild(script);
    };
    // 构造 GET 请求参数,key=value&callback=callback
    const formatParams = { ...params, callback };
    const requestParams = Object.keys(formatParams)
      .reduce((acc, cur) => {
        return acc.concat([`${cur}=${formatParams[cur]}`]);
      }, [])
   .join('&');
 // 构造 GET 请求的 url 地址
    const src = `${url}?${requestParams}`;
    script.setAttribute('src', src);
    document.body.appendChild(script);
  });
}

// 调用时
jsonp({
  url: 'https://xxx.xxx',
  params: {...},
  callback: 'func',
})
CORS[4](Cross-Origin Resource Sharing)的全称叫 跨域资源共享,名称好高大上,别怕,这玩意儿其实就是一种机制。浏览器不是有同源策略呐,这东西好是好,但是对于开发人员来说就不怎么友好了,因为我们可能经常需要发起一个 跨域 HTTP 请求。我们之前说过,跨域的请求其实是发出去了的,只不过被浏览器给拦截了,因为不安全,说直白点儿就是,你想要从服务器哪儿拿个东西,但是没有经过人家允许啊。所以怎么样才安全 ?服务器允许了不就安全了,这就是 CORS 实现的原理:使用额外的 HTTP 头来告诉浏览器,让运行在某一个 origin 上的 Web 应用允许访问来自不同源服务器上的指定的资源。
*目前,所有的主流浏览器都支持 CORS,其中,IE 浏览器的版本不能低于 10,IE 8 和 9 需要通过 XDomainRequest 来实现。完整的兼容性情况 ? *
GET /cors HTTP/1.1
Origin: https://xxx.xx
Accept-Language: en-US
Connection: keep-alive
... ...
OPTIONS /cors HTTP/1.1
Origin: http://xxx.xx
Access-Control-Request-Method: PUT
Accept-Language: en-US
... ...
不会触发 CORS 预检的,就是简单请求。哪些请求不会触发预检 ?使用以下方法之一:GET, HEAD, POST,并且 Content-Type 的值仅限于下列三者之一:
- text/plain
- multipart/form-data
- application/x-www-form-urlencoded
PostMessage 是 Html5 XMLHttpRequest Level 2 中的 API,它可以实现跨文档通信(Cross-document messaging)。兼容性上,IE8+,Chrome,Firfox 等主流浏览器都支持,可以放心用😊,如何理解跨文档通信?你可以类比设计模式中的发布-订阅模式,在这里,一个窗口发送消息,另一个窗口接受消息,之所以说类似发布-订阅模式,而不是观察者模式,是因为这里两个窗口间没有直接通信,而是通过浏览器这个第三方平台。
window.postMessage(message, origin, [transfer])
window.addEventListener("message", function receiveMessage(event) {}, false); // 推荐,兼容性更好

window.onmessage = function receiveMessage(event) {} // 不推荐,这是一个实验性的功能,兼容性不如上面的方法
我们知道同源策略限制的是:浏览器向服务器发送跨域请求需要遵循的标准,那如果是服务器向服务器发送跨域请求呢?答案当然是,不受浏览器的同源策略限制。利用这个思路,我们就可以搭建一个代理服务器,接受客户端请求,然后将请求转发给服务器,拿到响应后,再将响应转发给客户端:

这就是 Nginx 反向代理的原理,只需要简单配置就可以实现跨域:
server {
  listen       80;
  server_name  www.domain1.com;
  location / {
    proxy_pass   http://www.domain2.com:8080;  #反向代理
    proxy_cookie_domain www.domain2.com www.domain1.com; #修改cookie里域名
    index  index.html index.htm;

    # 当用 webpack-dev-server 等中间件代理接口访问 nignx 时,此时无浏览器参与,故没有同源限制,下面的跨域配置可不启用
    add_header Access-Control-Allow-Origin *;
    add_header Access-Control-Allow-Credentials true;
    # ...
  }
}
实现的原理和我们前文提到的代理服务器原理如出一辙,只不过这里使用了 Node 中间件做为代理。需要注意的是,浏览器向代理服务器请求时仍然遵循同源策略,别忘了在 Node 层通过 CORS 做跨域处理:
const https = require('https')
// 接受客户端请求
const sever = https.createServer((req, res) => {
  ...
  const { method, headers } = req
  // 设置 CORS 允许跨域
  res.writeHead(200, {
    'Access-Control-Allow-Origin': '*',
    'Access-Control-Allow-Methods': '*',
    'Access-Control-Allow-Headers': 'Content-Type',
    ...
  })
  // 请求服务器
  const proxy = https.request({ host: 'xxx', method, headers, ...}, response => {
    let body = ''
    response.on('data', chunk => { body = body + chunk })
    response.on('end', () => {
      // 响应结果转发给客户端
      res.end(body)
    })
  })
  // 结束请求
  proxy.end()
})
document.domain = 'test.com' // 设置 domain 相同

// 通过 iframe 嵌入跨域的页面
const iframe = document.createElement('iframe')
iframe.setAttribute('src', 'b.test.com/xxx.html')
iframe.onload = function() {
  // 拿到 iframe 实例后就可以直接访问 iframe 中的数据
  console.log(iframe.contentWindow.xxx)
}
document.appendChild(iframe)
编程式导航
<!DOCTYPE html>
<html lang="en">
  <head>
    <meta charset="UTF-8" />
    <meta name="viewport" content="width=device-width, initial-scale=1.0" />
    <meta http-equiv="X-UA-Compatible" content="ie=edge" />
    <title>Document</title>
    <!-- 导入 vue 文件 -->
    <script src="./lib/vue_2.5.22.js"></script>
    <script src="./lib/vue-router_3.0.2.js"></script>
  </head>
  <body>
    <!-- 被 vm 实例所控制的区域 -->
    <div id="app">
      <router-link to="/user/1">User1</router-link>
      <router-link to="/user/2">User2</router-link>
      <router-link :to="{ name: 'user', params: {id: 3} }">User3</router-link>
      <router-link to="/register">Register</router-link>

      <!-- 路由占位符 -->
      <router-view></router-view>
    </div>

    <script>
      const User = {
        props: ['id', 'uname', 'age'],
        template: `<div>
          <h1>User 组件 -- 用户id为: {{id}} -- 姓名为:{{uname}} -- 年龄为:{{age}}</h1>
          <button @click="goRegister">跳转到注册页面</button>
        </div>`,
        methods: {
          goRegister() {
            this.$router.push('/register')
          }
        },
      }

      const Register = {
        template: `<div>
          <h1>Register 组件</h1>
          <button @click="goBack">后退</button>
        </div>`,
        methods: {
          goBack() {
            this.$router.go(-1)
          }
        }
      }

      // 创建路由实例对象
      const router = new VueRouter({
        // 所有的路由规则
        routes: [
          { path: '/', redirect: '/user' },
          {
            // 命名路由
            name: 'user',
            path: '/user/:id',
            component: User,
            props: route => ({ uname: 'zs', age: 20, id: route.params.id })
          },
          { path: '/register', component: Register }
        ]
      })

      // 创建 vm 实例对象
      const vm = new Vue({
        // 指定控制的区域
        el: '#app',
        data: {},
        // 挂载路由实例对象
        // router: router
        router
      })
    </script>
  </body>
</html>
登录功能实现、
路由导航守卫控制访问权限
//为路由导航添加 beforeEach  导航守卫
router.beforeEach((to,from,next) => {
 //如果用户访问登录页直接放行
 if(to.path === '/login')return next()
 //从 sessionStorage中获取到保存token值
 const tokenStr = window.sessionStorage.getItem('token')
 //没有token 强制跳转登录页
 if(!tokenStr)return next('login')
 next()
 })
router/index.js
import Vue from 'vue'
import VueRouter from 'vue-router'
import Login from '../components/Login.vue'
import Home from '../components/Home.vue'
Vue.use(VueRouter)

const router = new VueRouter({
  routes:[
    {path:'/',redirect:'/login'},
    {path:'/login',  component:Login },
    {path:'/home',  component:Home }
  ]
})
//挂在路由导航守卫
router.beforeEach((to,from,next) =>{
  //to将要去的路径
  //from 代表从哪个路径跳转而来
  //next是一个函数 表示放行
  //next() 放行 next('/login') 强制 跳转
  if(to.path === '/login') return next()
  //获取token
  const tokenStr = window.sessionStorage.getItem('token')
  if(!tokenStr) return next('/login')
  next()
})

export default router
退出
基于 token的方式实现退出比较简单,只需要销毁本地toke即可,这样后续请求不会携带 token,必须冲子女登录生成一个新的token之后才可以访问页面。
//清空
window.sessionStorage.clear()
//跳转到登录项
this.$router.push('/login')
退出
<template>
<div>
    <el-button type="success" @click="logout">退出</el-button>
</div>
</template>

<script>
export default {
    methods:{
        logout() {
            window.sessionStorage.clear()//我们找到页面保存的token登录数据清空就可以了
            this.$router.push('/login')
        }
    }
}
</script>
.prettierrc 代码格式化优化
{
    "semi":false,//注销分号
    "singleQuote":true //改成单引号
}
优化 Element-UI组件 ,按需引入代码
import Vue from 'vue'
import { Button, Form, FormItem, Input, Message } from 'element-ui'
Vue.use( Button )
Vue.use( Form)
Vue.use( FormItem)
Vue.use( Input )
Vue.prototype.$message = Message
登录 login
<template>
<div class="login_container">
<!-- 登录组件 -->
<div class="login_box">
<!-- 登录 -->
<div class="avatar_box">
<img src="../assets/logo.svg" />
</div>
<el-form
ref="loginFormRef"
:model="loginForm"
:rules="loginFormRules"
label-width="0px"
class="login_form"
>
<!-- 账号 -->
<el-form-item prop="username">
<el-input
v-model="loginForm.username"
prefix-icon="iconfont icon-user"
></el-input>
</el-form-item>
<!-- 密码 -->
<el-form-item prop="password">
<el-input
v-model="loginForm.password"
prefix-icon="iconfont icon-3702mima"
></el-input>
</el-form-item>
<!-- 按钮 -->
<el-form-item class="btns">
<el-button type="primary" @click="login">登录</el-button>
<el-button type="info" @click="resetLoginForm">重置</el-button>
</el-form-item>
</el-form>
</div>
</div>
</template>
<script>
export default {
data() {
return {
//这是登录表单数据绑定对象
loginForm: {
username: 'admin',
password: '123456'
},
loginFormRules: {
//这是表单必填项
//验证用户名是否合法
username: [
{ required: true, message: '请输入登录名称', trigger: 'blur' },
{ min: 3, max: 10, message: '长度3-10个字符', trigger: 'blur' }
],
password: [
{ required: true, message: '请输入密码', trigger: 'blur' },
{ min: 6, max: 15, message: '长度6-15个字符', trigger: 'blur' }
]
}
}
},
methods: {
//重置表单
resetLoginForm() {
//我们同form绑定事件找到this找到refs方法调用清空函数
this.$refs.loginFormRef.resetFields()
},
login() {
//验证登录 获取表单的对象
this.$refs.loginFormRef.validate(async valid => {
if (!valid) return
const { data: res } = await this.$http.post('login', this.loginForm)
if (res.meta.status !== 200) return this.$message.error('登录失败')
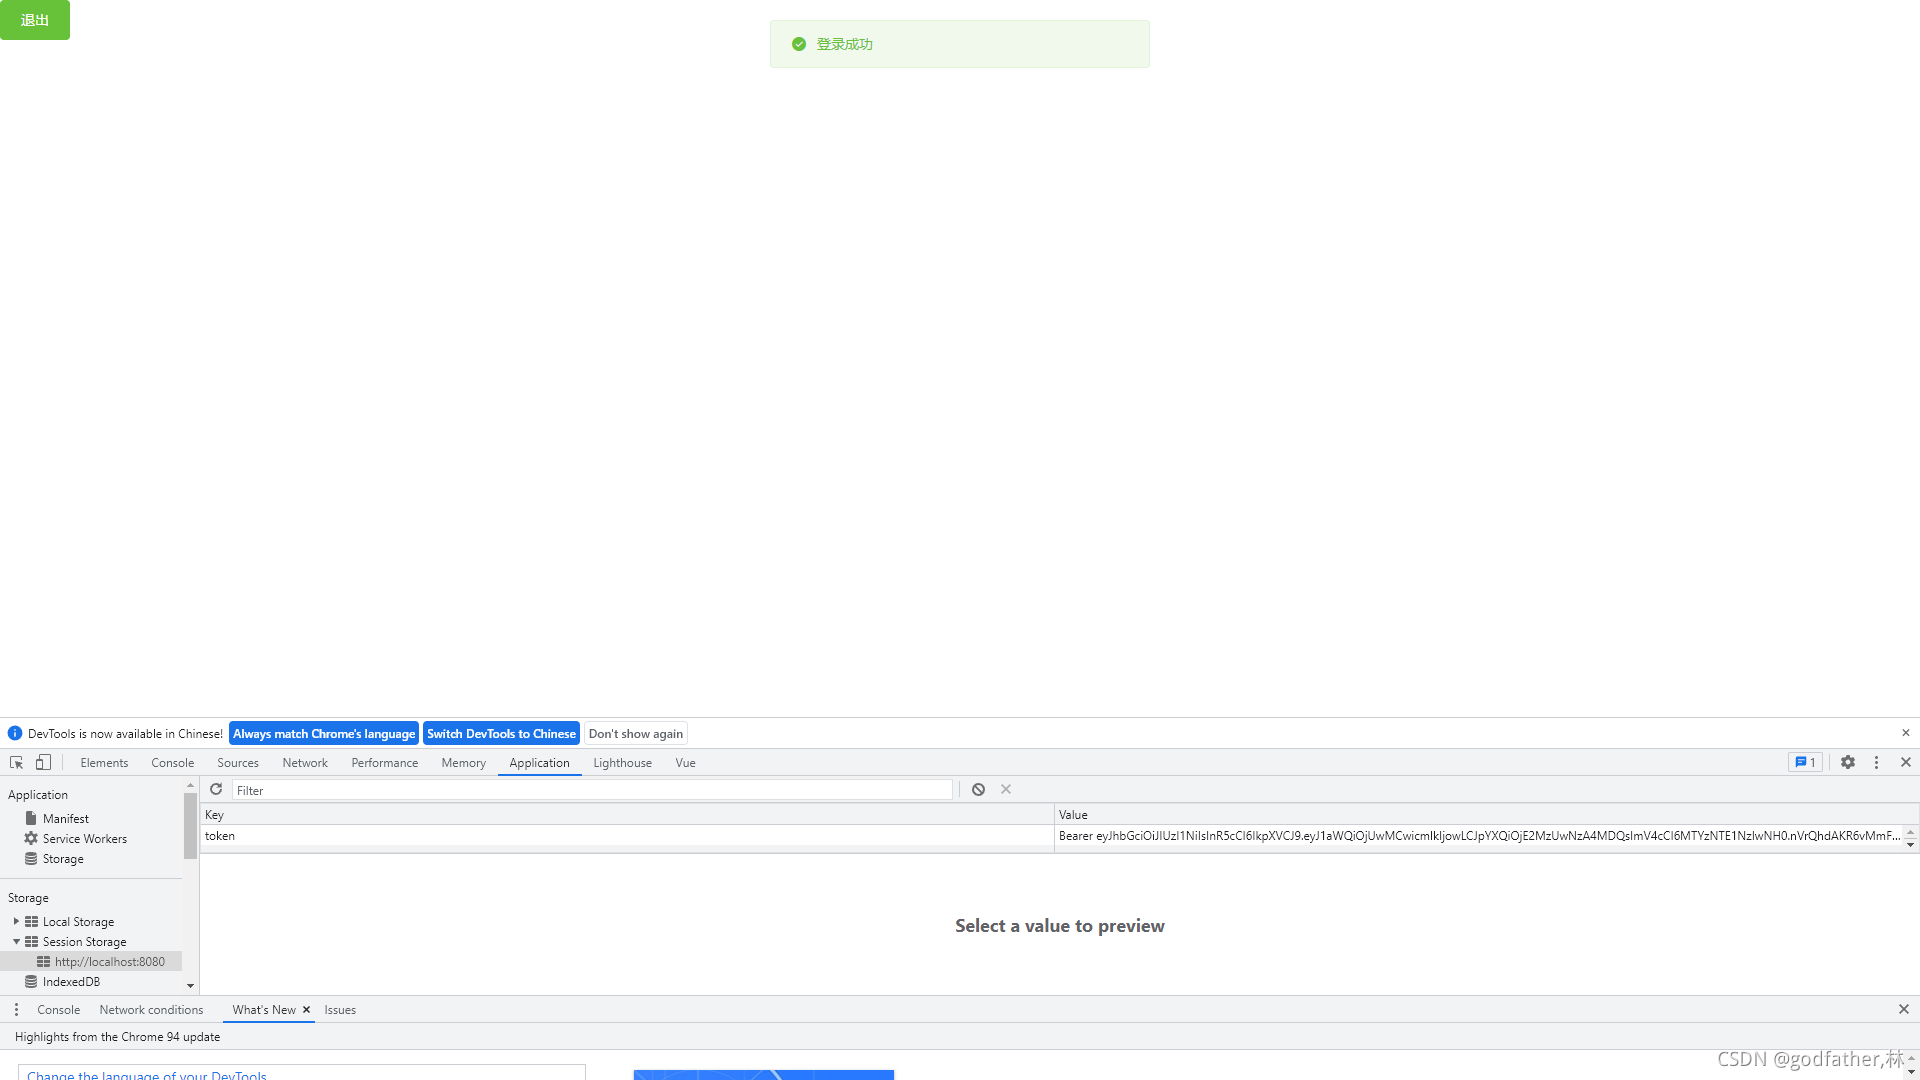
this.$message.success('登录成功')
// 1.将扥估成功之后 token保存到客户端 sessionStorage
//项目中出登录之外其他API接口必须登录之后才能访问
//token只用当前网站打开期间生效将token保存在sessionStorage中
window.sessionStorage.setItem('token', res.data.token)
// 通过编程式导航跳转到后提主页路由地址/home
this.$router.push('/home')
})
}
}
}
</script>
<style lang="less">
.login_container {
height: 100%;
width: 100%;
background-color: rgb(95, 151, 153);
}
.login_box {
width: 450px;
height: 300px;
background-color: #fff;
border-radius: 3%;
position: absolute; //定位
left: 50%; //左边距 上边距
top: 50%;
transform: translate(-50%, -50%); //减去盒子本身的上下50%
.avatar_box {
width: 130px; //给图片加盒子设置大小 图片直接100%
height: 130px;
border: 1px solid #eee;
border-radius: 50%;
padding: 10px;
box-shadow: 0 0 20px #ddd;
position: absolute;
left: 50%;
background: #fff;
transform: translate(-50%, -50%);
img {
width: 100%;
height: 100%;
border-radius: 50%;
background-color: #eee;
}
}
}
.login_form {
position: absolute;
bottom: 5px;
width: 100%;
padding: 0 20px;
box-sizing: border-box;
}
.btns {
display: flex;
justify-content: flex-end;
}
</style>

git 提交
- git checkout -b login 创建并切换分支
- git branch login 切换
- git status 查看
- git add . 添加
- git status 查看
- git commit -m “xxx” 名
- git checkout master 切换到主分支
- git merge login 提交到login分支上的代码合并到master
- git branch 查看当前 所在分支
- git push 提交
- git push -u origin login 把本地分支提交到远程仓库并创建 login分支
主页,通过接口获取菜单数据
通过axios请求拦截器添加token,保证拥有获取数据权限
axios.interceptors.request.use(config => {
  conole.log(config)//在最后必须return config v请求头对象添加Tken 验证Authorization
  config.headers.Authorization = window.sessionStorage.getItem('token')
  return config
})
axios.interceptors.request.use(config => {
  console.log(config)
  config.headers.Authorization = window.sessionStorage.getItem('token')
  return config//在最后必须return config
})
Vue.prototype.$http = axios;
// 配置请求根路径

首页 welcome
<template>
  <el-container>
    <!-- 头部区域 -->
    <el-header>
      <div>
        <img src="../assets/heima.png" alt="" /> <span>后台管理系统</span>
      </div>
      <el-button type="success" @click="logout">退出</el-button>
      </el-header
    >
    <el-container>
      <!-- 左侧 边栏目-->
      <el-aside style="background-color: #333744 ;" :width="isCollaose ? '64px' : '200px' "><!-- 伸缩 -->
        <div class='toggle-button' @click='toggleCollapse'> | | | </div>
        <el-menu
          background-color="#333744"
          text-color="#fff"
          active-text-color="#ffd00b" :unique-opened="true" :collapse="isCollaose"
        :collapse-transition='false' router :default-active="activePath">
          <!-- 一级菜单 -->
          <el-submenu
            :index="item.id + ''"
            v-for="item in menulist"
            :key="item.id"
          >
            <template slot="title">
              <!-- 图标 -->
              <i :class="iconsObj[item.id]"></i>
              <!-- 文本 -->
              <span>{{ item.authName }}</span>
            </template>
            <!-- 二级菜单导航 -->
            <el-menu-item :index=" '/'+subItem.path" @click="saveNavState('/'+subItem.path)" v-for="subItem in item.children" :key='subItem.id'>
              <template>
                <!-- 图标 -->
              <i class="el-icon-menu"></i>
                <span>{{subItem.authName}}</span>
                <!-- 文本 -->
              </template>
            </el-menu-item>
          </el-submenu>
        </el-menu>
      </el-aside>
      <!-- 内容 -->
      <el-main>
        <router-view></router-view>
      </el-main>
    </el-container>
  </el-container>
</template>

<script>
export default {
  data() {
    return {
      //左侧菜单数据
      menulist: [],
      iconsObj:{
        '125':"iconfont icon-user",
        '103':"iconfont icon-tijikongjian",
        '101':"iconfont icon-shangpin",
        '102':"iconfont icon-danju",
        '145':"iconfont icon-baobiao"
      },//折叠
      isCollaose:false,
      //被激活的链接地址
      activePath:''
    }
  },
  created() {
    //在创建前调用
    this.getMenuList()
    this.activePath = window.sessionStorage.getItem('activePath')
  },
  methods: {
    logout() {
      window.sessionStorage.clear()
      this.$router.push('/login')
    },
    async getMenuList() {
      const { data: res } = await this.$http.get('menus')
      if (res.meta.status != 200) return this.$message.error(res.meta.msg)
      this.menulist = res.data
      console.log(res)
    },
    //点击按钮切换展开
    toggleCollapse(){
     this.isCollaose = !this.isCollaose
    },
    saveNavState(activePath) {
      window.sessionStorage.setItem('activePath',activePath)
      this.activePath = activePath
    }
  }
}
</script>

<style lang="less" scoped>
.el-container {
  height: 100%;
}

.el-header {
  background: #373d41;
  display: flex;
  justify-content: space-between;
  color: #fff;
  font-size: 28px;
  .el-button{
    margin: 6px;
  }
  > div {
    display: flex;
    align-items: center;
    span {
      padding-left: 15px;
    }
  }
}

.el-aside {
  background-color: #373d41;
}

.el-menu {
  border: none;
}

.iconfont{
  padding: 10px;
}

.el-main {
  background: #eee;
}

.toggle-button{
  background: #4A5064;
  color: #eee;
  text-align: center;
  line-height: 24px;
}
</style>

用户管理/用户列表 users
<template>
  <div>
    <!-- 列表 -->
    <el-breadcrumb separator="/">
      <el-breadcrumb-item :to="{ path: '/home' }">首页</el-breadcrumb-item>
      <el-breadcrumb-item><a href="/">用户管理</a></el-breadcrumb-item>
      <el-breadcrumb-item>用户列表</el-breadcrumb-item>
    </el-breadcrumb>
    <!-- 卡片 -->
    <el-card class="box-card">
      <!-- 搜索添加 -->
      <el-row :gutter="20">
        <el-col :span="8">
          <el-input
            placeholder="请输入内容"
            v-model="queryInfo.query"
            clearable
            @clear="getUserList"
          >
            <el-button
              slot="append"
              icon="el-icon-search"
              @click="getUserList"
            ></el-button>
          </el-input>
        </el-col>
        <el-col :span="4">
          <el-button type="primary" @click="addDialogVisible = true"
            >添加用户</el-button
          >
        </el-col>
      </el-row>
      <!-- 用户列表区域 -->
      <el-table :data="userlist" border stripe>
        <el-table-column type="index" label="id"></el-table-column>
        <el-table-column label="姓名" prop="username"></el-table-column>
        <el-table-column label="邮箱" prop="email"></el-table-column>
        <el-table-column label="电话" prop="mobile"></el-table-column>
        <el-table-column label="角色" prop="role_name"></el-table-column>
        <el-table-column label="状态" prop="mg_name">
          <!-- 通过作用域插槽就可以 scope.row -->
          <template slot-scope="scope">
            <!-- 开关按钮插件 通过scope.row.mg_name 关联绑定 -->
            <el-switch
              v-model="scope.row.mg_name"
              @change="userStateChaged(scope.row)"
            ></el-switch>
          </template>
        </el-table-column>
        <el-table-column label="操作" width="180px">
          <template slot-scope="scope">
            <!-- 开关按钮插件 通过scope.row.mg_name 关联绑定 -->
            <!-- 修改 -->
            <el-button
              type="prmary"
              icon="el-icon-edit"
              @click="showEditDialog(scope.row.id)"
              size="mini"
            ></el-button>
            <!-- 删除 -->
            <el-button
              type="danger"
              icon="el-icon-delete" @click="removeUserById(scope.row.id)"
              size="mini"
            ></el-button>
            <!-- 分配角色 -->
            <el-tooltip
              style="margin-left:8px;"
              effect="dark"
              content="分配角色"
              placement="top"
              :enterable="false"
              ><el-button
                type="warning"
                icon="el-icon-setting"
                size="mini"
              ></el-button
            ></el-tooltip>
          </template>
        </el-table-column>
      </el-table>
      <!-- 分页 -->
      <el-pagination
        style="margin-top:10px;"
        @size-change="handleSizeChange"
        @current-change="handleCurrentChange"
        :current-page="queryInfo.pagenum"
        :page-sizes="[1, 2, 3, 4, 10]"
        :page-size="queryInfo.pagesize"
        layout="total, sizes, prev, pager, next, jumper"
        :total="400"
      >
      </el-pagination>
    </el-card>
    <!-- 添加用户对话框 -->
    <el-dialog
      title="添加用户"
      :visible.sync="addDialogVisible"
      @close="addDialogClosed"
      width="30%"
    >
      <!-- 对话框内容 -->
      <el-form
        :model="addForm"
        :rules="addFormRules"
        ref="addFormRef"
        label-width="70px"
      >
        <el-form-item label="用户" prop="username">
          <el-input v-model="addForm.username"></el-input>
        </el-form-item>
        <el-form-item label="密码" prop="password">
          <el-input v-model="addForm.password"></el-input>
        </el-form-item>
        <el-form-item label="邮箱" prop="email">
          <el-input v-model="addForm.email"></el-input>
        </el-form-item>
        <el-form-item label="手机" prop="mobile">
          <el-input v-model="addForm.mobile"></el-input>
        </el-form-item>
      </el-form>
      <!-- 底部区域 -->
      <span slot="footer" class="dialog-footer">
        <el-button @click="addDialogVisible = false">取 消</el-button>
        <el-button type="primary" @click="addUser">确 定</el-button>
      </span>
    </el-dialog>
    <!-- 修改对话框 -->
    <el-dialog
      title="修改用户"
      :visible.sync="editDialogVisible"
      width="30%"
      @close="editDialogClosed"
    >
      <el-form
        :model="editForm"
        :rules="editFormRules"
        ref="editFormRef"
        label-width="70px"
      >
        <el-form-item label="用户名">
          <el-input v-model="editForm.username" disabled></el-input>
        </el-form-item>
        <el-form-item label="邮箱">
          <el-input v-model="editForm.email" prop="email"></el-input>
        </el-form-item>
        <el-form-item label="手机号">
          <el-input v-model="editForm.mobile" prop="mobile"></el-input>
        </el-form-item>
      </el-form>
      <span slot="footer" class="dialog-footer">
        <el-button @click="editDialogVisible = false">取 消</el-button>
        <el-button type="primary" @click="editUserInfo"
          >确 定</el-button
        >
      </span>
    </el-dialog>
  </div>
</template>

<script>
export default {
  data() {
    //验证邮箱
    var checkEmail = (rule, value, cb) => {
      //
      const regEamil = /^([a-zA-Z0-9_-])+@([a-zA-Z0-9_-])+(\.[a-zA-Z0-9_-])+/
      if (regEamil.test(value)) {
        //正则text.value值
        return cb()
      }
      cb(new Error('请输入合法邮箱'))
    }
    //验证手机号
    var checkMobile = (rule, value, cb) => {
      const regMobile = /^(0|86|17951)?(13[0-9]|15[012356789]|17[678]|18[0-9]|14[57])[0-9]{8}$/
      if (regMobile.test(value)) {
        return cb()
      }
      cb(new Error('请输入合法手机号'))
    }
    return {
      //获取用户列表参数对象
      queryInfo: {
        query: '', //字符串
        pagenum: 1, //第几页条数据
        //当前每页显示多少条数据
        pagesize: 2 //显示二十条数据
      },
      userlist: [], //我们的数据获成功了并且保存到这里
      taotal: 0,
      addDialogVisible: false, //控制对话框的行为区域
      addForm: {
        //添加用户表单数据
        username: '',
        password: '',
        email: '',
        mobile: ''
      },
      addFormRules: {
        //表单验证规则
        username: [
          { required: true, message: '请输入用户名', trigger: 'blur' },
          { min: 3, max: 10, message: '用户名长度3~10个字符', trigger: 'blur' }
        ],
        password: [
          { required: true, message: '请输入密码', trigger: 'blur' },
          { min: 6, max: 15, message: '用户名长度6~15个字符', trigger: 'blur' }
        ],
        email: [
          { required: true, message: '请输入邮箱', trigger: 'blur' },
          { validator: checkEmail, trigger: 'blur' }
        ],
        mobile: [
          { required: true, message: '请输入手机号', trigger: 'blur' },
          { validator: checkMobile, trigger: 'blur' }
        ]
      },
      editDialogVisible: false, //修改控制用户对话框的显示隐藏
      editForm: {}, //查询到的用户信息对象
      editFormRules: {
        //修改验证规则对象
        email: [
          { reqwuired: true, message: '用户邮箱', trigger: 'blur' },
          { validator: checkEmail, trigger: 'blur' }
        ],
        mobile: [
          { reqwuired: true, message: '用户手机号', trigger: 'blur' },
          { validator: checkMobile, trigger: 'blur' }
        ]
      }
    }
  },
  created() {
    this.getUserList() //调用这个请求
  },
  methods: {
    //在定义请求数据
    async getUserList() {
      //函数  请求方法get 参数params
      const { data: res } = await this.$http.get('users', {
        params: this.queryInfo
      })
      console.log(res)
      if (res.meta.status !== 200) {
        return this.$message.error('获取用户列表失败')
      }
      //拿到数据成功后 我们给列表 users taotal赋值 返回过来的数据一定要核实
      this.userlist = res.data.users
      this.taotal = res.data.taotal
      console.log(res)
    },
    handleSizeChange(newSize) {
      //监听 pagesize改变事件 通过参数监听
      // console.log(newSize) //我们通过这个监听事件我们找到它点击并且发生的变化在赋值给它并更新
      this.queryInfo.pagesize = newSize
      this.getUserList()
    },
    handleCurrentChange(newPage) {
      // console.log(newPage)
      this.queryInfo.pagenum = newPage
      this.getUserList()
    },
    async userStateChaged(userinfo) {
      //监听 switch 开关状态的改变
      console.log(userinfo) //我们通过userinfo这个属性找到id 并且找到 状态
      const { data: res } = await this.$http.put(
        'users/{userinfo.id}/state/${userinfo.mg_state}'
      )
      if (res.meta.status !== 200) {
        //判断我们找到这个状态是否 !==200
        userinfo.mg_state = !userinfo.mg_state //如果是取反
        return this.$message.error('更新失败!') //如果不是我们更新失败提示
      }
      this.$message.success('更新用户状态成功')
    },
    addDialogClosed() {
      //监听对话框关闭事件  拿到表单ref的引用拿到表单的
      this.$refs.addFormRef.resetFields()
    },
    //表单的预校验 拿到整个表单的数据对象
    addUser() {
      this.$refs.addFormRef.validate(async valid => {
        if (!valid) reuturn //可以发起添加用户的网络请求
        const { data: res } = await this.$http.post('users', this.addForm) //请求路径和表单绑定数据
        if (res.meta.status !== 201) {
          this.$message.error('添加用户失败!')
        }
        this.$message.success('添加用户成功') //提示成功
        this.addDialogVisible = false //关闭对话框
        this.getUserList()
      })
    },
    async showEditDialog(id) {
      //展示编辑对话框
      // console.log(id)
      const { data: res } = await this.$http.get('users/' + id)
      if (res.meta.status !== 200) {
        return this.$message.error('查询用户信息失败')
      }
      this.editForm = res.data
      this.editDialogVisible = true
    },
    editDialogClosed() {
      //监听修改对话框的关闭事件
      this.$refs.editFormRef.resetFields()
    },
    //修改用户信息
    editUserInfo() {
      this.$refs.editFormRef.validate(async valid => {
        if (!valid) return //发起修改用户信息
         const {data:res} = await this.$http.put('users/' + this.editForm.id,
        {
          email: this.editForm.email,
          mobile: this.editForm.mobile
        })
        if(res.meta.status !== 200){
          return this.$message.error("更新用户失败")
        }
        //关闭对话框
          this.editDialogVisible = false
          //刷新数据列表
          this.getUserList()
          this.$message.success('更新用户信息成功')
      })
    },
    async removeUserById(id){//删除id对应信息
      //弹框询问用户是否删除数据
        const confirmResult = await this.$confirm('此操作将永久删除该用户, 是否继续?', '提示', {
          confirmButtonText: '确定',
          cancelButtonText: '取消',
          type: 'warning'
        }).catch(err => err) //接收捕获
        //如果用户确认删除则返回值为字符串confirm
        //如果用户取消删除 则字符串返回值为字符串cancel
        if(confirmResult !== 'confirm'){
          return tisd.$messge.info('已经取消删除')
        }
       const {data:res} = await this.$http.delete('users/'+ id)
       if(res.meta.status !== 200){
         return this.$message.error('删除用户失败')
       }
       this.$message.success('删除用户成功!')
       this.getUserList()
  }
  }
}
</script>

<style lang="less" scope>
.card {
  padding: 25px;
}
.el-table {
  margin-top: 5px;
  font-size: 10px;
}
</style>


- git checkout -b user 创建本地分支并且换
- git branch
- git status 查看当前状态
- git add . 提交
- git status 已经提交
- git commit -m “用户功能开发”
- git status
- git branch
- git push -u origin user 将本地分支提交到远程仓库
- git checkout master 切换到主分支
- git merge rights 把分支合并
权限管理/角色列表 roles
<template>
  <div>
    <!-- 面包屑导航 -->
    <el-breadcrumb separator="/">
      <el-breadcrumb-item :to="{ path: '/home' }">首页</el-breadcrumb-item>
      <el-breadcrumb-item><a href="/">权限管理</a></el-breadcrumb-item>
      <el-breadcrumb-item>角色列表</el-breadcrumb-item>
    </el-breadcrumb>
    <!-- 卡片视图 -->
    <el-card>
      <!-- 添加角色 -->
      <el-row>
        <el-col>
          <el-button type="primary">添加角色</el-button>
        </el-col>
      </el-row>
      <el-table :data="rolelist" border stripe>
        <!-- 展开行 -->
        <el-table-column type="expand">
          <template slot-scope="scope">
            <el-row
              :class="['bdbottom', i1 === 0 ? 'bdtop' : '', 'vcenter']"
              v-for="(item1, i1) in scope.row.children"
              :key="item1.id"
            >
              <!-- 渲染一级权限 -->
              <el-col :span="5">
                <el-tag closable @close="removeRigById(scope.row, item1.id)">{{
                  item1.authName
                }}</el-tag>
                <i class="el-icon-caret-right"></i>
              </el-col>
              <!-- 渲染二级权限 -->
              <el-col :span="19">
                <!-- 通过for循环嵌套二级权限 -->
                <el-row
                  :class="[i2 === 0 ? '' : 'bdtop', 'vcenter']"
                  v-for="(item2, i2) in item1.children"
                  :key="item2.id"
                >
                  <!-- 二级权限渲染 -->
                  <el-col :span="6">
                    <el-tag
                      closable
                      @close="removeRigById(scope.row, item2.id)"
                      type="success"
                      >{{ item2.authName }}</el-tag
                    >
                    <i class="el-icon-caret-right"></i>
                  </el-col>
                  <!-- 3级权限渲染 -->
                  <el-col :span="18">
                    <el-tag
                      closable
                      @close="removeRigById(scope.row, item3.id)"
                      type="warning"
                      v-for="(item3, i3) in item2.children"
                      :key="i3"
                    >
                      {{ item3.authName }}
                    </el-tag>
                  </el-col>
                </el-row>
              </el-col>
            </el-row>
          </template>
        </el-table-column>
        <!-- 索引 -->
        <el-table-column type="index"></el-table-column>
        <el-table-column label="角色名称" prop="roleName"></el-table-column>
        <el-table-column label="角色描述" prop="roleDesc"></el-table-column>
        <el-table-column label="角色操作" width="300px">
          <template slot-scope="scope">
            <el-button size="mini" type="primary" icon="el-icon-edit"
              >编辑</el-button
            >
            <el-button size="mini" type="danger" icon="el-icon-delete"
              >删除</el-button
            >
            <el-button
              size="mini"
              type="warning"
              icon="el-icon-setting"
              @click="showSetRightDialog(scope.row)">分配权限</el-button
            >
          </template>
        </el-table-column>
      </el-table>
    </el-card>
    <!-- 分配权限对话框 -->
    <el-dialog
      title="分配权限用户权限"
      :visible.sync="setRightDialogVisible"
      width="45%" @close="setRightDialogClosed"
    >
    <!-- 树形控件 -->
      <el-tree defaultExpandAll show-checkbox node-key="id" ref="treeRef" :default-checked-keys="defKeys" default-expand-all="true" :data="rightslist" :props="treeProps" ></el-tree>
      <span slot="footer" class="dialog-footer">
        <el-button @click="setRightDialogVisible = false">取 消</el-button>
        <el-button type="primary" @click="allotRights"
          >确 定</el-button
        >
      </span>
    </el-dialog>
  </div>
</template>
<script>
export default {
  data() {
    return {
      //所有角色列表
      rolelist: [],
      //控制分配权限对话框的显示隐藏
      setRightDialogVisible: false,
      //所有权限数据
      rightslist:[],
      treeProps:{
        label:'authName',
        children:'children'
      },//树形控件
      defKeys:[],
       // 当前即将分配权限的角色id
      roleId: ''
    }
  },
  created() {
    this.getRolesList()
  },
  methods: {
    //获取角色列表
    async getRolesList() {
      const { data: res } = await this.$http.get('roles')
      if (res.meta.status !== 200) {
        return this.$message.error('获取角色列表失败')
      }
      this.rolelist = res.data
      //  console.log(this.rolelist)
    }, //根据id删除对应的权限
    async removeRigById(role, rightId) {
      //弹框提示用户是否删除
      const confirmResult = await this.$confirm(
        '此操作将永久删除该文件, 是否继续?',
        '提示',
        {
          confirmButtonText: '确定',
          cancelButtonText: '取消',
          type: 'warning'
        }
      ).catch(err => err)
      if (confirmResult !== 'confirm') {
        return this.$message.info('取消删除')
      }
      const { data: res } = await this.$http.delete(
        `roles/${role.id}/rights/${rightId}`
      )
      if (res.meta.status !== 200) {
        return this.$message.error('删除成功')
      }
      // this.getRolesList()//我们删除后调用这个函数数据会刷新页面重新渲染
      role.children = res.data //我们可以为当前角色信息重新赋值权限就可以了
    },
    //展示分配权限对话框
    async showSetRightDialog(role) {
       this.roleId = role.id
      //展示分配权限的对话框
      const {data:res} = await this.$http.get('rights/tree')
      if(res.meta.status !== 200) {
          return this.$message.error('获取权限数据失败')
      }//把所有获取的权限保存到data
      this.rightslist = res.data
      console.log(this.rightslist)
      //            递归获取三级节点的id
      this.getLeafKeys(role,this.defKeys)
      this.setRightDialogVisible = true
    },//通过递归的方式获取角色所三级权限 并保存 defKeys数组中
    getLeafKeys(node,arr){//一个节点是否是三级节点 一个数组 node不包含children树形则是三级节点
      if(!node.children){//
        return arr.push(node.id)//不是三级节点直接push
      }//我们调用递归获取三级节点
      node.children.forEach(item => this.getLeafKeys(item,arr))//循环这个children树形循环调用他里面的item
    },
    setRightDialogClosed() {//监听对话框的关闭事件
      this.defKeys = []    //我们关闭清空数组里面的元素项
      },
     async allotRights() {//为角色分配权限 拿到有的id ref="treeRef"
        const keys = [
          ...this.$refs.treeRef.getCheckedKeys(),
          ...this.$refs.treeRef.getHalfCheckedKeys()
        ]
        const idStr = keys.join(',')//字符串拼接逗号隔开
       const {data:res} = await this.$http.post(`roles/${this.roleId}/rights`,{rids:idStr})//请求体传递idStr
       if(res.meta.status !== 200){
         return this.$message.error('获取权限失败!')
       }
       this.$message.success('分配成功')
       this.getRolesList()
      this.setRightDialogVisible = false
      }
  }
}
</script>
<style lang="less" scope>
.el-tag {
  margin: 7px;
}

.bdtop {
  border-top: 1px solid #eee;
}

.bdbottom {
  border-bottom: 1px solid #eee;
}

.vcenter {
  display: flex;
  align-items: center;
}
</style>


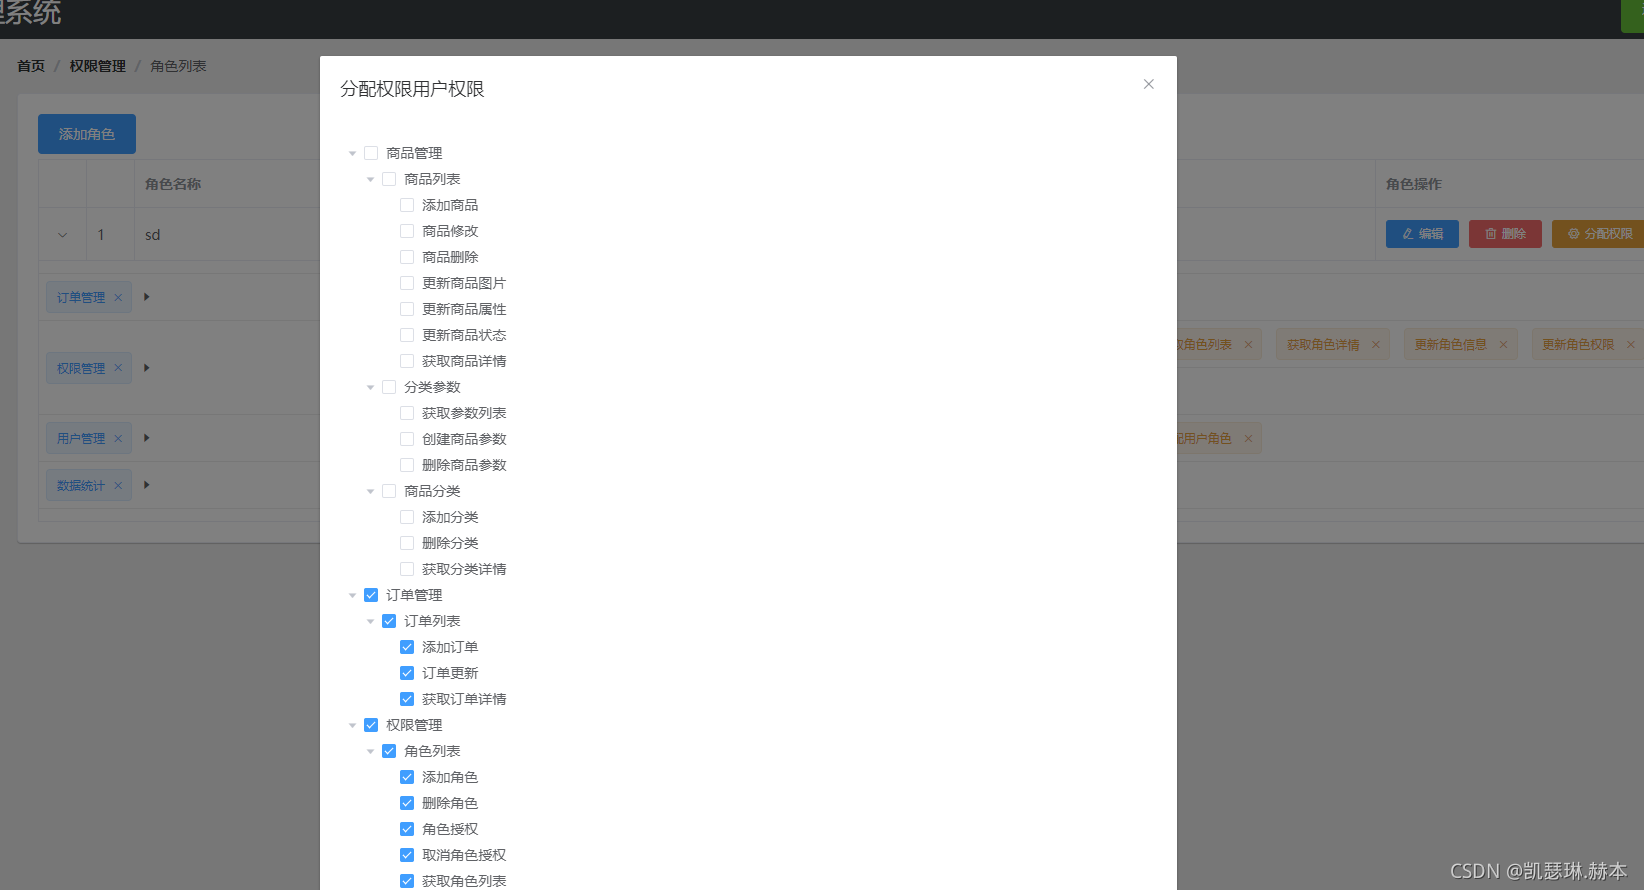
权限管理/权限列表 rights
<template>
    <div>
          <!-- 面包屑导航 -->
    <el-breadcrumb separator="/">
      <el-breadcrumb-item :to="{ path: '/home' }">首页</el-breadcrumb-item>
      <el-breadcrumb-item><a href="/">权限管理</a></el-breadcrumb-item>
      <el-breadcrumb-item>权限列表</el-breadcrumb-item>
    </el-breadcrumb>
    <!-- 卡片视图 -->
     <el-card>
        <el-table :data="rightsList" border stripe>
            <el-table-column type="index" prop="#"></el-table-column>
            <el-table-column label="权限名称" prop="authName"></el-table-column>
            <el-table-column label="路径" prop="path"></el-table-column>
            <el-table-column label="权限等级" prop="level">
                <template slot-scope="scope">
                    <el-tag v-if="scope.row.level === '0'">一级</el-tag>
                    <el-tag type="success" v-else-if="scope.row.level === '1'">二级</el-tag>
                    <el-tag type="warning" v-else>三级</el-tag>
                </template>
            </el-table-column>
        </el-table>
     </el-card>
    </div>
</template>

<script>
export default {
    data() {
        return {
           //权限列表
           rightsList:[]
        }
    },
    created() {
        this.getRightList()
    },
     methods:{
        // 获取权限列表
       async getRightList(){
       const {data:res} = await this.$http.get('rights/list')
       if(res.meta.status !== 200) {
           return this.$message.error('获取列表数据失败')
       }
       this.rightsList = res.data
       console.log(this.rightsList)
        }
    }
}
</script>
<style lang="less" scope>

</style>

git
- git branch 查看
- git checkout -b rights 切换分支创建
- git push -u origin rights 推送到云端
- git branch 查看当前所处分支 rights是否是rights不是就切换
- git add .
- git commit -m “xxx”
- git push 我们在云端已经有 rights 分支直接推送
- git checkout master 切换到master分支合并
- git merge rights 合并分支
- git branch 在查看我们所处的分支master主分支上了
- .git push 我们在推送
git
12. git branch 查看我们当前所处的分支 master 上
13. git checkout -b goods_cate 创建并切换分支goods_cate
14. git branch 查看我们当前所处的分支 goods_cate上
15. git push -u origin goods_params 合并
商品分类 /categories
<template>
  <div>
    <!-- 面包屑导航区域 -->
    <el-breadcrumb separator-class="el-icon-arrow-right">
      <el-breadcrumb-item :to="{ path: '/home' }">首页</el-breadcrumb-item>
      <el-breadcrumb-item>商品管理</el-breadcrumb-item>
      <el-breadcrumb-item>商品分类</el-breadcrumb-item>
    </el-breadcrumb>
    <!-- 卡片视图区域 -->
    <el-card>
      <el-row>
        <el-col>
          <el-button type="primary" @click="showAddCateDialog">添加分类</el-button>
        </el-col>
      </el-row>
      <!-- 表格 -->
      <tree-table class="treeTable" :data="catelist" :columns="columns" :selection-type="false" :expand-type="false" show-index index-text="#" border :show-row-hover="false">
        <!-- 是否有效 -->
        <template slot="isok" slot-scope="scope">
          <i class="el-icon-success" v-if="scope.row.cat_deleted === false" style="color: lightgreen;"></i>
          <i class="el-icon-error" v-else style="color: red;"></i>
        </template>
        <!-- 排序 -->
        <template slot="order" slot-scope="scope">
          <el-tag size="mini" v-if="scope.row.cat_level===0">一级</el-tag>
          <el-tag type="success" size="mini" v-else-if="scope.row.cat_level===1">二级</el-tag>
          <el-tag type="warning" size="mini" v-else>三级</el-tag>
        </template>
        <!-- 操作 -->
        <template slot="opt" >
          <el-button type="primary" icon="el-icon-edit" size="mini">编辑</el-button>
          <el-button type="danger" icon="el-icon-delete" size="mini">删除</el-button>
        </template>
      </tree-table>

      <!-- 分页区域 -->
      <el-pagination @size-change="handleSizeChange" @current-change="handleCurrentChange" :current-page="querInfo.pagenum" :page-sizes="[3, 5, 10, 15]" :page-size="querInfo.pagesize" layout="total, sizes, prev, pager, next, jumper" :total="total">
      </el-pagination>
    </el-card>

    <!-- 添加分类的对话框 -->
    <el-dialog title="添加分类" :visible.sync="addCateDialogVisible" width="50%" @close="addCateDialogClosed">
      <!-- 添加分类的表单 -->
      <el-form :model="addCateForm" :rules="addCateFormRules" ref="addCateFormRef" label-width="100px">
        <el-form-item label="分类名称:" prop="cat_name">
          <el-input v-model="addCateForm.cat_name"></el-input>
        </el-form-item>
        <el-form-item label="父级分类:">
          <!-- options 用来指定数据源 -->
          <!-- props 用来指定配置对象 -->
          <el-cascader expand-trigger="hover" :options="parentCateList" :props="cascaderProps" v-model="selectedKeys" @change="parentCateChanged" clearable change-on-select>
          </el-cascader>
        </el-form-item>
      </el-form>
      <span slot="footer" class="dialog-footer">
        <el-button @click="addCateDialogVisible = false">取 消</el-button>
        <el-button type="primary" @click="addCate">确 定</el-button>
      </span>
    </el-dialog>
  </div>
</template>

<script>
export default {
  data() {
    return {
      // 查询条件
      querInfo: {
        type: 3,
        pagenum: 1,
        pagesize: 5
      },
      // 商品分类的数据列表,默认为空
      catelist: [],
      // 总数据条数
      total: 0,
      // 为table指定列的定义
      columns: [
        {
          label: '分类名称',
          prop: 'cat_name'
        },
        {
          label: '是否有效',
          // 表示,将当前列定义为模板列
          type: 'template',
          // 表示当前这一列使用模板名称
          template: 'isok'
        },
        {
          label: '排序',
          // 表示,将当前列定义为模板列
          type: 'template',
          // 表示当前这一列使用模板名称
          template: 'order'
        },
        {
          label: '操作',
          // 表示,将当前列定义为模板列
          type: 'template',
          // 表示当前这一列使用模板名称
          template: 'opt'
        }
      ],
      // 控制添加分类对话框的显示与隐藏
      addCateDialogVisible: false,
      // 添加分类的表单数据对象
      addCateForm: {
        // 将要添加的分类的名称
        cat_name: '',
        // 父级分类的Id
        cat_pid: 0,
        // 分类的等级,默认要添加的是1级分类
        cat_level: 0
      },
      // 添加分类表单的验证规则对象
      addCateFormRules: {
        cat_name: [
          { required: true, message: '请输入分类名称', trigger: 'blur' }
        ]
      },
      // 父级分类的列表
      parentCateList: [],
      // 指定级联选择器的配置对象
      cascaderProps: {
        value: 'cat_id',
        label: 'cat_name',
        children: 'children'
      },
      // 选中的父级分类的Id数组
      selectedKeys: []
    }
  },
  created() {
    this.getCateList()
  },
  methods: {
    // 获取商品分类数据
    async getCateList() {
      const { data: res } = await this.$http.get('categories', {
        params: this.querInfo
      })

      if (res.meta.status !== 200) {
        return this.$message.error('获取商品分类失败!')
      }

      console.log(res.data)
      // 把数据列表,赋值给 catelist
      this.catelist = res.data.result
      // 为总数据条数赋值
      this.total = res.data.total
    },
    // 监听 pagesize 改变
    handleSizeChange(newSize) {
      this.querInfo.pagesize = newSize
      this.getCateList()
    },
    // 监听 pagenum 改变
    handleCurrentChange(newPage) {
      this.querInfo.pagenum = newPage
      this.getCateList()
    },
    // 点击按钮,展示添加分类的对话框
    showAddCateDialog() {
      // 先获取父级分类的数据列表
      this.getParentCateList()
      // 再展示出对话框
      this.addCateDialogVisible = true
    },
    // 获取父级分类的数据列表
    async getParentCateList() {
      const { data: res } = await this.$http.get('categories', {
        params: { type: 2 }
      })

      if (res.meta.status !== 200) {
        return this.$message.error('获取父级分类数据失败!')
      }

      console.log(res.data)
      this.parentCateList = res.data
    },
    // 选择项发生变化触发这个函数
    parentCateChanged() {
      console.log(this.selectedKeys)
      // 如果 selectedKeys 数组中的 length 大于0,证明选中的父级分类
      // 反之,就说明没有选中任何父级分类
      if (this.selectedKeys.length > 0) {
        // 父级分类的Id
        this.addCateForm.cat_pid = this.selectedKeys[
          this.selectedKeys.length - 1
        ]
        // 为当前分类的等级赋值
        this.addCateForm.cat_level = this.selectedKeys.length
        return
      } else {
        // 父级分类的Id
        this.addCateForm.cat_pid = 0
        // 为当前分类的等级赋值
        this.addCateForm.cat_level = 0
      }
    },
    // 点击按钮,添加新的分类
    addCate() {
      this.$refs.addCateFormRef.validate(async valid => {
        if (!valid) return
        const { data: res } = await this.$http.post(
          'categories',
          this.addCateForm
        )

        if (res.meta.status !== 201) {
          return this.$message.error('添加分类失败!')
        }

        this.$message.success('添加分类成功!')
        this.getCateList()
        this.addCateDialogVisible = false
      })
    },
    // 监听对话框的关闭事件,重置表单数据
    addCateDialogClosed() {
      this.$refs.addCateFormRef.resetFields()
      this.selectedKeys = []
      this.addCateForm.cat_level = 0
      this.addCateForm.cat_pid = 0
    }
  }
}
</script>

<style lang="less" scoped>
.treeTable {
  margin-top: 15px;
}

.el-cascader {
  width: 100%;
}
</style>
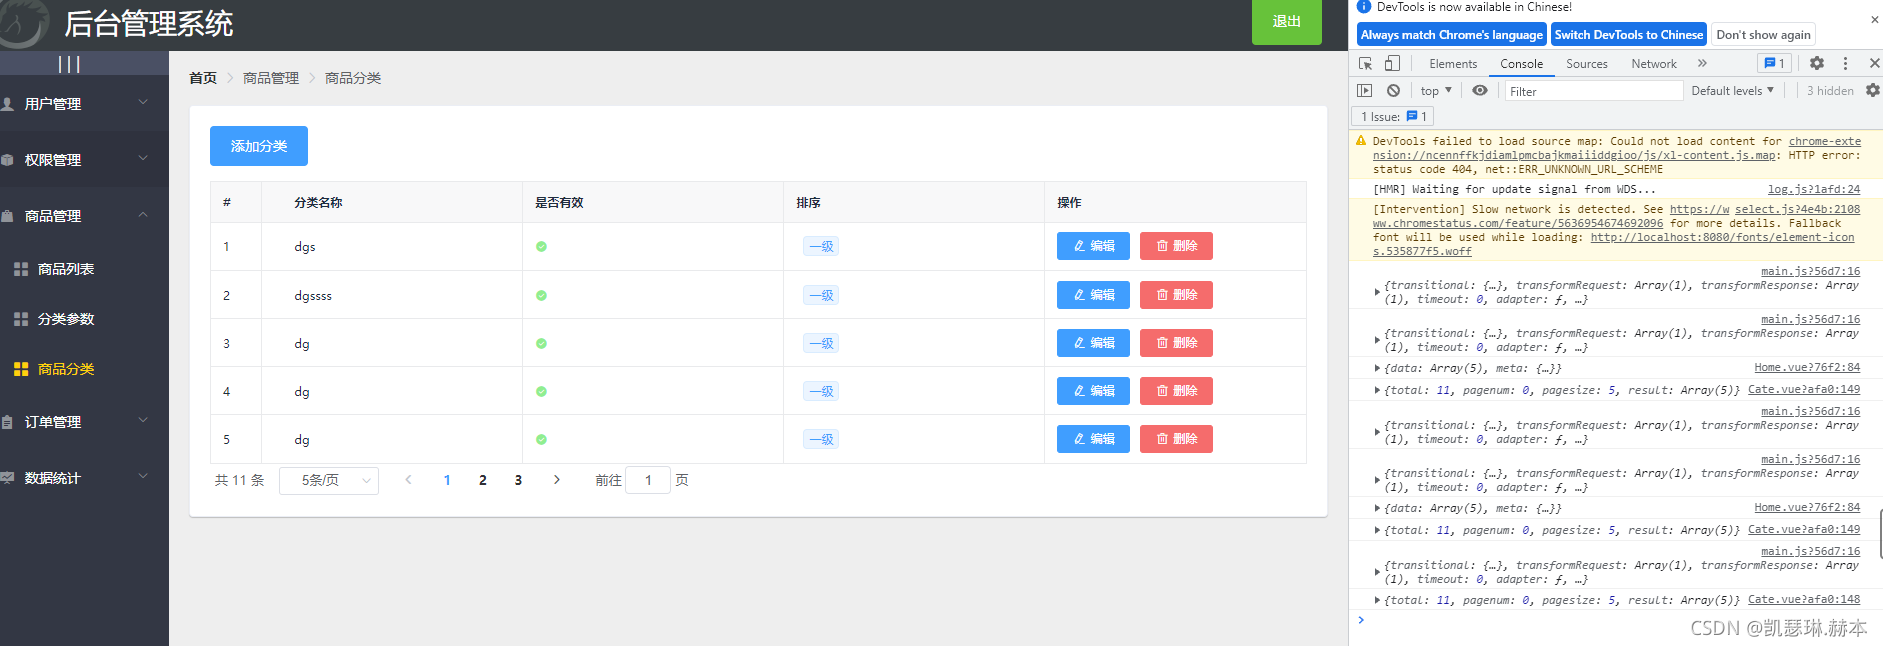

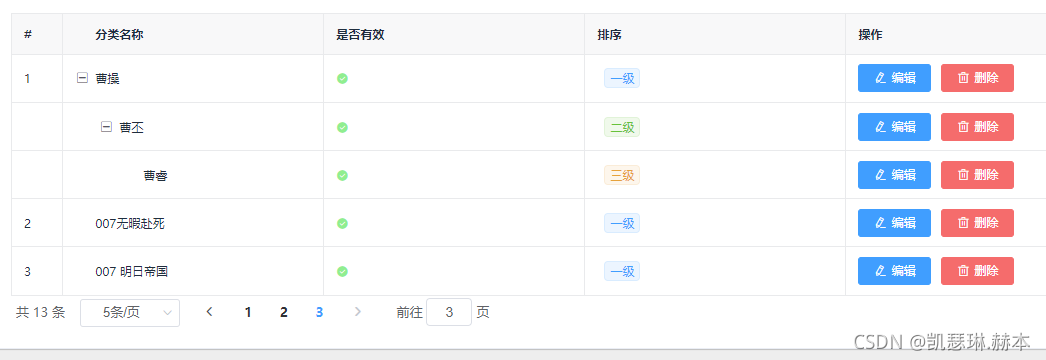
- git branch 查看我们当前所在的分支是goods_cate
- git status 没有提交
- git add .
- git commit -m “完成分类”
- git push 提交
- git branch
- git checkout master
- git merge goods_cate 合并分支
- git push 推送到云端
- git branch
- git checkout -b goods_params
- git branch
- git push -u origin goods_params
分类参数 params
<template>
  <div>
     <!-- 面包屑导航区域 -->
    <el-breadcrumb separator-class="el-icon-arrow-right">
      <el-breadcrumb-item :to="{ path: '/home' }">首页</el-breadcrumb-item>
      <el-breadcrumb-item>商品分类</el-breadcrumb-item>
      <el-breadcrumb-item>分类参数</el-breadcrumb-item>
    </el-breadcrumb>
    <el-card>
        <el-alert  title="注意: show-icon 只允许分为第三季分类设置相关参数!" :closable="false" type="warning" show-icon></el-alert>
    <!-- 选择商品分类区域 -->
    <el-row class="cat_opt">
        <el-col>
        <span>选择商品分类:</span>
        <!-- 选择商品分类的级联选择框 -->
          <el-cascader
            :options="catelist"
            :props="cateProps"
            v-model="selectedCateKeys"
            @change="handleChange"></el-cascader>
        </el-col>
    </el-row>
      <!-- 页签区域 -->
      <el-tabs v-model="activeName" @tab-click="handleClick">
      <!-- 添加参数 -->
        <el-tab-pane label="动态参数" name="many"><el-button type="primary" size="mini" @click="addDialogVisible=true" :disabled="isBtnDisabled">动态参数</el-button>
        <!-- 动态参数表格 -->
        <el-table :data="manyTableData" border stripe>
        <!-- 展开航 -->
         <!-- 展开航 -->
        <el-table-column type="expand">
          <templateb slot-scope="scope">
            <el-tag v-for="(item,i) in scope.row.attr_vals" :key="i" closable @close="handleClose(i,scope.row)">{{item}}</el-tag>
            <!-- 输入文本框 -->
            <el-input
            class="input-new-tag"
            v-if="scope.row.inputVisible"
            v-model="scope.row.inputValue"
            ref="saveTagInput"
            size="small"
            @keyup.enter.native="handleInputConfirm(scope.row)"
            @blur="handleInputConfirm(scope.row)"
          >
          </el-input>
          <!-- 添加按钮 -->
          <el-button v-else class="button-new-tag" size="small" @click="showInput(scope.row)">+ New Tag</el-button>
          </templateb>
        </el-table-column>
          <!-- 索引列 -->
          <el-table-column type="index"></el-table-column>
          <el-table-column label="参数名称" prop="attr_name"></el-table-column>
          <el-table-column label="操作" >
          <template slot-scope="scope">
            <el-button type="primary" icon="el-icon-edit" @click="showEiditDialog(scope.row.attr_id)" size="mini">编辑</el-button>
            <el-button type="danger" icon="el-icon-delete" @click="removeParams(scope.row.attr_id)" size="mini">删除</el-button>
          </template>
          </el-table-column>
           </el-table>
        </el-tab-pane>
        <!-- 添加静态属性 -->
        <el-tab-pane label="静态属性" name="only"><el-button type="primary" size="mini" @click="addDialogVisible=true" :disabled="isBtnDisabled">静态属性</el-button>
           <!-- 动态参数表格 -->
        <el-table :data="onlyTableData" border stripe>
        <!-- 展开航 -->
        <el-table-column type="expand">
          <templateb slot-scope="scope">
            <el-tag v-for="(item,i) in scope.row.attr_vals" :key="i" closable @close="handleClose(i,scope.row)">{{item}}</el-tag>
            <!-- 输入文本框 -->
            <el-input
            class="input-new-tag"
            v-if="scope.row.inputVisible"
            v-model="scope.row.inputValue"
            ref="saveTagInput"
            size="small"
            @keyup.enter.native="handleInputConfirm(scope.row)"
            @blur="handleInputConfirm(scope.row)"
          >
          </el-input>
          <!-- 添加按钮 -->
          <el-button v-else class="button-new-tag" size="small" @click="showInput(scope.row)">+ New Tag</el-button>
          </templateb>
        </el-table-column>
          <!-- 索引列 -->
          <el-table-column type="index"></el-table-column>
          <el-table-column label="属性名称" prop="attr_name"></el-table-column>
          <el-table-column label="操作" >
          <template slot-scope="scope">
            <el-button type="primary" icon="el-icon-edit" @click="showEiditDialog(scope.row.attr_id)" size="mini">编辑</el-button>
            <el-button type="danger" icon="el-icon-delete" @click="removeParams(scope.row.attr_id)" size="mini">删除</el-button>
          </template>
          </el-table-column>
           </el-table>
        </el-tab-pane>
      </el-tabs>
    </el-card>
    <!-- 添加参数对话框 -->
    <el-dialog
  :title="'添加'+titleText"
  :visible.sync="addDialogVisible"
  width="36%" @close="addDialogClosed">
    <!-- 添加参数对话框 内容 -->
  <el-form :rules="addFormRules" ref="addFormRef" :model="addForm" label-width="100px">
  <el-form-item :label="titleText" prop="attr_name">
    <el-input v-model="addForm.attr_name"></el-input>
  </el-form-item>
  </el-form>
  <span slot="footer" class="dialog-footer">
    <el-button @click="addDialogVisible = false">取 消</el-button>
    <el-button type="primary" @click="addParams">确 定</el-button>
  </span>
</el-dialog>
<!-- 修改参数的对话框 -->
     <el-dialog
  :title="'修改'+titleText"
  :visible.sync="editDialogVisible"
  width="36%" @close="editDialogClosed">
    <!-- 添加参数对话框 内容 -->
  <el-form :rules="editFormRules" ref="editFormRef" :model="editForm" label-width="100px">
  <el-form-item :label="titleText" prop="attr_name">
    <el-input v-model="editForm.attr_name"></el-input>
  </el-form-item>
  </el-form>
  <span slot="footer" class="dialog-footer">
    <el-button @click="editDialogVisible = false">取 消</el-button>
    <el-button type="primary" @click="editParams">确 定</el-button>
  </span>
</el-dialog>
  </div>
</template>

<script>
export default {
  data() {
    return {
      //获取商品数据分类
        catelist:[],
        //级联选择框配置对象
        cateProps:{
          value:'cat_id',
          label:'cat_name',
          childrenl:'childrenl'
        },
        //级联选择框双向数据绑定
        selectedCateKeys:[],
        //被激活的也签名称
        activeName:'many',
        manyTableData:[],//动态参数的数据
        onlyTableData:[],//静态参数的数据
        //控制添加对话框的显示隐藏
        addDialogVisible:false, //默认为false
        //添加参数的表单 数据对象
        addForm:{
          attr_name:''
        },
        //添加表单验证规则对象
        addFormRules:{
          attr_name:[{required:true,message:'请输入对象',trigger:'blur'}]
        },
        //控制修改对话框的显示隐藏
        editDialogVisible:false,
        //修改表验证规则对象
        editForm:{},
        editFormRules:{
          attr_name:[{required:true,message:'请输入参数名称',trigger:'blur'}]
        },
        //控制文本框切换显示隐藏
        inputVisible:false ,
        //文本框内容
        inputValue:''

      }
  },
  created() {//调用数据
      this.getCateList()
  },
  methods: {
   async getCateList() {
     const {data:res} = await this.$http.get('categories')
     if(res.meta.status !== 200){
       return this.$message.error('获取商品分类失败')
     }
     this.catelist = res.data
     console.log(this.catelist)
    },
    //级联选择框选择变化会触发
    handleChange(){//我们只需要监听change事件触发我们选中1就是一级分类二就是二级分类三就是三级分类如果是就表是不是就未选中的状态
      this.getParamsData()
    },
    handleClick() {
      console.log(this.activeName)
      this.getParamsData()
    },
    //获取参数的列表数据
     async getParamsData() {
      // 证明选中的不是三级分类
      if (this.selectedCateKeys.length !== 3) {
        this.selectedCateKeys = []
        this.manyTableData = []
        this.onlyTableData = []
        return
      }

      // 证明选中的是三级分类
      console.log(this.selectedCateKeys)
      // 根据所选分类的Id,和当前所处的面板,获取对应的参数
      const { data: res } = await this.$http.get(
        `categories/${this.cateId}/attributes`,
        {
          params: { sel: this.activeName }
        }
      )

      if (res.meta.status !== 200) {
        return this.$message.error('获取参数列表失败!')
      }
      res.data.forEach(item => {
        item.attr_vals = item.attr_vals ? item.attr_vals.split(' ') : []
        //控制文本框显示隐藏
        item.inputVisible = false
        //文本框中输入的值
        item.inputValue = ''
      })
      console.log(res.data)//获取到数据判断一下
      if (this.activeName === 'many') {
        this.manyTableData = res.data
      } else {
        this.onlyTableData = res.data
      }
    },
    //监听对话框关闭事件
   addDialogClosed() {
      this.$refs.addFormRef.resetFields()
    },
    //点击按钮添加参数
    addParams(){
        this.$refs.addFormRef.validate(async valid => {
          if(!valid) return
         const {data:res} = await this.$http.post(`categories/${this.cateId}/attributes`,{
           attr_name:this.addForm.attr_name,
           attr_sel:this.activeName
          })
          if(res.meta.status !== 201){
            return this.$message.error('添加参数失败!')
          }
          this.$message.success('添加参数成功')
          this.addDialogVisible = false
          this.getCateList()
        })
    },//点击修改按钮
   async showEiditDialog(attr_id){
     // 查询当前参数的信息
      const { data: res } = await this.$http.get(`categories/${this.cateId}/attributes/${attr_id}`,{
        params: { attr_sel: this.activeName }
      })
      if(res.meta.status!== 200){
        return this.$message.error('获取参数信息失败')
      }
        this.editForm = res.data
        this.editDialogVisible = true
    },//重置修改表单
        editDialogClosed(){
          this.$refs.editFormRef.resetFields()
        },
        //点击按钮需要被禁用则返回true否则返回false
         editParams(){
          this.$refs.editFormRef.validate(async valid=>{
            if(!valid) return
            const { data: res } = await this.$http.put(
          `categories/${this.cateId}/attributes/${this.editForm.attr_id}`,
          { attr_name: this.editForm.attr_name, attr_sel: this.activeName })
            if(res.meta.status !== 200){
              return this.$message.error('修改参数失败')
            }
            this.$message.success('修改参数成功!')
            this.getParamsData()
            this.editDialogVisible = false
          })
        },
        //根据id删除当前项
        async removeParams(attr_id){
            const confirmResult = await this.$confirm('此操作将永久删除参数,是否继续?','提示',{
              confirmButtonText:'确定',
              cancelButtonText:'取消',
              type:'warning'
            }).catch(err=>err)
            //取消当前删除操作
            if(confirmResult !== 'confirm'){
              return this.$message.info('取消删除')
            }
            //删除
           const {data:res} = await this.$http.delete(`categories/${this.cateId}/attributes/${attr_id}`)
            if(res.meta.status!== 200){
              return this.$message.error('删除参数失败')
            }
            this.$message.success('删除参数成功')
            this.getParamsData()
       },//文本框失去焦点 Enter键
        handleInputConfirm(row){
         if(row.inputValue.trim().length ===0) {
           row.inputValue = ''
           row.inputVisible = false
           return
         }
          row.attr_vals.push(row.inputValue.trim() )
       row.inputValue = ''
       row.inputVisible = false
       //需要发起请求保存数据库
        this.saveAttrVals(row)
       },
       //将对 attr_vals操作保存到数据库
      async saveAttrVals(row){
         const {data:res} = await this.$http.put(`categories/${this.cateId}/attributes/${row.attr_id}`,{
         attr_name:row.attr_name,
         attr_sel:row.attr_sel,
         attr_vals:row.attr_vals.join('')
       })
       if(res.meta.status!==200){
         return this.$message.error('修改参数失败!')
       }
       this.$message.success('修改成功')
       },
       //点击按钮输入文本
       showInput(row){
         row.inputVisible=true
         //让文本框自动获取焦点  $nextTick当页面被重新渲染才执行官回调 函数中的代码
        this.$nextTick(_ => {
          this.$refs.saveTagInput.$refs.input.focus()
        })
       },
       //删除对应参数选项
       handleClose(i,row){
         row.attr_vals.splice(i,1)
         this.saveAttrVals(row)
       }
  },
    computed:{//和级联选择器对应数组有关系 如果选择3就使用 不是3就禁用
      isBtnDisabled(){
        if(this.selectedCateKeys.length !== 3){
          return true
        }//如果按钮需要被禁用则返回true 否则false
        return false
      },
      cateId(){//当前选中的ID
        if(this.selectedCateKeys.length === 3){
          return this.selectedCateKeys[2]
        }
        return null
      },
      titleText() {//动态计算标题的文本
        if(this.activeName === 'many'){//根据面板来计算如果当前 激活的是动态属性
          return '动态参数'
        }
          return '静态属性'
      }
    }
}
</script>

<style lang="less" scoped>
    .cat_opt{
     margin:15px 0px;
    }

    .el-cascader{
        margin:0 10px;
    }
    .input-new-tag{
      width: 100px;
    }
</style>


商品列表 /goods
<template>
    <div>
          <!-- 面包屑导航区域 -->
    <el-breadcrumb separator-class="el-icon-arrow-right">
      <el-breadcrumb-item :to="{ path: '/home' }">首页</el-breadcrumb-item>
      <el-breadcrumb-item>商品管理</el-breadcrumb-item>
      <el-breadcrumb-item>商铺列表</el-breadcrumb-item>
    </el-breadcrumb>
    <el-card>
            <el-row :gutter="20">
                <el-col :span="8">
                    <el-input placeholder="请输入内容" v-model="queryInfo.query" clearable @clear="getGoodsList"><el-button slot="append" icon="el-icon-search" @click="getGoodsList"></el-button></el-input>
                </el-col>
                <el-col :span="4"><el-button type="primary" @click="goAddpage">添加商品</el-button></el-col>
            </el-row>
            <!-- table 表格区域 -->
             <template>
                   <!-- table表格区域 -->
                <el-table :data="goodslist" border stripe>
                    <el-table-column type="index"></el-table-column>
                    <el-table-column label="商品名称" prop="goods_name"></el-table-column>
                     <el-table-column label="商品价格(元)" prop="goods_price" width="95px"></el-table-column>
                    <el-table-column label="商品重量" prop="goods_weight" width="70px"></el-table-column>
                    <el-table-column label="创建时间" prop="add_time" width="180px">
                        <template slot-scope="scope">
                           {{scope.row.add_time | dataFormat}}
                        </template>
                    </el-table-column>
                    <el-table-column label="操作">
                        <template slot-scope="scope">
                          <el-button type="primary" size="mini" icon="el-icon-edit"></el-button>
                          <el-button type="danger"  size="mini" @click="removeById(scope.row.goods_id)" icon="el-icon-delete"></el-button>
                        </template>
                    </el-table-column>
                </el-table>
        <!-- 分页 -->
            <div class="block">
            <el-pagination
            @size-change="handleSizeChange"
            @current-change="handleCurrentChange"
            :current-page="queryInfo.pagenum"
            :page-sizes="[3,5, 10, 15]"
            :page-size="queryInfo.pagesize"
            layout="total, sizes, prev, pager, next, jumper"
            :total="total" background>
            </el-pagination>
                </div>
            </template>
     </el-card>
    </div>
</template>
<script>
export default {
    data() {
        return {
            //查询
           queryInfo:{
            query:'',
            pagenum:1,
            pagesize:10
           },//商品分页
           goodslist:[],
           //总数据条数
           total:0
        }
    },
    created(){
        this.getGoodsList()
    },
    methods:{
          async getGoodsList(){
          const { data: res } = await this.$http.get('goods', {
        params: this.queryInfo})
           if(res.meta.status !== 200){
               return this.$message.error('获取商品列表')
           }
           this.$message.success('获取商品列表成功')
           this.goodslist = res.data.goods
           console.log(res.data)
           this.total = res.data.total
           }   ,
           handleSizeChange(newSize){
               this.queryInfo.pagesize = newSize
               this.getGoodsList()
           }     ,
            handleCurrentChange(newSize){
               this.queryInfo.pagenum = newSize
               this.getGoodsList()
           },
           async removeById(id){
              const confirmResult = await this.$confirm('删除该商品, 是否继续?', '提示', {
                confirmButtonText: '确定',
                cancelButtonText: '取消',
                type: 'warning'
                }).catch(err => err)
                if(confirmResult !== 'confirm'){
                    return this.$message.info('取消删除')
                }
                const {data:res} = await this.$http.delete(`goods/${id}`)
                 if(res.meta.status !== 200){
               return this.$message.error('删除失败')
                    }
                    this.$message.success('删除成功')
                   this.getGoodsList()

           },
           goAddpage(){
               this.$router.push(`/goods/add`)
           }
    }
}
</script>
<style lang="less" scoped>

</style>

商品列表 /goods/add
<template>
  <div>
    <!-- 面包屑导航区域 -->
    <el-breadcrumb separator-class="el-icon-arrow-right">
      <el-breadcrumb-item :to="{ path: '/home' }">首页</el-breadcrumb-item>
      <el-breadcrumb-item>商品管理</el-breadcrumb-item>
      <el-breadcrumb-item>添加商品</el-breadcrumb-item>
    </el-breadcrumb>

    <!-- 卡片视图 -->
    <el-card>
      <!-- 提示区域 -->
      <el-alert title="添加商品信息" type="info" center show-icon :closable="false">
      </el-alert>
      <!-- 步骤条区域 -->
      <el-steps :space="200" :active="activeIndex - 0" finish-status="success" align-center>
        <el-step title="基本信息"></el-step>
        <el-step title="商品参数"></el-step>
        <el-step title="商品属性"></el-step>
        <el-step title="商品图片"></el-step>
        <el-step title="商品内容"></el-step>
        <el-step title="完成"></el-step>
      </el-steps>

      <!-- tab栏区域 -->

      <el-form :model="addForm" :rules="addFormRules" ref="addFormRef" label-width="100px" label-position="top">
        <el-tabs v-model="activeIndex" :tab-position="'left'" :before-leave="beforeTabLeave" @tab-click="tabClicked">
          <el-tab-pane label="基本信息" name="0">
            <el-form-item label="商品名称" prop="goods_name">
              <el-input v-model="addForm.goods_name"></el-input>
            </el-form-item>
            <el-form-item label="商品价格" prop="goods_price">
              <el-input v-model="addForm.goods_price" type="number"></el-input>
            </el-form-item>
            <el-form-item label="商品重量" prop="goods_weight">
              <el-input v-model="addForm.goods_weight" type="number"></el-input>
            </el-form-item>
            <el-form-item label="商品数量" prop="goods_number">
              <el-input v-model="addForm.goods_number" type="number"></el-input>
            </el-form-item>
            <el-form-item label="商品分类" prop="goods_cat">
              <el-cascader expand-trigger="hover" :options="catelist" :props="cateProps" v-model="addForm.goods_cat" @change="handleChange">
              </el-cascader>
            </el-form-item>
          </el-tab-pane>
          <el-tab-pane label="商品参数" name="1">
            <!-- 渲染表单的Item项 -->
            <el-form-item :label="item.attr_name" v-for="item in manyTableData" :key="item.attr_id">
              <!-- 复选框组 -->
              <el-checkbox-group v-model="item.attr_vals">
                <el-checkbox :label="cb" v-for="(cb, i) in item.attr_vals" :key="i" border></el-checkbox>
              </el-checkbox-group>
            </el-form-item>
          </el-tab-pane>
          <el-tab-pane label="商品属性" name="2">
            <el-form-item :label="item.attr_name" v-for="item in onlyTableData" :key="item.attr_id">
              <el-input v-model="item.attr_vals"></el-input>
            </el-form-item>
          </el-tab-pane>
          <el-tab-pane label="商品图片" name="3">
            <!-- action 表示图片要上传到的后台API地址 -->
            <el-upload :action="uploadURL" :on-preview="handlePreview" :on-remove="handleRemove" list-type="picture" :headers="headerObj" :on-success="handleSuccess">
              <el-button size="small" type="primary">点击上传</el-button>
            </el-upload>
          </el-tab-pane>
           <el-tab-pane label="商品内容" name="4">
            <!-- 富文本编辑器组件 -->
            <quill-editor v-model="addForm.goods_introduce"></quill-editor>
            <!-- 添加商品的按钮 -->
            <el-button type="primary" class="btnAdd" @click="add">添加商品</el-button>
          </el-tab-pane>
        </el-tabs>
      </el-form>

    </el-card>

    <!-- 图片预览 -->
    <el-dialog title="图片预览" :visible.sync="previewVisible" width="50%">
      <img :src="previewPath" alt="" class="previewImg">
    </el-dialog>
  </div>
</template>

<script>
import _ from 'lodash'

export default {
  data() {
    return {
      activeIndex: '0',
      // 添加商品的表单数据对象
      addForm: {
        goods_name: '',
        goods_price: 0,
        goods_weight: 0,
        goods_number: 0,
        // 商品所属的分类数组
        goods_cat: [],
        // 图片的数组
        pics: [],
        // 商品的详情描述
        goods_introduce: '',
        attrs: []
      },
      addFormRules: {
        goods_name: [
          { required: true, message: '请输入商品名称', trigger: 'blur' }
        ],
        goods_price: [
          { required: true, message: '请输入商品价格', trigger: 'blur' }
        ],
        goods_weight: [
          { required: true, message: '请输入商品重量', trigger: 'blur' }
        ],
        goods_number: [
          { required: true, message: '请输入商品数量', trigger: 'blur' }
        ],
        goods_cat: [
          { required: true, message: '请选择商品分类', trigger: 'blur' }
        ]
      },
      // 商品分类列表
      catelist: [],
      cateProps: {
        label: 'cat_name',
        value: 'cat_id',
        children: 'children'
      },
      // 动态参数列表数据
      manyTableData: [],
      // 静态属性列表数据
      onlyTableData: [],
      // 上传图片的URL地址
      uploadURL: 'https://www.liulongbin.top:8888/api/private/v1/upload',
      // 图片上传组件的headers请求头对象
      headerObj: {
        Authorization: window.sessionStorage.getItem('token')
      },
      previewPath: '',
      previewVisible: false
    }
  },
  created() {
    this.getCateList()
  },
  methods: {
    // 获取所有商品分类数据
    async getCateList() {
      const { data: res } = await this.$http.get('categories')

      if (res.meta.status !== 200) {
        return this.$message.error('获取商品分类数据失败!')
      }

      this.catelist = res.data
      console.log(this.catelist)
    },
    // 级联选择器选中项变化,会触发这个函数
    handleChange() {
      console.log(this.addForm.goods_cat)
      if (this.addForm.goods_cat.length !== 3) {
        this.addForm.goods_cat = []
      }
    },
    beforeTabLeave(activeName, oldActiveName) {
      // console.log('即将离开的标签页名字是:' + oldActiveName)
      // console.log('即将进入的标签页名字是:' + activeName)
      // return false
      if (oldActiveName === '0' && this.addForm.goods_cat.length !== 3) {
        this.$message.error('请先选择商品分类!')
        return false
      }
    },
    async tabClicked() {
      // console.log(this.activeIndex)
      // 证明访问的是动态参数面板
      if (this.activeIndex === '1') {
        const { data: res } = await this.$http.get(
          `categories/${this.cateId}/attributes`,
          {
            params: { sel: 'many' }
          }
        )

        if (res.meta.status !== 200) {
          return this.$message.error('获取动态参数列表失败!')
        }

        console.log(res.data)
        res.data.forEach(item => {
          item.attr_vals =
            item.attr_vals.length === 0 ? [] : item.attr_vals.split(' ')
        })
        this.manyTableData = res.data
      } else if (this.activeIndex === '2') {
        const { data: res } = await this.$http.get(
          `categories/${this.cateId}/attributes`,
          {
            params: { sel: 'only' }
          }
        )

        if (res.meta.status !== 200) {
          return this.$message.error('获取静态属性失败!')
        }

        console.log(res.data)
        this.onlyTableData = res.data
      }
    },
    // 处理图片预览效果
    handlePreview(file) {
      console.log(file)
      this.previewPath = file.response.data.url
      this.previewVisible = true
    },
    // 处理移除图片的操作
    handleRemove(file) {
      // console.log(file)
      // 1. 获取将要删除的图片的临时路径
      const filePath = file.response.data.tmp_path
      // 2. 从 pics 数组中,找到这个图片对应的索引值
      const i = this.addForm.pics.findIndex(x => x.pic === filePath)
      // 3. 调用数组的 splice 方法,把图片信息对象,从 pics 数组中移除
      this.addForm.pics.splice(i, 1)
      console.log(this.addForm)
    },
    // 监听图片上传成功的事件
    handleSuccess(response) {
      console.log(response)
      // 1. 拼接得到一个图片信息对象
      const picInfo = { pic: response.data.tmp_path }
      // 2. 将图片信息对象,push 到pics数组中
      this.addForm.pics.push(picInfo)
      console.log(this.addForm)
    },
    // 添加商品
    add() {
      this.$refs.addFormRef.validate(async valid => {
        if (!valid) {
          return this.$message.error('请填写必要的表单项!')
        }
        // 执行添加的业务逻辑
        // lodash   cloneDeep(obj)
        const form = _.cloneDeep(this.addForm)
        form.goods_cat = form.goods_cat.join(',')
        // 处理动态参数
        this.manyTableData.forEach(item => {
          const newInfo = {
            attr_id: item.attr_id,
            attr_value: item.attr_vals.join(' ')
          }
          this.addForm.attrs.push(newInfo)
        })
        // 处理静态属性
        this.onlyTableData.forEach(item => {
          const newInfo = { attr_id: item.attr_id, attr_value: item.attr_vals }
          this.addForm.attrs.push(newInfo)
        })
        form.attrs = this.addForm.attrs
        console.log(form)
        // 发起请求添加商品
        // 商品的名称,必须是唯一的
        const { data: res } = await this.$http.post('goods', form)

        if (res.meta.status !== 201) {
          return this.$message.error('添加商品失败!')
        }
        this.$message.success('添加商品成功!')
        this.$router.push('/goods')
      })
    }
  },
  computed: {
    cateId() {
      if (this.addForm.goods_cat.length === 3) {
        return this.addForm.goods_cat[2]
      }
      return null
    }
  }
}
</script>

<style lang="less" scoped>
.el-checkbox {
  margin: 0 10px 0 0 !important;
}

.previewImg {
  width: 100%;
}

.btnAdd {
  margin-top: 15px;
}
</style>

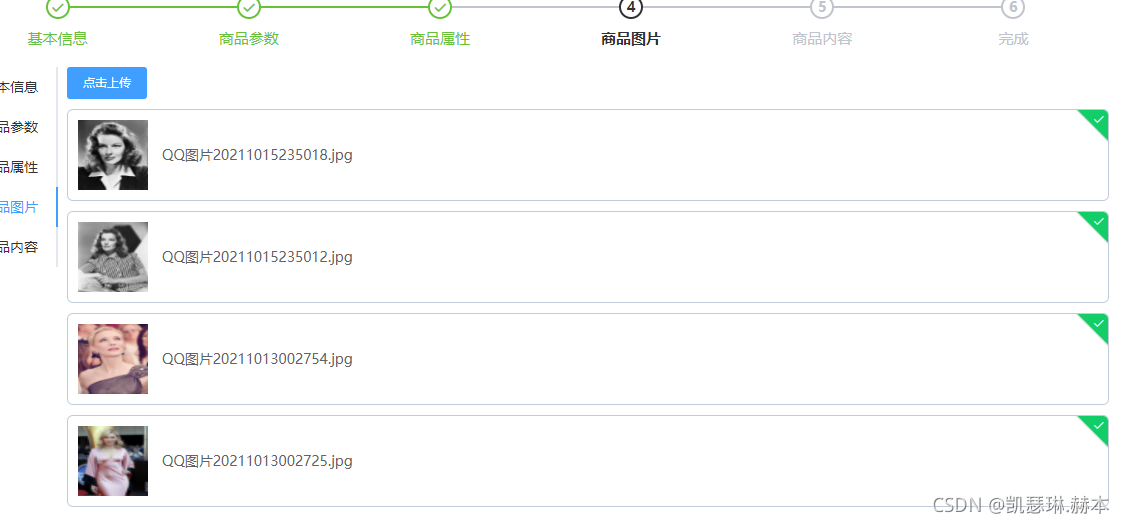
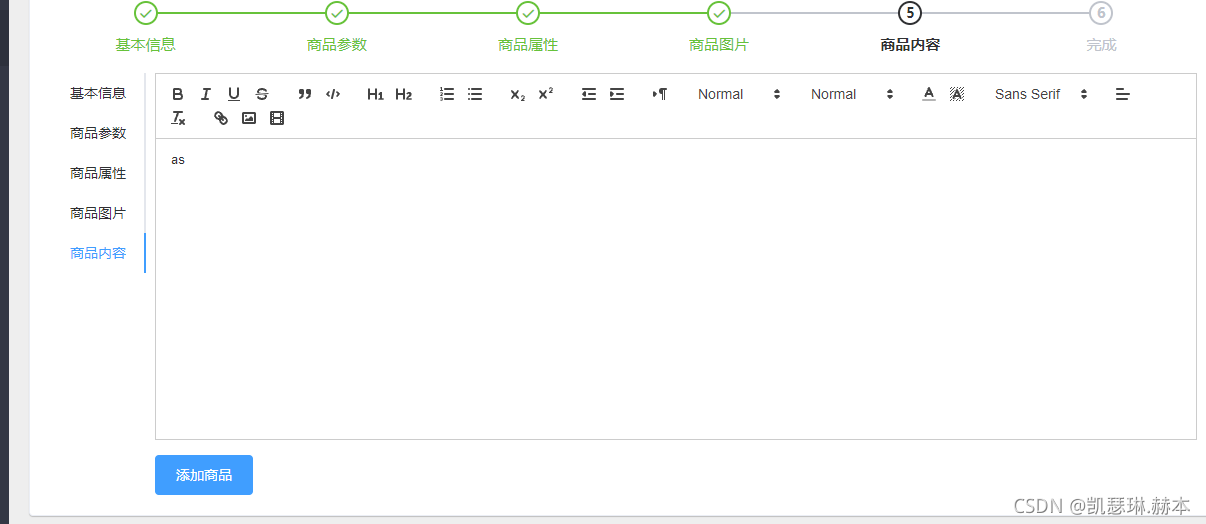
订单列表/order
<template>
    <div>
           <!-- 面包屑导航区域 -->
    <el-breadcrumb separator-class="el-icon-arrow-right">
      <el-breadcrumb-item :to="{ path: '/home' }">首页</el-breadcrumb-item>
      <el-breadcrumb-item>订单管理</el-breadcrumb-item>
      <el-breadcrumb-item>订单列表</el-breadcrumb-item>
    </el-breadcrumb>
    <el-card>
        <el-row>
            <el-col :span="8">
                    <el-input placeholder="请输入内容" ><el-button slot="append" icon="el-icon-search" ></el-button></el-input>
                  </el-col>
        </el-row>
        <!-- 订单数据列表 -->
        <el-table :data="orderlist" border stripe >
            <el-table-column type="index"></el-table-column>
            <el-table-column label="订单编号" prop="order_number" ></el-table-column>
            <el-table-column label="订单价格" prop="order_price" ></el-table-column>
            <el-table-column label="是否付款" prop="pay_status" >
            <template slot-scope="scope">
            <el-tag type="success" v-if="scope.row.pay_status === '1'">已付款</el-tag>
            <el-tag type="danger" v-else>未付款</el-tag>
          </template>
            </el-table-column>
            <el-table-column label="是否发货" prop="is_send" >
            <template>
              <template slot-scope='scope'>
               {{scope.row.is_send}}
            </template>
            </template>
            </el-table-column>
            <el-table-column label="下单时间" prop="create_time" >
              <template slot-scope='scope'>
                {{scope.row.create_time | dataFormat}}
             </template>
            </el-table-column>
            <el-table-column label="操作"  >
                <template >
            <el-button size="mini" type="primary" icon="el-icon-edit" @click="showBox"></el-button>
            <el-button size="mini" type="success" icon="el-icon-location" @click="showProgressBox"></el-button>
          </template>
            </el-table-column>
        </el-table>

    <!-- 分页区域 -->
          <el-pagination class="el-pag"
      @size-change="handleSizeChange"
      @current-change="handleCurrentChange"
      :current-page="queryInfo.pagenum"
      :page-sizes="[5,10,15]"
      :page-size="queryInfo.pagesize"
      layout="total, sizes, prev, pager, next, jumper"
      :total="total">
    </el-pagination>
    </el-card>
    <!--修改地址 对话框  -->
    <el-dialog
  title="修改地址"
  :visible.sync="addresVisible"
  width="48%" @close="addressDialogClosed">
  <el-form ref="addressFormRef" :model="addressForm" :rules="addressFormRules" label-width="100px">
  <el-form-item label="省市区/县" prop="address1">
  <el-cascader :options="cityData" v-model="addressForm.address1"></el-cascader>
  </el-form-item>
  <el-form-item label="详细地址" prop="address2">
    <el-input v-model="addressForm.address2"></el-input>
  </el-form-item>
  </el-form>
  <span slot="footer" class="dialog-footer">
    <el-button @click="addresVisible = false">取 消</el-button>
    <el-button type="primary" @click="addresVisible = false">确 定</el-button>
  </span>
</el-dialog>
<!-- 对话框  -->
    <el-dialog
  title="修改地址"
  :visible.sync="progrssVisble"
  width="48%" >
<el-timeline >
    <el-timeline-item
      v-for="(activity, index) in progressInfo"
      :key="index"
      :timestamp="activity.time">
      {{activity.context}}
    </el-timeline-item>
  </el-timeline>
</el-dialog>
    </div>
</template>
<script>
// 本地数据引入
import cityData from './citydata.js'
export default {
    data() {
        return {
           queryInfo:{
               query:"",
               pagenum:1,
               pagesize:5
           },
           total:0,
           orderlist:[],
           addresVisible:false,
           addressForm:{
               address1:[],
               address2:[]
           },
           addressFormRules:{
               address1:[{required:true,message:'请输入省市区县',trigger:'blur'}],
               address2:[{required:true,message:'请输填写详细地址',trigger:'blur'}]
             },
             //接收引入上面本地数据
             cityData,
             progrssVisble:false,
             progressInfo:[]
        }
    },
    created(){
        this.getOrderList()
    },
    methods:{
        async getOrderList() {
            const {data:res}= await this.$http.get('orders',{params:this.queryInfo})
            if(res.meta.status !== 200){
                return this.$message.error('获取列表数据失败')
            }
            this.total = res.data.total
            this.orderlist = res.data.goods
        },
        handleSizeChange(newSize) {
            this.queryInfo.pagesize = newSize
            this.getOrderList()
        },
        handleCurrentChange(newSize) {
            this.queryInfo.pagenum = newSize
            this.getOrderList()
        },
        showBox(){
            this.addresVisible = true
        },
        addressDialogClosed(){
            this.$refs.addressFormRef.resetFields()
        },
       async showProgressBox(){
       const { data: res } = await this.$http.get('/kuaidi/804909574412544580')

      if (res.meta.status !== 200) {
        return this.$message.error('获取物流进度失败!')
      }
      this.progressInfo = res.data

             this.progrssVisble = true
        }
    }

}
</script>
<style lang="less" scoped>

    .el-pag{
        margin-top:15px;
    }

    .el-cascader{
        width:100%;
    }
</style>
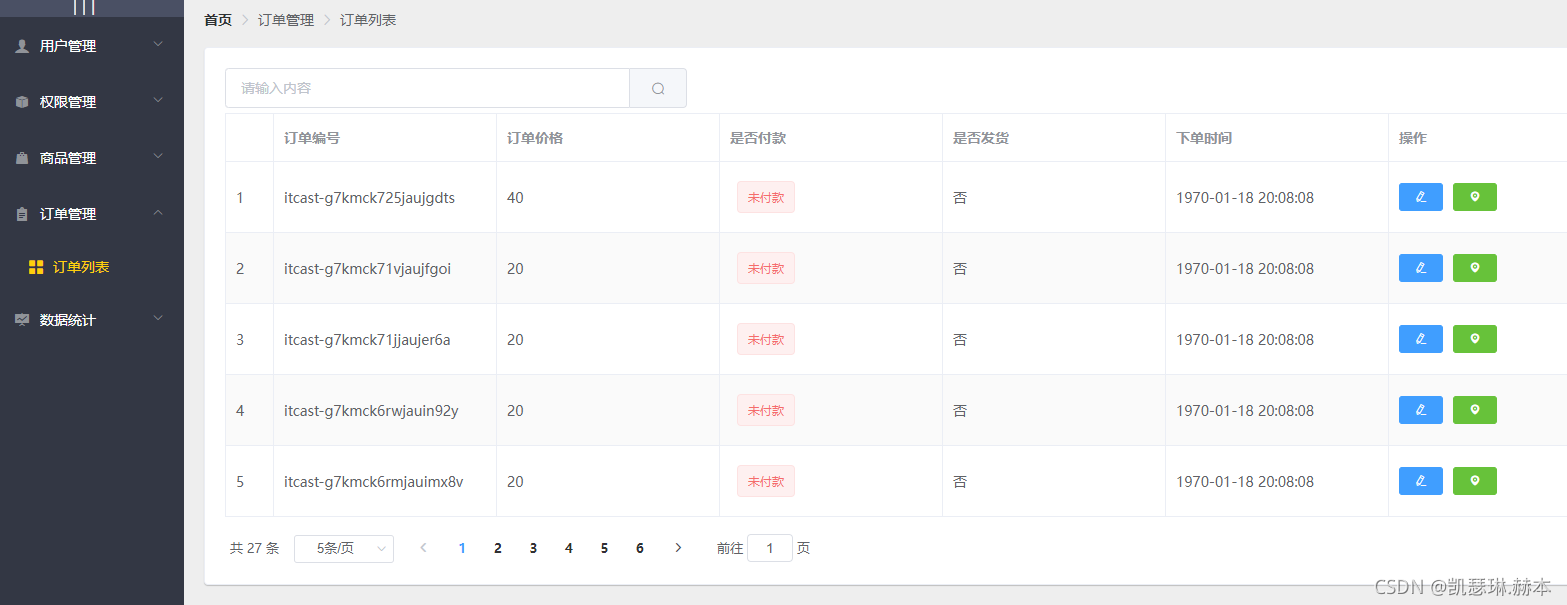
订单统计 / Report
<template>
  <div>
    <!-- 面包屑导航区域 -->
    <el-breadcrumb separator="/">
      <el-breadcrumb-item :to="{ path: '/home' }">首页</el-breadcrumb-item>
      <el-breadcrumb-item>数据统计</el-breadcrumb-item>
      <el-breadcrumb-item>数据报表</el-breadcrumb-item>
    </el-breadcrumb>
    <!-- 卡片视图区域 -->
    <el-card>
      <!-- 2. 为ECharts准备一个具备大小(宽高)的Dom -->
  <div id="main" style="width: 800px;height:500px;"></div>
    </el-card>
  </div>
</template>
<script>
import echarts from 'echarts'
import _ from 'lodash'
export default {
    data() {
        return {
            options: {
        title: {
          text: '用户来源'
        },
        tooltip: {
          trigger: 'axis',
          axisPointer: {
            type: 'cross',
            label: {
              backgroundColor: '#E9EEF3'
            }
          }
        },
        grid: {
          left: '3%',
          right: '4%',
          bottom: '3%',
          containLabel: true
        },
        xAxis: [
          {
            boundaryGap: false
          }
        ],
        yAxis: [
          {
            type: 'value'
          }
        ]
      }
        }
    },
   async mounted(){
         // 基于准备好的dom,初始化echarts实例
      var myChart = echarts.init(document.getElementById('main'))

      const {data:res} = await this.$http.get(`reports/type/1`)
        if(res.meta.status!== 200){
            return  this.$message.error('获取折线图失败')
        }
      // 指定图表的配置项和数据


      // 使用刚指定的配置项和数据显示图表。
    const result = _.merge(res.data,this.options)
      myChart.setOption(result);
    },
    created() {

    },
    methods:{

    }
}
</script>
<style>

</style>
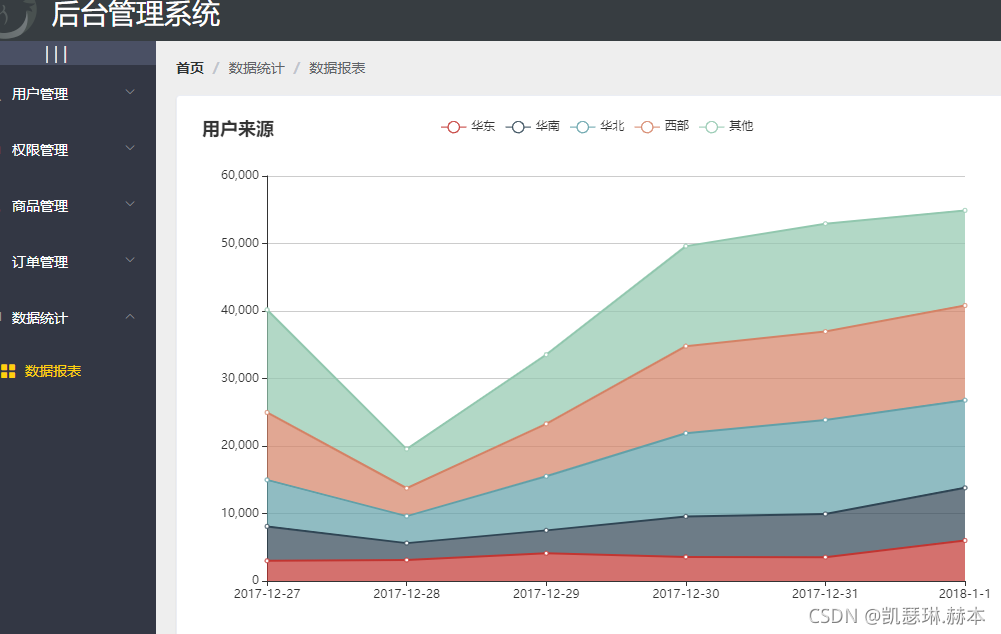
router/index
import Vue from 'vue'
import VueRouter from 'vue-router'
import Login from '../components/Login.vue'
import Home from '../components/Home.vue'
import Welcome from '../components/Welcome.vue'
import Users from '../components/user/Users.vue'
import Rights from '../components/power/Rights.vue'
import Roles from '../components/power/Roles.vue'
import Cate from '../components/goods/Cate.vue'
import Params from '../components/goods/Params.vue'
import List from '../components/goods/List.vue'
import Add from '../components/goods/Add.vue'
import Order from '../components/goods/order/Order.vue'
import Report from '../components/report/Report.vue'

Vue.use(VueRouter)

const router = new VueRouter({
  routes: [
    { path: '/', redirect: '/login' },
    { path: '/login', component: Login },
    {
      path: '/home',
      component: Home,
      redirect: '/welcome',
      children: [{ path: '/welcome', component: Welcome }
      ,{ path:'/users', component:Users},
      { path:'/rights' ,component:Rights},
      { path:'/roles' ,component:Roles},
      { path:'/categories' ,component:Cate},
      { path:'/params' ,component:Params},
      { path:'/goods' ,component:List},
      { path:'/goods/add' ,component:Add},
      { path:'/orders' ,component:Order},
      { path:'/reports' ,component:Report}
    ]
    }
  ]
})
//挂在路由导航守卫
router.beforeEach((to, from, next) => {
  //to将要去的路径
  //from 代表从哪个路径跳转而来
  //next是一个函数 表示放行
  //next() 放行 next('/login') 强制 跳转
  if (to.path === '/login') return next()
  //获取token
  const tokenStr = window.sessionStorage.getItem('token')
  if (!tokenStr) return next('/login')
  next()
})

export default router
plugins/element.js
import Vue from 'vue'
import {
  Button,
  Form,
  FormItem,
  Input,
  Message,
  Container,
  Header,
  Aside,
  Main,
  Menu,
  Submenu,
  MenuItem,
  Breadcrumb,
  BreadcrumbItem,
  Card,
  Row,
  Col,
  Table,
  TableColumn,
  Switch,
  Tooltip,
  Pagination,
  Dialog,
  MessageBox,
  Tag,
  Tree,
  Select,
  Option,
  Cascader,
  Alert,
  Tabs,
  TabPane,
  Steps,
  Step,
  CheckboxGroup,
  Checkbox,
  Upload
} from 'element-ui'

Vue.use(Button)
Vue.use(Form)
Vue.use(FormItem)
Vue.use(Input)
Vue.use(Container)
Vue.use(Header)
Vue.use(Aside)
Vue.use(Main)
Vue.use(Menu)
Vue.use(Submenu)
Vue.use(MenuItem)
Vue.use(Breadcrumb)
Vue.use(BreadcrumbItem)
Vue.use(Card)
Vue.use(Row)
Vue.use(Col)
Vue.use(Table)
Vue.use(TableColumn)
Vue.use(Switch)
Vue.use(Tooltip)
Vue.use(Pagination)
Vue.use(Dialog)
Vue.use(Tag)
Vue.use(Tree)
Vue.use(Select)
Vue.use(Option)
Vue.use(Cascader)
Vue.use(Alert)
Vue.use(Tabs)
Vue.use(TabPane)
Vue.use(Steps)
Vue.use(Step)
Vue.use(CheckboxGroup)
Vue.use(Checkbox)
Vue.use(Upload)

Vue.prototype.$message = Message
Vue.prototype.$confirm = MessageBox.confirm
main
import Vue from 'vue'
import App from './App.vue'
import router from './router/index.js'
//Element组件库
import './plugins/element.js'
// 导入全局样式表
import './assets/css/global.css'
//导入注册tree-grid 三方插件
import TreeTable from 'vue-table-with-tree-grid'
// 导入字体库
import './assets/fonts/iconfont.css'
import axios from 'axios'
//导入富文本编辑器
import VueQuillEditor from 'vue-quill-editor'
//导入富文本
import 'quill/dist/quill.core.css'
import 'quill/dist/quill.snow.css'
import 'quill/dist/quill.bubble.css'

// https://www.liulongbin.top:8888/api/private/v1/ http://127.0.0.1:8888/api/private/v1/
axios.defaults.baseURL= 'https://www.liulongbin.top:8888/api/private/v1/'
axios.interceptors.request.use(config => {
  // console.log(config)
  config.headers.Authorization = window.sessionStorage.getItem('token')
  return config//在最后必须return config
})
//将富文本编辑器注册为全局可用组价
Vue.use(VueQuillEditor)
Vue.prototype.$http = axios;
// 配置请求根路径
Vue.config.productionTip = false
//注册为全局组件
Vue.component('tree-table',TreeTable)
//全局过滤器 时间戳
Vue.filter('dataFormat',function(originVal){
  const dt = new Date(originVal)
  const y = dt.getFullYear()
  const m = (dt.getMonth() + 1 + '').padStart(2,'0')
  const d = (dt.getDate()+ '').padStart(2,'0')
  const hh = (dt.getHours()+'').padStart(2,'0')
  const mm = (dt.getMinutes() + '').padStart(2,'0')
  const ss = (dt.getMinutes() + '').padStart(2,'0')
  return `${y}-${m}-${d} ${hh}:${mm}:${ss}`
})
new Vue({
  router,
  render: h => h(App)
}).$mount('#app')
项目打包上线
###今日目标
1.完成项目优化
2.完成项目上线
1.项目优化
实现步骤:
A.生成打包报告,根据报告优化项目
B.第三方库启用CDN
C.Element-UI组件按需加载
D.路由懒加载
E.首页内容定制
2.添加进度条
给项目添加进度条效果,先打开项目控制台,打开依赖,安装nprogress
打开main.js,编写如下代码
//导入进度条插件
import NProgress from 'nprogress'
//导入进度条样式
import 'nprogress/nprogress.css'
.....
//请求在到达服务器之前,先会调用use中的这个回调函数来添加请求头信息
axios.interceptors.request.use(config => {
  //当进入request拦截器,表示发送了请求,我们就开启进度条
  NProgress.start()
  //为请求头对象,添加token验证的Authorization字段
  config.headers.Authorization = window.sessionStorage.getItem("token")
  //必须返回config
  return config
})
//在response拦截器中,隐藏进度条
axios.interceptors.response.use(config =>{
  //当进入response拦截器,表示请求已经结束,我们就结束进度条
  NProgress.done()
  return config
})
3.根据报错修改代码
根据ESLint的警告提示更改对应的代码
在.prettierrc文件中更改设置"printWidth":200, 将每行代码的文字数量更改为200
{
    "semi":false,
    "singleQuote":true,
    "printWidth":200
}
4.执行build
安装一个插件(babel-plugin-transform-remove-console)在项目build阶段移除所有的console信息
打开项目控制台,点击依赖->开发依赖,输入babel-plugin-transform-remove-console,安装
打开babel.config.js,编辑代码如下:
//项目发布阶段需要用到的babel插件
const productPlugins = []

//判断是开发还是发布阶段
if(process.env.NODE_ENV === 'production'){
  //发布阶段
  productPlugins.push("transform-remove-console")
}

module.exports = {
  "presets": [
    "@vue/app"
  ],
  "plugins": [
    [
      "component",
      {
        "libraryName": "element-ui",
        "styleLibraryName": "theme-chalk"
      }
    ],
    ...productPlugins
  ]
}
5.生成打包报告
A.命令行形式生成打包报告
vue-cli-service build --report
B.在vue控制台生成打包报告
点击“任务”=>“build”=>“运行”
运行完毕之后点击右侧“分析”,“控制台”面板查看报告
6.修改webpack的默认配置
默认情况下,vue-cli 3.0生成的项目,隐藏了webpack配置项,如果我们需要配置webpack
需要通过vue.config.js来配置。
在项目根目录中创建vue.config.js文件,
module.exports = {
    chainWebpack:config=>{
        //发布模式
        config.when(process.env.NODE_ENV === 'production',config=>{
            //entry找到默认的打包入口,调用clear则是删除默认的打包入口
            //add添加新的打包入口
            config.entry('app').clear().add('./src/main-prod.js')
        })
        //开发模式
        config.when(process.env.NODE_ENV === 'development',config=>{
            config.entry('app').clear().add('./src/main-dev.js')
        })
    }
}
补充:
chainWebpack可以通过链式编程的形式,修改webpack配置
configureWebpack可以通过操作对象的形式,修改webpack配置
7.加载外部CDN
默认情况下,依赖项的所有第三方包都会被打包到js/chunk-vendors.******.js文件中,导致该js文件过大
那么我们可以通过externals排除这些包,使它们不被打包到js/chunk-vendors.******.js文件中
module.exports = {
    chainWebpack:config=>{
        //发布模式
        config.when(process.env.NODE_ENV === 'production',config=>{
            //entry找到默认的打包入口,调用clear则是删除默认的打包入口
            //add添加新的打包入口
            config.entry('app').clear().add('./src/main-prod.js')

            //使用externals设置排除项
            config.set('externals',{
                vue:'Vue',
                'vue-router':'VueRouter',
                axios:'axios',
                lodash:'_',
                echarts:'echarts',
                nprogress:'NProgress',
                'vue-quill-editor':'VueQuillEditor'
            })
        })
        //开发模式
        config.when(process.env.NODE_ENV === 'development',config=>{
            config.entry('app').clear().add('./src/main-dev.js')
        })
    }
}
设置好排除之后,为了使我们可以使用vue,axios等内容,我们需要加载外部CDN的形式解决引入依赖项。
打开开发入口文件main-prod.js,删除掉默认的引入代码
import Vue from 'vue'
import App from './App.vue'
import router from './router'
// import './plugins/element.js'
//导入字体图标
import './assets/fonts/iconfont.css'
//导入全局样式
import './assets/css/global.css'
//导入第三方组件vue-table-with-tree-grid
import TreeTable from 'vue-table-with-tree-grid'
//导入进度条插件
import NProgress from 'nprogress'
//导入进度条样式
// import 'nprogress/nprogress.css'
// //导入axios
import axios from 'axios'
// //导入vue-quill-editor(富文本编辑器)
import VueQuillEditor from 'vue-quill-editor'
// //导入vue-quill-editor的样式
// import 'quill/dist/quill.core.css'
// import 'quill/dist/quill.snow.css'
// import 'quill/dist/quill.bubble.css'

axios.defaults.baseURL = 'http://127.0.0.1:8888/api/private/v1/'
//请求在到达服务器之前,先会调用use中的这个回调函数来添加请求头信息
axios.interceptors.request.use(config => {
  //当进入request拦截器,表示发送了请求,我们就开启进度条
  NProgress.start()
  //为请求头对象,添加token验证的Authorization字段
  config.headers.Authorization = window.sessionStorage.getItem("token")
  //必须返回config
  return config
})
//在response拦截器中,隐藏进度条
axios.interceptors.response.use(config =>{
  //当进入response拦截器,表示请求已经结束,我们就结束进度条
  NProgress.done()
  return config
})
Vue.prototype.$http = axios

Vue.config.productionTip = false

//全局注册组件
Vue.component('tree-table', TreeTable)
//全局注册富文本组件
Vue.use(VueQuillEditor)

//创建过滤器将秒数过滤为年月日,时分秒
Vue.filter('dateFormat',function(originVal){
  const dt = new Date(originVal)
  const y = dt.getFullYear()
  const m = (dt.getMonth()+1+'').padStart(2,'0')
  const d = (dt.getDate()+'').padStart(2,'0')

  const hh = (dt.getHours()+'').padStart(2,'0')
  const mm = (dt.getMinutes()+'').padStart(2,'0')
  const ss = (dt.getSeconds()+'').padStart(2,'0')

  return `${y}-${m}-${d} ${hh}:${mm}:${ss}`
})

new Vue({
  router,
  render: h => h(App)
}).$mount('#app')
然后打开public/index.html添加外部cdn引入代码
<!DOCTYPE html>
<html lang="en">
  <head>
    <meta charset="utf-8">
    <meta http-equiv="X-UA-Compatible" content="IE=edge">
    <meta name="viewport" content="width=device-width,initial-scale=1.0">
    <link rel="icon" href="<%= BASE_URL %>favicon.ico">
    <title>电商后台管理系统</title>

    <!-- nprogress 的样式表文件 -->
    <link rel="stylesheet" href="https://cdn.staticfile.org/nprogress/0.2.0/nprogress.min.css" />
    <!-- 富文本编辑器 的样式表文件 -->
    <link rel="stylesheet" href="https://cdn.staticfile.org/quill/1.3.4/quill.core.min.css" />
    <link rel="stylesheet" href="https://cdn.staticfile.org/quill/1.3.4/quill.snow.min.css" />
    <link rel="stylesheet" href="https://cdn.staticfile.org/quill/1.3.4/quill.bubble.min.css" />
    <!-- element-ui 的样式表文件 -->
    <link rel="stylesheet" href="https://cdn.staticfile.org/element-ui/2.8.2/theme-chalk/index.css" />

    <script src="https://cdn.staticfile.org/vue/2.5.22/vue.min.js"></script>
    <script src="https://cdn.staticfile.org/vue-router/3.0.1/vue-router.min.js"></script>
    <script src="https://cdn.staticfile.org/axios/0.18.0/axios.min.js"></script>
    <script src="https://cdn.staticfile.org/lodash.js/4.17.11/lodash.min.js"></script>
    <script src="https://cdn.staticfile.org/echarts/4.1.0/echarts.min.js"></script>
    <script src="https://cdn.staticfile.org/nprogress/0.2.0/nprogress.min.js"></script>
    <!-- 富文本编辑器的 js 文件 -->
    <script src="https://cdn.staticfile.org/quill/1.3.4/quill.min.js"></script>
    <script src="https://cdn.jsdelivr.net/npm/vue-quill-editor@3.0.4/dist/vue-quill-editor.js"></script>

    <!-- element-ui 的 js 文件 -->
    <script src="https://cdn.staticfile.org/element-ui/2.8.2/index.js"></script>

  </head>
  <body>
    <noscript>
      <strong>We're sorry but vue_shop doesn't work properly without JavaScript enabled. Please enable it to continue.</strong>
    </noscript>
    <div id="app"></div>
    <!-- built files will be auto injected -->
  </body>
</html>
8.定制首页内容
开发环境的首页和发布环境的首页展示内容的形式有所不同
如开发环境中使用的是import加载第三方包,而发布环境则是使用CDN,那么首页也需根据环境不同来进行不同的实现
我们可以通过插件的方式来定制首页内容,打开vue.config.js,编写代码如下:
module.exports = {
    chainWebpack:config=>{
        config.when(process.env.NODE_ENV === 'production',config=>{
            ......

            //使用插件
            config.plugin('html').tap(args=>{
                //添加参数isProd
                args[0].isProd = true
                return args
            })
        })

        config.when(process.env.NODE_ENV === 'development',config=>{
            config.entry('app').clear().add('./src/main-dev.js')

            //使用插件
            config.plugin('html').tap(args=>{
                //添加参数isProd
                args[0].isProd = false
                return args
            })
        })
    }
}
然后在public/index.html中使用插件判断是否为发布环境并定制首页内容
<!DOCTYPE html>
<html lang="en">
  <head>
    <meta charset="utf-8">
    <meta http-equiv="X-UA-Compatible" content="IE=edge">
    <meta name="viewport" content="width=device-width,initial-scale=1.0">
    <link rel="icon" href="<%= BASE_URL %>favicon.ico">
    <title><%= htmlWebpackPlugin.options.isProd ? '' : 'dev - ' %>电商后台管理系统</title>

    <% if(htmlWebpackPlugin.options.isProd){ %>
    <!-- nprogress 的样式表文件 -->
    <link rel="stylesheet" href="https://cdn.staticfile.org/nprogress/0.2.0/nprogress.min.css" />
    ........
    <!-- element-ui 的 js 文件 -->
    <script src="https://cdn.staticfile.org/element-ui/2.8.2/index.js"></script>
    <% } %>
  </head>
  .......
9.路由懒加载
当路由被访问时才加载对应的路由文件,就是路由懒加载。
路由懒加载实现步骤:
1.安装 @babel/plugin-syntax-dynamic-import
打开vue控制台,点击依赖->安装依赖->开发依赖->搜索@babel/plugin-syntax-dynamic-import
点击安装。
2.在babel.config.js中声明该插件,打开babel.config.js
//项目发布阶段需要用到的babel插件
const productPlugins = []

//判断是开发还是发布阶段
if(process.env.NODE_ENV === 'production'){
  //发布阶段
  productPlugins.push("transform-remove-console")
}

module.exports = {
  "presets": [
    "@vue/app"
  ],
  "plugins": [
    [
      "component",
      {
        "libraryName": "element-ui",
        "styleLibraryName": "theme-chalk"
      }
    ],
    ...productPlugins,
    //配置路由懒加载插件
    "@babel/plugin-syntax-dynamic-import"
  ]
}
3.将路由更改为按需加载的形式,打开router.js,更改引入组件代码如下:
import Vue from 'vue'
import Router from 'vue-router'
const Login = () => import(/* webpackChunkName:"login_home_welcome" */ './components/Login.vue')
// import Login from './components/Login.vue'
const Home = () => import(/* webpackChunkName:"login_home_welcome" */ './components/Home.vue')
// import Home from './components/Home.vue'
const Welcome = () => import(/* webpackChunkName:"login_home_welcome" */ './components/Welcome.vue')
// import Welcome from './components/Welcome.vue'
const Users = () => import(/* webpackChunkName:"user" */ './components/user/Users.vue')
// import Users from './components/user/Users.vue'
const Rights = () => import(/* webpackChunkName:"power" */ './components/power/Rights.vue')
// import Rights from './components/power/Rights.vue'
const Roles = () => import(/* webpackChunkName:"power" */ './components/power/Roles.vue')
// import Roles from './components/power/Roles.vue'
const Cate = () => import(/* webpackChunkName:"goods" */ './components/goods/Cate.vue')
// import Cate from './components/goods/Cate.vue'
const Params = () => import(/* webpackChunkName:"goods" */ './components/goods/Params.vue')
// import Params from './components/goods/Params.vue'
const GoodList = () => import(/* webpackChunkName:"goods" */ './components/goods/List.vue')
// import GoodList from './components/goods/List.vue'
const GoodAdd = () => import(/* webpackChunkName:"goods" */ './components/goods/Add.vue')
// import GoodAdd from './components/goods/Add.vue'
const Order = () => import(/* webpackChunkName:"order" */ './components/order/Order.vue')
// import Order from './components/order/Order.vue'
const Report = () => import(/* webpackChunkName:"report" */ './components/report/Report.vue')
// import Report from './components/report/Report.vue'
10.项目上线
A.通过node创建服务器
在vue_shop同级创建一个文件夹vue_shop_server存放node服务器
使用终端打开vue_shop_server文件夹,输入命令 npm init -y
初始化包之后,输入命令 npm i express -S
打开vue_shop目录,复制dist文件夹,粘贴到vue_shop_server中
在vue_shop_server文件夹中创建app.js文件,编写代码如下:
const express = require('express')

const app = express()

app.use(express.static('./dist'))

app.listen(8998,()=>{
    console.log("server running at http://127.0.0.1:8998")
})
然后再次在终端中输入 node app.js
B.开启gzip压缩
打开vue_shop_server文件夹的终端,输入命令:npm i compression -D
打开app.js,编写代码:
const express = require('express')

const compression = require('compression')

const app = express()

app.use(compression())
app.use(express.static('./dist'))

app.listen(8998,()=>{
    console.log("server running at http://127.0.0.1:8998")
})
C.配置https服务
配置https服务一般是后台进行处理,前端开发人员了解即可。
首先,需要申请SSL证书,进入https://freessl.cn官网
在后台导入证书,打开今天资料/素材,复制素材中的两个文件到vue_shop_server中
打开app.js文件,编写代码导入证书,并开启https服务
const express = require('express')
const compression = require('compression')
const https = require('https')
const fs = require('fs')

const app = express()
//创建配置对象设置公钥和私钥
const options = {
    cert:fs.readFileSync('./full_chain.pem'),
    key:fs.readFileSync('./private.key')
}

app.use(compression())
app.use(express.static('./dist'))

// app.listen(8998,()=>{
//     console.log("server running at http://127.0.0.1:8998")
// })

//启动https服务
https.createServer(options,app).listen(443)
注意:因为我们使用的证书有问题,所以无法正常使用https服务
D.使用pm2管理应用
打开vue_shop_server文件夹的终端,输入命令:npm i pm2 -g
使用pm2启动项目,在终端中输入命令:pm2 start app.js --name 自定义名称
查看项目列表命令:pm2 ls
重启项目:pm2 restart 自定义名称
停止项目:pm2 stop 自定义名称
删除项目:pm2 delete 自定义名称
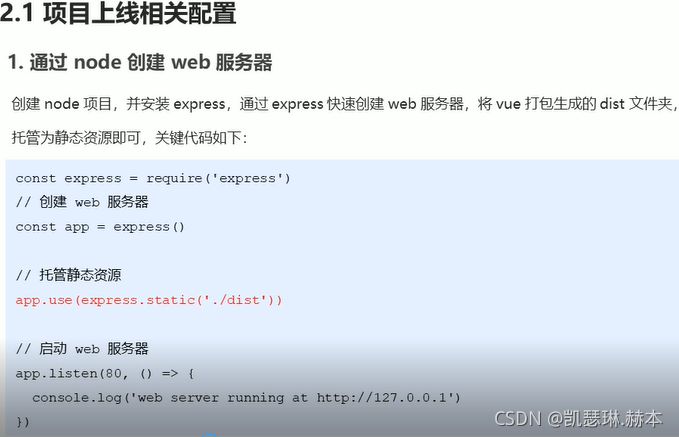
const express = require('express')
const app = express()

app.use(express.static('./dist'))

app.listen(80,() => {
    console.log('server running at http://127.0.0.2')
})
打开终端 node .\app.js


 2266
2266


 被折叠的 条评论
为什么被折叠?
被折叠的 条评论
为什么被折叠?
 到【灌水乐园】发言


