


十 SpringSecurity
git checkout -b 10.0.0_spring_security
1. 什么是 SpringSecurity
- Spring Security 是一个功能强大且高度可定制的身份验证和访问控制框架。它是保护基于 Spring 的应用程序的事实标准。
- Spring Security 是一个专注于为 Java 应用程序提供身份验证和授权的框架。像所有 Spring 项目一样,Spring Security 的真正强大之处在于它可以轻松扩展以满足自定义需求
2. 为什么使用 Spring Security
- 对身份验证和授权的全面且可扩展的支持
- 防止会话固定、点击劫持、跨站点请求伪造等攻击
- Servlet API 集成
- 与 Spring Web MVC 的可选集成
3. 怎么使用 Spring Security
3.1 Srping Security 入门
https://github.com/jianglinChen191023/security-1
分支: git checkout -b 1.0.0_start
3.1.1 下载需要的资源文件 git clone https://github.com/spring-guides/gs-securing-web.git
- 使用 Idea 克隆

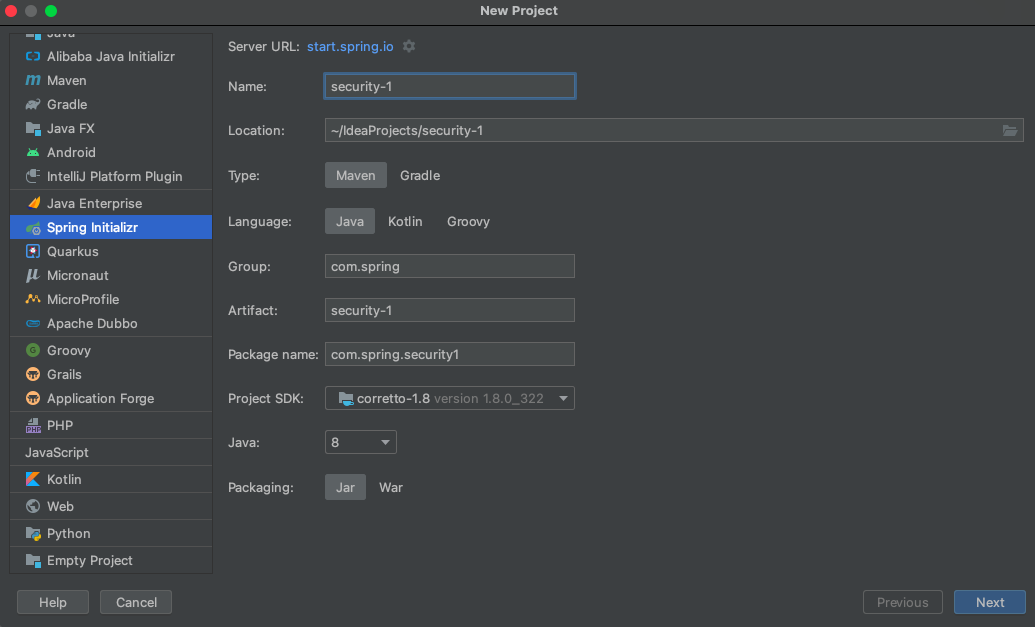
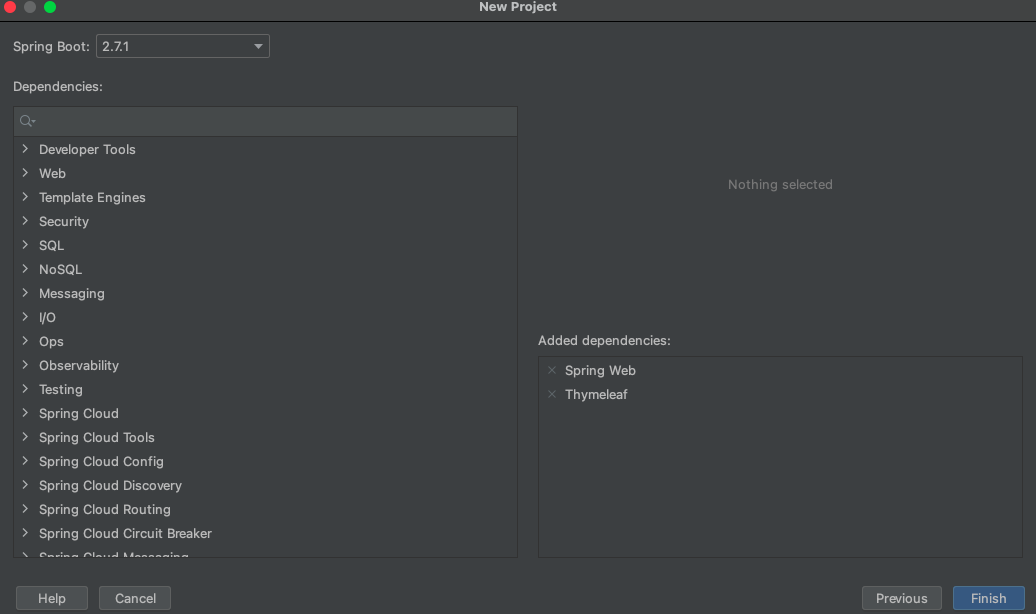
3.1.2 初始化一个项目
- Dependencies 选择
Spring Web和Thymeleaf
3.1.3 视图
以下 Thymeleaf 模板中定义(来自src/main/resources/templates/home.html):
- home.html
<!DOCTYPE html>
<html xmlns="http://www.w3.org/1999/xhtml" xmlns:th="https://www.thymeleaf.org" xmlns:sec="https://www.thymeleaf.org/thymeleaf-extras-springsecurity3">
    <head>
        <title>Spring Security Example</title>
    </head>
    <body>
        <h1>Welcome!</h1>

        <p>Click <a th:href="@{/hello}">here</a> to see a greeting.</p>
    </body>
</html>
- hello.html
<!DOCTYPE html>
<html xmlns="http://www.w3.org/1999/xhtml" xmlns:th="https://www.thymeleaf.org"
      xmlns:sec="https://www.thymeleaf.org/thymeleaf-extras-springsecurity3">
    <head>
        <title>Hello World!</title>
    </head>
    <body>
        <h1 th:inline="text">Hello [[${#httpServletRequest.remoteUser}]]!</h1>
        <form th:action="@{/logout}" method="post">
            <input type="submit" value="Sign Out"/>
        </form>
    </body>
</html>
- login.html
<!DOCTYPE html>
<html xmlns="http://www.w3.org/1999/xhtml" xmlns:th="https://www.thymeleaf.org"
      xmlns:sec="https://www.thymeleaf.org/thymeleaf-extras-springsecurity3">
    <head>
        <title>Spring Security Example </title>
    </head>
    <body>
        <div th:if="${param.error}">
            Invalid username and password.
        </div>
        <div th:if="${param.logout}">
            You have been logged out.
        </div>
        <form th:action="@{/login}" method="post">
            <div><label> User Name : <input type="text" name="username"/> </label></div>
            <div><label> Password: <input type="password" name="password"/> </label></div>
            <div><input type="submit" value="Sign In"/></div>
        </form>
    </body>
</html>
3.1.4 配置 SpringMVC 的类
package com.spring.security1;

import org.springframework.context.annotation.Configuration;
import org.springframework.web.servlet.config.annotation.ViewControllerRegistry;
import org.springframework.web.servlet.config.annotation.WebMvcConfigurer;

@Configuration
public class MvcConfig implements WebMvcConfigurer {

	public void addViewControllers(ViewControllerRegistry registry) {
		registry.addViewController("/home").setViewName("home");
		registry.addViewController("/").setViewName("home");
		registry.addViewController("/hello").setViewName("hello");
		registry.addViewController("/login").setViewName("login");
	}

}
3.1.5 设置 Spring Security
- 添加依赖
<dependency>
  <groupId>org.springframework.boot</groupId>
  <artifactId>spring-boot-starter-security</artifactId>
</dependency>
<dependency>
  <groupId>org.springframework.security</groupId>
  <artifactId>spring-security-test</artifactId>
  <scope>test</scope>
</dependency>
- 以下安全配置(来自src/main/java/com/example/securingweb/WebSecurityConfig.java)确保只有经过身份验证的用户才能看到
package com.spring.security1;

import org.springframework.context.annotation.Bean;
import org.springframework.context.annotation.Configuration;
import org.springframework.security.config.annotation.web.builders.HttpSecurity;
import org.springframework.security.config.annotation.web.configuration.EnableWebSecurity;
import org.springframework.security.config.annotation.web.configuration.WebSecurityConfigurerAdapter;
import org.springframework.security.core.userdetails.User;
import org.springframework.security.core.userdetails.UserDetails;
import org.springframework.security.core.userdetails.UserDetailsService;
import org.springframework.security.provisioning.InMemoryUserDetailsManager;

@Configuration
@EnableWebSecurity
public class WebSecurityConfig extends WebSecurityConfigurerAdapter {
    @Override
    protected void configure(HttpSecurity http) throws Exception {
        http
                // 对请求进行授权
                .authorizeRequests()
                // 无条件访问 "/" "/home"
                .antMatchers("/", "/home").permitAll()
                // 其他请求需要登录以后才可以访问
                .anyRequest().authenticated()
                .and()
                // 以表单的形式登录
                .formLogin()
                // 指定登录页面 - 无条件访问
                // /login           GET     跳转到登录页面
                // /login           POST    提交登录表单
                // /login?error     GET     登录失败
                // /login?logout    GET     退出登录-注销功能
                .loginPage("/login")
                .permitAll()
                .and()
                // /logout          POST    302 重定向到-/login?logout 注销
                .logout()
                .permitAll();
    }

    @Bean
    @Override
    public UserDetailsService userDetailsService() {
        UserDetails user =
                User.withDefaultPasswordEncoder()
                        .username("user")
                        .password("password")
                        .roles("USER")
                        .build();

        return new InMemoryUserDetailsManager(user);
    }
}
- 该类 WebSecurityConfig 被注释 @EnableWebSecurity 为启用 Spring Security 的 Web 安全支持并提供 Spring MVC 集成。它还扩展WebSecurityConfigurerAdapter和覆盖了它的几个方法来设置 Web 安全配置的一些细节。
- 该configure(HttpSecurity)方法定义了哪些 URL 路径应该被保护,哪些不应该。具体来说,/和/home路径被配置为不需要任何身份验证。所有其他路径都必须经过身份验证。
- 当用户成功登录时,他们将被重定向到先前请求的需要身份验证的页面。有一个自定义**/login页面(由 指定loginPage()****),每个人都可以查看。**
- 该userDetailsService()方法使用单个用户设置内存中的用户存储。该用户的用户名是user,密码是password,角色是USER。
3.1.6 结果
- 应用程序启动后,将浏览器指向http://localhost:8080. 您应该会看到主页,如下图所示:
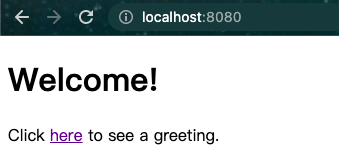
- 当您单击该链接时,它会尝试将您带到位于 的问候语页面/hello。但是,由于该页面是安全的并且您还没有登录,它会将您带到登录页面,如下图所示:
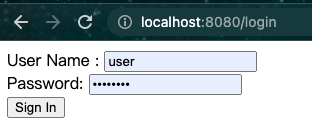
- 在登录页面,分别输入用户名和密码字段,以测试用户身份user登录password。提交登录表单后,您将通过身份验证,然后进入欢迎页面,如下图所示:
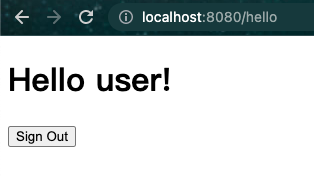
- 如果您单击
**注销**按钮,您的身份验证将被撤销,您将返回登录页面,并显示一条消息,表明您已注销。
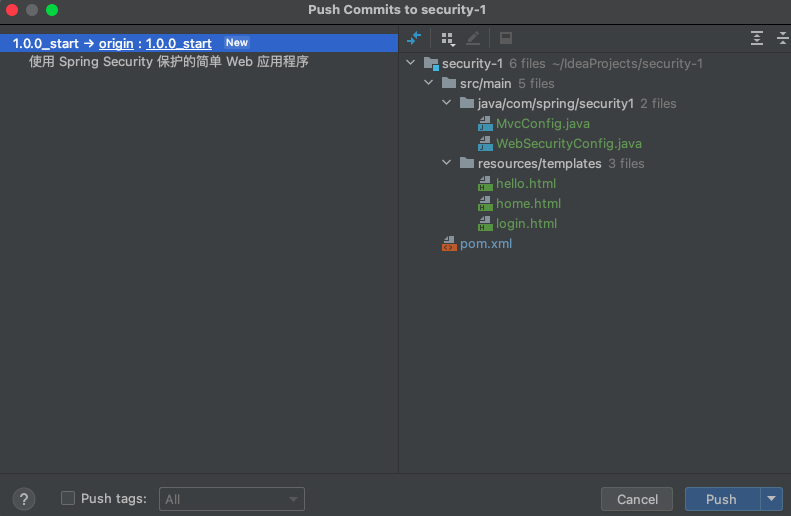
3.1.6 Push
3.2 Srping Security 的访问控制
git checkout -b 2.0.0_access_control
3.2.1 请求匹配调度和授权 - 示例
@Configuration
@Order(SecurityProperties.BASIC_AUTH_ORDER - 10)
public class ApplicationConfigurerAdapter extends WebSecurityConfigurerAdapter {
  @Override
  protected void configure(HttpSecurity http) throws Exception {
    http.antMatcher("/match1/**")
      .authorizeRequests()
        .antMatchers("/match1/user").hasRole("USER")
        .antMatchers("/match1/spam").hasRole("SPAM")
        .anyRequest().isAuthenticated();
  }
}
3.2.2 方法安全 - 示例
- 顶层配置注解开启
@SpringBootApplication
@EnableGlobalMethodSecurity(securedEnabled = true)
public class SampleSecureApplication {
}
- 使用
@Secured("ROLE_USER")
@Service
public class MyService {

  @Secured("ROLE_USER")
  public String secure() {
    return "Hello Security";
  }

}
- 此示例是具有安全方法的服务。如果 Spring 创建了@Bean这种类型的 a,它会被代理,调用者必须在方法实际执行之前通过安全拦截器。如果访问被拒绝,调用者会得到一个
AccessDeniedException而不是实际的方法结果。
3.2.3 授权 HTTP 请求
3.2.3.1 题目: /helllo 路径要求拥有 USER角色, /helllo_2 路径要求拥有 ADMIN角色
- hello_2.html
<!DOCTYPE html>
<html xmlns="http://www.w3.org/1999/xhtml" xmlns:th="https://www.thymeleaf.org"
      xmlns:sec="https://www.thymeleaf.org/thymeleaf-extras-springsecurity3">
    <head>
        <title>Hello World!</title>
    </head>
    <body>
        <h1 th:inline="text"><Hello_2></Hello_2> [[${#httpServletRequest.remoteUser}]]!</h1>
        <form th:action="@{/logout}" method="post">
            <input type="submit" value="Sign Out"/>
        </form>
    </body>
</html>
- MvcConfig.java
package com.spring.security1;

import org.springframework.context.annotation.Configuration;
import org.springframework.web.servlet.config.annotation.ViewControllerRegistry;
import org.springframework.web.servlet.config.annotation.WebMvcConfigurer;

@Configuration
public class MvcConfig implements WebMvcConfigurer {

    @Override
    public void addViewControllers(ViewControllerRegistry registry) {
        registry.addViewController("/home").setViewName("home");
        registry.addViewController("/").setViewName("home");
        registry.addViewController("/hello").setViewName("hello");
        registry.addViewController("/hello_2").setViewName("hello_2");
        registry.addViewController("/login").setViewName("login");
    }

}
- WebSecurityConfig.java
package com.spring.security1;

import org.springframework.context.annotation.Bean;
import org.springframework.context.annotation.Configuration;
import org.springframework.security.config.annotation.web.builders.HttpSecurity;
import org.springframework.security.config.annotation.web.configuration.EnableWebSecurity;
import org.springframework.security.config.annotation.web.configuration.WebSecurityConfigurerAdapter;
import org.springframework.security.core.userdetails.User;
import org.springframework.security.core.userdetails.UserDetails;
import org.springframework.security.core.userdetails.UserDetailsService;
import org.springframework.security.provisioning.InMemoryUserDetailsManager;

@Configuration
@EnableWebSecurity
public class WebSecurityConfig extends WebSecurityConfigurerAdapter {
    @Override
    protected void configure(HttpSecurity http) throws Exception {
        http
                // 对请求进行授权
                .authorizeRequests(authorize -> authorize
                        // “/hello/” URL 将被限制为具有“ROLE_USER”角色的用户。您会注意到,由于我们正在调用该hasRole方法,因此我们不需要指定“ROLE_”前缀。
                        .antMatchers("/hello").hasRole("USER")
                        .antMatchers("/hello_2").hasRole("ADMIN")
                        // 无条件访问 "/" "/home"
                        .antMatchers("/", "/home").permitAll()
                        // 其他请求需要登录以后才可以访问
                        .anyRequest().authenticated()
                )
                // 以表单的形式登录
                .formLogin(form -> form
                        // 指定登录页面 - 无条件访问
                        // /login           GET     跳转到登录页面
                        // /login           POST    提交登录表单
                        // /login?error     GET     登录失败
                        // /login?logout    GET     退出登录-注销功能
                        .loginPage("/login")
                        .permitAll()
                        .defaultSuccessUrl("/home")
                )
                // /logout          POST    302 重定向到-/login?logout 注销
                .logout();
    }

    @Bean
    @Override
    public UserDetailsService userDetailsService() {
        User.UserBuilder users = User.withDefaultPasswordEncoder();
        UserDetails user = users
                .username("user")
                .password("password")
                .roles("USER")
                .build();
        UserDetails admin = users
                .username("admin")
                .password("password")
                .roles("ADMIN")
                .build();

        return new InMemoryUserDetailsManager(user, admin);
    }

}
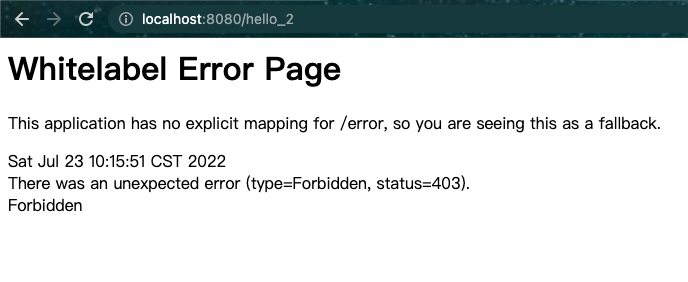
- 无权限会跳转到 403 页面
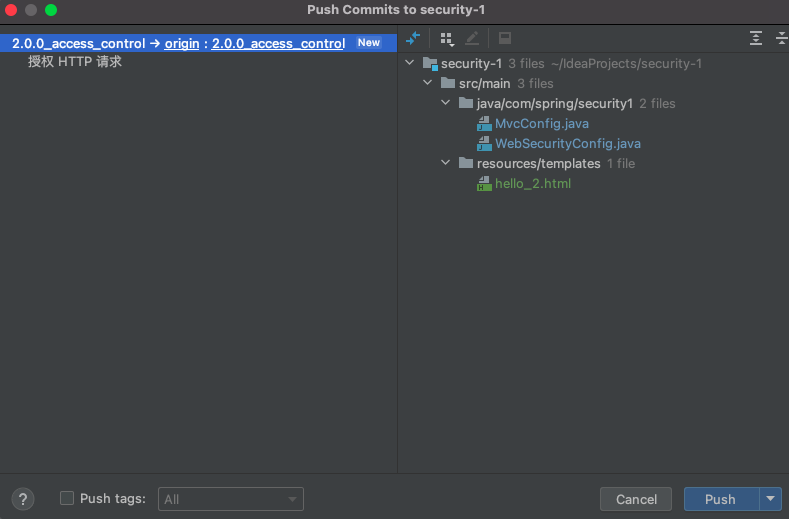
3.2.4 Push
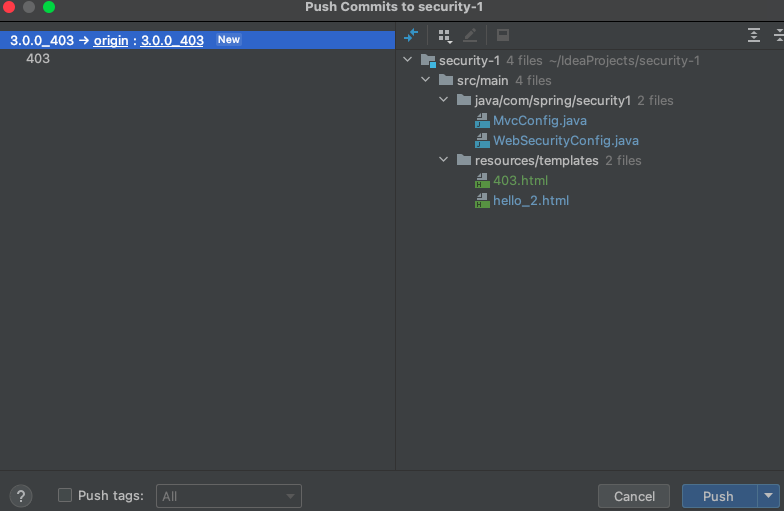
3.3 无权限403-自定义403页面
git checkout -b 3.0.0_403
3.3.1 403 页面
<!DOCTYPE html>
<html xmlns="http://www.w3.org/1999/xhtml" xmlns:th="https://www.thymeleaf.org"
      xmlns:sec="https://www.thymeleaf.org/thymeleaf-extras-springsecurity3">
    <head>
        <title>403</title>
    </head>
    <body>
        <h1 th:inline="text">403 [[${#request.getAttribute('message')}]]</h1>
    </body>
</html>
3.3.2 403 跳转
package com.spring.security1;

import org.springframework.context.annotation.Configuration;
import org.springframework.web.servlet.config.annotation.ViewControllerRegistry;
import org.springframework.web.servlet.config.annotation.WebMvcConfigurer;

@Configuration
public class MvcConfig implements WebMvcConfigurer {

    @Override
    public void addViewControllers(ViewControllerRegistry registry) {
        registry.addViewController("/home").setViewName("home");
        registry.addViewController("/").setViewName("home");
        registry.addViewController("/hello").setViewName("hello");
        registry.addViewController("/hello_2").setViewName("hello_2");
        registry.addViewController("/403").setViewName("403");
        registry.addViewController("/login").setViewName("login");
    }

}
3.3.3 配置
package com.spring.security1;

import org.springframework.context.annotation.Bean;
import org.springframework.context.annotation.Configuration;
import org.springframework.security.config.annotation.web.builders.HttpSecurity;
import org.springframework.security.config.annotation.web.configuration.EnableWebSecurity;
import org.springframework.security.config.annotation.web.configuration.WebSecurityConfigurerAdapter;
import org.springframework.security.core.userdetails.User;
import org.springframework.security.core.userdetails.UserDetails;
import org.springframework.security.core.userdetails.UserDetailsService;
import org.springframework.security.provisioning.InMemoryUserDetailsManager;

@Configuration
@EnableWebSecurity
public class WebSecurityConfig extends WebSecurityConfigurerAdapter {
    @Override
    protected void configure(HttpSecurity http) throws Exception {
        http
                // 对请求进行授权
                .authorizeRequests(authorize -> authorize
                        // “/hello/” URL 将被限制为具有“ROLE_USER”角色的用户。您会注意到,由于我们正在调用该hasRole方法,因此我们不需要指定“ROLE_”前缀。
                        .antMatchers("/hello").hasRole("USER")
                        .antMatchers("/hello_2").hasRole("ADMIN")
                        // 无条件访问 "/" "/home"
                        .antMatchers("/", "/home").permitAll()
                        // 其他请求需要登录以后才可以访问
                        .anyRequest().authenticated()
                )
                // 以表单的形式登录
                .formLogin(form -> form
                        // 指定登录页面 - 无条件访问
                        // /login           GET     跳转到登录页面
                        // /login           POST    提交登录表单
                        // /login?error     GET     登录失败
                        // /login?logout    GET     退出登录-注销功能
                        .loginPage("/login")
                        .permitAll()
                        .defaultSuccessUrl("/home")
                )
                // /logout          POST    302 重定向到-/login?logout 注销
                .logout()
                .and()
//                .exceptionHandling(handling -> handling
//                                .accessDeniedPage("/403"));
                .exceptionHandling(handling -> handling
                        .accessDeniedHandler((httpServletRequest, httpServletResponse, e) -> {
//                            httpServletResponse.setStatus(HttpServletResponse.SC_FORBIDDEN);
//                            httpServletRequest.setAttribute(WebAttributes.ACCESS_DENIED_403, e);
                            httpServletRequest.setAttribute("message", "抱歉! 您无法访问这个资源!");
                            httpServletRequest.getRequestDispatcher("/403").forward(httpServletRequest, httpServletResponse);
                        }));
    }

    @Bean
    @Override
    public UserDetailsService userDetailsService() {
        User.UserBuilder users = User.withDefaultPasswordEncoder();
        UserDetails user = users
                .username("user")
                .password("password")
                .roles("USER")
                .build();
        UserDetails admin = users
                .username("admin")
                .password("password")
                .roles("ADMIN")
                .build();

        return new InMemoryUserDetailsManager(user, admin);
    }

}
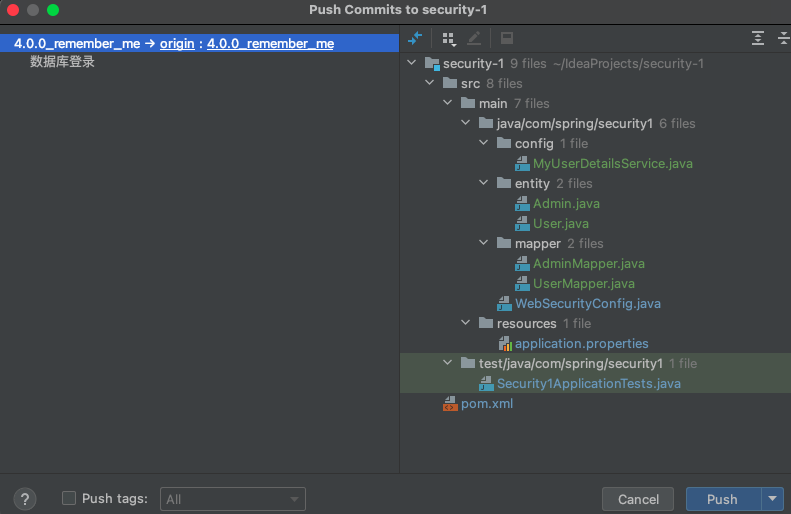
3.4 记住我
git checkout -b 4.0.0_remember_me
3.4.1 内存版
程序重启需要重新登录
- 配置
package com.spring.security1;

import org.springframework.context.annotation.Bean;
import org.springframework.context.annotation.Configuration;
import org.springframework.security.config.annotation.web.builders.HttpSecurity;
import org.springframework.security.config.annotation.web.configuration.EnableWebSecurity;
import org.springframework.security.config.annotation.web.configuration.WebSecurityConfigurerAdapter;
import org.springframework.security.core.userdetails.User;
import org.springframework.security.core.userdetails.UserDetails;
import org.springframework.security.core.userdetails.UserDetailsService;
import org.springframework.security.provisioning.InMemoryUserDetailsManager;

@Configuration
@EnableWebSecurity
public class WebSecurityConfig extends WebSecurityConfigurerAdapter {
    @Override
    protected void configure(HttpSecurity http) throws Exception {
        http
                // 对请求进行授权
                .authorizeRequests(authorize -> authorize
                        // “/hello/” URL 将被限制为具有“ROLE_USER”角色的用户。您会注意到,由于我们正在调用该hasRole方法,因此我们不需要指定“ROLE_”前缀。
                        .antMatchers("/hello").hasRole("USER")
                        .antMatchers("/hello_2").hasRole("ADMIN")
                        // 无条件访问 "/" "/home"
                        .antMatchers("/", "/home").permitAll()
                        // 其他请求需要登录以后才可以访问
                        .anyRequest().authenticated()
                )
                // 以表单的形式登录
                .formLogin(form -> form
                        // 指定登录页面 - 无条件访问
                        // /login           GET     跳转到登录页面
                        // /login           POST    提交登录表单
                        // /login?error     GET     登录失败
                        // /login?logout    GET     退出登录-注销功能
                        .loginPage("/login")
                        .permitAll()
                        .defaultSuccessUrl("/home")
                )
                // /logout          POST    302 重定向到-/login?logout 注销
                .logout()
                .and()
                /* 403 页面 */
//                .exceptionHandling(handling -> handling
//                                .accessDeniedPage("/403"));
                .exceptionHandling()
                .accessDeniedHandler((httpServletRequest, httpServletResponse, e) -> {
//                            httpServletResponse.setStatus(HttpServletResponse.SC_FORBIDDEN);
//                            httpServletRequest.setAttribute(WebAttributes.ACCESS_DENIED_403, e);
                    httpServletRequest.setAttribute("message", "抱歉! 您无法访问这个资源!");
                    httpServletRequest.getRequestDispatcher("/403").forward(httpServletRequest, httpServletResponse);
                })
                .and()
                /* 记住我 */
                .rememberMe();
//;
    }

    @Bean
    @Override
    public UserDetailsService userDetailsService() {
        User.UserBuilder users = User.withDefaultPasswordEncoder();
        UserDetails user = users
                .username("user")
                .password("password")
                .roles("USER")
                .build();
        UserDetails admin = users
                .username("admin")
                .password("password")
                .roles("ADMIN")
                .build();

        return new InMemoryUserDetailsManager(user, admin);
    }

}
- 表单
<!DOCTYPE html>
<html xmlns="http://www.w3.org/1999/xhtml" xmlns:th="https://www.thymeleaf.org"
      xmlns:sec="https://www.thymeleaf.org/thymeleaf-extras-springsecurity3">
    <head>
        <title>Spring Security Example </title>
    </head>
    <body>
        <div th:if="${param.error}">
            Invalid username and password.
        </div>
        <div th:if="${param.logout}">
            You have been logged out.
        </div>
        <form th:action="@{/login}" method="post">
            <div><label> User Name : <input type="text" name="username"/> </label></div>
            <div><label> Password: <input type="password" name="password"/> </label></div>
            <div><label> <input type="checkbox" name="remember-me" title="记住我"/> 记住我 </label></div>
            <div><input type="submit" value="Sign In"/></div>
        </form>
    </body>
</html>
3.4.2 数据库版 - 配置数据库
3.4.2.1 相关依赖
<dependency>
			<groupId>com.alibaba</groupId>
			<artifactId>druid-spring-boot-starter</artifactId>
			<version>1.1.17</version>
		</dependency>

		<dependency>
			<groupId>org.mybatis.spring.boot</groupId>
			<artifactId>mybatis-spring-boot-starter</artifactId>
			<version>2.1.1</version>
		</dependency>

		<!-- https://mvnrepository.com/artifact/mysql/mysql-connector-java -->
		<dependency>
			<groupId>mysql</groupId>
			<artifactId>mysql-connector-java</artifactId>
			<version>5.1.47</version>
		</dependency>

		<!-- https://mvnrepository.com/artifact/org.springframework/spring-orm -->
		<dependency>
			<groupId>org.springframework</groupId>
			<artifactId>spring-orm</artifactId>
			<version>4.3.20.RELEASE</version>
		</dependency>
3.4.2.2 配置数据库
# 配置数据库连接池
spring.datasource.driver-class-name=com.mysql.jdbc.Driver
spring.datasource.url=jdbc:mysql://175.178.174.83:3306/security?useUnicode=true&characterEncoding=UTF-8&serverTimezone=UTC&useSSL=false
spring.datasource.username=root
# 生成的加密后的密码
spring.datasource.password=lEdXTUweRH6bqzFKEy07vHkzKrziXqkHBQNwjK6FohatpabGU+2uxc73RZftE1vD3F5GDPZDhNg6vebNTNAOcA==
# 生成的公钥
public-key=MFwwDQYJKoZIhvcNAQEBBQADSwAwSAJBAMNXQuj4GCqDt+t3ex6W9u5hf50/o/JZKS6C0lKlzzUXvWHqAhJxqWoa3C2+Jp+CUtJhugMtTpeLMf5+Acokg8ECAwEAAQ==
# 配置 connection-properties,启用加密,配置公钥。
spring.datasource.druid.connection-properties=config.decrypt=true;config.decrypt.key=${public-key}
# 启用ConfigFilter
spring.datasource.druid.filter.config.enabled=true
此处为语雀加密文本卡片,点击链接查看:https://www.yuque.com/lingchen-bf1rc/hoahc6/dr7gqc#W5fIZ
3.4.2.3 mapper
package com.spring.security1.mapper;

import com.spring.security1.entity.User;
import org.apache.ibatis.annotations.Mapper;
import org.apache.ibatis.annotations.Select;

@Mapper
public interface UserMapper {

    /**
     * 根据用户名查询用户的信息
     *
     * @param username
     * @return
     */
    @Select(value = "SELECT * FROM user WHERE username = #{username}")
    User getUserByUsername(String username);

}
3.4.2.4 entity
package com.spring.security1.entity;

public class User {

    private Integer id;
    private String username;
    private String password;

    public User() {

    }

    public User(Integer id, String username, String password) {
        this.id = id;
        this.username = username;
        this.password = password;
    }

    public Integer getId() {
        return id;
    }

    public void setId(Integer id) {
        this.id = id;
    }

    public String getUsername() {
        return username;
    }

    public void setUsername(String username) {
        this.username = username;
    }

    public String getPassword() {
        return password;
    }

    public void setPassword(String password) {
        this.password = password;
    }

    @Override
    public String toString() {
        return "User{" +
                "id=" + id +
                ", username='" + username + '\'' +
                ", password='" + password + '\'' +
                '}';
    }

}
3.4.2.5 测试
package com.spring.security1;

import com.spring.security1.entity.User;
import com.spring.security1.mapper.UserMapper;
import org.junit.jupiter.api.Test;
import org.springframework.beans.factory.annotation.Autowired;
import org.springframework.boot.test.context.SpringBootTest;

@SpringBootTest
class Security1ApplicationTests {

    @Autowired
    UserMapper userMapper;

    @Test
    void contextLoads() {
        User user = userMapper.getUserByUsername("123");
        System.out.println(user.getId());
    }

}
3.4.3 数据库版 - 启用令牌仓库功能
3.4.3.1 建表 - 类 JdbcTokenRepositoryImpl
- SQL
create table persistent_logins
(username varchar(64) not null,
 series varchar(64) primary key,
 token varchar(64) not null,
 last_used timestamp not null
)
3.4.3.2 配置
package com.spring.security1;

import org.springframework.beans.factory.annotation.Autowired;
import org.springframework.context.annotation.Bean;
import org.springframework.context.annotation.Configuration;
import org.springframework.security.config.annotation.web.builders.HttpSecurity;
import org.springframework.security.config.annotation.web.configuration.EnableWebSecurity;
import org.springframework.security.config.annotation.web.configuration.WebSecurityConfigurerAdapter;
import org.springframework.security.core.userdetails.User;
import org.springframework.security.core.userdetails.UserDetails;
import org.springframework.security.core.userdetails.UserDetailsService;
import org.springframework.security.provisioning.InMemoryUserDetailsManager;
import org.springframework.security.web.authentication.rememberme.JdbcTokenRepositoryImpl;

import javax.sql.DataSource;

@Configuration
@EnableWebSecurity
public class WebSecurityConfig extends WebSecurityConfigurerAdapter {

    @Autowired
    DataSource dataSource;

    @Override
    protected void configure(HttpSecurity http) throws Exception {
        JdbcTokenRepositoryImpl jdbcTokenRepository = new JdbcTokenRepositoryImpl();
        jdbcTokenRepository.setDataSource(dataSource);

        http
                // 对请求进行授权
                .authorizeRequests(authorize -> authorize
                        // “/hello/” URL 将被限制为具有“ROLE_USER”角色的用户。您会注意到,由于我们正在调用该hasRole方法,因此我们不需要指定“ROLE_”前缀。
                        .antMatchers("/hello").hasRole("USER")
                        .antMatchers("/hello_2").hasRole("ADMIN")
                        // 无条件访问 "/" "/home"
                        .antMatchers("/", "/home").permitAll()
                        // 其他请求需要登录以后才可以访问
                        .anyRequest().authenticated()
                )
                // 以表单的形式登录
                .formLogin(form -> form
                        // 指定登录页面 - 无条件访问
                        // /login           GET     跳转到登录页面
                        // /login           POST    提交登录表单
                        // /login?error     GET     登录失败
                        // /login?logout    GET     退出登录-注销功能
                        .loginPage("/login")
                        .permitAll()
                        .defaultSuccessUrl("/home")
                )
                // /logout          POST    302 重定向到-/login?logout 注销
                .logout()
                .and()
                /* 403 页面 */
//                .exceptionHandling(handling -> handling
//                                .accessDeniedPage("/403"));
                .exceptionHandling()
                .accessDeniedHandler((httpServletRequest, httpServletResponse, e) -> {
//                            httpServletResponse.setStatus(HttpServletResponse.SC_FORBIDDEN);
//                            httpServletRequest.setAttribute(WebAttributes.ACCESS_DENIED_403, e);
                    httpServletRequest.setAttribute("message", "抱歉! 您无法访问这个资源!");
                    httpServletRequest.getRequestDispatcher("/403").forward(httpServletRequest, httpServletResponse);
                })
                .and()
                /* 记住我 */
                .rememberMe(rememberMeConfigurer -> rememberMeConfigurer
                        .tokenRepository(jdbcTokenRepository));
    }

    @Bean
    @Override
    public UserDetailsService userDetailsService() {
        User.UserBuilder users = User.withDefaultPasswordEncoder();
        UserDetails user = users
                .username("user")
                .password("password")
                .roles("USER")
                .build();
        UserDetails admin = users
                .username("admin")
                .password("password")
                .roles("ADMIN")
                .build();

        return new InMemoryUserDetailsManager(user, admin);
    }

}
3.4.3.3 登录 - 发现数据库中多了个数据
- 重启程序还是登录状态

3.4.3.4 注销 - 发现数据库中存储的数据记录被删除了
3.5 数据库登录认证
3.5.1 了解 Srping Security 默认实现
- 默认使用
JdbcDaoImpl类的方法查询数据库
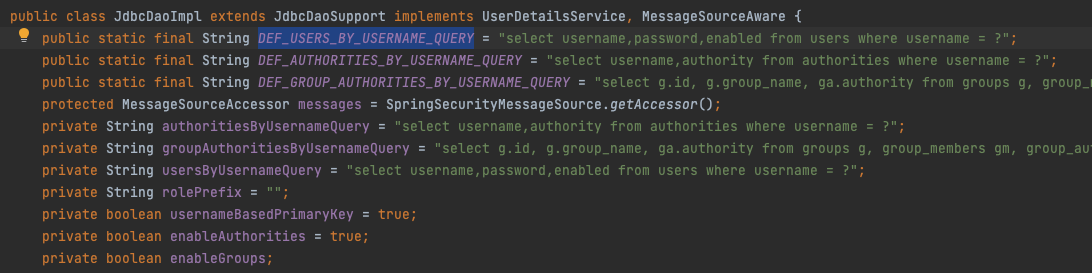
- Spring Security 的默认实现已经将 SQL 语句硬编码在 JdbcDaoImpl 类中, 这种情况下, 我们有下面三种选择
- 按照 JdbcDaoImpl 类中 SQL 语句设计表结构
- 修改 JdbcDaoImpl 类的源码
- 不使用
**JdbcAuthentication**()
3.5.2 自定义数据库查询方式
builder.userDetailsService(userDetailsService)- 其中
userDetailsService需要自定义实现UserDetailsService接口的类并自动装配
package com.spring.security1.config;

import com.spring.security1.entity.Admin;
import com.spring.security1.mapper.AdminMapper;
import org.springframework.beans.factory.annotation.Autowired;
import org.springframework.security.core.GrantedAuthority;
import org.springframework.security.core.authority.SimpleGrantedAuthority;
import org.springframework.security.core.userdetails.User;
import org.springframework.security.core.userdetails.UserDetails;
import org.springframework.security.core.userdetails.UserDetailsService;
import org.springframework.security.core.userdetails.UsernameNotFoundException;
import org.springframework.stereotype.Component;

import java.util.ArrayList;
import java.util.List;

@Component
public class MyUserDetailsService implements UserDetailsService {

    @Autowired
    AdminMapper adminMapper;

    /**
     * 根据表单提交的用户名查询 User 对象, 并装配角色、权限等信息
     *
     * @param username 表单提交的用户名
     * @return
     * @throws UsernameNotFoundException
     */
    @Override
    public UserDetails loadUserByUsername(String username) throws UsernameNotFoundException {
        Admin admin = adminMapper.getAdminByLoginAcct(username);
        if (null == admin) {
            return null;
        }

        // 设置权限
        List<GrantedAuthority> authorityList = new ArrayList<>();
        authorityList.add(new SimpleGrantedAuthority("ROLE_ADMIN"));
        authorityList.add(new SimpleGrantedAuthority("UPDATE"));

        String password = admin.getUserPswd();

        // AuthorityUtils权限信息
        return new User(username, "{noop}" + password, authorityList);
    }
}
3.5.2.1 Admin
- SQL
/*
Navicat Premium Data Transfer

Source Server         : 腾讯云
Source Server Type    : MySQL
Source Server Version : 50738
Source Host           : 175.178.174.83:3306
Source Schema         : project_crowd

Target Server Type    : MySQL
Target Server Version : 50738
File Encoding         : 65001

Date: 02/08/2022 11:11:47
*/

SET NAMES utf8mb4;
SET FOREIGN_KEY_CHECKS = 0;

-- ----------------------------
-- Table structure for t_admin
-- ----------------------------
DROP TABLE IF EXISTS `t_admin`;
CREATE TABLE `t_admin` (
  `id` int(11) NOT NULL AUTO_INCREMENT,
  `login_acct` varchar(255) NOT NULL,
  `user_pswd` char(32) NOT NULL,
  `user_name` varchar(255) NOT NULL,
  `email` varchar(255) NOT NULL,
  `create_time` char(19) DEFAULT NULL,
  PRIMARY KEY (`id`)
) ENGINE=InnoDB AUTO_INCREMENT=3 DEFAULT CHARSET=utf8;

SET FOREIGN_KEY_CHECKS = 1;
- 实体类
package com.spring.security1.entity;

public class Admin {
    private Integer id;

    private String loginAcct;

    private String userPswd;

    private String userName;

    private String email;

    private String createTime;

    public Admin() {
    }

    public Admin(Integer id, String loginAcct, String userPswd, String userName, String email, String createTime) {
        this.id = id;
        this.loginAcct = loginAcct;
        this.userPswd = userPswd;
        this.userName = userName;
        this.email = email;
        this.createTime = createTime;
    }

    public Integer getId() {
        return id;
    }

    public void setId(Integer id) {
        this.id = id;
    }

    public String getLoginAcct() {
        return loginAcct;
    }

    public void setLoginAcct(String loginAcct) {
        this.loginAcct = loginAcct == null ? null : loginAcct.trim();
    }

    public String getUserPswd() {
        return userPswd;
    }

    public void setUserPswd(String userPswd) {
        this.userPswd = userPswd == null ? null : userPswd.trim();
    }

    public String getUserName() {
        return userName;
    }

    public void setUserName(String userName) {
        this.userName = userName == null ? null : userName.trim();
    }

    public String getEmail() {
        return email;
    }

    public void setEmail(String email) {
        this.email = email == null ? null : email.trim();
    }

    public String getCreateTime() {
        return createTime;
    }

    public void setCreateTime(String createTime) {
        this.createTime = createTime == null ? null : createTime.trim();
    }

    @Override
    public String toString() {
        return "Admin{" +
                "id=" + id +
                ", loginAcct='" + loginAcct + '\'' +
                ", userPswd='" + userPswd + '\'' +
                ", userName='" + userName + '\'' +
                ", email='" + email + '\'' +
                ", createTime='" + createTime + '\'' +
                '}';
    }
}
- Mapper
package com.spring.security1.mapper;

import com.spring.security1.entity.Admin;
import org.apache.ibatis.annotations.Mapper;
import org.apache.ibatis.annotations.Select;

@Mapper
public interface AdminMapper {

    /**
     * 根据用户名查询用户信息
     *
     * @param loginAcct 用户名
     * @return
     */
    @Select("SELECT id, login_acct as loginAcct, user_pswd as userPswd, user_name as userName, email, create_time as createTime FROM t_admin WHERE login_acct = #{loginAcct}")
    Admin getAdminByLoginAcct(String loginAcct);

}
3.5.3 密码加密
3.5.3.1 WebSecurityConfig
package com.spring.security1;

import com.spring.security1.config.MyUserDetailsService;
import org.springframework.beans.factory.annotation.Autowired;
import org.springframework.context.annotation.Bean;
import org.springframework.context.annotation.Configuration;
import org.springframework.security.config.annotation.web.builders.HttpSecurity;
import org.springframework.security.config.annotation.web.configuration.EnableWebSecurity;
import org.springframework.security.config.annotation.web.configuration.WebSecurityConfigurerAdapter;
import org.springframework.security.crypto.bcrypt.BCryptPasswordEncoder;
import org.springframework.security.crypto.password.PasswordEncoder;
import org.springframework.security.web.authentication.rememberme.JdbcTokenRepositoryImpl;

import javax.sql.DataSource;

@Configuration
@EnableWebSecurity
public class WebSecurityConfig extends WebSecurityConfigurerAdapter {

    @Autowired
    DataSource dataSource;

    @Autowired
    MyUserDetailsService myUserDetailsService;

    /**
    * 建立BCryptPasswordEncoder的bean
    * <p>
    * 获取方法:
    *
    * @return
    * @Autowired private PasswordEncoder passwordEncoder;
    * </p>
    */
    @Bean
    public PasswordEncoder create() {
        return new BCryptPasswordEncoder();
    }

    @Override
    protected void configure(HttpSecurity http) throws Exception {
        JdbcTokenRepositoryImpl jdbcTokenRepository = new JdbcTokenRepositoryImpl();
        jdbcTokenRepository.setDataSource(dataSource);

        http
            // 对请求进行授权
            .authorizeRequests(authorize -> authorize
                               // “/hello/” URL 将被限制为具有“ROLE_USER”角色的用户。您会注意到,由于我们正在调用该hasRole方法,因此我们不需要指定“ROLE_”前缀。
                               .antMatchers("/hello").hasRole("USER")
                               .antMatchers("/hello_2").hasRole("ADMIN")
                               // 无条件访问 "/" "/home"
                               .antMatchers("/", "/home").permitAll()
                               // 其他请求需要登录以后才可以访问
                               .anyRequest().authenticated()
                              )
            // 以表单的形式登录
            .formLogin(form -> form
                       // 指定登录页面 - 无条件访问
                       // /login           GET     跳转到登录页面
                       // /login           POST    提交登录表单
                       // /login?error     GET     登录失败
                       // /login?logout    GET     退出登录-注销功能
                       .loginPage("/login")
                       .permitAll()
                       .defaultSuccessUrl("/home")
                      )
            // /logout          POST    302 重定向到-/login?logout 注销
            .logout()
            .and()
            /* 403 页面 */
            //                .exceptionHandling(handling -> handling
            //                                .accessDeniedPage("/403"));
            .exceptionHandling()
            .accessDeniedHandler((httpServletRequest, httpServletResponse, e) -> {
                //                            httpServletResponse.setStatus(HttpServletResponse.SC_FORBIDDEN);
                //                            httpServletRequest.setAttribute(WebAttributes.ACCESS_DENIED_403, e);
                httpServletRequest.setAttribute("message", "抱歉! 您无法访问这个资源!");
                httpServletRequest.getRequestDispatcher("/403").forward(httpServletRequest, httpServletResponse);
            })
            .and()
            /* 记住我 */
            .rememberMe(rememberMeConfigurer -> rememberMeConfigurer
                        .tokenRepository(jdbcTokenRepository));
    }

    //    @Bean
    //    @Override
    //    public UserDetailsService userDetailsService() {
    //        User.UserBuilder users = User.withDefaultPasswordEncoder();
    //        UserDetails user = users
    //                .username("user")
    //                .password("password")
    //                .roles("USER")
    //                .build();
    //        UserDetails admin = users
    //                .username("admin")
    //                .password("password")
    //                .roles("ADMIN")
    //                .build();
    //
    //        return new InMemoryUserDetailsManager(user, admin);
    //    }

}
3.5.3.2 MyUserDetailsService
package com.spring.security1.config;

import com.spring.security1.entity.Admin;
import com.spring.security1.mapper.AdminMapper;
import org.springframework.beans.factory.annotation.Autowired;
import org.springframework.security.core.GrantedAuthority;
import org.springframework.security.core.authority.SimpleGrantedAuthority;
import org.springframework.security.core.userdetails.User;
import org.springframework.security.core.userdetails.UserDetails;
import org.springframework.security.core.userdetails.UserDetailsService;
import org.springframework.security.core.userdetails.UsernameNotFoundException;
import org.springframework.security.crypto.password.PasswordEncoder;
import org.springframework.stereotype.Component;

import java.util.ArrayList;
import java.util.List;

@Component
public class MyUserDetailsService implements UserDetailsService {

    @Autowired
    AdminMapper adminMapper;

    @Autowired
    PasswordEncoder passwordEncoder;

    /**
     * 根据表单提交的用户名查询 User 对象, 并装配角色、权限等信息
     *
     * @param username 表单提交的用户名
     * @return
     * @throws UsernameNotFoundException
     */
    @Override
    public UserDetails loadUserByUsername(String username) throws UsernameNotFoundException {
        Admin admin = adminMapper.getAdminByLoginAcct(username);
        if (null == admin) {
            return null;
        }

        // 设置权限
        List<GrantedAuthority> authorityList = new ArrayList<>();
        authorityList.add(new SimpleGrantedAuthority("ROLE_ADMIN"));
        authorityList.add(new SimpleGrantedAuthority("UPDATE"));

        String password = admin.getUserPswd();

        // AuthorityUtils权限信息
        return new User(username, password, authorityList);
    }
}


 2342
2342


 被折叠的 条评论
为什么被折叠?
被折叠的 条评论
为什么被折叠?
 到【灌水乐园】发言


