


Spring Boot整合 druid、Mybatis-plus
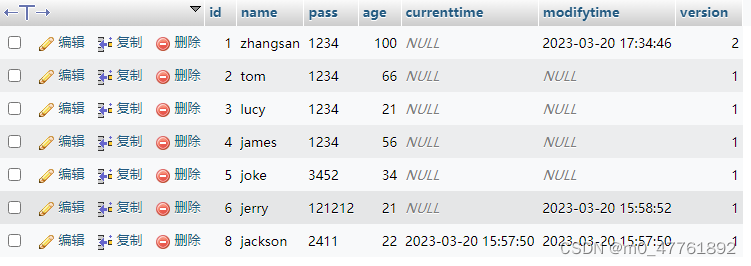
一、数据库test中数据表stu的内容
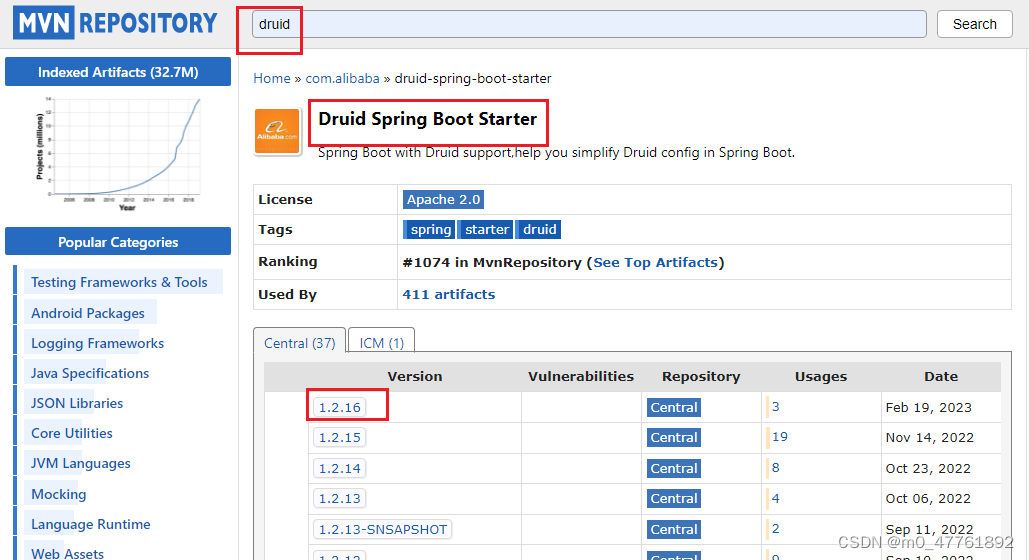
二、在maven官网查找相关依赖 ,maven地址:Maven官网
- 搜索druid和,mybatis-plus,由于是 springboot 和 druid整合,所以选择第二个Druid Spring Boot Starter ,点击进入查看各种版本。
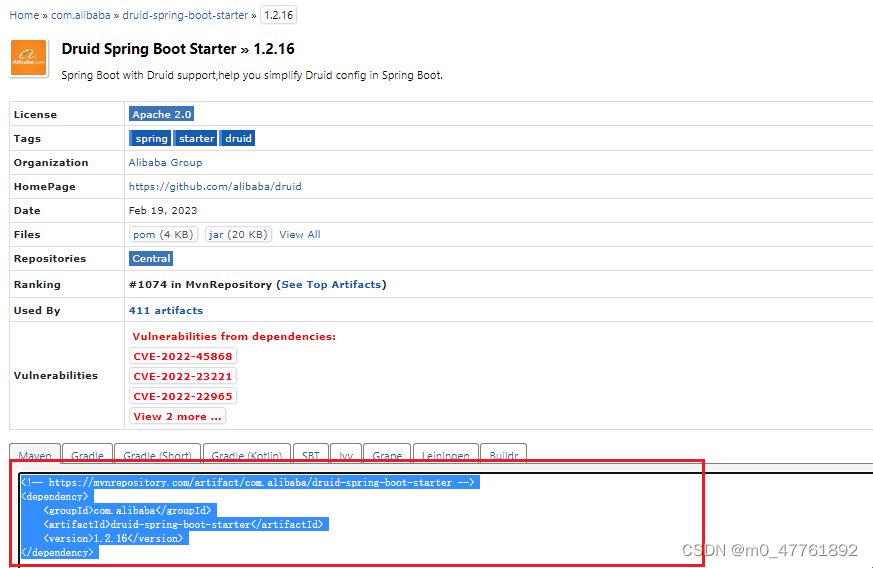
- 点击版本号1.2.6 ,可以看到不同构建工具如何添加druid依赖,选择Maven,复制依赖代码,添加到pom.xml中。
<!-- https://mvnrepository.com/artifact/com.alibaba/druid-spring-boot-starter -->
<dependency>
    <groupId>com.alibaba</groupId>
    <artifactId>druid-spring-boot-starter</artifactId>
    <version>1.2.16</version>
</dependency>
三、在pom.xml文件中添加使用到的各种依赖。
<?xml version="1.0" encoding="UTF-8"?>
<project xmlns="http://maven.apache.org/POM/4.0.0" xmlns:xsi="http://www.w3.org/2001/XMLSchema-instance"
         xsi:schemaLocation="http://maven.apache.org/POM/4.0.0 https://maven.apache.org/xsd/maven-4.0.0.xsd">
    <modelVersion>4.0.0</modelVersion>
    <parent>
        <groupId>org.springframework.boot</groupId>
        <artifactId>spring-boot-starter-parent</artifactId>
        <version>2.7.9</version>
        <relativePath/> <!-- lookup parent from repository -->
    </parent>
    <groupId>dzxx</groupId>
    <artifactId>crudcopy</artifactId>
    <version>0.0.1-SNAPSHOT</version>
    <name>crudcopy</name>
    <description>crudcopy project for Spring Boot</description>
    <properties>
        <java.version>1.8</java.version>
    </properties>
    <dependencies>
        <dependency>
            <groupId>org.springframework.boot</groupId>
            <artifactId>spring-boot-starter-web</artifactId>
        </dependency>
        <!-- https://mvnrepository.com/artifact/com.baomidou/mybatis-plus-boot-starter -->
        <dependency>
            <groupId>com.baomidou</groupId>
            <artifactId>mybatis-plus-boot-starter</artifactId>
            <version>3.5.3.1</version>
        </dependency>

        <dependency>
            <groupId>com.alibaba</groupId>
            <artifactId>druid-spring-boot-starter</artifactId>
            <version>1.2.16</version>
        </dependency>

        <!-- https://mvnrepository.com/artifact/log4j/log4j -->
        <dependency>
            <groupId>log4j</groupId>
            <artifactId>log4j</artifactId>
            <version>1.2.17</version>
        </dependency>

        <dependency>
        <groupId>com.mysql</groupId>
        <artifactId>mysql-connector-j</artifactId>
        <scope>runtime</scope>
    </dependency>

        <dependency>
            <groupId>org.projectlombok</groupId>
            <artifactId>lombok</artifactId>
            <optional>true</optional>
        </dependency>
        <dependency>
            <groupId>org.springframework.boot</groupId>
            <artifactId>spring-boot-starter-test</artifactId>
            <scope>test</scope>
        </dependency>
    </dependencies>
</project>
三、项目配置
由于项目涉及到的配置较多,对不同的配置进行分文件配置。在resources目录下新建application-druid.properties文件和application-mybatisp.properties文件,分别用于配置数据库连接和mybatis-Plus配置。同时在pom.xml文件中添加log4j2的依赖。
3.1 在pom.xml文件中添加log4j2的依赖
<dependency>
    <groupId>log4j</groupId>
    <artifactId>log4j</artifactId>
    <version>1.2.17</version>
</dependency>
3.2 在application.properties中配置服务器
#服务器配置
server.port=8080
server.servlet.context-path=/
server.tomcat.uri-encoding=utf-8
server.tomcat.max-connections=10000
server.tomcat.accept-count=1000
server.tomcat.threads.max=1000
server.tomcat.threads.min-spare=500
3.3 在application-druid.properties中配置数据库连接和druid
#数据库连接属性配置
#第一种配置方式
#spring.datasource.driver-class-name= com.mysql.cj.jdbc.Driver
#spring.datasource.url= jdbc:mysql://localhost:3306/test?useUnicode=true&characterEncoding=utf-8&useSSL=true
#spring.datasource.username= root
#spring.datasource.password= 1234
#spring.datasource.type=com.alibaba.druid.pool.DruidDataSource
#第二种配置方式(推荐)
spring.datasource.druid.driver-class-name= com.mysql.cj.jdbc.Driver
spring.datasource.druid.url= jdbc:mysql://localhost:3306/test?useUnicode=true&characterEncoding=utf-8&useSSL=true
#spring.datasource.druid.driver-class-name= com.p6spy.engine.spy.P6SpyDriver
#spring.datasource.druid.url=  jdbc:p6spy:mysql://localhost:3306/test?useUnicode=true&characterEncoding=utf-8&useSSL=true
spring.datasource.druid.username= root
spring.datasource.druid.password= 1234
#使用数据加密后的url username  pass,防止删库跑路

#druid 数据源专有配置
spring.datasource.druid.initialSize= 5
spring.datasource.druid.min-Idle= 5
spring.datasource.druid.max-active= 20
spring.datasource.druid.max-Wait= 60000
spring.datasource.druid.time-between-eviction-runs-millis= 60000
spring.datasource.druid.min-evictable-idle-time-millis= 300000
spring.datasource.druid.validation-query= SELECT 1 FROM DUAL
spring.datasource.druid.test-while-idle= true
spring.datasource.druid.test-on-borrow= false
spring.datasource.druid.test-on-return= false
spring.datasource.druid.pool-prepared-statements = true
spring.datasource.druid.filters= stat,wall,log4j2
spring.datasource.druid.max-pool-prepared-statement-per-connection-size= 20
spring.datasource.druid.use-global-data-source-stat= true
spring.datasource.druid.connection-properties= druid.stat.mergeSql=true;druid.stat.slowSqlMillis=500

#druid连接池监控
##druid的版本在1.1.10版本以上需要配置开启 stat-view-servlet ,不配置情况下为默认不开监控页面,
# 其他一些配置 如sql监控也是默认不开启的,若是要开启某个功能要手动开启

spring.datasource.druid.stat-view-servlet.enabled = true
spring.datasource.druid.stat-view-servlet.url-pattern = /druid/*
spring.datasource.druid.stat-view-servlet.login-username = admin
spring.datasource.druid.stat-view-servlet.login-password = 123
spring.datasource.druid.web-stat-filter.enabled = true
spring.datasource.druid.web-stat-filter.url-pattern = /*
spring.datasource.druid.web-stat-filter.exclusions = *.js,*.jpg
3.4在application-mybatisp.properties中配置Mybatis-plus
#Mybatis-plus 的配置
#开启sql日志
mybatis-plus.configuration.log-impl= org.apache.ibatis.logging.stdout.StdOutImpl
#默认的mapper.xml路径地址是resource-》mapper-》*.xml 即:classpath:/mapper/*.xml,
#如果不是,需要通过此配置设置
mybatis-plus.mapper-locations=classpath:/mapper/*.xml
#全局设置主键生成策略,实体类就可以不用注解@TableId(value = "id",type = IdType.AUTO)
mybatis-plus.global-config.db-config.id-type=auto
3.5 在主类中添加 配置扫描注解
package dzxx.crud;

import org.springframework.boot.SpringApplication;
import org.springframework.boot.autoconfigure.SpringBootApplication;
import org.springframework.context.annotation.PropertySource;

@SpringBootApplication
// 加载 properties 配置文件
@PropertySource(value = {"classpath:/application-druid.properties",
        "classpath:/application-mybatisp.properties"})
public class   CrudApplication {

    public static void main(String[] args) {
        SpringApplication.run(CrudApplication.class, args);
    }
}
四、创建实体类,
package dzxx.crud.pojo;
import com.baomidou.mybatisplus.annotation.*;
import lombok.Data;
import java.util.Date;

@Data
@TableName(value = "stu")
public class Stu {
    @TableId(value = "id",type = IdType.AUTO)
    // Integer默认值是null,可以区分未赋值和值为0的情况.需要区分未赋值的情况下用Integer
    private Integer id;
    private String name;
    private String pass;
    private int age;
    private Date currenttime;
    private Date modifytime;
    private Integer version;
    public Stu() {    }
    public Stu(Integer id, String name, String pass, int age) {
        this.id = id;
        this.name = name;
        this.pass = pass;
        this.age = age;
    }
}
五、创建自定义Mapper接口,继承BaseMapper接口后,无需编写 mapper.xml 文件,即可获得CRUD功能 使用@Mapper注解。另外也可以使用编写 mapper.xml 的方式实现。
package dzxx.crud.repository;

import com.baomidou.mybatisplus.core.mapper.BaseMapper;
import dzxx.crud.pojo.Stu;
import org.apache.ibatis.annotations.Mapper;
import org.apache.ibatis.annotations.Param;
import java.util.List;

@Mapper
//表明这是一个Mapper,也可以在启动类上加上包扫描
//Mapper 继承BaseMapper该接口后,无需编写 mapper.xml 文件,即可获得CRUD功能
public interface StuMapper extends BaseMapper<Stu> {
    // 每个参数前面加上占位符@Param("xxx") ,xxx为mapper.xml文件sql语句中的参数
    // Dao层是必须要写占位符的,因为它是直接和xml文件里的SQL语句进行对接的。
    // 但是在Service层中可写可不写,
    List<Stu> getByAge(@Param("age") Integer age);
}
六、七、在resource-》mapper文件夹下创建stumapper.xml文件,namespace应该对应接口路径。编写sql语句,id对应接口方法,返回值对应实体类或者其他数据类型
<?xml version="1.0" encoding="UTF-8"?>
<!DOCTYPE mapper PUBLIC "-//mybatis.org//DTD Mapper 3.0//EN" "http://mybatis.org/dtd/mybatis-3-mapper.dtd">
<mapper namespace="dzxx.crud.repository.StuMapper">
    <select id="getByAge" resultType="dzxx.crud.pojo.Stu">
        select * from stu where age>#{age}
    </select>
</mapper>
八、编写service接口
package dzxx.crud.service;

import com.baomidou.mybatisplus.extension.service.IService;
import dzxx.crud.pojo.Stu;
import java.util.List;

public interface StuService extends IService<Stu> {
    //使用自定义xml(mapper/StuMapper.xml)实现
    List<Stu> getByAge(Integer age);
}
九、编写service实现类
package dzxx.crud.service.serviceImpl;

import com.baomidou.mybatisplus.extension.service.impl.ServiceImpl;
import dzxx.crud.pojo.Stu;
import dzxx.crud.repository.StuMapper;
import dzxx.crud.service.StuService;
import org.springframework.beans.factory.annotation.Autowired;
import org.springframework.stereotype.Service;
import java.util.List;

@Service
public class StuServiceImpl extends ServiceImpl<StuMapper,Stu> implements StuService {
    @Autowired(required = false)
    StuMapper stuMapper;
    @Override
    public List<Stu> getByAge(Integer age) {
        return stuMapper.getByAge(age);
    }
}
十、编写测试方法,注意@Autowired(required = false)的使用
package dzxx.crud;
import com.baomidou.mybatisplus.core.conditions.query.QueryWrapper;
import dzxx.crud.pojo.Stu;
import dzxx.crud.service.StuService;
import org.junit.jupiter.api.Test;
import org.springframework.beans.factory.annotation.Autowired;
import org.springframework.boot.test.context.SpringBootTest;
import java.util.Arrays;
import java.util.List;
@SpringBootTest
class CrudApplicationTests {
// 当使用@Autowired注解的时候,其实默认就是@Autowired(required=true),表示注入的时候,该bean必须存在,否则就会注入失败。
// @Autowired(required=false):表示忽略当前要注入的bean,如果有直接注入,没有跳过,不会报错
@Autowired(required = false)
private StuService stuService;
@Test
//添加数据
void save(){
Stu stu=new Stu(null,"jackson","2411",22);
stuService.save(stu);
System.out.println(stu);
}
@Test
//修改数据
void update(){
Stu stu=new Stu(6,"jerry","121212",21);
stuService.updateById(stu);
System.out.println(stu);
}
@Test
//删除数据
void del(){
//根据id删除单个
// boolean res=stuService.removeById(6);
//批量删除
List<Integer> ids=Arrays.asList(9,5);
boolean res=stuService.removeByIds(ids);
System.out.println(" 删除:"+res);
}
@Test
//查找数据
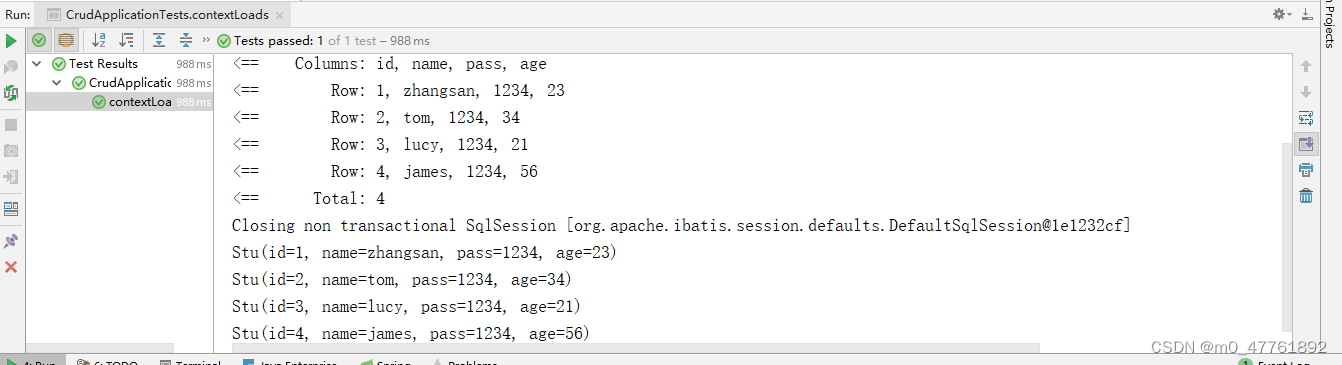
void findAll(){
// Stu stu=stuService.getById(6);
// System.out.println(stu.toString());
// List<Integer> ids=Arrays.asList(3,5);
// List<Stu> stus=stuService.listByIds(ids);
// for (Stu stu1:stus)
// System.out.println(stu1.toString());
//
List<Stu> stuList= stuService.list();
for (Stu stu1:stuList)
System.out.println(stu1.toString());
}
@Test
void findsome(){
QueryWrapper<Stu> wrapper=new QueryWrapper<>();
wrapper.select("id","name","age")
.gt("age", 22);
System.out.println(stuService.list(wrapper));
}
@Test
void findwithXml(){
// //如果涉及到复杂数据库操作,还是需要编写mapper.xml文件
// 1、定义接口映射器StuMappper,并提供接口方法getByage(),
// 2.在resource/mapper创建和Mapper接口名称相同的SQL映射文件:StuMapper.xml
// 其中namespace应该对应接口路径,
// 3. 编写sql语句,id对应接口方法,返回值对应实体类或者其他数据类型
//4,服务层调用该接口方法即可实现对应功能。
System.out.println(stuService.getByAge(45));
}
}
七、运行测试方法


 2126
2126


 被折叠的 条评论
为什么被折叠?
被折叠的 条评论
为什么被折叠?
 到【灌水乐园】发言


