


样式不能用,less-loader 版本高导致的,卸载之前的版本,下载 npm install less-loader@5.0.0
1.登录

登录
获取前台提交的用户名和密码,封装到user对象中,前后台逻辑就通了,之后就是调用dao层,完成数据库的操作,根据数据库的结果反馈给前台页面。
 //1.验证校验规则
            this.$refs.loginFormRef.validate(async valid => {
              if (!valid) return;//验证失败
              //
               const {data :res} = await this.$http.post("login",this.loginForm);//访问后台
              if (res.flag== "ok") {
根据数据库查出来的信息,接下来就是把数据传送到前台,前台进行解析。

验证不成功,就退出
 login() {
            //1.验证校验规则,通过form表单对象来完成   表单对象 (this.$refs.loginFormRef)
            this.$refs.loginFormRef.validate(valid=>{
             console.log(valid);
              if(!valid)  return;

            })

2.分页查询
1.后端
编写用户查询的DAO层
public interface EmpDao {
    //查询所有信息
    public List<Emp>  getAllEmp(@Param("username")String username,@Param("pageStart") int pageStart, @Param("pageSize") int pageSize);

    public int getEmpCounts(@Param("username") String username);

}
配置映射文件
 <!--分页查询-->
    <select id="getAllEmp" resultType="com.ma.bean.Emp">
        SELECT * FROM emp
        <if test="username !=null ">
            WHERE username like #{username}
        </if>
        LIMIT #{pageStart},#{pageSize}
    </select>

    <select id="getEmpCounts" resultType="java.lang.Integer">
        SELECT count(*) FROM emp
        <if test="username !=null ">
            WHERE username like #{username}
        </if>
    </select>
查询和分页的参数封装一个实体,根据用户名模糊查询。
package com.ma.bean;

public class QueryInfo {
    private String query;//查询信息 username
    private int pageNum=1;//当前页面
    private int pageSize=1;//每页最大数

    public QueryInfo() {
    }

    public QueryInfo(String query, int pageNum, int pageSize) {
        this.query = query;
        this.pageNum = pageNum;
        this.pageSize = pageSize;
    }

    public String getQuery() {
        return query;
    }

    public int getPageNum() {
        return pageNum;
    }

    public int getPageSize() {
        return pageSize;
    }

    public void setQuery(String query) {
        this.query = query;
    }

    public void setPageNum(int pageNum) {
        this.pageNum = pageNum;
    }

    public void setPageSize(int pageSize) {
        this.pageSize = pageSize;
    }

    @Override
    public String toString() {
        return "QueryInfo{" +
                "query='" + query + '\'' +
                ", pageNum=" + pageNum +
                ", pageSize=" + pageSize +
                '}';
    }
}
编写controller层
public class EmpController {
    @Autowired
    private EmpDao empDao;

    @CrossOrigin
    @RequestMapping("/allEmp")

    public String getEmpList(QueryInfo queryInfo){//查询和分页的参数封装一个实体
        System.out.println(queryInfo);
        //获取最大列表数和当前编号
        int numbers = empDao.getEmpCounts("%"+queryInfo.getQuery()+"%");// 获取数据总数
        int pageStart = (queryInfo.getPageNum()-1)*queryInfo.getPageSize();
        List<Emp> emps = empDao.getAllEmp("%"+queryInfo.getQuery()+"%",pageStart,queryInfo.getPageSize());
        System.out.println(emps);
        HashMap<String, Object> res = new HashMap<>();
        res.put("numbers",numbers);
        res.put("data",emps);
        // System.out.println("总条数:"+numbers);
        System.out.println(res);
        String users_json = JSON.toJSONString(res);
        return users_json;
    }
}
2.前端(vue element -ui)
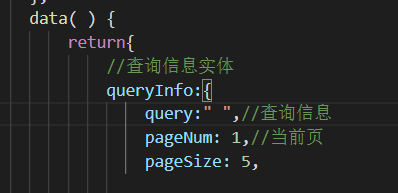
查询信息实体,把查询数据封装到实体中
data( ) {
        return{
            //查询信息实体
            queryInfo:{
                query:"",//查询信息
                pageNum: 1,//当前页
                pageSize: 5,

            },
            empList:[],
            total:0,

        }
    },
    methods:{
        //获取所有用户
        async getEmpList() {
            console.log(111);
         const  {data:res}  = await this.$http.get("allEmp",{params:this.queryInfo});//这里用了get请求
            this.empList=res.data;
            this.total=res.numbers;
            console.log(res.numbers);
        },
            // 监听pageSize改变的事件
        handleSizeChange(newSize) {
          this.queryInfo.pageSize = newSize;
          this.getEmpList(); // 数据发生改变重新申请数据
        },
        // 监听pageNum改变的事件
        handleCurrentChange(newPage) {
          this.queryInfo.pageNum = newPage;
          this.getEmpList(); // 数据发生改变重新申请数据
        },

    },
3.添加用户
1.后端
//dao层
    public int addEmp(Emp emp);
    //mapping 映射文件
 <insert id="addEmp">
        INSERT INTO emp
        (username,job_id,salary,dept_id,state, role)
        VALUE
        (#{username},#{job_id},#{salary},#{dept_id} ,#{state},#{role})
    </insert>
    //添加的controller,用户状态和角色,直接在这里面添加。
  @RequestMapping("/addEmp")
    public String addUser(@RequestBody Emp emp){
         System.out.println(emp);

       emp.setState(false);
        emp.setRole("普通用户");
        int i = empDao.addEmp(emp);
        String str = i >0?"success":"error";
        return str;
    }
2.前端
先设置用户对话框不显示
addDialogVisible: false, // 对话框显示
新增用户按钮
<!-- 添加用户 -->
        <el-col :span="4">
          <el-button type="primary" @click="addDialogVisible = true">添加用户</el-button>
        </el-col>
新增用户对话框
 <!-- 新增用户对话框 -->
           <el-dialog title="添加用户" :visible.sync="addDialogVisible" width="50%"
          @close="addDialogClosed">
            <!-- 内容主体区域 -->
            <el-form :model="addForm" :rules="addFormRules"
              ref="addFormRef" label-width="70px">
              <!-- 用户名 -->
              <el-form-item label="用户名" prop="username">
                <el-input v-model="addForm.username"></el-input>
              </el-form-item>
              <!-- 工作编号 -->
              <el-form-item label="工作编号" prop="job_id">
                <el-input v-model="addForm.job_id"></el-input>
              </el-form-item>
              <!-- 薪水 -->
              <el-form-item label="薪水" prop="salary">
                <el-input v-model="addForm.salary"></el-input>
              </el-form-item>

              <el-form-item label="部门编号" prop="job_id">
                <el-input v-model="addForm.dept_id"></el-input>
              </el-form-item>
            </el-form>
            <!-- 内容底部区域 -->
            <span slot="footer" class="dialog-footer">
              <el-button @click="addDialogVisible = false">取 消</el-button>
              <el-button type="primary" @click="addUser">确 定</el-button>
            </span>
          </el-dialog>

    </div>
用于数据封装,前台添加的用户封装到addForm中,
export default {
    created(){
        this.getEmpList();//更新列表
    },
    data( ) {
        return{
            empList:[],
            total:0,
             addDialogVisible: false, // 对话框显示

             // 验证规则
      addFormRules:{
        username:[
           { required: true, message: "请输入用户名", trigger: "blur" },
          { min: 5, max: 8, message: "长度在 5 到 8 个字符", trigger: "blur" }
        ],
        },
          // 添加用户表单项
                addForm: {
                  username: "",
                  job_id: "",
                  salary: "",
                  dept_id:"",
                },
        }
监听添加用户,前台请求后台,把数据插入,插入之后,隐藏插入对话框,更新emplist
 // 监听添加用户
          addDialogClosed(){
            this.$refs.addFormRef.resetFields();// 重置表单项
          },
        // 添加用户
      addUser(){
        this.$refs.addFormRef.validate(async valid =>{
        console.log(valid);
        if( !valid ) return;
        // 发起请求
        const {data:res} = await this.$http.post("addEmp",this.addForm);
        if (res != "success") {
        userinfo.state = !userinfo.state;
        return this.$message.error("操作失败!!!");
        }
        this.$message.success("操作成功!!!");
        //隐藏
        this.addDialogVisible = false;
        this.getEmpList();
      })
4.查询每个部门的员工
1.后端
由于部门和员工是一对多关系,首先写关系映射
public class Dept {
    private  int id;
    private  String dname;
    private String location;
    //一对多关系映射,主表实体应该包含从表实体的集合引用
    private List<Emp> emps;

    public Dept() {
    }

    public Dept(String dname, String location, List<Emp> emps) {
        this.dname = dname;
        this.location = location;
        this.emps = emps;
    }

    public int getId() {
        return id;
    }

    public void setId(int id) {
        this.id = id;
    }

    public String getDname() {
        return dname;
    }

    public void setDname(String dname) {
        this.dname = dname;
    }

    public String getLocation() {
        return location;
    }

    public void setLocation(String location) {
        this.location = location;
    }

    public List<Emp> getEmps() {
        return emps;
    }

    public void setEmps(List<Emp> emps) {
        this.emps = emps;
    }

    @Override
    public String toString() {
        return "Dept{" +
                "id=" + id +
                ", dname='" + dname + '\'' +
                ", location='" + location + '\'' +
                ", emps=" + emps +
                '}';
    }
}
编写查询方法
 /**
     * 查询所有部门,同时获取到所有员工信息
     * @return
     */
    List<Dept> findAll(@Param("id")  Integer id);
编写mapping 映射查询方法
 <!--查询一个部门里面的人-->
    <!--定义emp的resultMap-->
    <resultMap id="deptEmpMap" type="com.ma.bean.Dept">
        <id property="id" column="id"></id>
        <result property="dname" column="dname"></result>
        <result property="location" column="location"></result>
        <!--配置dept对象中emps集合的映射-->
        <collection property="emps" ofType="com.ma.bean.Emp" >
            <id property="id" column="sid"></id>
            <result property="username" column="username"></result>
            <result property="job_id" column="job_id"></result>
            <result property="salary" column="salary"></result>
            <result property="state" column="state"></result>
            <result property="role" column="role"></result>
        </collection>
    </resultMap>

    <!-- 查询部门里的人 -->
    <select id="findAll" resultMap="deptEmpMap">
      select d.*, e.id as sid ,e.username,  e.job_id,e.salary ,e.state ,e.role from dept d,emp e WHERE d.id=e.dept_id and  d.id=#{id} ;
    </select>
编写controller 方法
 @RequestMapping("/alldeptuser/{id}")
    public  String  getAlldept(@PathVariable("id") Integer id){
        List<Dept> all = deptDao.findAll(id);
        System.out.println(all);
        HashMap<String, Object> res = new HashMap<>();

        res.put("data",all);
        System.out.println(res);
        String users_json = JSON.toJSONString(res);
        return users_json;
    }
2.前端
 <!-- 查询部门员工按钮 -->
            <el-button  type="primary"   size="mini" @click="showAllUser(scope.row.id)">查询部门员工</el-button>


//将部门id传到deptuser页面
         showAllUser(id){
        this.$router.push( {
           path: "/deptuser",
          query:{
             deptid:id,
           }
        });//页面路由跳转
取到路由带过来的参数
sync getParams() {
        // 取到路由带过来的参数
        const id = this.$route.query.deptid
        console.log(id);
//访问后台,后台携带数据返回
        const  {data:res}  = await this.$http.post(`alldeptuser/${id}`);
            this.empList=res.data;
            console.log(res.data[0].emps[0].username);


    },
5.注册功能,在后端实现查询出用户,就不能注册
注册后端逻辑,和添加非常相似,主要就是添加一个查询用户名的功能,如果用户名存在就返回页面用户名已存在。
验证完成前端验证,两次密码输入不一致,就报错。
  密码
                     <el-input v-model="registerForm.password" prefix-icon="iconfont  iconmima" type="password" autocomplete="off"></el-input>
                  </el-form-item>
                  <el-form-item  prop="checkPass">
                   确认密码
                     <el-input v-model="registerForm.checkPass" prefix-icon="iconfont  iconmima" type="password" autocomplete="off"></el-input>
                  </el-form-item>
 //表单数据对象
            registerForm:{
                username:'马老师',
                password:'12345',
                checkPass: '12345',

            },

      加入验证函数
       var validatePass = (rule, value, callback) => {
              if (value === '') {
                callback(new Error('请输入密码'));
              } else {
                if (this.registerForm.checkPass !== '') {
                  this.$refs.registerFormRef.validateField('checkPass');
                }
                callback();
              }
            };
            var validatePass2 = (rule, value, callback) => {
              if (value === '') {
                callback(new Error('请再次输入密码'));
              } else if (value !== this.registerForm.password) {
                callback(new Error('两次输入密码不一致!'));
              } else {
                callback();
              }
            };
后端
   //注册功能的查询
    public User  getUsername(@Param("username") String username);

       <!--注册  查询用户的名字-->
    <select id="getUsername" resultType="com.ma.bean.User">
        SELECT *FROM user
       	WHERE username=#{username}
    </select>
     //根据用户名查询
    @RequestMapping("/selectUser")
    public String selectUser(@RequestBody User user){
        String flag="error";
        User us = userDao.getUsername(user.getUsername());
        System.out.println(us);
        HashMap<String, Object> res = new HashMap<>();
        if(us!=null){
            flag="ok";
        }
        res.put("flag",flag);
        String res_json = JSON.toJSONString(res);
        return res_json;

    }
前端
 submit() {
              this.$refs.registerFormRef.validate(async valid =>{
           // console.log(valid);
            if( !valid ) return;
          const {data:res} = await  this.$http.post("selectUser",this.registerForm);

          if (res.flag =="ok") {
             console.log(res.flag);
          return this.$message.error("用户已存在!!!");
           }

          const {data:res1} = await this.$http.post("registerUser",this.registerForm);
          if (res1 != "success") {
          return this.$message.error("注册失败!!!");
           }
          this.$message.success("注册成功!!!");
         });
      },
6.登录功能,加入验证码验证。
总结问题,比如这里有个空格,就查询不出来,一定不能有空格,已经犯了两次错误。
挂在路由导航守卫,相当于过滤器的作用。
登陆页面,和注册页面都会放行
//挂载路由导航守卫 拦截器的作用
router.beforeEach((to,from,next)=>{
  //to 将要访问
  //from 从哪访问
  //next 接着干的事情 next(url) 重定向到url上next()继续访问到to路径
  if(to.path=='/register' ) return next();//如果是注册页面也会放行

  if(to.path=='/login' ) return next();//如果是登录页面也会放行
  //获取user
  const userFlag= window.sessionStorage.getItem("user");//取出当前用户
  if(!userFlag) return next("/login"  );//无值,返回登录页面
  next();//符合要求 放行

})


 551
551


 被折叠的 条评论
为什么被折叠?
被折叠的 条评论
为什么被折叠?
 到【灌水乐园】发言


