


1.依赖配置:
导入maven依赖
            <!-- 引入生成token与加解密的包 -->
             <dependency>
                <groupId>org.bitbucket.b_c</groupId>
                <artifactId>jose4j</artifactId>
                <version>${jose4j.version}</version>
            </dependency>

            <!-- 引入spring security框架 -->
            <dependency>
                <groupId>org.springframework.boot</groupId>
                <artifactId>spring-boot-starter-security</artifactId>
                <version>${spring.boot.version}</version>
            </dependency>

            <!-- 引入redis 主要用于临时缓存部分数据-->
            <dependency>
                <groupId>org.springframework.boot</groupId>
                <artifactId>spring-boot-starter-data-redis</artifactId>
                <version>${spring-redis.version}</version>
            </dependency>
2.配置对应的config
如下开始进行配置
/**
 * @Author: q_j_c
 * @Date: 2022/10/8 10:33
 */

@Configuration
@EnableWebSecurity(debug=true)  // 启用spring security框架 ,并且开启debug 模式,方便后面跟踪源码的流程。
@EnableGlobalMethodSecurity(securedEnabled=true,prePostEnabled=true)   //启用授权的其中两个注解
public class AppSecurityConfig extends WebSecurityConfigurerAdapter {


    //Bean注解帮你解决掉对象内依赖的注入注解的问题,传统的直接new的情况下是不会帮你解决这么一个问题
    @Bean
    public UserDetailsService  getUserDetailsService(){
        return new UserDetailsServiceImpl();
    }


    @Bean
    public UserLoginAuthenticationProvider  authenticationProvider(){
        UserLoginAuthenticationProvider userLoginAuthenticationProvider = new UserLoginAuthenticationProvider();
        userLoginAuthenticationProvider.setUserDetailsService(getUserDetailsService());
        userLoginAuthenticationProvider.setPasswordEncoder(encoder());
        return userLoginAuthenticationProvider;
    }

    @Bean
    public AuthenticationManager authenticationManager() {
        return new ProviderManager(authenticationProvider());
    }

    @Bean
    public UserLoginAuthenticationFilter loginAuthenticationFilter(){
        return new UserLoginAuthenticationFilter(authenticationManager());
    }

    @Bean
    public TokenManagerFilter  tokenManagerFilter(){
        return new TokenManagerFilter();
    }

    @Bean
    public PasswordEncoder encoder(){
        return new BCryptPasswordEncoder();
    }

    @Bean
    public UserLogoutHandler logoutHandler(){
        return new UserLogoutHandler();
    }

    protected void configure(AuthenticationManagerBuilder auth){
      auth.authenticationProvider(authenticationProvider());
    }


    @Override
    protected void configure(HttpSecurity http) throws Exception {
        addFilters(http);       //添加自定义的过滤器
        addHandler(http);      //添加自定义的处理器
        addRequestURL(http);
    }

    private void addRequestURL(HttpSecurity http)throws Exception{
        http.sessionManagement().sessionCreationPolicy(SessionCreationPolicy.STATELESS);
        http.formLogin() // 表单方式
                .and()
                .authorizeRequests() // 授权配置
                .antMatchers("login").permitAll()
                .anyRequest() //任何请求
                .authenticated(); // 都需要认证
        http.csrf().disable();
    }

    private void addFilters(HttpSecurity http){

        http.addFilterBefore(loginAuthenticationFilter(), UsernamePasswordAuthenticationFilter.class);
        http.addFilterBefore(tokenManagerFilter(), SessionManagementFilter.class);

    }

    private void addHandler(HttpSecurity http){
        LogoutConfigurer configurer = http.getConfigurer(LogoutConfigurer.class);
        configurer.addLogoutHandler(logoutHandler());
        configurer.logoutSuccessHandler(logoutHandler());
    }
}
3.启动服务并登录
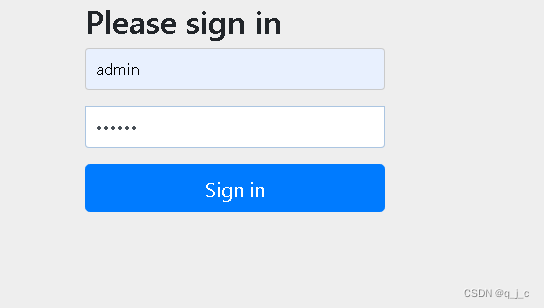
开始登录~~
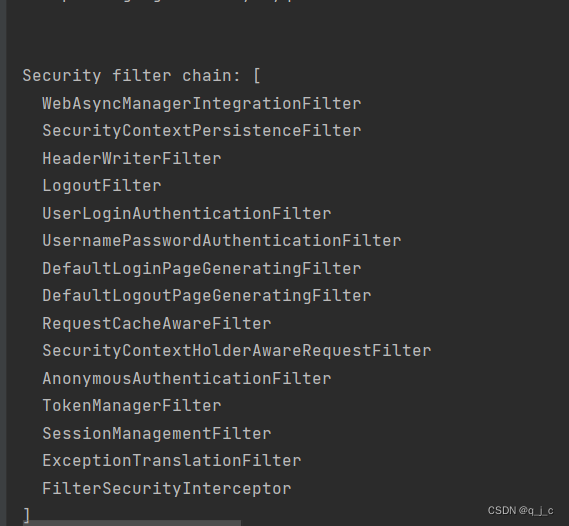
3.1然后后台打印出对应的日志,里面包含了框架本身自带的过滤器,也包含了我们自己开发的过滤器。
3.2 登录成功,后台生成了对应的token值并打印出来~~

4.拿token值在postman端进行校验登录
4.1键入接口url,以及相关参数,然后配上后台返回的token值

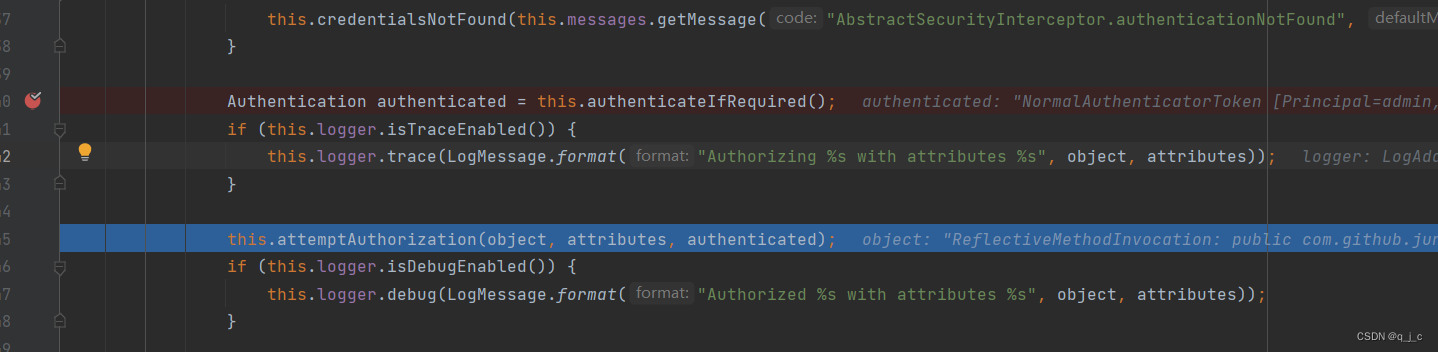
4.2debug看代码在抽象类AbstractSecurityInterceptor拦截器处进行,调用认证与鉴权方法。
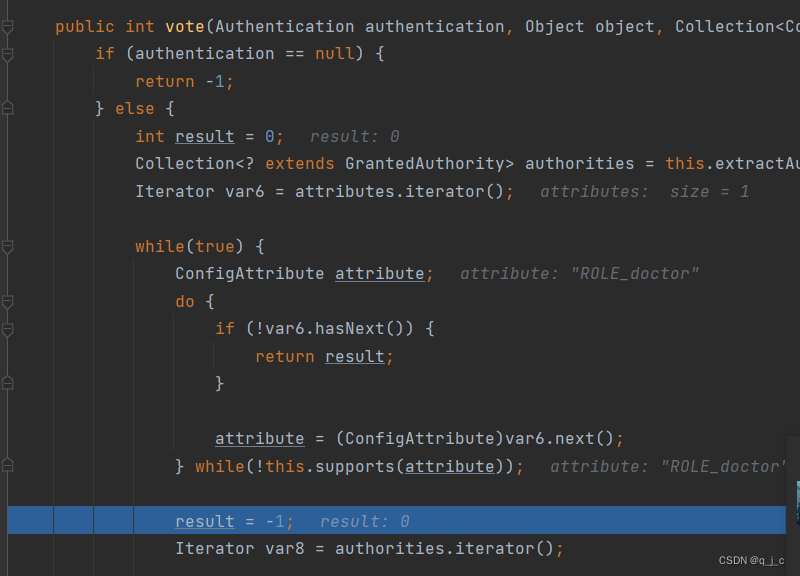
4.3.直接看授权情况,当前主要用了注解Secured

4.4可以看到RoleVoter,进行授权,如果注解内放置的角色与自己在Collection<? extends GrantedAuthority> 的集合中有维护一样的名字就granted ,否则就deny。

5.后面
先引出整个主流程,后面顺着看spring security的主流程源码,学习其中的细节~~。


 272
272


 被折叠的 条评论
为什么被折叠?
被折叠的 条评论
为什么被折叠?
 到【灌水乐园】发言


