


文章目录
1. 发送邮件
- 邮箱设置
- 启用客户端SMTP服务
- Spring Email
- 导入jar包(即引入依赖)
- 邮箱参数配置
- 使用JavaMailSender发送邮件
- 模板引擎
- 使用Thymeleaf发送HTML邮件
1.1 邮箱设置
选择新浪邮箱,开启SMTP服务(一开始选择的是QQ邮箱,但老是出问题)

1.2 Spring Email
- 导入jar包
在mavenrepository中搜索spring mail


将方框中的内容复制到项目中的pom文件中
   <!-- email -->
    <dependency>
        <groupId>org.springframework.boot</groupId>
        <artifactId>spring-boot-starter-mail</artifactId>
        <version>2.1.5.RELEASE</version>
    </dependency>
- 邮箱参数设置
可以参考SpringBoot文档mail模块找到,配置如下:
# MailProperties
spring.mail.host=smtp.sina.com
spring.mail.port=465
spring.mail.username=xxx@sina.com
spring.mail.password=xxx
spring.mail.protocol=smtps
spring.mail.properties.mail.smtp.ssl.enable=true
注意:password设置的值是客户端授权码,具体操作流程可以参考新浪邮箱帮助文档
- 使用JavaMailSender发送邮件
建立一个util包,写一个邮件工具类MailClient
package com.ateam.community.util;

import org.slf4j.Logger;
import org.slf4j.LoggerFactory;
import org.springframework.beans.factory.annotation.Autowired;
import org.springframework.beans.factory.annotation.Value;
import org.springframework.mail.javamail.JavaMailSender;
import org.springframework.mail.javamail.MimeMessageHelper;
import org.springframework.stereotype.Component;

import javax.mail.MessagingException;
import javax.mail.internet.MimeMessage;

/**
 * @author wsh
 * @date 2021-11-14 20:24
 * @description
 */
@Component
public class MailClient {

    private static final Logger logger = LoggerFactory.getLogger(MailClient.class);

    @Autowired
    private JavaMailSender mailSender;

	// 配置文件中的用户名
    @Value("${spring.mail.username}")
    private String from;

    public void sendMail(String to, String subject, String context, boolean isHtml) {
        try {
            MimeMessage message = mailSender.createMimeMessage();
            MimeMessageHelper helper = new MimeMessageHelper(message);
            helper.setFrom(from);
            helper.setTo(to);
            helper.setSubject(subject);
            // isHtml是Boolean变量,true是支持字符文本,即支持HTML文本
            helper.setText(context,isHtml);
            mailSender.send(helper.getMimeMessage());
        } catch (MessagingException e) {
            logger.error("邮件发送失败" + e.getMessage());
        }
    }

}
测试刚才写的工具类:
package com.ateam.community;

import com.ateam.community.util.CommunityUtil;
import com.ateam.community.util.MailClient;

import com.ateam.community.util.RedisKeyUtil;
import org.apache.commons.lang3.StringUtils;
import org.junit.Test;
import org.junit.runner.RunWith;
import org.springframework.beans.factory.annotation.Autowired;
import org.springframework.boot.test.context.SpringBootTest;
import org.springframework.data.redis.core.RedisTemplate;
import org.springframework.test.context.ContextConfiguration;
import org.springframework.test.context.junit4.SpringRunner;
import org.thymeleaf.TemplateEngine;
import org.thymeleaf.context.Context;

import java.util.concurrent.TimeUnit;

/**
 * @author wsh
 * @date 2021-11-14 21:04
 * @description
 */
@RunWith(SpringRunner.class)
@SpringBootTest
@ContextConfiguration(classes = CommunityApplication.class)//配置类
public class MailTests {

    @Autowired
    private MailClient mailClient;

    //注入Thymeleaf
    @Autowired
    private TemplateEngine templateEngine;

	// 测试发送普通邮件
    @Test
    public void testTextMail(){
        mailClient.sendMail("xxx@qq.com","TEST"," this is wangsuhang speaking",false);
    }

	// 测试发送HTML文件,这里是要根据用户名设置对应的HTML
    @Test
    public void testHtmlMail(){
    	// 导入的是 :org.thymeleaf.context.Context;
        Context context = new Context();
        // 填充的是 HTML 中的:变量
        context.setVariable("username","json");

        String content = templateEngine.process("/mail/demo", context);
        System.out.println(content);

        mailClient.sendMail("xxx@qq.com","test",content,true);
    }
}
其中,demo.html为:
<!DOCTYPE html>
<html lang="en" xmlns:th="http://www.thymeleaf.org">
<head>
    <meta charset="UTF-8">
    <title>邮件示例</title>
</head>
<body>
    <p>欢迎你,<span style="color: red;" th:text="${username}"></span>!</p>
</body>
</html>
测试结果(以HTML的为例):
这是打印出来的content
<!DOCTYPE html>
<html lang="en">
<head>
    <meta charset="UTF-8">
    <title>邮件示例</title>
</head>
<body>
    <p>欢迎你,<span style="color: red;">json</span>!</p>
</body>
</html>

2. 开发注册功能
- 访问注册页面
- 点击顶部区域内的链接,打开注册页面
- 提交注册数据
- 通过表单提交数据
- 服务端验证账号是否已存在、邮箱是否已注册
- 服务端发送激活邮件
- 激活注册账号
- 点击邮件中的链接,访问服务端的激活服务

2.1 访问注册页面
- 公用头部
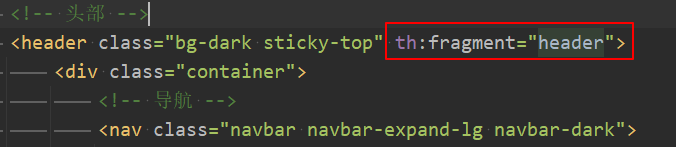
项目中所有要用到头部的页面,都用同一个头部,如下所示:

- 可以用Thymeleaf提供的th:fragment标签来共用这部分代码,修改index.html中的部分内容


- 修改register.html中的部分内容

2.2 提交注册数据
准备工作:
- 导入一个常用的包 commons lang ,主要是字符串判断是否为空等功能

pom.xml中添加如下:
<!--    commons-lang : 处理集合、字符串空值等问题 -->
    <dependency>
        <groupId>org.apache.commons</groupId>
        <artifactId>commons-lang3</artifactId>
        <version>3.9</version>
    </dependency>
- 添加配置信息
因为考虑到以后上线后,和 现在开发时的域名不一样,所以在配置文件中将项目的访问路径写出来,方便以后的修改:
#community
community.path.domain=http://localhost:8080
- 在util包下,写个工具类,主要用于生成随机字符串和MD5加密
public class CommunityUtil {

    // 生成随机字符串
    public static String generateUUID() {
        return UUID.randomUUID().toString().replace("-","");
    }

    // MD5加密
    public static String md5(String key) {
        if (StringUtils.isBlank(key)){
            return null;
        }

        return DigestUtils.md5DigestAsHex(key.getBytes());
    }
}
开始开注册功能:
一般开发的顺序为:数据访问层、业务层、视图层
-
数据访问层,在第一章节中的MyBatis的入门已开发好了
-
业务层:在service包下,创建UserService类
package com.ateam.community.service;

@Service
public class UserService implements CommunityConstant {

    @Autowired
    private UserMapper userMapper;

    @Autowired
    private MailClient mailClient;

    @Autowired
    private TemplateEngine templateEngine;

    @Value("${community.path.domain}")
    private String domain;

    @Value("${server.servlet.context-path}")
    private String contextPath;


    public Map<String, Object> register(User user) {
        HashMap<String, Object> map = new HashMap<>();

        //空值处理
        if (user == null) {
            throw new IllegalArgumentException("参数不能为空!");
        }

        if (StringUtils.isBlank(user.getPassword())) {
            map.put("passwordMsg", "密码不能为空!");
            return map;
        }

        if (StringUtils.isBlank(user.getUsername())) {
            map.put("usernameMsg", "账号不能为空");
            return map;
        }

        if (StringUtils.isBlank(user.getEmail())) {
            map.put("emailMsg", "邮箱不能为空");
            return map;
        }

        // 验证账号
        User u = userMapper.selectByName(user.getUsername());
        if (u != null){
            map.put("usernameMsg","该账号已存在!");
            return map;
        }

        // 验证邮箱
        u = userMapper.selectByEmail(user.getEmail());
        if (u != null) {
            map.put("emailMsg", "该邮箱已被注册!");
            return map;
        }

        // 注册用户
        // 随机生成盐
        user.setSalt(CommunityUtil.generateUUID().substring(0,5));
        user.setPassword(CommunityUtil.md5(user.getPassword() + user.getSalt()));
		// 0-普通用户; 1-超级管理员; 2-版主;
		user.setUserType(0);
		// 0-未激活;1-已激活
		user.setStatus(0);
        user.setCreateTime(new Date());
        user.setActivationCode(CommunityUtil.generateUUID());
        user.setHeaderUrl(String.format("http://images.nowcoder.com/head/%dt.png", new Random().nextInt(1000)));

        userMapper.insertUser(user);

        // 激活邮件
        Context context = new Context();
        context.setVariable("email",user.getEmail());
        // http://localhost:8080/community/activation/101/code
        String url = domain + contextPath + "/activation/" + user.getId() + "/" + user.getActivationCode();
        context.setVariable("url",url);
        String content = templateEngine.process("/mail/activation", context);

        mailClient.sendMail(user.getEmail(),"激活账号",content,true);

        return map;
    }


    public User findUserByName(String name) {
        return userMapper.selectByName(name);
    }

    public User findUserByEmail(String email) {
        return userMapper.selectByEmail(email);
    }
}
其中,邮件模板为:mail目录下的activation.html
<!doctype html>
<html lang="en" xmlns:th="http://www.thymeleaf.org">
<head>
    <meta charset="utf-8">
    <link rel="icon" href="https://static.nowcoder.com/images/logo_87_87.png"/>
    <title>牛客网-激活账号</title>
</head>
<body>
	<div>
		<p>
			<b th:text="${email}">xxx@xxx.com</b>, 您好!
		</p>
		<p>
			您正在注册Ateam社区, 这是一封激活邮件, 请点击
			<a th:href="${url}">此链接</a>,
			激活您的Ateam社区账号!
		</p>
	</div>
</body>
</html>
- 视图层,在controller包下,创建LoginController
package com.ateam.community.controller;


@Controller
public class LoginController implements CommunityConstant {

    private static final Logger logger = LoggerFactory.getLogger(LoginController.class);

    @Autowired
    private UserService userService;

    @Autowired
    private Producer producer;

    @Value("${server.servlet.context-path}")
    private String contextPath;


    @RequestMapping(value = "/register",method = RequestMethod.GET)
    public String getRegisterPage() {
        return "/site/register";
    }


    @RequestMapping(value = "/register",method = RequestMethod.POST)
    public String register(Model model, User user) {
        Map<String, Object> map = userService.register(user);
        if (map == null || map.isEmpty()) {
            model.addAttribute("msg","注册成功,已向您的邮箱发送了一封激活邮件,请尽快激活!");
            model.addAttribute("target","/index");
            return "/site/operate-result";
        } else {
			// 注册失败,将错误信息返回给页面,提示用户
            model.addAttribute("usernameMsg",map.get("usernameMsg"));
            model.addAttribute("emailMsg",map.get("emailMsg"));
            model.addAttribute("passwordMsg",map.get("passwordMsg"));
            return "/site/register";
        }
    }


}
注册成功,到操作中间页面,在site包下operate-result.html
<!-- 内容 -->
<div class="main">
	<div class="container mt-5">
		<div class="jumbotron">
			<p class="lead" th:text="${msg}">您的账号已经激活成功,可以正常使用了!</p>
			<hr class="my-4">
			<p>
				系统会在 <span id="seconds" class="text-danger">8</span> 秒后自动跳转,
				您也可以点此 <a id="target" th:href="@{${target}}" class="text-primary">链接</a>, 手动跳转!
			</p>
		</div>
	</div>
</div>
注册失败,请求处理重新到register.html页面中,并携带错误的信息
处理register.html
- 为每个要提交信息的标签增加name属性,便于SpringMVC识别,并将信息封装到User类

- 注册过程中的错误处理
添加默认值(当注册失败时,输入框中的上一次输入内容还在),th:vaue:

输出错误信息:

<!-- 内容 -->
<div class="main">
<div class="container pl-5 pr-5 pt-3 pb-3 mt-3 mb-3">
<h3 class="text-center text-info border-bottom pb-3">注 册</h3>
<form class="mt-5" method="post" th:action="@{/register}">
<div class="form-group row">
<label for="username" class="col-sm-2 col-form-label text-right">账号:</label>
<div class="col-sm-10">
<input type="text"
th:class="|form-control ${usernameMsg!=null?'is-invalid':''}|"
th:value="${user!=null?user.username:''}"
id="username" name="username" placeholder="请输入您的账号!" required>
<div class="invalid-feedback" th:text="${usernameMsg}">
该账号已存在!
</div>
</div>
</div>
<div class="form-group row mt-4">
<label for="password" class="col-sm-2 col-form-label text-right">密码:</label>
<div class="col-sm-10">
<input type="password"
th:class="|form-control ${passwordMsg!=null?'is-invalid':''}|"
th:value="${user!=null?user.password:''}"
id="password" name="password" placeholder="请输入您的密码!" required>
<div class="invalid-feedback" th:text="${passwordMsg}">
密码长度不能小于8位!
</div>
</div>
</div>
<div class="form-group row mt-4">
<label for="confirm-password" class="col-sm-2 col-form-label text-right">确认密码:</label>
<div class="col-sm-10">
<input type="password" class="form-control"
th:value="${user!=null?user.password:''}"
id="confirm-password" placeholder="请再次输入密码!" required>
<div class="invalid-feedback">
两次输入的密码不一致!
</div>
</div>
</div>
<div class="form-group row">
<label for="email" class="col-sm-2 col-form-label text-right">邮箱:</label>
<div class="col-sm-10">
<input type="email" id="email"
th:class="|form-control ${emailMsg!=null?'is-invalid':''}|"
th:value="${user!=null?user.email:''}"
name="email" placeholder="请输入您的邮箱!" required>
<div class="invalid-feedback" th:text="${emailMsg}">
该邮箱已注册!
</div>
</div>
</div>
<div class="form-group row mt-4">
<div class="col-sm-2"></div>
<div class="col-sm-10 text-center">
<button type="submit" class="btn btn-info text-white form-control">立即注册</button>
</div>
</div>
</form>
</div>
</div>
7.3 激活注册账号
- 为了项目后面其他代码的复用,在util包下定义几个激活状态常量
让用到此常量的类实现此接口
public interface CommunityConstant {

    /**
     * 激活成功
     */
    int ACTIVATION_SUCCESS = 0;

    /**
     * 重复激活
     */
    int ACTIVATION_REPEAT = 1;

    /**
     * 激活失败
     */
    int ACTIVATION_FAILURE =2;
}
- 业务层:在service包下的UserService类中增加新方法
    public int activation(int userId, String code) {
        User user = userMapper.selectById(userId);
        if (user.getStatus() == 1) {
            return ACTIVATION_REPEAT;
        } else if (user.getActivationCode().equals(code)) {
        	// 将状态改为1
            userMapper.updateStatus(userId,1);
            return ACTIVATION_SUCCESS;
        } else {
            return ACTIVATION_FAILURE;
        }

    }
- 视图层:在controller包下LoginController类中添加方法
    // http://localhost:8080/community/activation/101/code
    @RequestMapping(value = "/activation/{userId}/{code}",method = RequestMethod.GET)
    public String activation(Model model, @PathVariable("userId") int userid, @PathVariable("code") String code) {
        int result = userService.activation(userid, code);
        if (result == ACTIVATION_SUCCESS) {
            model.addAttribute("msg","激活成功,您的账号已经可以正常使用了!");
            model.addAttribute("target","/login");
        } else if (result == ACTIVATION_REPEAT) {
            model.addAttribute("msg","无效操作,该账号已经激活了!");
            model.addAttribute("target","/index");
        } else {
            model.addAttribute("msg","激活失败,您提供的激活码不正确!");
            model.addAttribute("target","/index");
        }

        return "/site/operate-result";
    }

    @RequestMapping(value = "/login",method = RequestMethod.GET)
    public String getLoginPage() {
        return "/site/login";
    }
包下的login.html页面,在开发登录和登出模块时,再开发。
3. 会话管理
- HTTP的基本性质
- HTTP是简单的
- HTTP是可扩展的
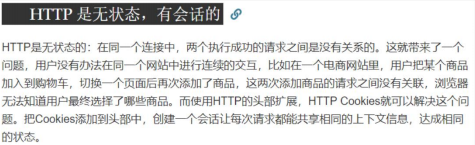
- HTTP是无状态的,有会话的
- Cookie
- 是服务器发送到浏览器,并保存在浏览器端的一小块数据
- 浏览器下次访问该服务器时,会自动携带该块数据,将其发送给服务器
- Session
- 是JavaEE的标准,用于在服务器端记录客户端的信息
- 数据存放在服务端更加安全,但是也会增加服务端的内存压力
Cookie测试:
- 服务器端发送cookie到浏览器
    // cookie示例
    @RequestMapping(value = "/cookie/set",method = RequestMethod.GET)
    @ResponseBody
    public String setCookie(HttpServletResponse response) {
        // 创建cookie
        Cookie cookie = new Cookie("code", CommunityUtil.generateUUID());
        // 设置cookie的生效范围
        cookie.setPath("/community");
        // 设置cookie生存时间
        cookie.setMaxAge(60 * 10);
        // 发送cookie
        response.addCookie(cookie);

        return "set cookie";
    }
- 在浏览器端访问服务器
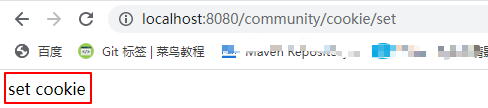
在浏览端可以看到code值了

- 服务器端获得cookie值
    @RequestMapping(value = "/cookie/get",method = RequestMethod.GET)
    @ResponseBody
    public String getCookie(@CookieValue("code") String code) {
        System.out.println(code);
        return "get cookie";
    }
idea控制台输出

Session测试:
    // session
    @RequestMapping(value = "/session/set",method = RequestMethod.GET)
    @ResponseBody
    public String setSession(HttpSession session) {
        session.setAttribute("code",CommunityUtil.generateUUID());
        session.setAttribute("name","wsh");

        return "set session";
    }

    @RequestMapping(value = "/session/get",method = RequestMethod.GET)
    @ResponseBody
    public String getSession(HttpSession session) {
        System.out.println(session.getAttribute("code"));
        System.out.println(session.getAttribute("name"));

        return "get session";
    }


4. 生成验证码
- Kaptcha
- 导入jar包
- 编写Kaptcha配置类
- 生成随机字符、生成图片
其核心接口为:
package com.google.code.kaptcha;

import java.awt.image.BufferedImage;

/**
 * Responsible for creating captcha image with a text drawn on it.
 */
public interface Producer
{
	/**
	 * Create an image which will have written a distorted text.
	 *
	 * @param text
	 *            the distorted characters
	 * @return image with the text
	 */
	public BufferedImage createImage(String text);

	/**
	 * @return the text to be drawn
	 */
	public abstract String createText();
}
默认实现类:

- 导入jar包
    <!--   验证码 kaptcha -->
    <dependency>
        <groupId>com.github.penggle</groupId>
        <artifactId>kaptcha</artifactId>
        <version>2.3.2</version>
    </dependency>
- 编写Kaptcha配置类
Kaptcha因为没有整合到Spring中,所以我们需要自己写一个配置类,在config包下,创建一个KapthcaConfig类
package com.ateam.community.config;

import com.google.code.kaptcha.Producer;
import com.google.code.kaptcha.impl.DefaultKaptcha;
import com.google.code.kaptcha.util.Config;
import org.springframework.context.annotation.Bean;
import org.springframework.context.annotation.Configuration;

import java.util.Properties;

@Configuration
public class KaptchaConfig {

    @Bean
    public Producer kaptchaProducer() {


        Properties properties = new Properties();
        properties.setProperty("kaptcha.image.width","100");
        properties.setProperty("kaptcha.image.height","40");
        properties.setProperty("kaptcha.textproducer.font.size","32");
        properties.setProperty("kaptcha.textproducer.font.color","0,0,0");
        properties.setProperty("kaptcha.textproducer.char.string","123456789abcedefghijklmnopqrstuvwxyz");
        properties.setProperty("kaptcha.textproducer.char.length","4");
        properties.setProperty("kaptcha.noise.impl","com.google.code.kaptcha.impl.NoNoise");


        DefaultKaptcha kaptcha = new DefaultKaptcha();
        Config config = new Config(properties);
        kaptcha.setConfig(config);
        return kaptcha;
    }
}
- 在LoginController中新加入方法
   @Autowired
    private Producer producer;

  // 返回验证码
    @RequestMapping(value = "/kaptcha",method = RequestMethod.GET)
    public void getKaptcha(HttpServletResponse response, HttpSession session) {
        // 生成验证码
        String text = producer.createText();
        BufferedImage image = producer.createImage(text);

        // 将验证码存入 session
        session.setAttribute("kaptcha",text);


        // 将图片输出给浏览器
        response.setContentType("image/png");
        try {
            //response 由SpringMVC 管理,输出流不用自己关
            ServletOutputStream outputStream = response.getOutputStream();
            ImageIO.write(image,"png",outputStream);
        } catch (IOException e) {
            logger.error("响应验证码失败:"  + e.getMessage());

        }
    }
- 修改site包下,login.html页面


5. 开发登录、退出状态
- 访问登录页面
- 点击顶部区域内的链接,打开登录页面
- 登录
- 登录账号、密码、验证码
- 成功时,生成登录凭证,发送给客户端
- 失败时,跳回登录页面
- 退出
- 将登录凭证修改为失效状态
- 跳转至网站首页

登录凭证相关
现阶段先存到数据库中,后续会优化(Redis)

5.1 访问登录页面
点击顶部区域内的链接,打开登录页面

5.2 登录
- 数据访问层:在dao包下,编写LoginTicketMapper类
此类,sql语句不写在mapper包下的xml文件里,采用注解方式。
package com.ateam.community.dao;

import com.ateam.community.entity.LoginTicket;
import org.apache.ibatis.annotations.Insert;
import org.apache.ibatis.annotations.Options;
import org.apache.ibatis.annotations.Select;
import org.apache.ibatis.annotations.Update;

/**
 * @author wsh
 * @date 2021-11-19 22:18
 * @description
 */
@Mapper
public interface LoginTicketMapper {

    @Insert({
            "insert into login_ticket(user_id,ticket,status,expired) ",
            "values(#{userId},#{ticket},#{status},#{expired})"
    })
    @Options(useGeneratedKeys = true,keyProperty = "id")
    int insertLoginTicket(LoginTicket loginTicket);

    @Select({
            "select id,user_id,ticket,status,expired from login_ticket ",
            "where ticket = #{ticket}"
    })
    LoginTicket selectByTicket(String ticket);

    @Update({
            "<script>",
            "update login_ticket set status = #{status} where ticket=#{ticket} ",
            "<if test=\"ticket!=null\"> ",
            "and 1=1 ",
            "</if>",
            "</script>"
    })
    int updateStatus(String ticket, int status);
}
- 服务层,在service包下,编写LoginService类
package com.ateam.community.service;

import com.ateam.community.dao.LoginTicketMapper;
import com.ateam.community.entity.LoginTicket;
import com.ateam.community.entity.User;
import com.ateam.community.util.CommunityUtil;
import org.apache.commons.lang3.StringUtils;
import org.springframework.beans.factory.annotation.Autowired;
import org.springframework.context.annotation.Primary;
import org.springframework.stereotype.Service;

import java.util.Date;
import java.util.HashMap;
import java.util.Map;

/**
 * @author wsh
 * @date 2021-12-19 17:50
 * @description
 */

@Service
public class LoginService {

    @Autowired
    private LoginTicketMapper loginTicketMapper;

    @Autowired
    private UserService userService;

    public Map<String,Object> login(String username, String password,int expireSeconds){
        HashMap<String, Object> map = new HashMap<>();
        // 空值处理
        if (StringUtils.isBlank(username)) {
            map.put("usernameMsg","用户名不能为空");
            return map;
        }

        if (StringUtils.isBlank(password)) {
            map.put("passwordMsg","密码不能为空");
            return map;
        }

        // 验证账号
        User user = userService.findUserByName(username);
        if (user == null) {
            map.put("usernameMsg","用户不存在");
            return map;
        }

        // 验证账号
        if (user.getStatus() == 0) {
            map.put("usernameMsg","该账号未激活");
            return map;
        }

        // 验证密码
        password = CommunityUtil.md5(password + user.getSalt());
        if (!password.equals(user.getPassword())) {
            map.put("passwordMsg","密码不正确");
            return map;
        }

        // 生成登录凭证
        LoginTicket loginTicket = new LoginTicket();
        loginTicket.setUserId(user.getId());
        loginTicket.setTicket(CommunityUtil.generateUUID());
        loginTicket.setStatus(0);
        loginTicket.setExpired(new Date(System.currentTimeMillis() + expireSeconds * 1000));
        loginTicketMapper.insertLoginTicket(loginTicket);
        map.put("ticket",loginTicket.getTicket());
        return map;
    }


}

}
- 视图层,在controller包下,LoginController类中添加方法
    @Value("${server.servlet.context-path}")
    private String contextPath;

    @RequestMapping(value = "/login",method = RequestMethod.POST)
    public String login(String username, String password, String code, boolean rememberme,
                        Model model, HttpSession session,
                        HttpServletResponse response{

        // 检测验证码
        String kaptcha = (String) session.getAttribute("kaptcha");
        if (StringUtils.isBlank(kaptchaOwner)) {
            model.addAttribute("codeMsg","验证已失效!");
            return "/site/login";
        }


        if (StringUtils.isBlank(kaptcha) || StringUtils.isBlank(code) || !kaptcha.equalsIgnoreCase(code)) {
            model.addAttribute("codeMsg","验证码不正确!");
            return "/site/login";
        }


        // 检测账号,密码
        int expiredSeconds = rememberme ? REMEMBER_EXPIRED_SECONDS : DEFAULT_EXPIRED_SECONDS;
        Map<String, Object> map = loginService.login(username, password, expiredSeconds);
        if (map.containsKey("ticket")) {
            Cookie cookie = new Cookie("ticket", map.get("ticket").toString());
            cookie.setPath(contextPath);
            cookie.setMaxAge(expiredSeconds);
            response.addCookie(cookie);

            return "redirect:/index";
        } else {
            model.addAttribute("usernameMsg", map.get("usernameMsg"));
            model.addAttribute("passwordMsg", map.get("passwordMsg"));
            return "/site/login";
        }

    }
其中的常量值:
    /**
     * 默认状态登录凭证的超时 时间
     */
    int DEFAULT_EXPIRED_SECONDS = 3600 * 12;

    /**
     * 记住状态的登录凭证 超时 时间
     */
    int REMEMBER_EXPIRED_SECONDS = 3600 * 24 * 100;
修改login.html页面
<div class="container pl-5 pr-5 pt-3 pb-3 mt-3 mb-3">
<h3 class="text-center text-info border-bottom pb-3">登 录</h3>
<form class="mt-5" method="post" th:action="@{/login}">
<div class="form-group row">
<label for="username" class="col-sm-2 col-form-label text-right">账号:</label>
<div class="col-sm-10">
<input type="text" th:class="|form-control ${usernameMsg!=null?'is-invalid':''}|"
th:value="${param.username}"
id="username" name="username" placeholder="请输入您的账号!" required>
<div class="invalid-feedback" th:text="${usernameMsg}">
该账号不存在!
</div>
</div>
</div>
<div class="form-group row mt-4">
<label for="password" class="col-sm-2 col-form-label text-right">密码:</label>
<div class="col-sm-10">
<input type="password" th:class="|form-control ${passwordMsg!=null?'is-invalid':''}|"
th:value="${param.password}"
id="password" name="password" placeholder="请输入您的密码!" required>
<div class="invalid-feedback" th:text="${passwordMsg}">
密码长度不能小于8位!
</div>
</div>
</div>
<div class="form-group row mt-4">
<label for="verifycode" class="col-sm-2 col-form-label text-right">验证码:</label>
<div class="col-sm-6">
<input type="text" th:class="|form-control ${codeMsg!=null?'is-invalid':''}|"
id="verifycode" name="code" placeholder="请输入验证码!">
<div class="invalid-feedback" th:text="${codeMsg}">
验证码不正确!
</div>
</div>
<div class="col-sm-4">
<img th:src="@{/kaptcha}" id="kaptcha" style="width:100px;height:40px;" class="mr-2"/>
<a href="javascript:refresh_kaptcha();" class="font-size-12 align-bottom">刷新验证码</a>
</div>
</div>
<div class="form-group row mt-4">
<div class="col-sm-2"></div>
<div class="col-sm-10">
<input type="checkbox" id="remember-me" name="rememberme"
th:checked="${param.rememberme}">
<label class="form-check-label" for="remember-me">记住我</label>
<a th:href="@{/user/forget}" class="text-danger float-right">忘记密码?</a>
</div>
</div>
<div class="form-group row mt-4">
<div class="col-sm-2"></div>
<div class="col-sm-10 text-center">
<button type="submit" class="btn btn-info text-white form-control">立即登录</button>
</div>
</div>
</form>
</div>
5.3 退出
- 将登录凭证修改为失效状态
在service层增加一个退出方法
    public void logout(String ticket) {
    	// 1 表示无效
        loginTicketMapper.updateStatus(ticket,1);
    }
- 在controller层增加一个logout方法
    @RequestMapping(value = "/logout",method = RequestMethod.GET)
    public String logout(@CookieValue("ticket") String ticket) {
        loginService.logout(ticket);
        // 跳转到登录页面
        return "redirect:/login";
    }
- 修改index.html页面

注:登录登出功能后续还会有优化,不然,每个用户的登录的每次新的登录都会在login_ticket表中增加一条记录
6. 显示登录信息
- 拦截器示例
- 定义拦截器,实现HandlerInterceptor
- 配置拦截器,为它指定拦截、排除的路径
- 拦截器的应用
- 在请求开始是查询登录用户
- 在本次请求中持有用户数据
- 在模板视图上显示用户数据
- 在请求结束是清理用户数据

6.1 拦截器示例
- 在controller包下,新建一个interceptor包,定义一个方法实现HandlerInterceptor
package com.ateam.community.controller.interceptor;

import org.slf4j.Logger;
import org.slf4j.LoggerFactory;
import org.springframework.stereotype.Component;
import org.springframework.web.servlet.HandlerInterceptor;
import org.springframework.web.servlet.ModelAndView;

import javax.servlet.http.HttpServletRequest;
import javax.servlet.http.HttpServletResponse;

/**
 * @author wsh
 * @date 2021-11-20 19:30
 * @description
 */
@Component
public class AlphaInterceptor implements HandlerInterceptor  {

    private static final Logger logger = LoggerFactory.getLogger(AlphaInterceptor.class);

    // 在 Controller 之前执行
    @Override
    public boolean preHandle(HttpServletRequest request, HttpServletResponse response, Object handler) throws Exception {
        logger.debug("preHandle:" + handler.toString());
        return true;
    }
    // 在 Controller 之后执行
    @Override
    public void postHandle(HttpServletRequest request, HttpServletResponse response, Object handler, ModelAndView modelAndView) throws Exception {
        logger.debug("postHandle:" + handler.toString());
    }
    // 在 TemplateEngineer 之后执行
    @Override
    public void afterCompletion(HttpServletRequest request, HttpServletResponse response, Object handler, Exception ex) throws Exception {
        logger.debug("afterCompletion:" + handler.toString());
    }
}
- 配置拦截器,为它指定拦截、排除的路径
在conf包中,新建一个类,实现WebMvcConfigurer
@Configuration
public class WebMvcConfig implements WebMvcConfigurer {

    @Autowired
    private AlphaInterceptor alphaInterceptor;

    @Override
    public void addInterceptors(InterceptorRegistry registry) {
        registry.addInterceptor(alphaInterceptor)
                .excludePathPatterns("/**/*.css","/**/*.js","/**/*.png","/**/*.jpg","/**/*.jpeg")//通配符
                .addPathPatterns("/register","/login");

}
6.2 拦截器应用
- 新建一个拦截器LoginTicketInterceptor
package com.ateam.community.controller.interceptor;

import com.ateam.community.entity.LoginTicket;
import com.ateam.community.entity.User;
import com.ateam.community.service.UserService;
import com.ateam.community.util.CookieUtil;
import com.ateam.community.util.HostHolder;
import org.springframework.beans.factory.annotation.Autowired;
import org.springframework.security.authentication.UsernamePasswordAuthenticationToken;
import org.springframework.security.core.Authentication;
import org.springframework.security.core.context.SecurityContextHolder;
import org.springframework.security.core.context.SecurityContextImpl;
import org.springframework.stereotype.Component;
import org.springframework.web.servlet.HandlerInterceptor;
import org.springframework.web.servlet.ModelAndView;

import javax.servlet.http.HttpServletRequest;
import javax.servlet.http.HttpServletResponse;
import java.util.Date;

/**
 * @author wsh
 * @date 2021-11-20 20:33
 * @description
 */
@Component
public class LoginTicketInterceptor implements HandlerInterceptor {

    @Autowired
    private UserService userService;

    @Autowired
    private HostHolder hostHolder;

    @Override
    public boolean preHandle(HttpServletRequest request, HttpServletResponse response, Object handler) throws Exception {

        // 从cookie中获取凭证
        String ticket = CookieUtil.getValue(request, "ticket");
        if (ticket != null) {
            // 查询凭证
            LoginTicket loginTicket = userService.findLoginTicket(ticket);
            // 检测凭证是否有效
            if (loginTicket != null && loginTicket.getStatus() == 0 && loginTicket.getExpired().after(new Date())) {
                // 更加凭证查询用户
                User user = userService.findUserById(loginTicket.getUserId());
                // 在本次请求中持有用户
                hostHolder.setUser(user);

            }
        }
        return true;
    }


	// 在controller之后把用户信息传递给模板
    @Override
    public void postHandle(HttpServletRequest request, HttpServletResponse response, Object handler, ModelAndView modelAndView) throws Exception {
        User user = hostHolder.getUser();
        if (user != null && modelAndView != null) {
            modelAndView.addObject("loginUser", user);
        }
    }


    @Override
    public void afterCompletion(HttpServletRequest request, HttpServletResponse response, Object handler, Exception ex) throws Exception {
        hostHolder.clear();
    }
}
util包下的HostHolder类可以模拟服务端的Session功能,存放是否有登录的user
防止多线程问题用ThreadLocal
package com.ateam.community.util;

import com.ateam.community.entity.User;
import org.springframework.stereotype.Component;

/**
 * @author wsh
 * @date 2021-11-22 21:36
 * @description
 */

// 持有用户信息,用于代替session对象
@Component
public class HostHolder {

    private ThreadLocal<User> users = new ThreadLocal<>();

    public void setUser(User user) {
        users.set(user);
    }

    public User getUser() {
        return users.get();
    }

    public void clear() {
        users.remove();
    }
}
CookieUtil根据key去cookie值,将其封装成一个工具类
package com.ateam.community.util;


import javax.servlet.http.Cookie;
import javax.servlet.http.HttpServletRequest;

/**
 * @author wsh
 * @date 2021-11-20 20:35
 * @description
 */
public class CookieUtil {

    public static String getValue(HttpServletRequest request, String name) {
        if (request == null || name == null) {
            throw new IllegalArgumentException("参数为空");
        }

        Cookie[] cookies = request.getCookies();
        if (cookies != null) {
            for (Cookie cookie : cookies) {
                if (cookie.getName().equals(name)) {
                    return cookie.getValue();
                }
            }
        }

        return null;
    }
}
- 在配置中加入拦截器
@Configuration
public class WebMvcConfig implements WebMvcConfigurer {

    @Autowired
    private AlphaInterceptor alphaInterceptor;

    @Autowired
    private LoginTicketInterceptor loginTicketInterceptor;


    @Override
    public void addInterceptors(InterceptorRegistry registry) {
        registry.addInterceptor(alphaInterceptor)
                .excludePathPatterns("/**/*.css","/**/*.js","/**/*.png","/**/*.jpg","/**/*.jpeg")//通配符
                .addPathPatterns("/register","/login");

        registry.addInterceptor(loginTicketInterceptor)
                .excludePathPatterns("/**/*.css","/**/*.js","/**/*.png","/**/*.jpg","/**/*.jpeg");//通配符

}
- 处理页面

7. 账号设置
- 上传文件
- 请求:必须是POST请求
- 表单:enctype = “multipart/form-data”
- Spring MVC:通过MultipartFile处理上传文件
- 开发步骤
- 访问账号设置页面
- 上传头像
- 获取头像
- 修改密码

7.1 访问账号设置页面
- 新建一个UserController类,编写一个方法,用户账户设置
@Controller
@RequestMapping(value = "/user")
public class UserController implements CommunityConstant {

    private static final Logger logger = LoggerFactory.getLogger(UserController.class);

    @RequestMapping(value = "/setting", method = RequestMethod.GET)
    public String getSettingPage() {
        return "/site/setting";
    }
}
- 修改site包下settings.html文件

- 修改index.html

7.2 上传头像
- 在UserService中新加一个方法
    public int updateHeader(int id, String headerUrl) {
        int rows = userMapper.updateHeader(id, headerUrl);
        return rows;
    }
- 在UserController中新加一个方法
@Controller
@RequestMapping(value = "/user")
public class UserController implements CommunityConstant {

    private static final Logger logger = LoggerFactory.getLogger(UserController.class);

    @Value("${community.path.upload}")
    private String uploadPath;

    @Value("${community.path.domain}")
    private String domain;


    @Value("${server.servlet.context-path}")
    private String contextPath;

    @Autowired
    private UserService userService;

    @Autowired
    private HostHolder hostHolder;

    @LoginRequired
    @RequestMapping(value = "/setting", method = RequestMethod.GET)
    public String getSettingPage() {
        return "/site/setting";
    }


    @RequestMapping(value = "/upload", method = RequestMethod.POST)
    public String uploadHeader(MultipartFile headerImage, Model model) {
        if (headerImage == null) {
            model.addAttribute("error", "您还没有选择图片!");
            return "/site/setting";
        }

        String filename = headerImage.getOriginalFilename();
        String suffix = filename.substring(filename.lastIndexOf("."));
        if (StringUtils.isBlank(suffix) || !((suffix.equals(".png")) || suffix.equals(".jpg"))) {
        model.addAttribute("error", "文件的格式不正确");
        return "/site/setting";
        }

        // 生成随机文件名
        filename  = CommunityUtil.generateUUID() + suffix;
        // 确定文件存放的路径
        File dest = new File(uploadPath + "/" + filename);
        try {
            // 存储文件
            headerImage.transferTo(dest);
        } catch (IOException e){
            logger.error("上传文件失败:" + e.getMessage());
            throw new RuntimeException("文件上传失败,服务器发送异常!",e);
        }

        // 更新当前用户的头像的路径(web访问路径)
        // http://localhsot:8080/comomunity/user/header/xxx.png
        User user = hostHolder.getUser();
        String headerUrl = domain + contextPath + "/user/header/" + filename;
        userService.updateHeader(user.getId(),headerUrl);

        return "redirect:/index";
    }
}
其中,uplpad是图片上传后存储的位置,在配置文件中配置,方便后续项目上线后,更改
community.path.upload=F:/code/community-data/upload
- 修改setting.htm文件
主要是那个post请求的表单

7.3 获取头像
在UserController中新加一个方法
    //http://localhost:8080/community/user/header/bca58eae9dee42a384e34d71c20a8c51.jpg
    // 向浏览器中响应图片
    @RequestMapping(value = "/header/{fileName}",method = RequestMethod.GET)
    public void getHeader(@PathVariable("fileName") String fileName, HttpServletResponse response) {
        // 服务器路径
        fileName = uploadPath + "/" + fileName;
        // 文件后缀
        String suffix = fileName.substring(fileName.lastIndexOf("."));
        // 响应图片
        response.setContentType("/image/" + suffix);
        try (
                FileInputStream fis = new FileInputStream(fileName);
                OutputStream outputStream = response.getOutputStream();
                ){
            byte[] buffer = new byte[1024];
            int len = 0;
            while ((len = fis.read(buffer)) != -1) {
                outputStream.write(buffer,0,len);
            }
        } catch (IOException e) {
            logger.error("读取文件失败:" + e.getMessage());
        }
    }
7.4 修改密码
- 在UserService中新增一个方法
    public int updatePassword(int id, String password) {
        int rows = userMapper.updatePassword(id, password);
        return rows;
    }
- 在UserController中新增一个方法
    @RequestMapping(value = "/update/password", method = RequestMethod.POST)
    public String updatePassword(String oldPassword, String newPassword, String confirmPassword, Model model) {

        if (StringUtils.isBlank(oldPassword)) {
            model.addAttribute("oldPasswordError","请输入原密码!");
            return "/site/setting";
        }

        if (StringUtils.isBlank(newPassword)) {
            model.addAttribute("newPasswordError","请输入新密码!");
            return "/site/setting";
        }

        if (StringUtils.isBlank(confirmPassword)) {
            model.addAttribute("confirmPasswordError","确认密码不能为空!");
            return "/site/setting";
        }

        if (!newPassword.equals(confirmPassword)) {
            model.addAttribute("confirmPasswordError","两次密码输入不一致!");
            return "/site/setting";
        }


        User user = hostHolder.getUser();
        // 判断 旧密码 是否正确
        oldPassword = CommunityUtil.md5(oldPassword + user.getSalt());
        if (!user.getPassword().equals(oldPassword)) {
            model.addAttribute("oldPasswordError", "原密码不正确!");
            return "/site/setting";
        }

        newPassword = CommunityUtil.md5(newPassword + user.getSalt());
        userService.updatePassword(user.getId(),newPassword);
        return "redirect:/index";
    }
- 修改setting.html
<!-- 修改密码 -->
<h6 class="text-left text-info border-bottom pb-2 mt-5">修改密码</h6>
<form class="mt-5" th:action="@{/user/update/password}" method="post">
	<div class="form-group row mt-4">
		<label for="old-password" class="col-sm-2 col-form-label text-right" >原密码:</label>
		<div class="col-sm-10">
			<input type="password" th:class="|form-control ${oldPasswordError!=null?'is-invalid':''}|"
				   id="old-password" name="oldPassword"
				   placeholder="请输入原始密码!" required>
			<div class="invalid-feedback" th:text="${oldPasswordError}">
				密码长度不能小于8位!
			</div>
		</div>
	</div>
	<div class="form-group row mt-4">
		<label for="new-password" class="col-sm-2 col-form-label text-right">新密码:</label>
		<div class="col-sm-10">
			<input type="password" th:class="|form-control ${newPasswordError!=null?'is-invalid':''}|"
				   id="new-password" name="newPassword"
				   placeholder="请输入新的密码!" required>
			<div class="invalid-feedback" th:text="${newPasswordError}">
				密码长度不能小于8位!
			</div>
		</div>
	</div>
	<div class="form-group row mt-4">
		<label for="confirm-password" class="col-sm-2 col-form-label text-right">确认密码:</label>
		<div class="col-sm-10">
			<input type="password" th:class="|form-control ${confirmPasswordError!=null?'is-invalid':''}|"
				   id="confirm-password" name="confirmPassword"
				   placeholder="再次输入新密码!" required>
			<div class="invalid-feedback" th:text="${confirmPasswordError}">
				两次输入的密码不一致!
			</div>
		</div>
	</div>
	<div class="form-group row mt-4">
		<div class="col-sm-2"></div>
		<div class="col-sm-10 text-center">
			<button type="submit" class="btn btn-info text-white form-control">立即保存</button>
		</div>
	</div>
</form>
8. 检查登录状态
- 使用拦截器
- 在方法前标注自定义注解
- 拦截所有请求,只处理带有该注解的方法
- 自定义注解
- 常用的元注解
@Target、@Retention、@Document、@Inherited - 如何读取元注解
Method.getDelcaredAnnotations()
Method.getAnnotation(Class< T > annotationClass)
- 常用的元注解
目前登录模块的问题

虽然用户没有登录,但若是知道对应的路径也可以访问到相关页面
8.1 自定义注解
常用的元注解
- @Target:声明自定义的注解可以作用在什么类型上,类上、方法上等
- @Retention:声明自定义的注解要保留的时间
1、RetentionPolicy.SOURCE:注解只保留在源文件,当Java文件编译成class文件的时候,注解被遗弃;
2、RetentionPolicy.CLASS:注解被保留到class文件,但jvm加载class文件时候被遗弃,这是默认的生命周期;
3、RetentionPolicy.RUNTIME:注解不仅被保存到class文件中,jvm加载class文件之后,仍然存在;
这3个生命周期分别对应于:Java源文件(.java文件) —> .class文件 —> 内存中的字节码。 - Document:声明自定义的注解生成文档要不要把注解也带上
- @Inherited:用于继承,一个子类继承父类,父类有注解,子类要不要继承这个注解
读取注解的方法:
- Method.getDelcaredAnnotations()
- Method.getAnnotation(Class< T > annotationClass)
8.2 使用拦截器
- 自定义注解
@Target(ElementType.METHOD)
@Retention(RetentionPolicy.RUNTIME)
public @interface LoginRequired {
}
- 新建拦截器进行处理
@Component
public class LoginRequiredInterceptor implements HandlerInterceptor {

    @Autowired
    private HostHolder hostHolder;

    @Override
    public boolean preHandle(HttpServletRequest request, HttpServletResponse response, Object handler) throws Exception {
        if (handler instanceof HandlerMethod) {
            HandlerMethod handlerMethod = (HandlerMethod) handler;
            // 获取拦截的方法
            Method method = handlerMethod.getMethod();
            LoginRequired loginRequired = method.getAnnotation(LoginRequired.class);
            if (loginRequired != null && hostHolder.getUser() == null) {
                response.sendRedirect(request.getContextPath() + "/login");
                return false;
            }
        }
        return true;
    }
}
- 配置拦截器
public class WebMvcConfig implements WebMvcConfigurer {

    @Autowired
    private AlphaInterceptor alphaInterceptor;

    @Autowired
    private LoginTicketInterceptor loginTicketInterceptor;

    @Autowired
    private LoginRequiredInterceptor loginRequiredInterceptor;


    @Override
    public void addInterceptors(InterceptorRegistry registry) {
        registry.addInterceptor(alphaInterceptor)
                .excludePathPatterns("/**/*.css","/**/*.js","/**/*.png","/**/*.jpg","/**/*.jpeg")//通配符
                .addPathPatterns("/register","/login");

        registry.addInterceptor(loginTicketInterceptor)
                .excludePathPatterns("/**/*.css","/**/*.js","/**/*.png","/**/*.jpg","/**/*.jpeg");//通配符


        registry.addInterceptor(loginRequiredInterceptor)
                .excludePathPatterns("/**/*.css","/**/*.js","/**/*.png","/**/*.jpg","/**/*.jpeg");//通配符

}
- 对需要拦截的方法添加此注解


 682
682


 被折叠的 条评论
为什么被折叠?
被折叠的 条评论
为什么被折叠?
 到【灌水乐园】发言


