


1.下载介质
数据库链接:https://pan.baidu.com/s/1RAbcipAiiWGDdDcCNAIjfw
提取码:9nzy
系统链接:链接:https://pan.baidu.com/s/1NgbNcw2pyGDYcmg5A47X4Q
提取码:ki4c
客户端链接:https://pan.baidu.com/s/1-KVEk0Ee6yQ0lXRfSLryWA
提取码:6np2
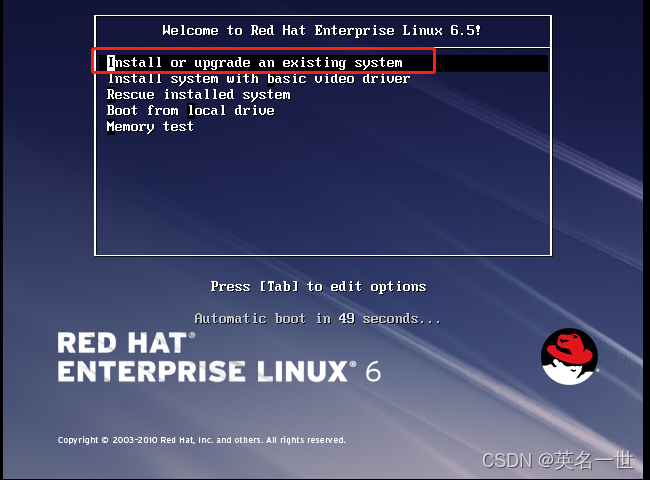
2.虚拟机安装(内存4G以上)
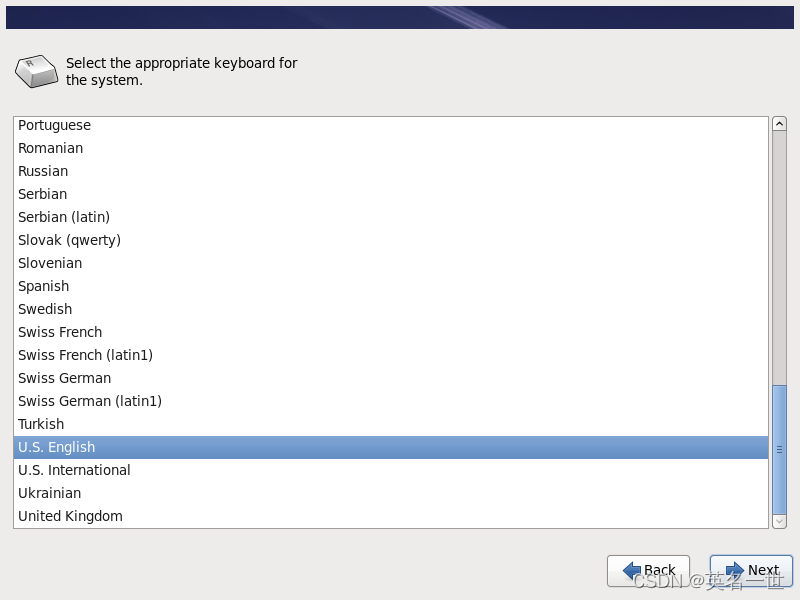
2.1 选择install or upgrade an existing system
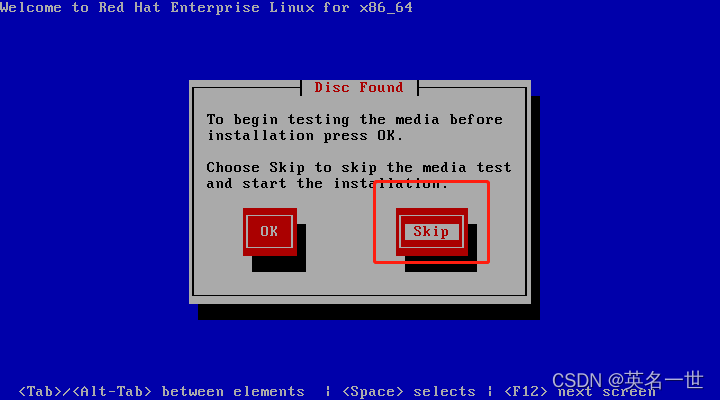
2.2 选择跳过
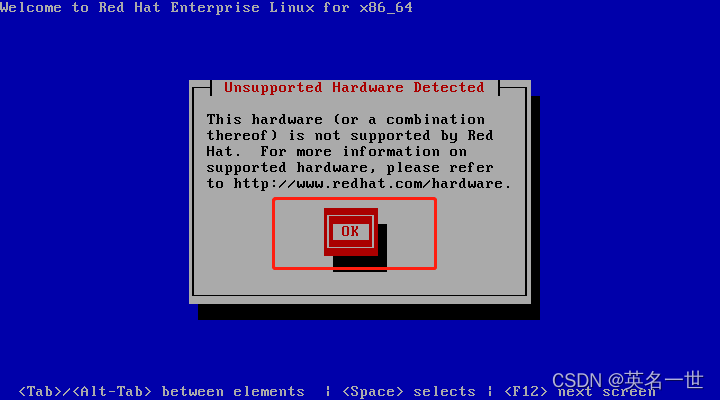
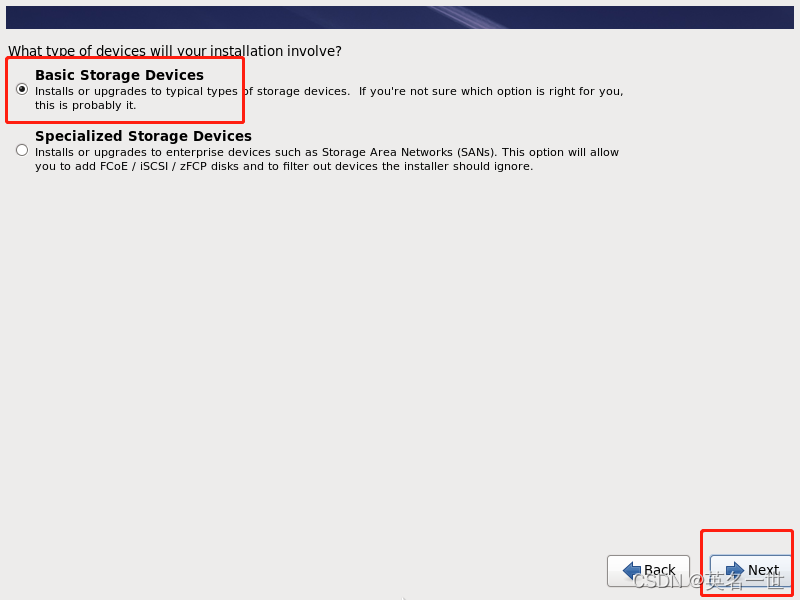
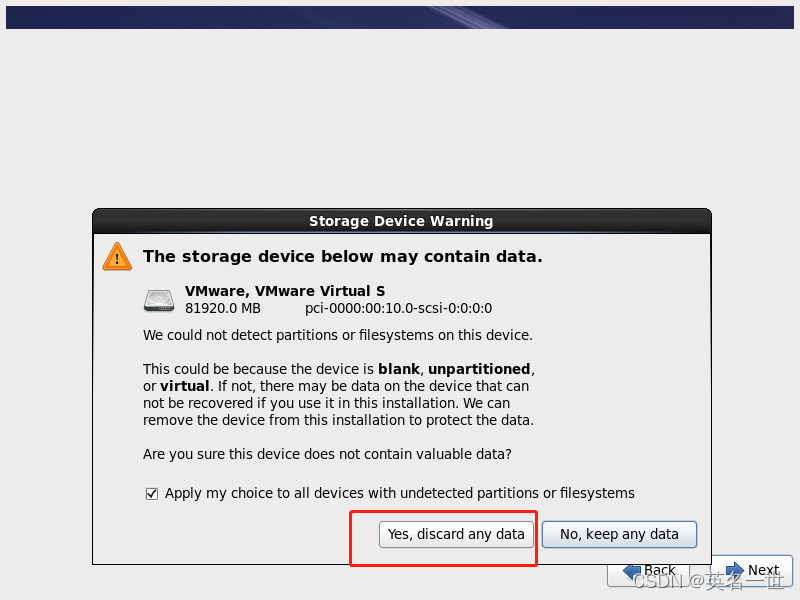
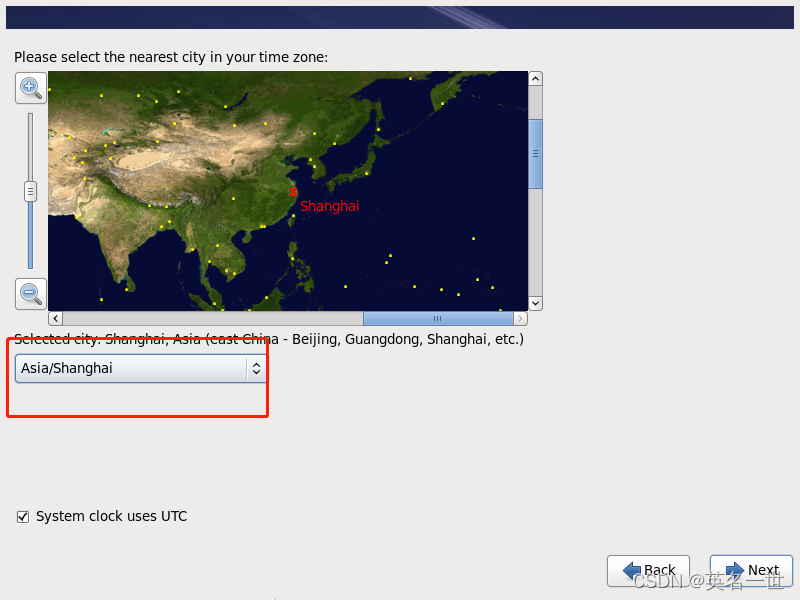
2.3
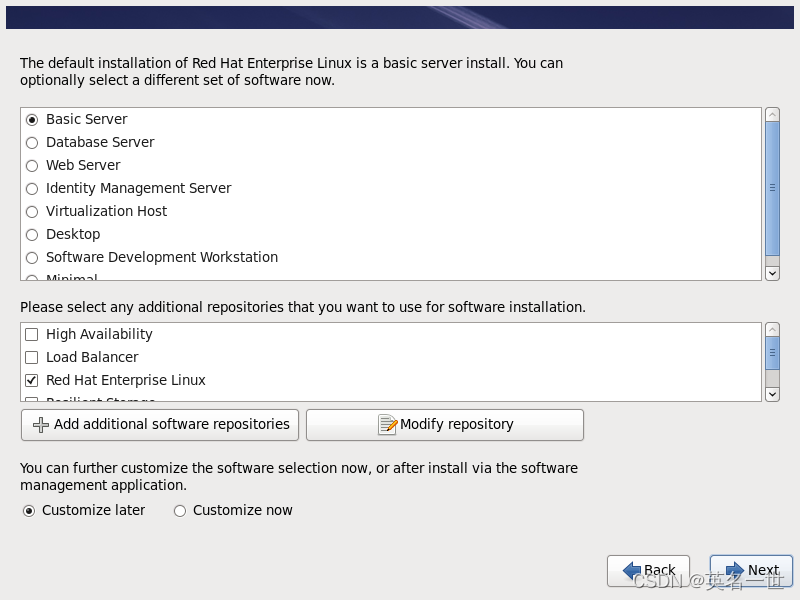
2.4 SOFTWARE SELECTION 按照下图选择“Server with GUI” 勾选图中的8个选项
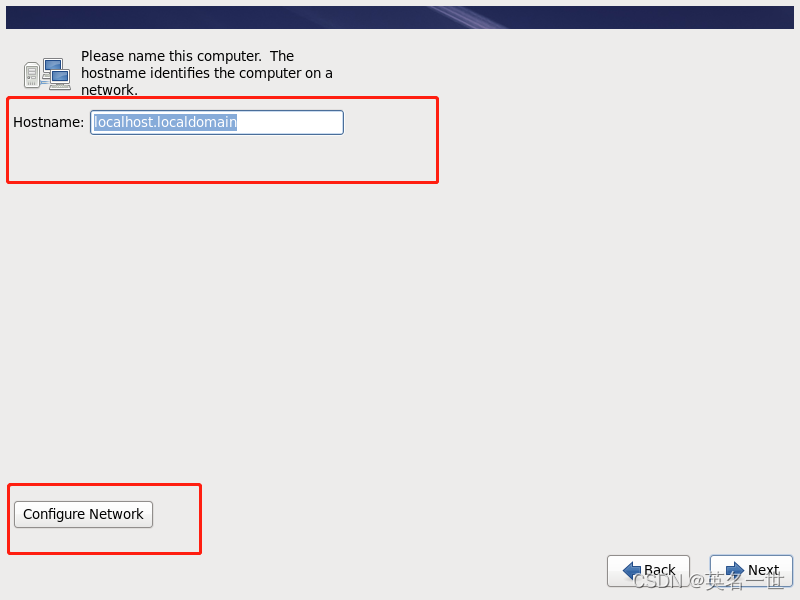
 2.5主机名和网络
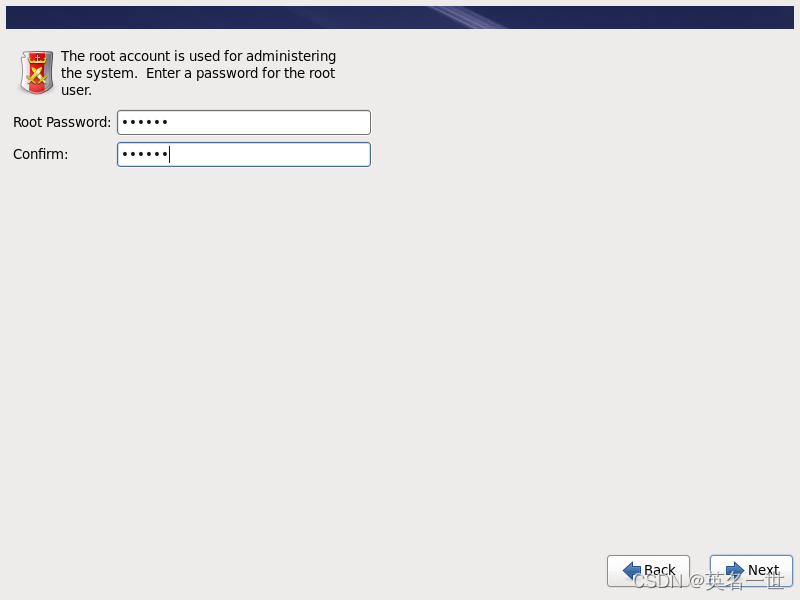
 2.6root密码
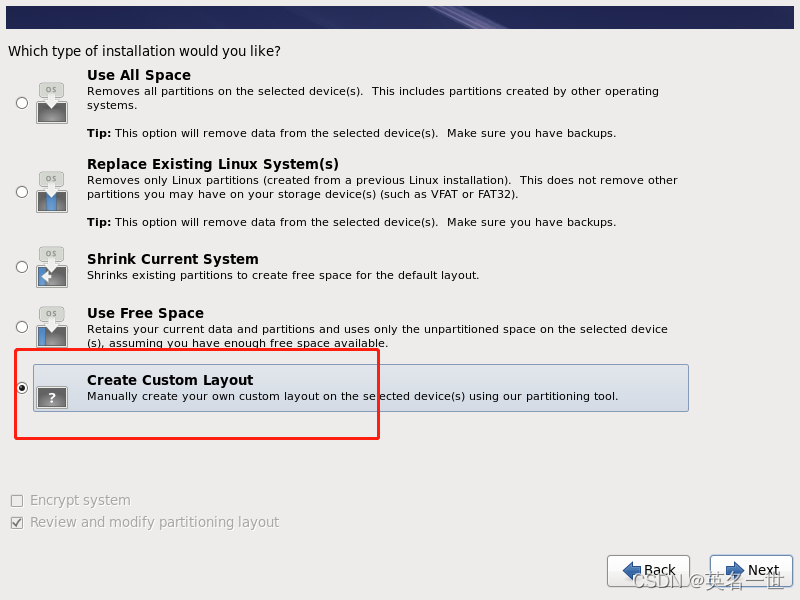
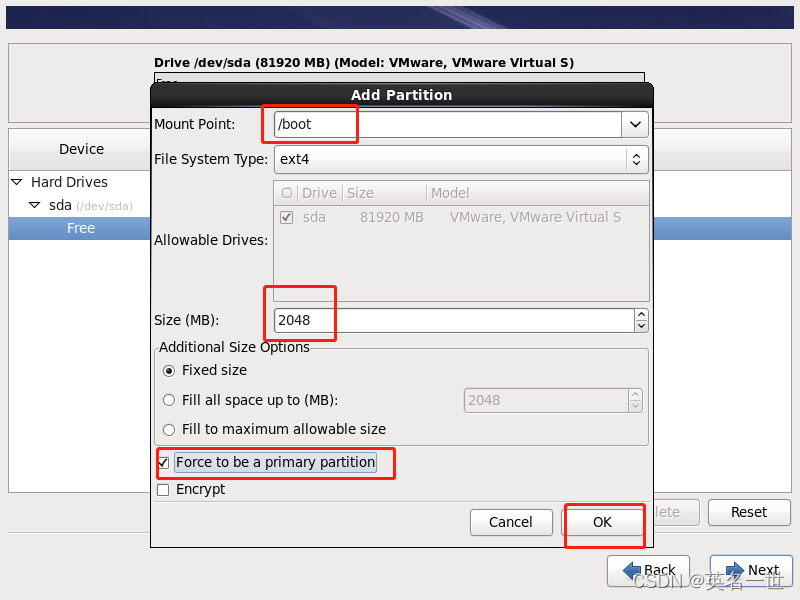
2.7创建自定义分区
创建标准分区
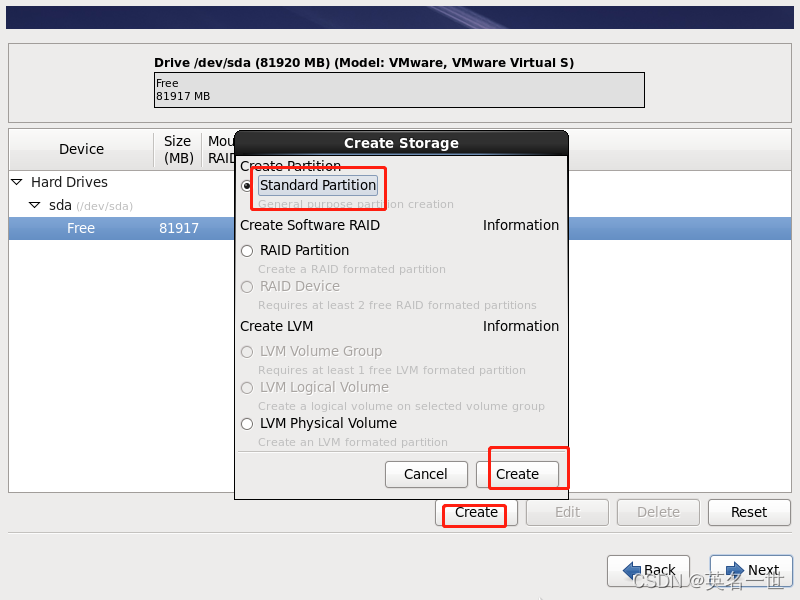
引导分区2G
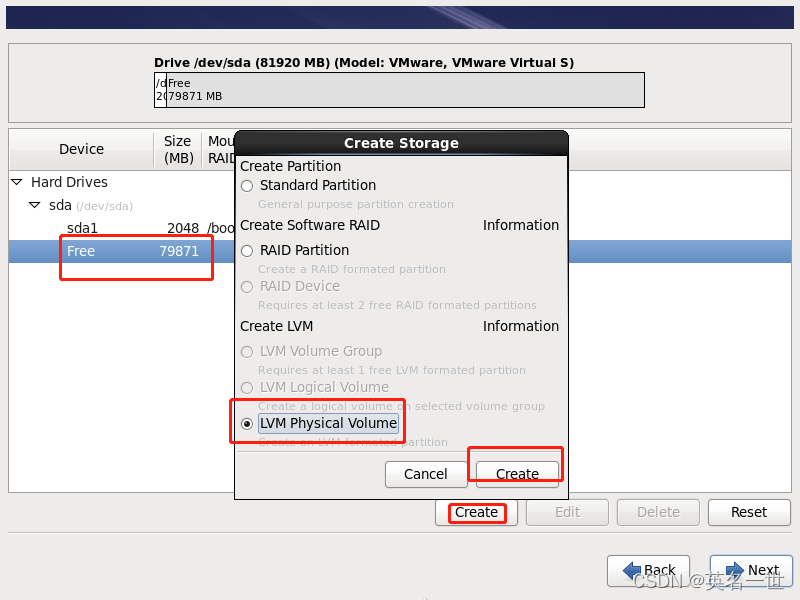
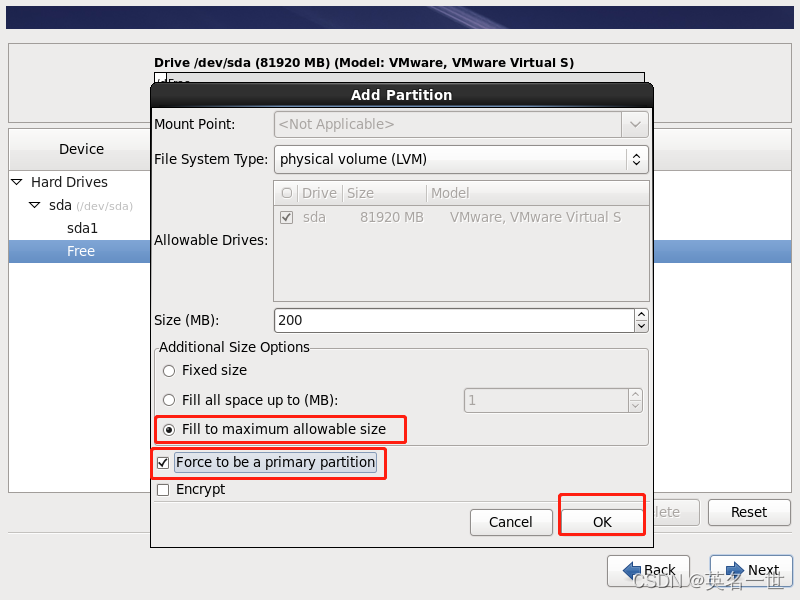
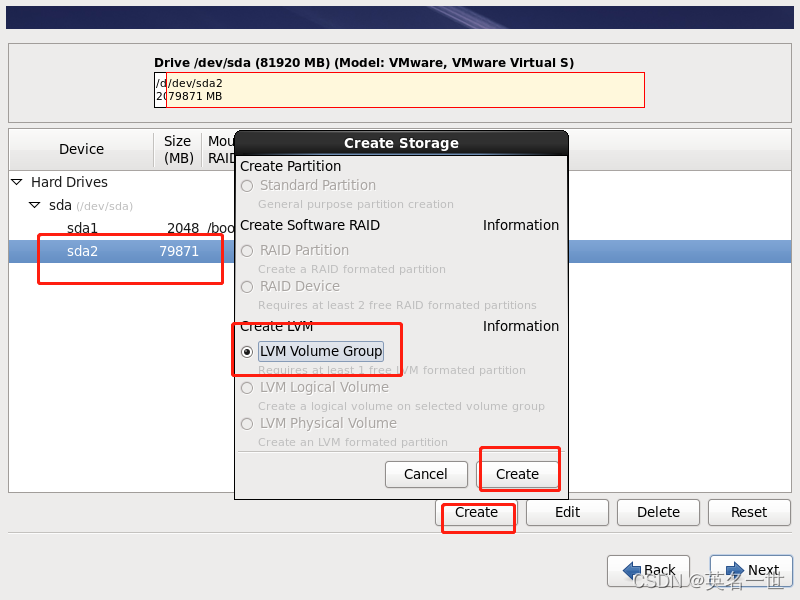
剩余全部空间逻辑卷组创建
/分区10G以上
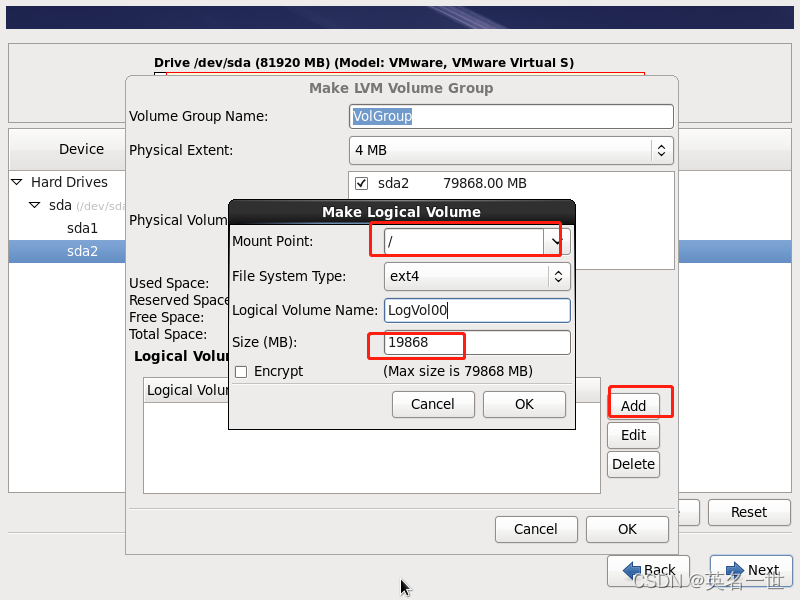
/swap分区为内存的1倍以上

/u01分区为剩余所有空间
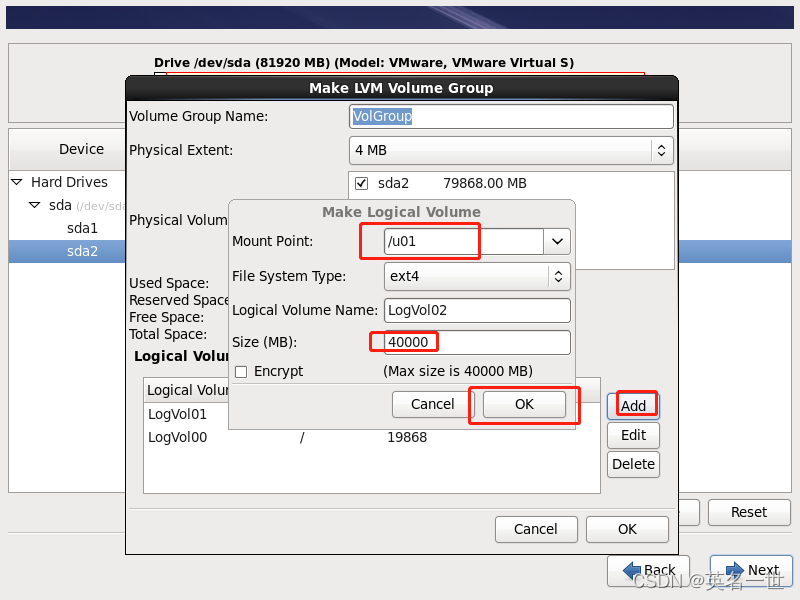
格式化分区后next
3.配置本地yum源
3.1 创建挂载目录
mkdir -p /media/cdrom3.2 上传rhel-server-6.5-x86_64-dvd.iso到opt目录下
3.3 挂载对应系统版本的iso光盘镜像文件
mount -o loop -t iso9660 /opt/rhel-server-6.5-x86_64-dvd.iso /media/cdrom3.4 配置yum文件如下
mv /etc/yum.repos.d/rhel-source.repo /etc/yum.repos.d/rhel-source.repobak&&vi /etc/yum.repos.d/rhel-source.repo[ISO]
name=iso
baseurl=file:///media/cdrom/
enabled=1
gpgcheck=04.安装需要的软件包
yum install -y binutils.x86_64 compat-libcap1.x86_64 compat-libstdc++-33.i686 compat-libstdc++-33.x86_64 gcc.x86_64 gcc-c++.x86_64 glibc.x86_64 glibc.i686 glibc-devel.x86_64 glibc-devel.i686 ksh.x86_64 libgcc.x86_64 libgcc.i686 libstdc++.i686 libstdc++.x86_64 libstdc++-devel.i686 libstdc++-devel.x86_64 libaio.x86_64 libaio.i686 libaio-devel.i686 libaio-devel.x86_64 libXext.x86_64 libXext.i686 libXtst.x86_64 libXtst.i686 libX11.x86_64 libX11.i686 libXau.x86_64 libXau.i686 libxcb.x86_64 libxcb.i686 libXi.x86_64 libXi.i686 make.x86_64 sysstat.x86_64 vnc vnc-server xdpyinfo 5.调整系统参数
service iptables stop
chkconfig iptables off
设置selinux为disabled
mv /etc/sysctl.conf /etc/sysctl.confbak&&vi /etc/sysctl.conf
# Kernel sysctl configuration file for Red Hat Linux
#
# For binary values, 0 is disabled, 1 is enabled.  See sysctl(8) and
# sysctl.conf(5) for more details.

# Controls IP packet forwarding
net.ipv4.ip_forward = 0

# Controls source route verification
net.ipv4.conf.default.rp_filter = 1

# Do not accept source routing
net.ipv4.conf.default.accept_source_route = 0

# Controls the System Request debugging functionality of the kernel
kernel.sysrq = 0

# Controls whether core dumps will append the PID to the core filename.
# Useful for debugging multi-threaded applications.
kernel.core_uses_pid = 1

# Controls the use of TCP syncookies
net.ipv4.tcp_syncookies = 1

# Disable netfilter on bridges.
#net.bridge.bridge-nf-call-ip6tables = 0
#net.bridge.bridge-nf-call-iptables = 0
#net.bridge.bridge-nf-call-arptables = 0

# Controls the default maxmimum size of a mesage queue
kernel.msgmnb = 65536

# Controls the maximum size of a message, in bytes
#kernel.msgmax = 65536

# Controls the maximum shared segment size, in bytes
#kernel.shmmax = 68719476736

# Controls the maximum number of shared memory segments, in pages
#kernel.shmall = 4294967296
# Oracle database 12c
fs.aio-max-nr = 1048576
fs.file-max = 6815744
kernel.shmall = 2097152
kernel.shmmax = 6442450944
kernel.shmmni = 4096
kernel.sem = 250 32000 100 128
kernel.panic_on_oops = 1
net.ipv4.ip_local_port_range = 9000 65500
net.core.rmem_default = 262144
net.core.rmem_max = 4194304
net.core.wmem_default = 262144
net.core.wmem_max = 1048586
vi /etc/security/limits.conf# Oracle database 12c
oracle soft nproc 2047
oracle hard nproc 16384
oracle soft nofile 1024
oracle hard nofile 65536
oracle soft stack 10240
vi /etc/pam.d/login# Oracle database 12c
session required pam_limits.so
sysctl -p生效
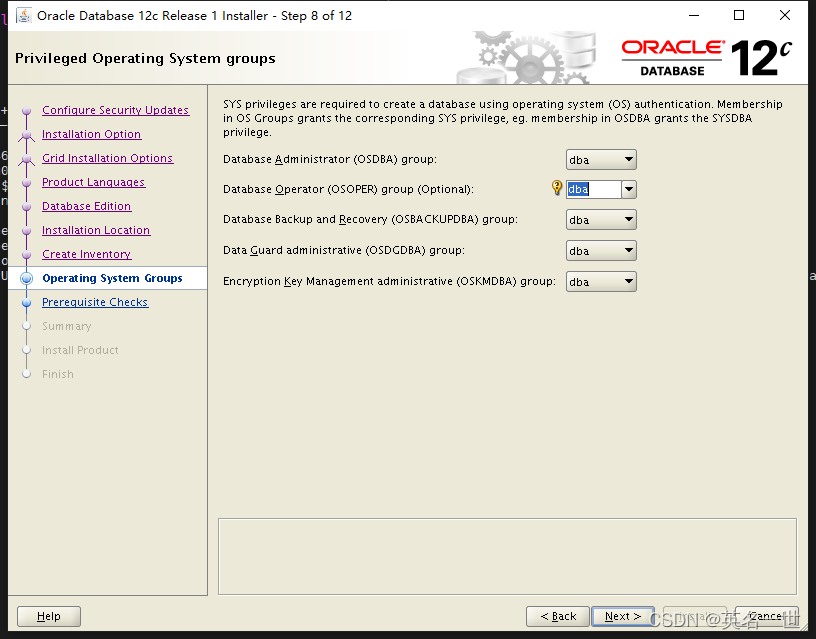
6.创建oracle用户并赋予权限
mkdir -p /u01/app/
groupadd -g 501 oinstall
groupadd -g 502 dba
useradd -u 502 -g oinstall -G dba oracle
chown -R oracle:oinstall /u01/app/
chmod -R 775 /u01/app
7.上传oracle压缩包到/u01/目录下

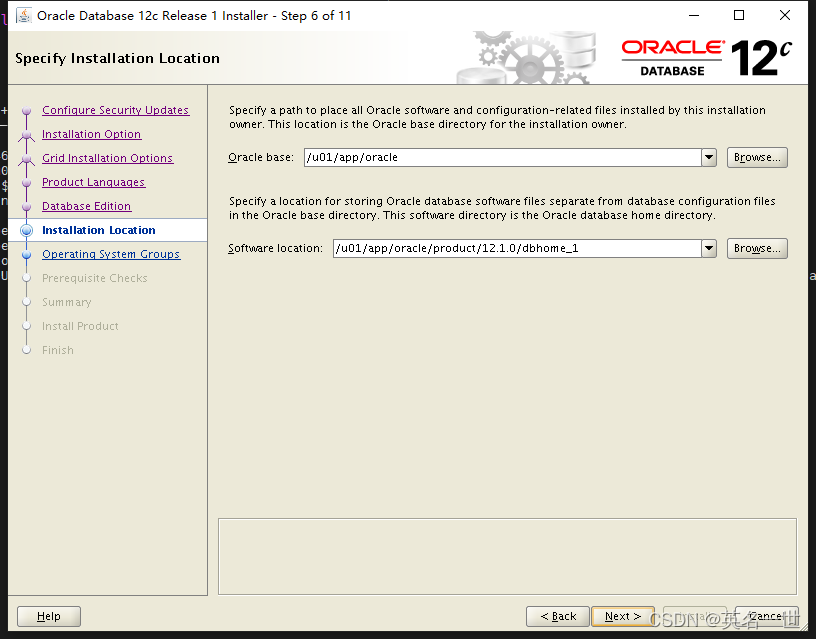
8.oracle用户环境变量
oracle 用户下vi编辑vi ~/.bash_profile,添加以下内容:
export ORACLE_BASE=/u01/app/oracle
export ORACLE_HOME=/u01/app/oracle/product/12.1.0/dbhome_1
export ORACLE_SID=oemrepo
export PATH=$ORACLE_HOME/bin:$PATH
9.解压软件并使用xshell调用图形安装软件(用oracle用户单独打开,不要切换用户)
cd /u01/app/
unzip /u01/linuxamd64_12102_database_1of2.zip && unzip /u01/linuxamd64_12102_database_2of2.zip
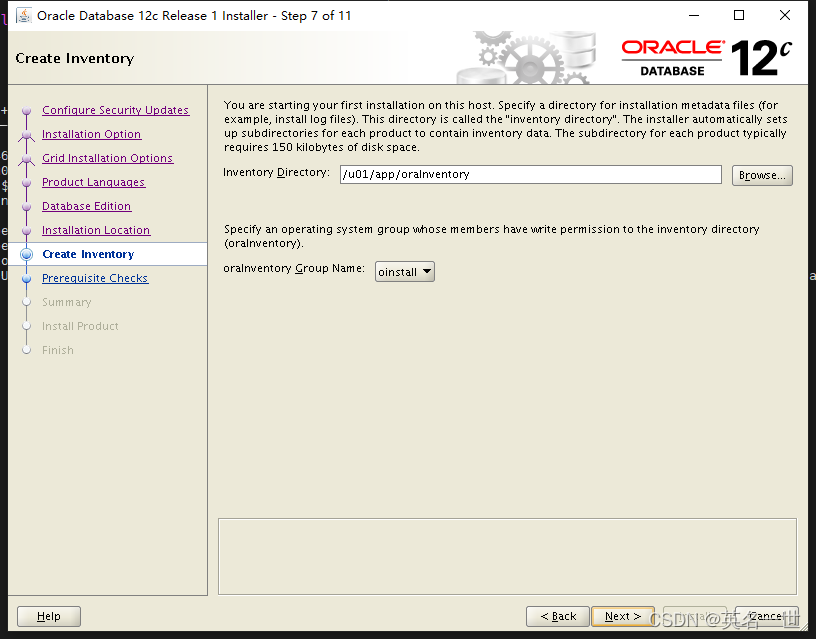
运行runInstaller
[oracle@OMR ~]$ cd /u01/app/database/
[oracle@OMR database]$ ls
install  response  rpm  runInstaller  sshsetup  stage  welcome.html
[oracle@OMR database]$ ./runInstaller
Starting Oracle Universal Installer...

Checking Temp space: must be greater than 500 MB.   Actual 24063 MB    Passed
Checking swap space: must be greater than 150 MB.   Actual 2015 MB    Passed
Checking monitor: must be configured to display at least 256 colors.    Actual 16777216    Passed
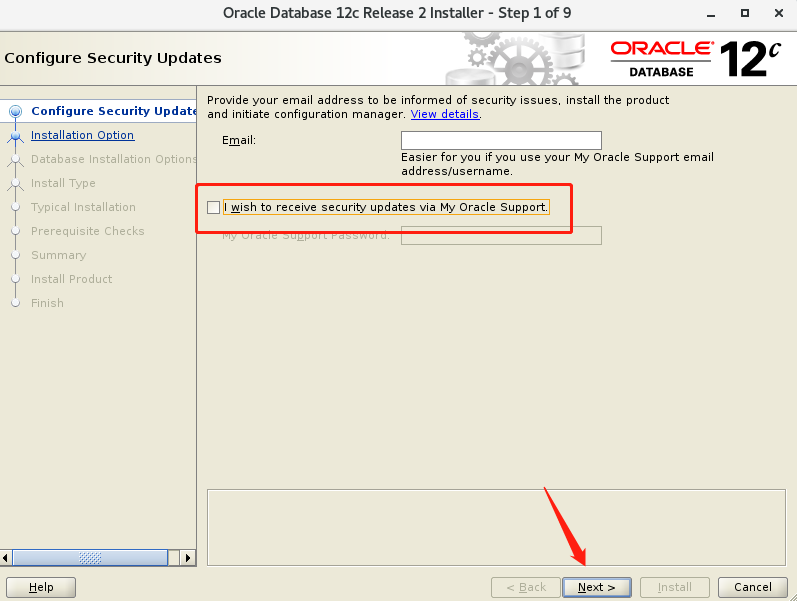
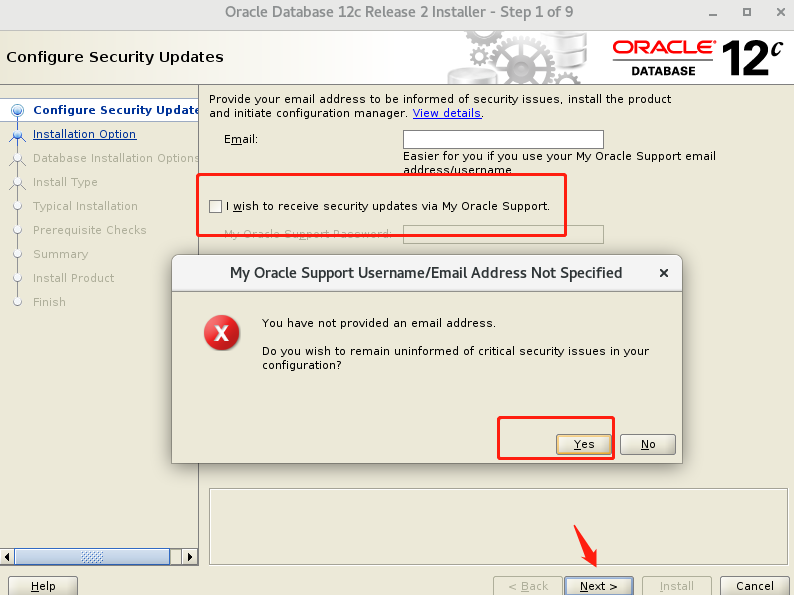
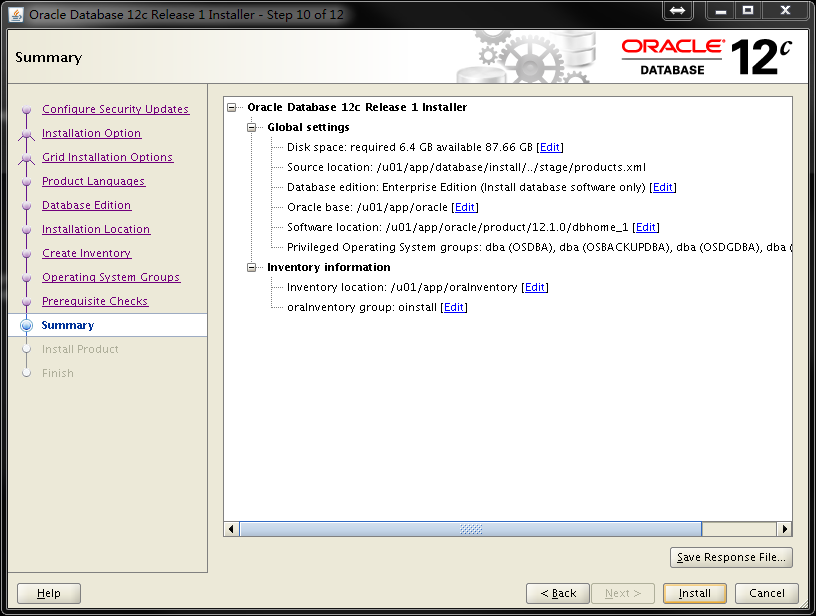
选择只安装软件:

确认最终安装信息无误:
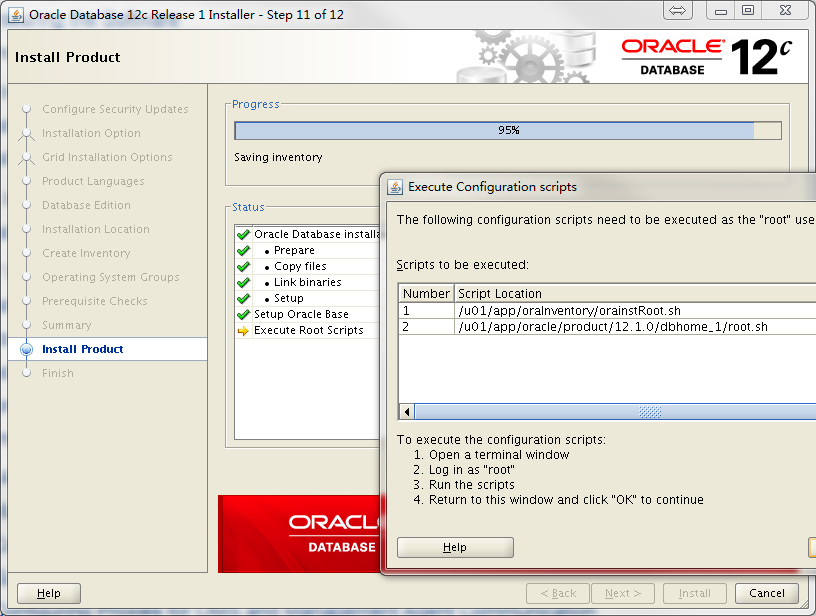
按要求root用户执行脚本:
完成安装:
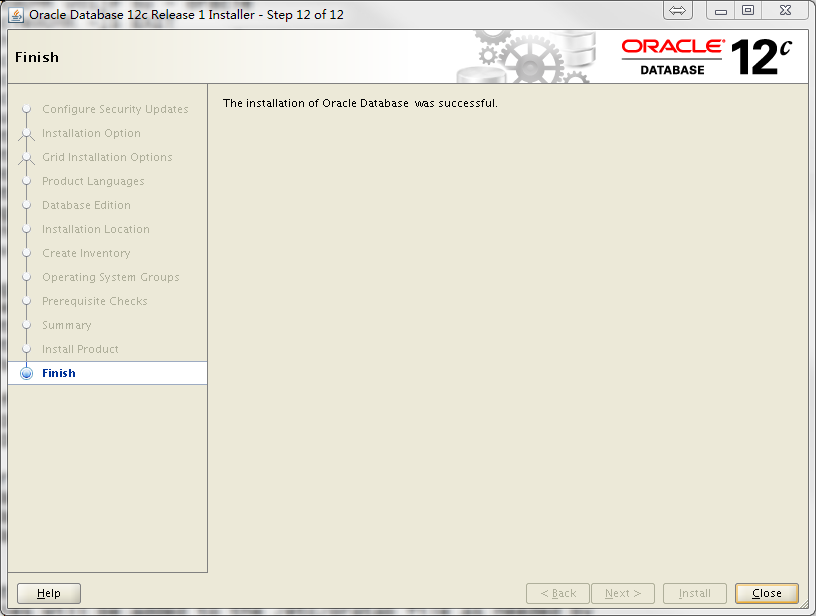
至此,Oracle 12.1.0.2 软件的安装已经完成
11.开启监听服务
netca
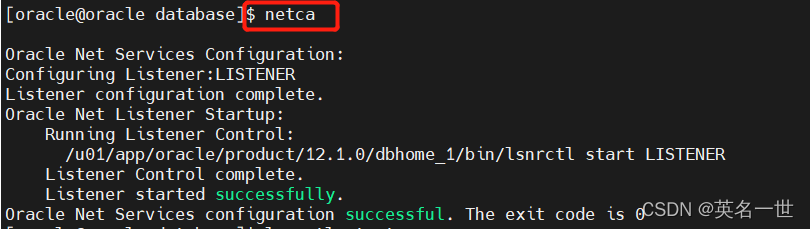
lsnrctl start

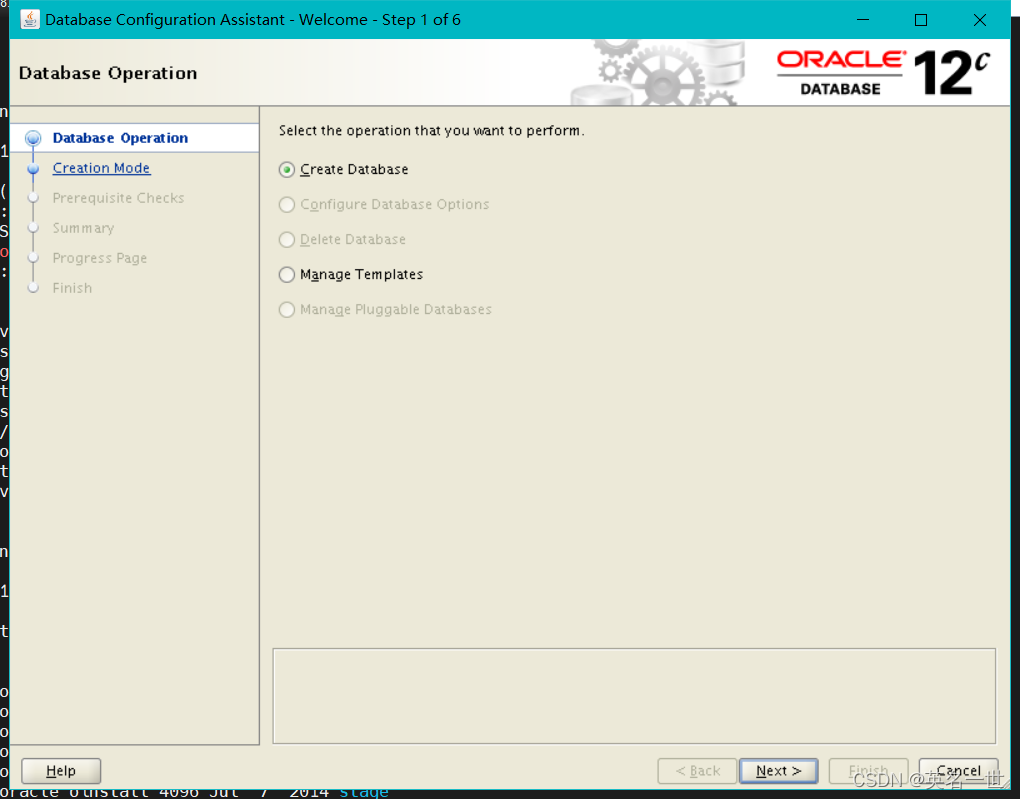
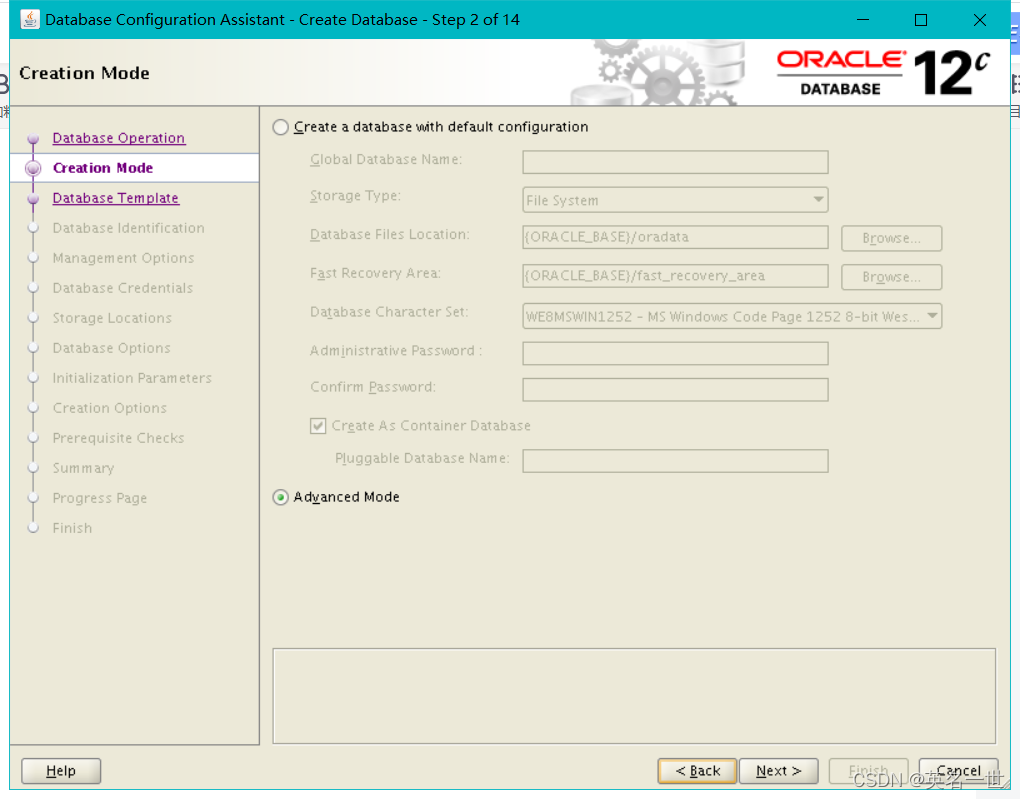
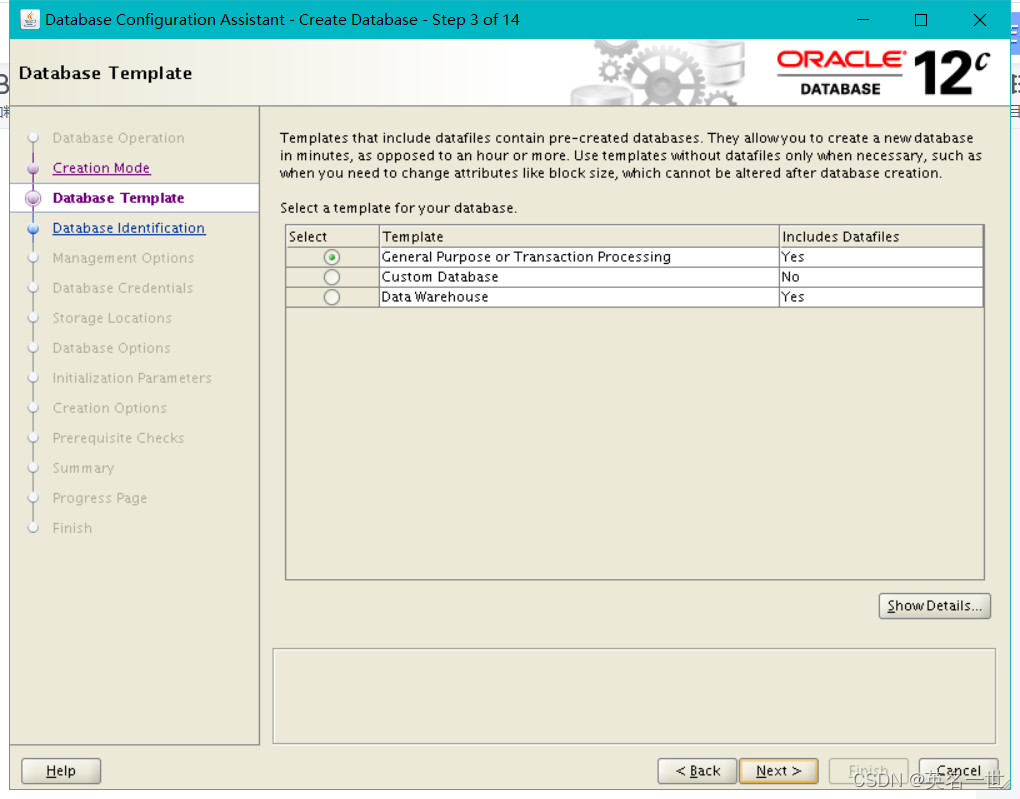
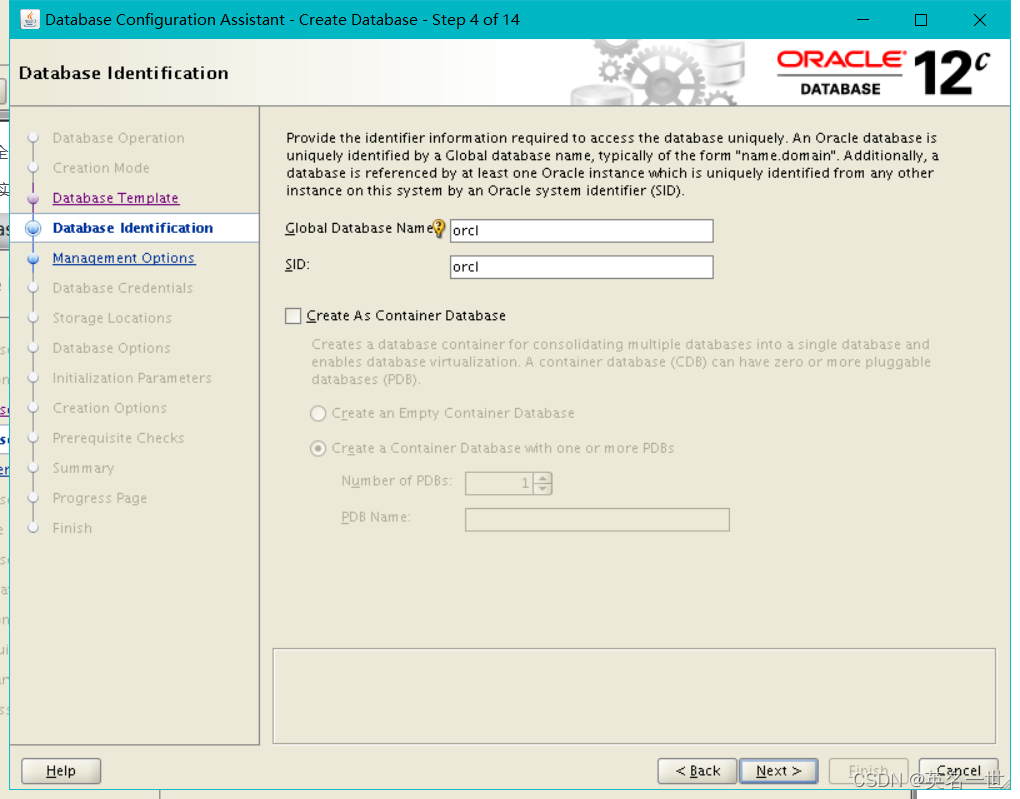
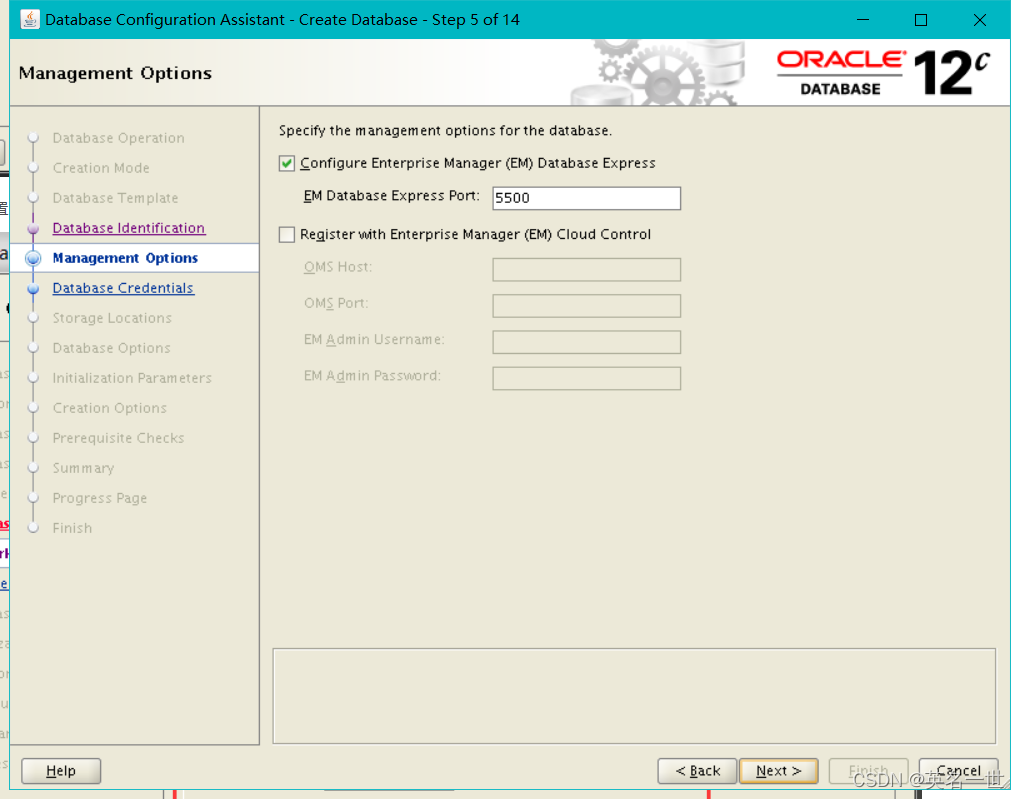
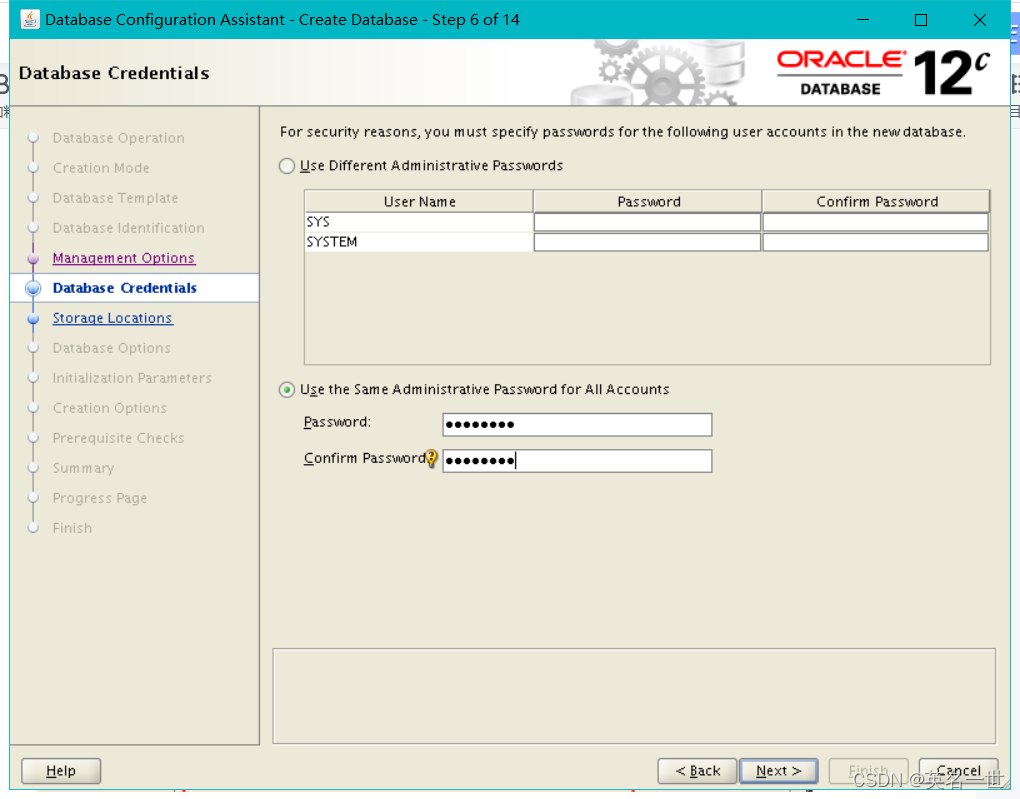
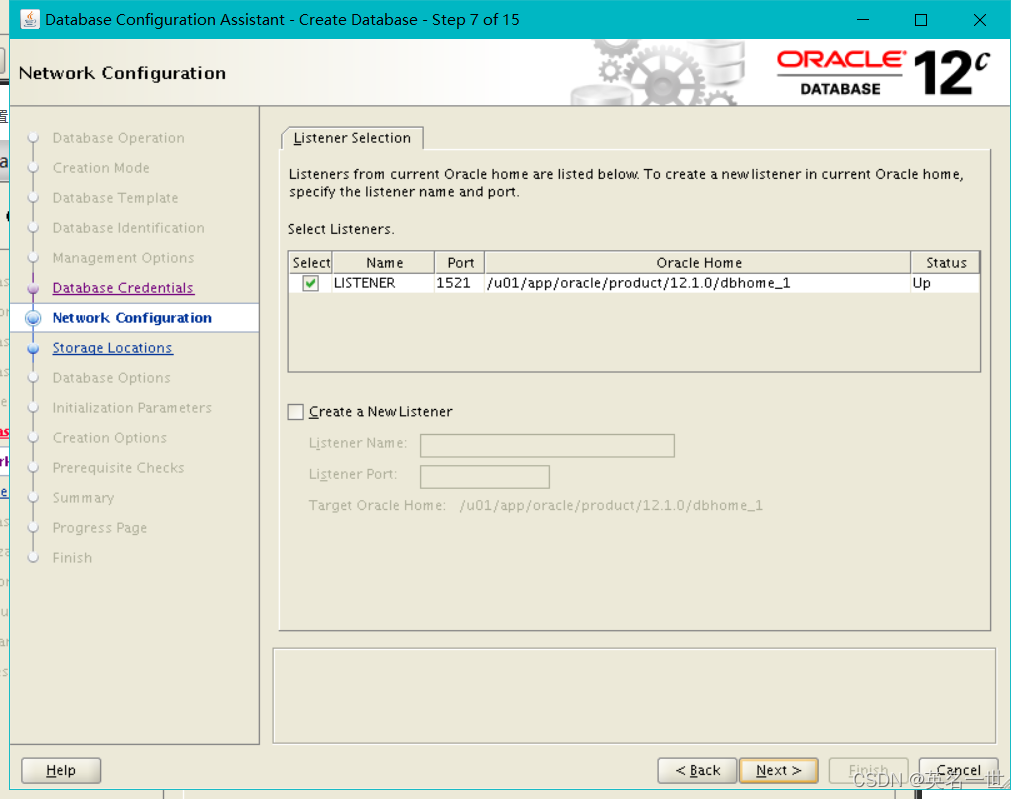
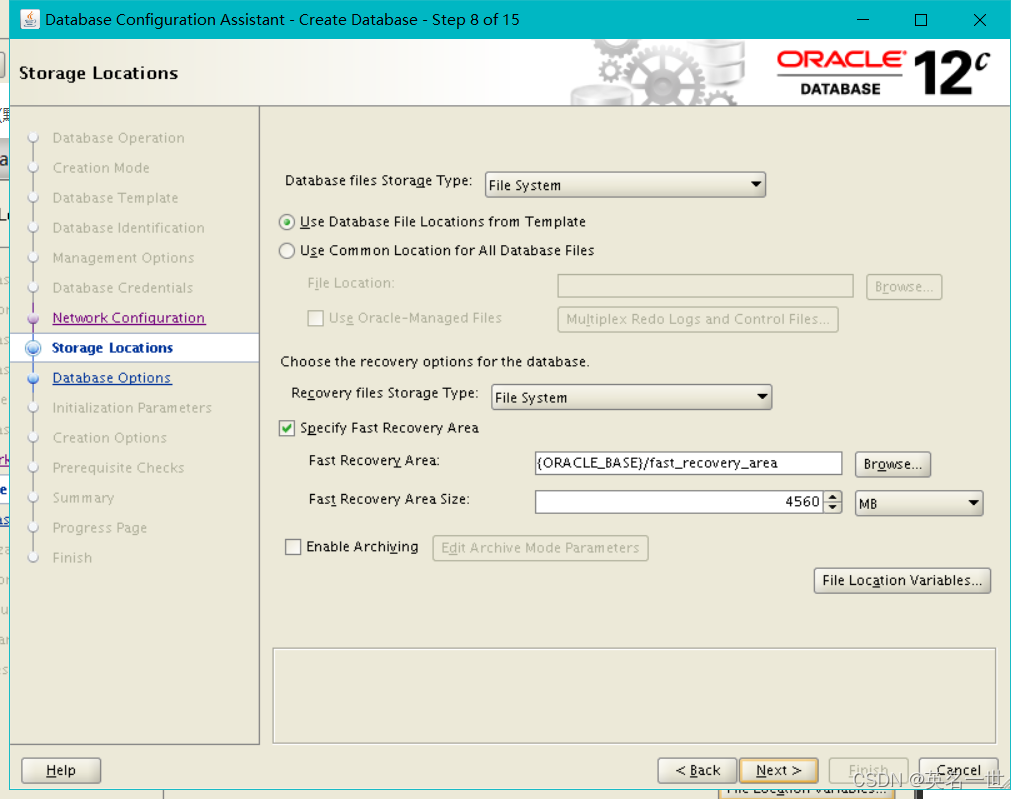
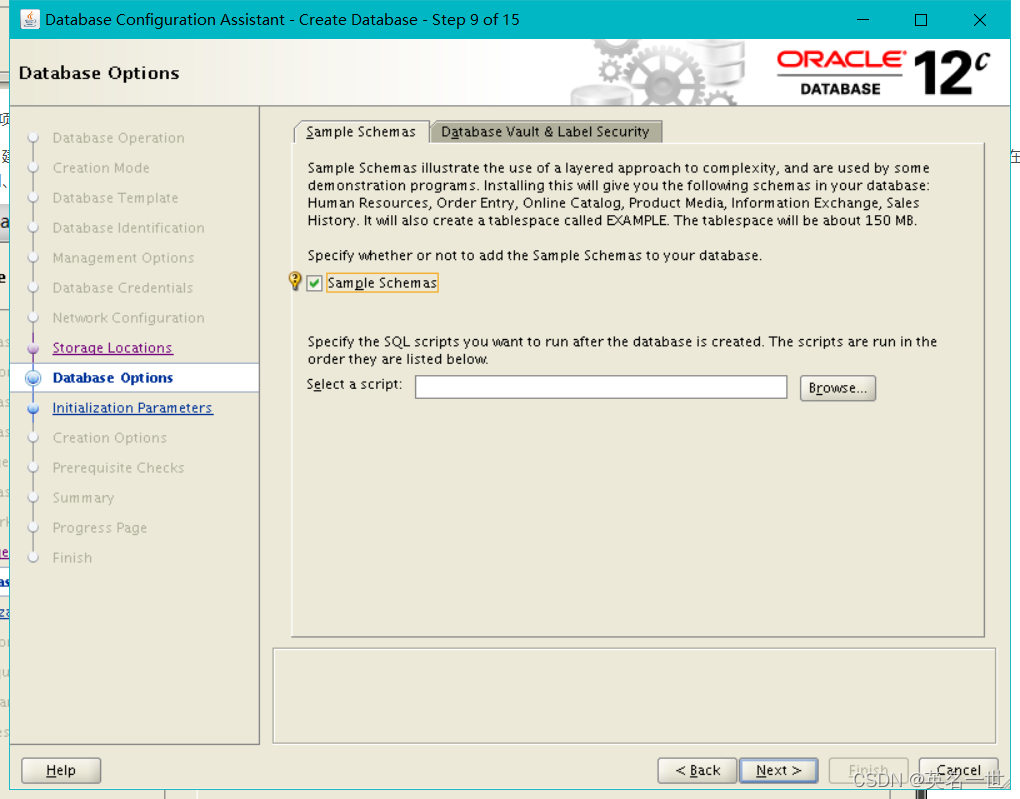
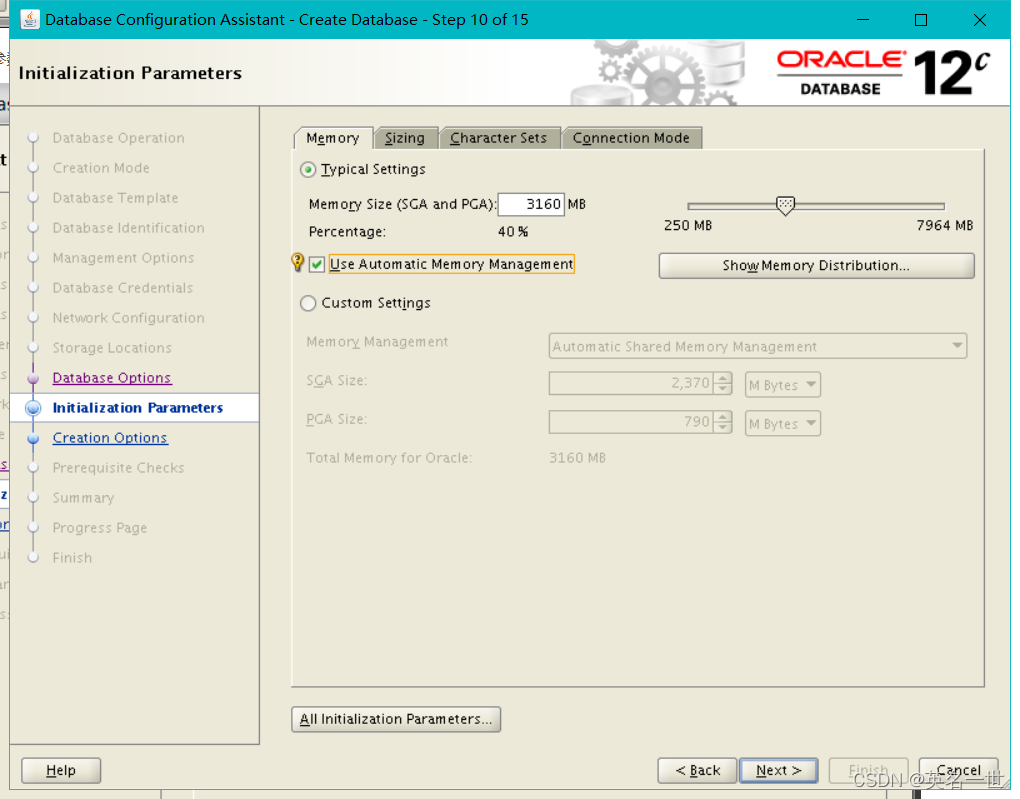
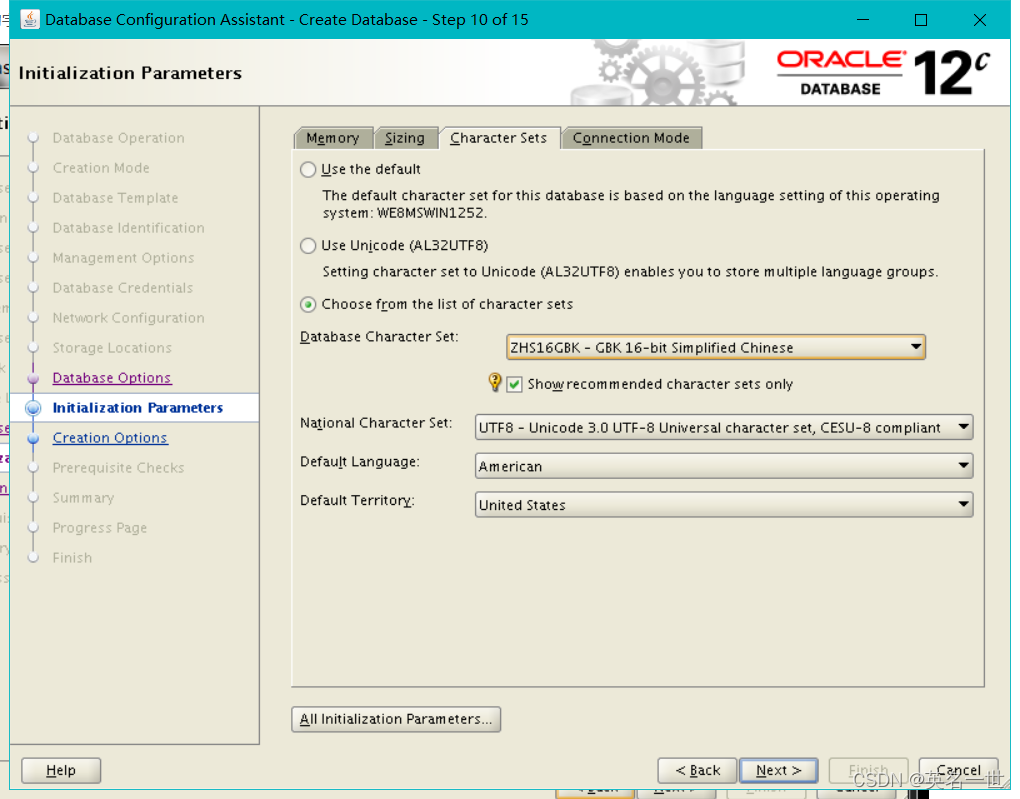
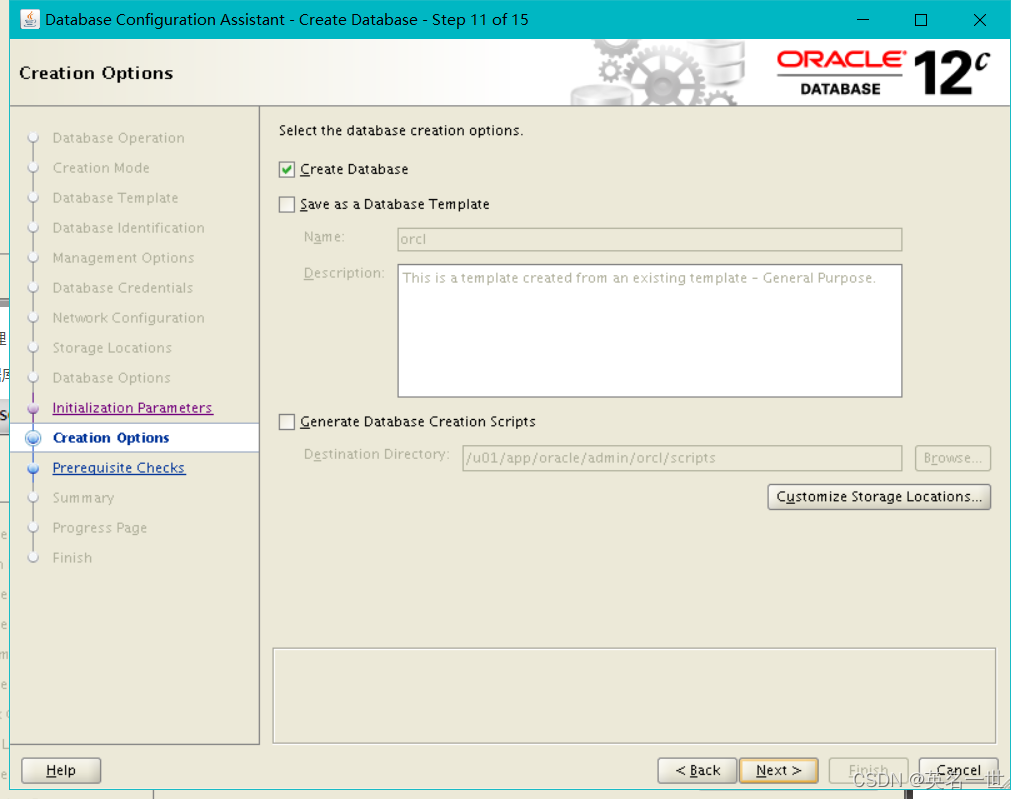
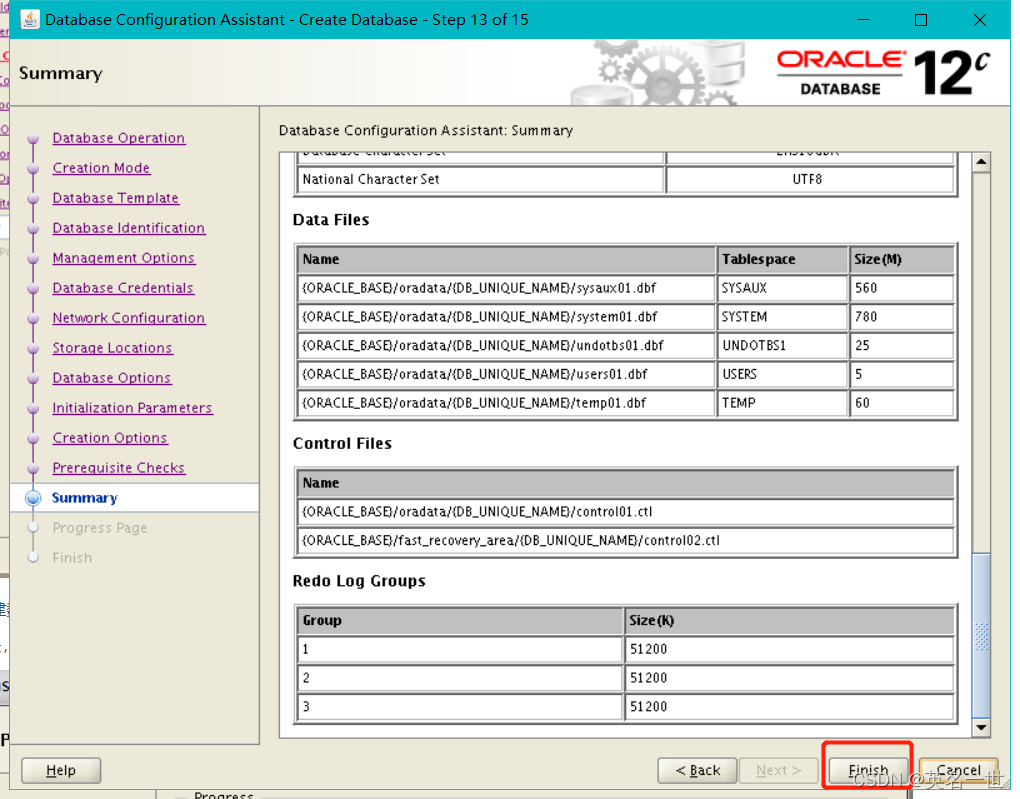
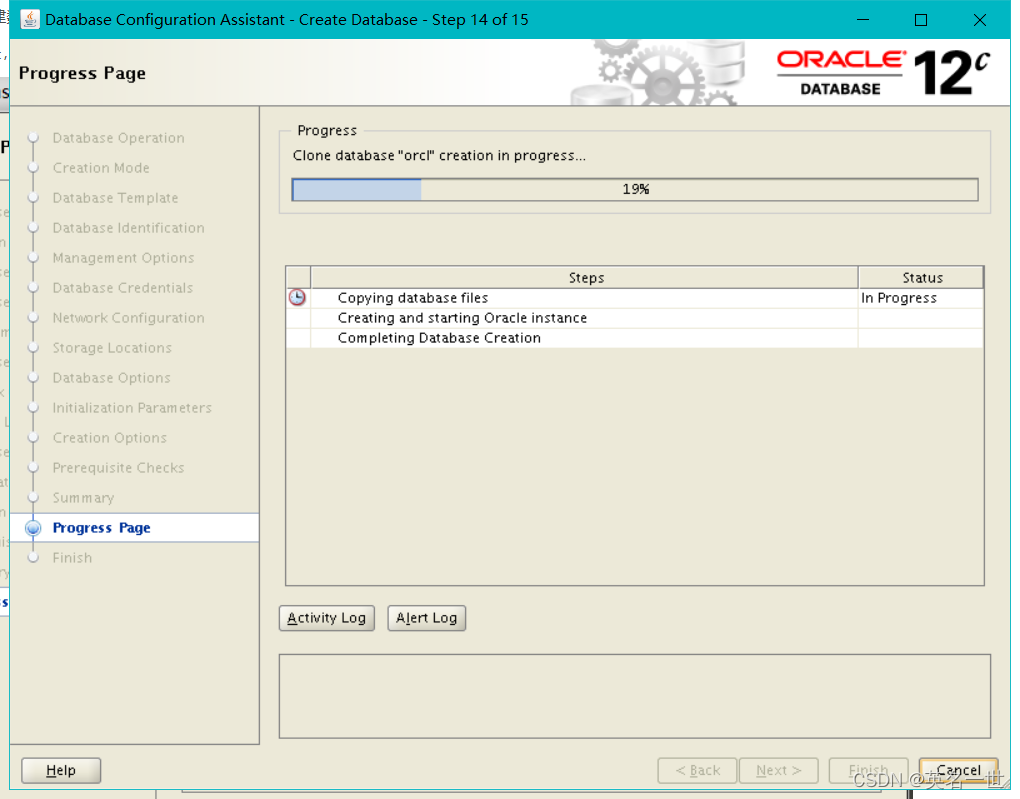
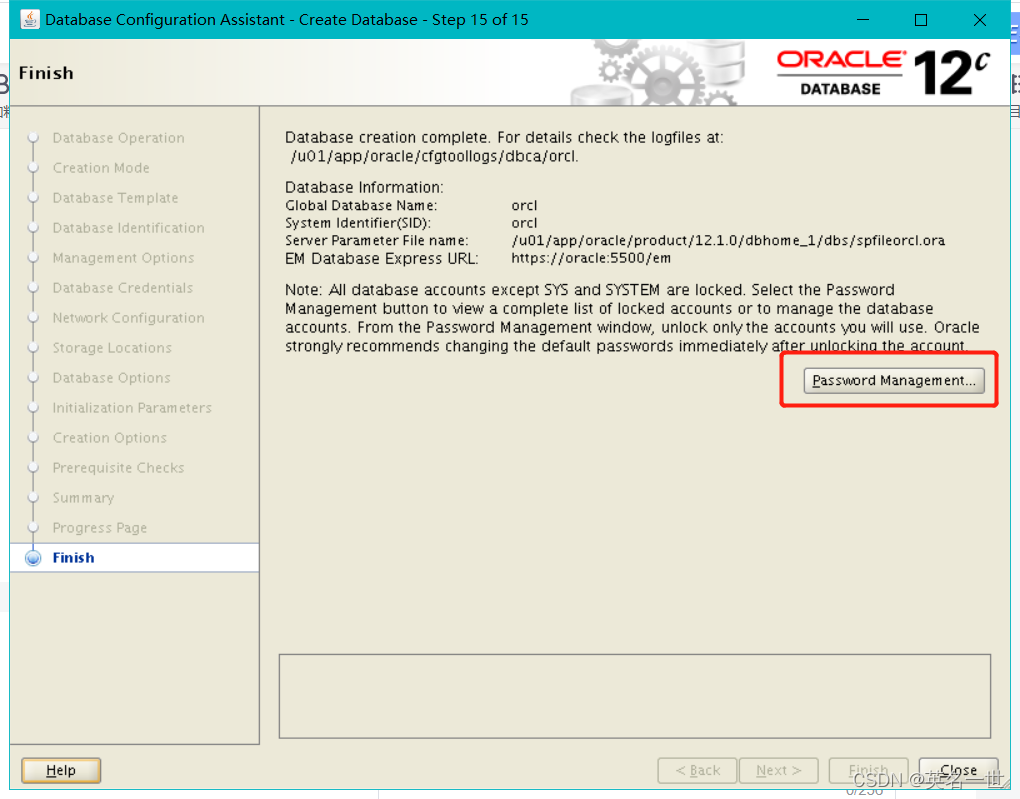
12.创建数据库
dbca
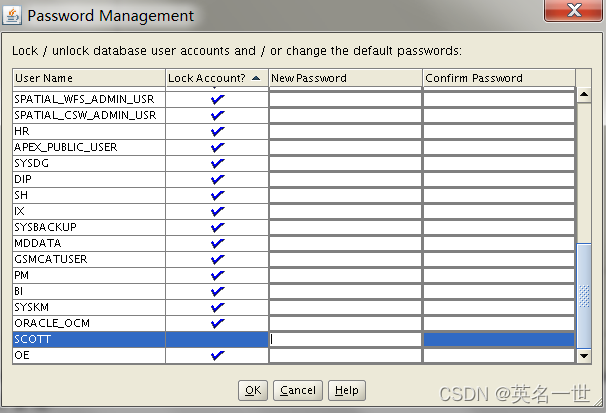
 解锁SCOTT用户,设置新密码
重启reboot
13.启动数据库
cp /u01/app/oracle/admin/orcl/pfile/init.ora.1125202111612 /u01/app/oracle/product/12.1.0/dbhome_1/dbs/initoemrepo.ora sqlplus /nolog
connect /as sysdba
startup
14.客户端连接
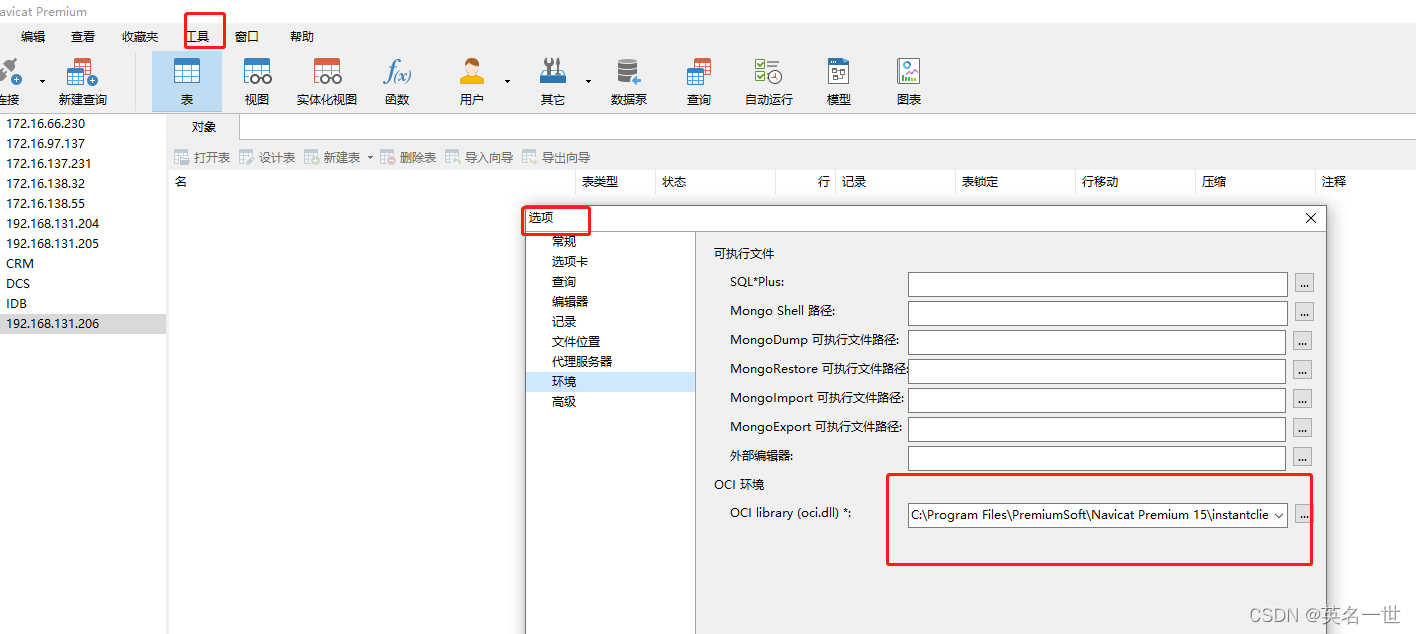
navicat 连接
配置工具-选项-OCI环境
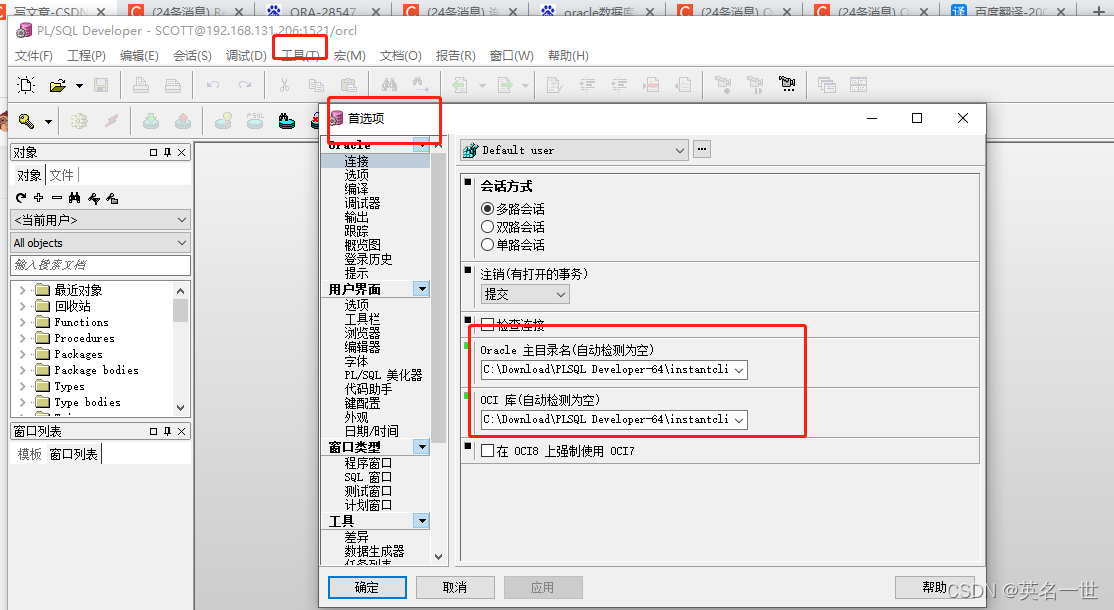
PLSQL连接
配置会话-首选项-oracle
C:\Download\PLSQL Developer-64\instantclient_12_2
C:\Download\PLSQL Developer-64\instantclient_12_2\oci.dll


 被折叠的 条评论
为什么被折叠?
被折叠的 条评论
为什么被折叠?
 到【灌水乐园】发言


