读取指定路径图片
BufferedImage image = ImageIO.read(new FileInputStream(imgPath));
写出网络图片
Url img = new URL(url);
InputStream in = img.openStream();
JPEGImageDecoder decoderFile = JPEGCodec.createJPEGDecoder(in);
BufferedImage image = decoderFile.decodeAsBufferedImage();
 String fileName = UUID.randomUUID().toString().replaceAll("-","") + ".png";
 FileOutputStream   fos   =   new   FileOutputStream("d:/44/" + fileName);
 ImageIO.write(bufferedImage,"png", fos);
将图片 转换成为 Byte【】 数组
ByteArrayOutputStream baos = new ByteArrayOutputStream();
ImageIO.write(bufferedImage, "png", baos);
byte[] bytes = baos.toByteArray();
将图片写出
String fileName = UUID.randomUUID().toString().replaceAll("-","") + ".png";
FileOutputStream fos = new FileOutputStream("d:/44/" + fileName);
ImageIO.write(bufferedImage,"png", fos);
借助虹软 只写出人脸
ImageInfo imageInfo = ImageFactory.bufferedImage2ImageInfo(bufferedImage);
Rect rect = faceInfo.getRect();
int x = rect.getLeft() > 20 ? rect.getLeft() -20 : 0;
int y = rect.getTop() > 20 ? rect.getTop() -20 : 0;
int w= rect.getRight() < imageInfo.getWidth() -20 ? rect.getRight() - x +20 : imageInfo.getWidth() - x;
int h = rect.getBottom() < imageInfo.getHeight() -20 ? rect.getBottom() - y + 20
: imageInfo.getHeight() - y;
bufferedImage = bufferedImage.getSubimage(x, y, w, h);
try {
String fileName = UUID.randomUUID().toString().replaceAll("-","") + ".png";
FileOutputStream fos = new FileOutputStream("d:/44/" + fileName);
ImageIO.write(bufferedImage,"png", fos);
fos.close();
log.info("图片写入成功");
} catch (IOException e) {
e.printStackTrace();
}
上传视频 操作 需要设定 传输的大小 否则音视频过大传输不上
spring:
  mvc:
    view:
      suffix: .html
  servlet:
    multipart:
      max-file-size: 300MB
      max-request-size: 500MB
上传视频 音频 需要在前端设定属性
<form action="http://localhost:8081/abc" method="post"
enctype="multipart/form-data">
<input name="fileImage" type="file" />
<input type="submit" value="提交"/>
</form>
接受 可用 spring 工具API MultipartFile
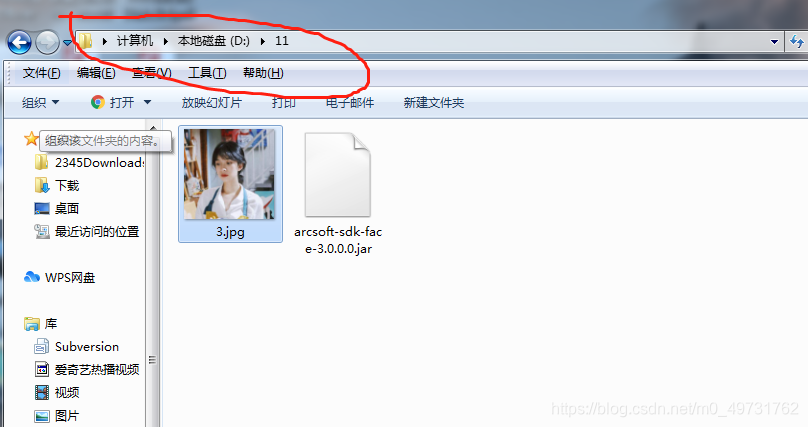
String path = "d:/11";
@RequestMapping("/file")
@ResponseBody
public String file(MultipartFile fileImage ) {
try {
BufferedImage read = ImageIO.read(fileImage.getInputStream());
} catch (IOException e1) {
e1.printStackTrace();
return "不是图片";
}
File file = new File(path);
if(!file.exists()) {
file.mkdirs();
}
String filename = fileImage.getOriginalFilename();
File realFile = new File(path +"/"+ filename);
try {
fileImage.transferTo(realFile);
} catch (IllegalStateException e) {
e.printStackTrace();
return "上传失败";
} catch (IOException e) {
e.printStackTrace();
return "上传失败";
}
return "上传成功";
}
springBoot 设置 虚拟路径
package com.tj.config;
import org.springframework.context.annotation.Configuration;
import org.springframework.web.servlet.config.annotation.ResourceHandlerRegistry;
import org.springframework.web.servlet.config.annotation.WebMvcConfigurerAdapter;
@Configuration
public class WebConfiguration extends WebMvcConfigurerAdapter {
@Override
public void addResourceHandlers(ResourceHandlerRegistry registry) {
registry.addResourceHandler("/image/**").addResourceLocations("file:d:/11/");
}
}
前端页面
<body>
	<img alt="图片损坏" src="http://localhost:8081/image/3.jpg">
</body>
</html>
效果展示
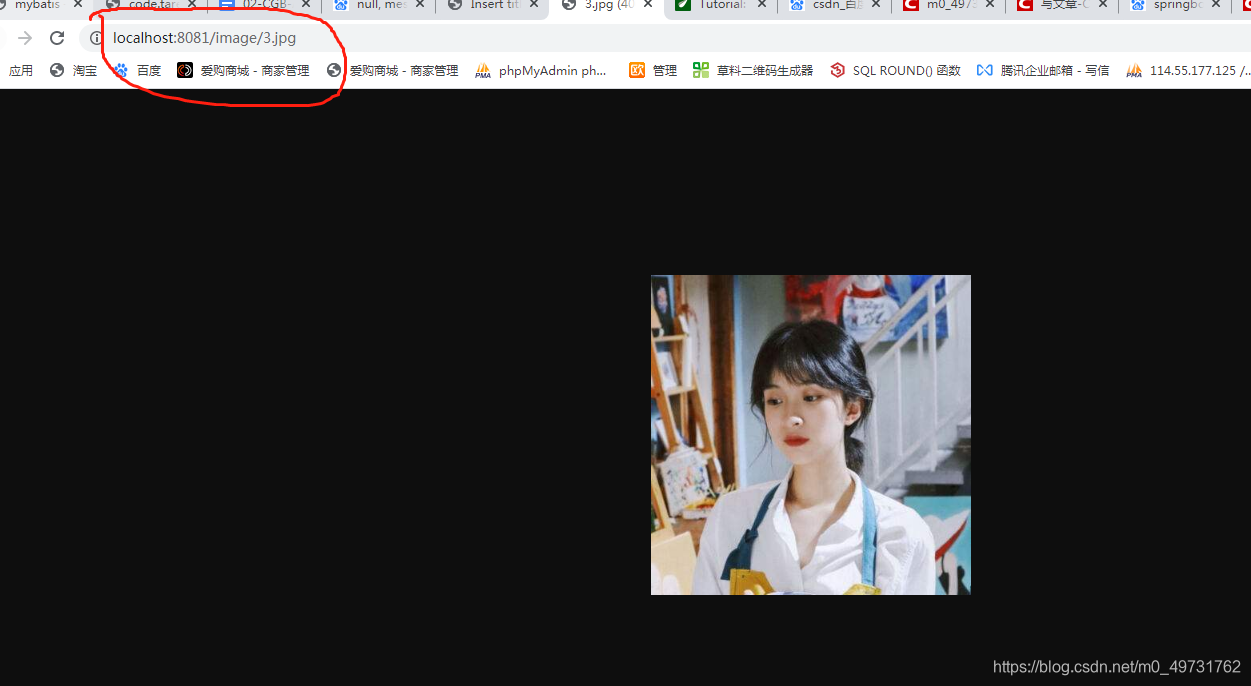
原文件
不大的图片 可以直接base64加密保存 前端直接请求这个加密数据就可
<img src="data:image/jpg;base64,base64默认加密数据>
写出图片工具方法
public static void byteToFile(String filePath, byte[] bytes, String fileName) {
File file = null;
File dir = new File(filePath);
if (!dir.exists() && !dir.isDirectory()) {
dir.mkdirs();
}
BufferedOutputStream bos = null;
java.io.FileOutputStream fos = null;
try {
file = new File(filePath + fileName);
fos = new java.io.FileOutputStream(file);
bos = new BufferedOutputStream(fos);
bos.write(bytes);
} catch (Exception e) {
e.printStackTrace();
} finally {
if (bos != null) {
try {
bos.close();
} catch (IOException e) {
e.printStackTrace();
}
}
if (fos != null) {
try {
fos.close();
} catch (IOException e) {
e.printStackTrace();
}
}
}
}


 820
820

 被折叠的 条评论
为什么被折叠?
被折叠的 条评论
为什么被折叠?
 到【灌水乐园】发言


