


一.初始化项目
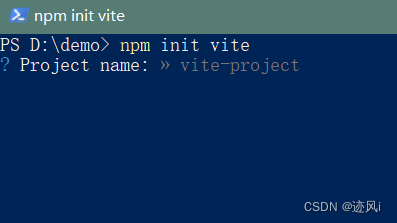
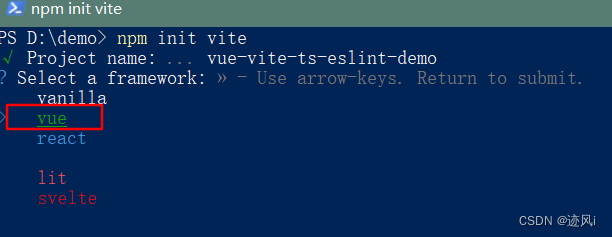
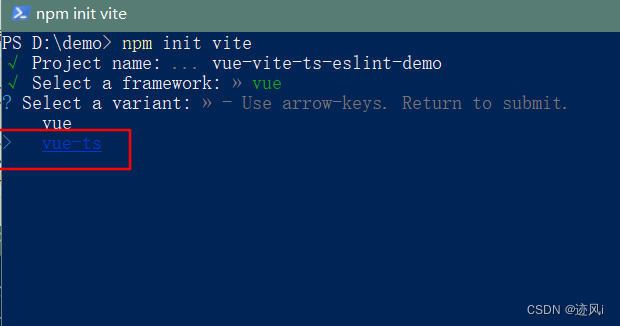
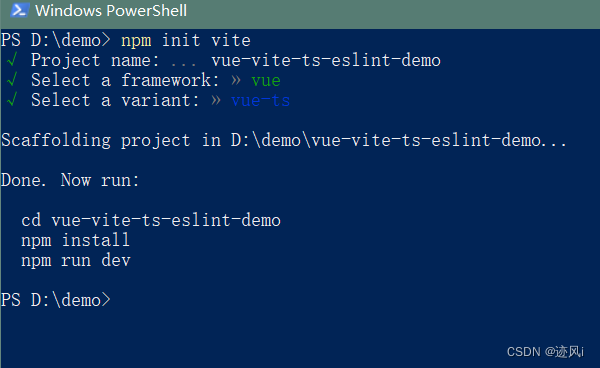
npm init vite
-
然后会出现请输入项目名称: 输入你的项目名称
-
然后选择vue
-
然后选择vue-ts, 根据你的项目是否需要ts
-
然后就生成了模板文件
二. 打开项目
- 先安装eslint
# npm
npm install eslint --save-dev

# yarn
yarn add eslint --dev
- 初始化eslint
# npm
npx eslint --init

# yarn
yarn run eslint --init
- 选择eslint初始化配置
# 选择 帮我们找到不规范的语法,并且强制应用代码规范  选第三个
? How would you like to use ESLint? ...
  To check syntax only
  To check syntax and find problems
> To check syntax, find problems, and enforce code style

# 选择 (import/export)代码规范(ES6 代码规范) 选第一个
  ? What type of modules does your project use? ...
> JavaScript modules (import/export)
  CommonJS (require/exports)
  None of these

# 选择 项目中使用的前端框架   Vue.js
? Which framework does your project use? ...
  React
> Vue.js
  None of these

# 是否验证 ts 代码规范  yes
? Does your project use TypeScript? » No / Yes

# 代码的运行环境是 浏览器/node  Browser(浏览器)
? Where does your code run? ...  (Press <space> to select, <a> to toggle all, <i> to invert
selection)
√ Browser
  Node

# 选择一个流行的代码规范  选Use a popular style guide
? How would you like to define a style for your project? ...
> Use a popular style guide
  Answer questions about your style

# 选择 Standard 代码规范
? Which style guide do you want to follow? ...
  Airbnb: https://github.com/airbnb/javascript
> Standard: https://github.com/standard/standard
  Google: https://github.com/google/eslint-config-google
  XO: https://github.com/xojs/eslint-config-xo

# ESLint配置文件 代码的保存格式
? What format do you want your config file to be in? ...
> JavaScript
  YAML
  JSON


Checking peerDependencies of eslint-config-standard@latest
The config that you've selected requires the following dependencies:

eslint-plugin-vue@latest @typescript-eslint/eslint-plugin@latest eslint-config-standard@latest eslint@^8.0.1 eslint-plugin-import@^2.25.2 eslint-plugin-n@^15.0.0 eslint-plugin-promise@^6.0.0 @typescript-eslint/parser@latest
# 选择 yes 安装依赖
? Would you like to install them now? » No / Yes

# 选择你的安装方式 npm
? Which package manager do you want to use? ...
> npm
  yarn
  pnpm
随后安装完成会生成 .eslintrc.cjs文件
-
在.eslintrc.cjs 文件中添加rules规则
module.exports = {
  env: {
    browser: true,
    es2021: true
  },
  extends: [
    'plugin:vue/vue3-essential',
    'standard'
  ],
  parserOptions: {
    ecmaVersion: 'latest',
    parser: '@typescript-eslint/parser',
    sourceType: 'module'
  },
  plugins: [
    'vue',
    '@typescript-eslint'
  ],
  rules: {
    // 禁止出现console
    'no-console': 'warn',
    // 禁用debugger
    'no-debugger': 'error'
  }
}
此时eslint配置的规则已经生效
-
设置eslint忽略文件
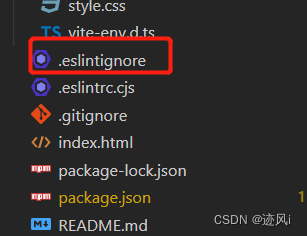
在根目录创建.eslintignore 文件
添加要忽略的文件# eslint 忽略检查 (根据项目需要自行添加) node_modules dist -
添加vscode保存自动解决eslint报错问题
打开vscode设置
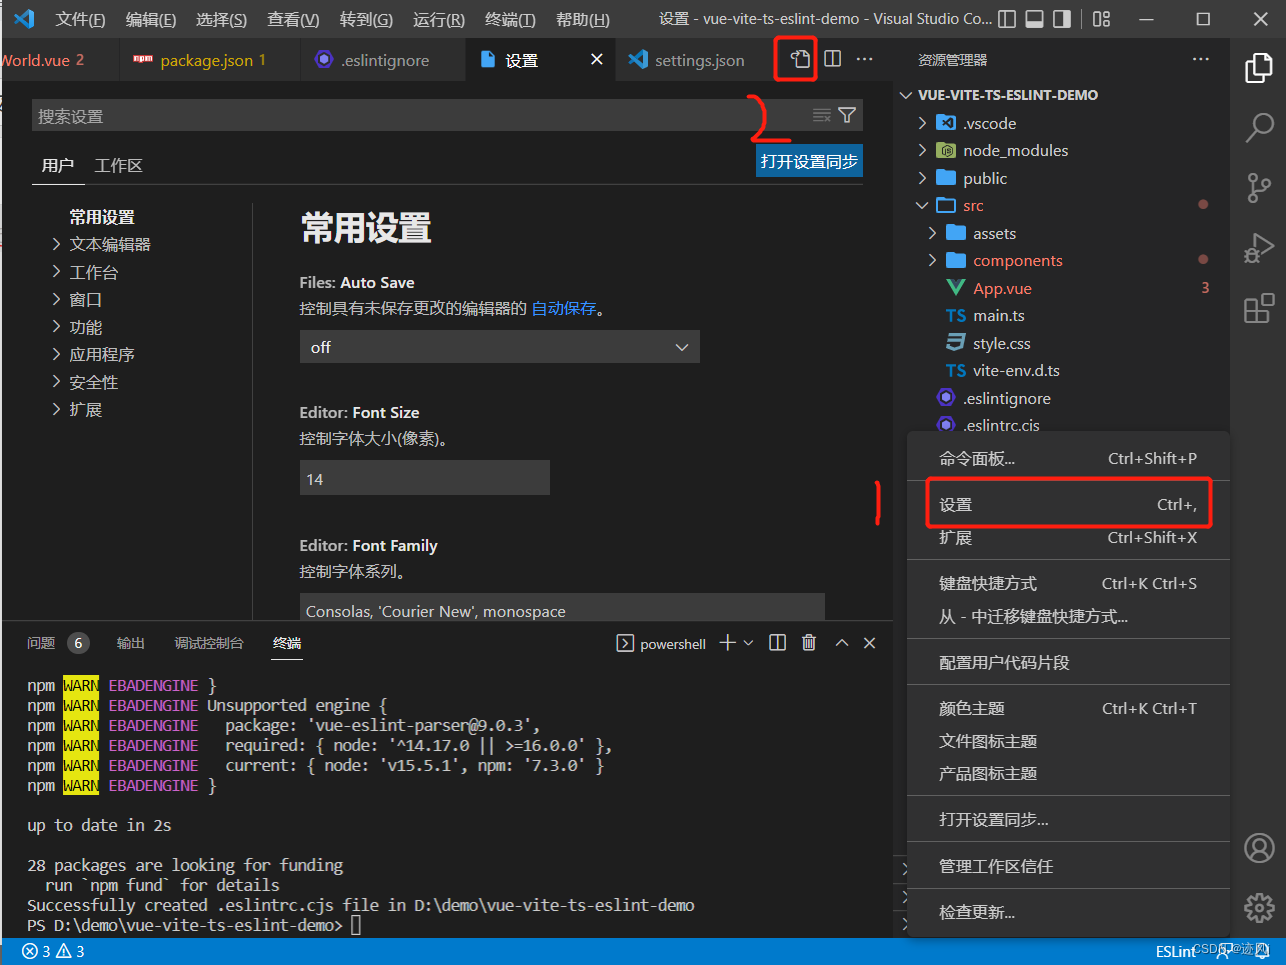
在 setting.json 添加一下配置{ "eslint.format.enable": true, "eslint.alwaysShowStatus": true, // 保存自动解决eslint报错 "editor.codeActionsOnSave": { "source.fixAll": true, "eslint.autoFixOnSave" : false, }, } -
添加提交代码校验代码规范
安装 lint-staged mrm// 安装完成会自动生成 .husky 文件夹 npx husky install npx mrm@2 lint-staged配置 git commit hook:
在package.json添加以下内容// eslint 需要验证 src目录下所有的 js、jsx、vue、ts、tsx 后缀的文件资源,对他们进行代码规范验证 // --fix 是指对于不符合要求的代码会自动格式化(简单的自动优化) // "git add" 自动修复eslint错误后自动提交 { "scripts": { "lint": "eslint src/**/*.{js,jsx,vue,ts,tsx} --fix", "prepare": "husky install" }, "devDependencies": { "husky": "^8.0.1", "lint-staged": "^12.3.5", }, "lint-staged": { "src/**/*.{js,jsx,vue,ts,tsx}": [ "eslint --fix", "git add" ] } }如果安装失败 删掉node_modules文件重新安装
快速删除node_nodules
安装npm install rimraf -g
控制台输入rimraf node_modules执行完之后根目录就会出现
.husky文件夹, 修改pre-commit 文件里面的代码为#!/bin/sh . "$(dirname "$0")/_/husky.sh" npx lint-staged可以尝试输入错误让eslint检验,再来commit 测试
最后就大功告成了!!!


 2463
2463


 被折叠的 条评论
为什么被折叠?
被折叠的 条评论
为什么被折叠?
 到【灌水乐园】发言


