


在上一篇文章中介绍了了Antv X6的安装&引入和一些简单配置,今天结合项目需求以及这几天搜到的一些资料,关于Antv X6想实现拖拽功能,可以自定义一个拖拽方法。方便自己后期查阅也希望可以帮助到其他小伙伴。
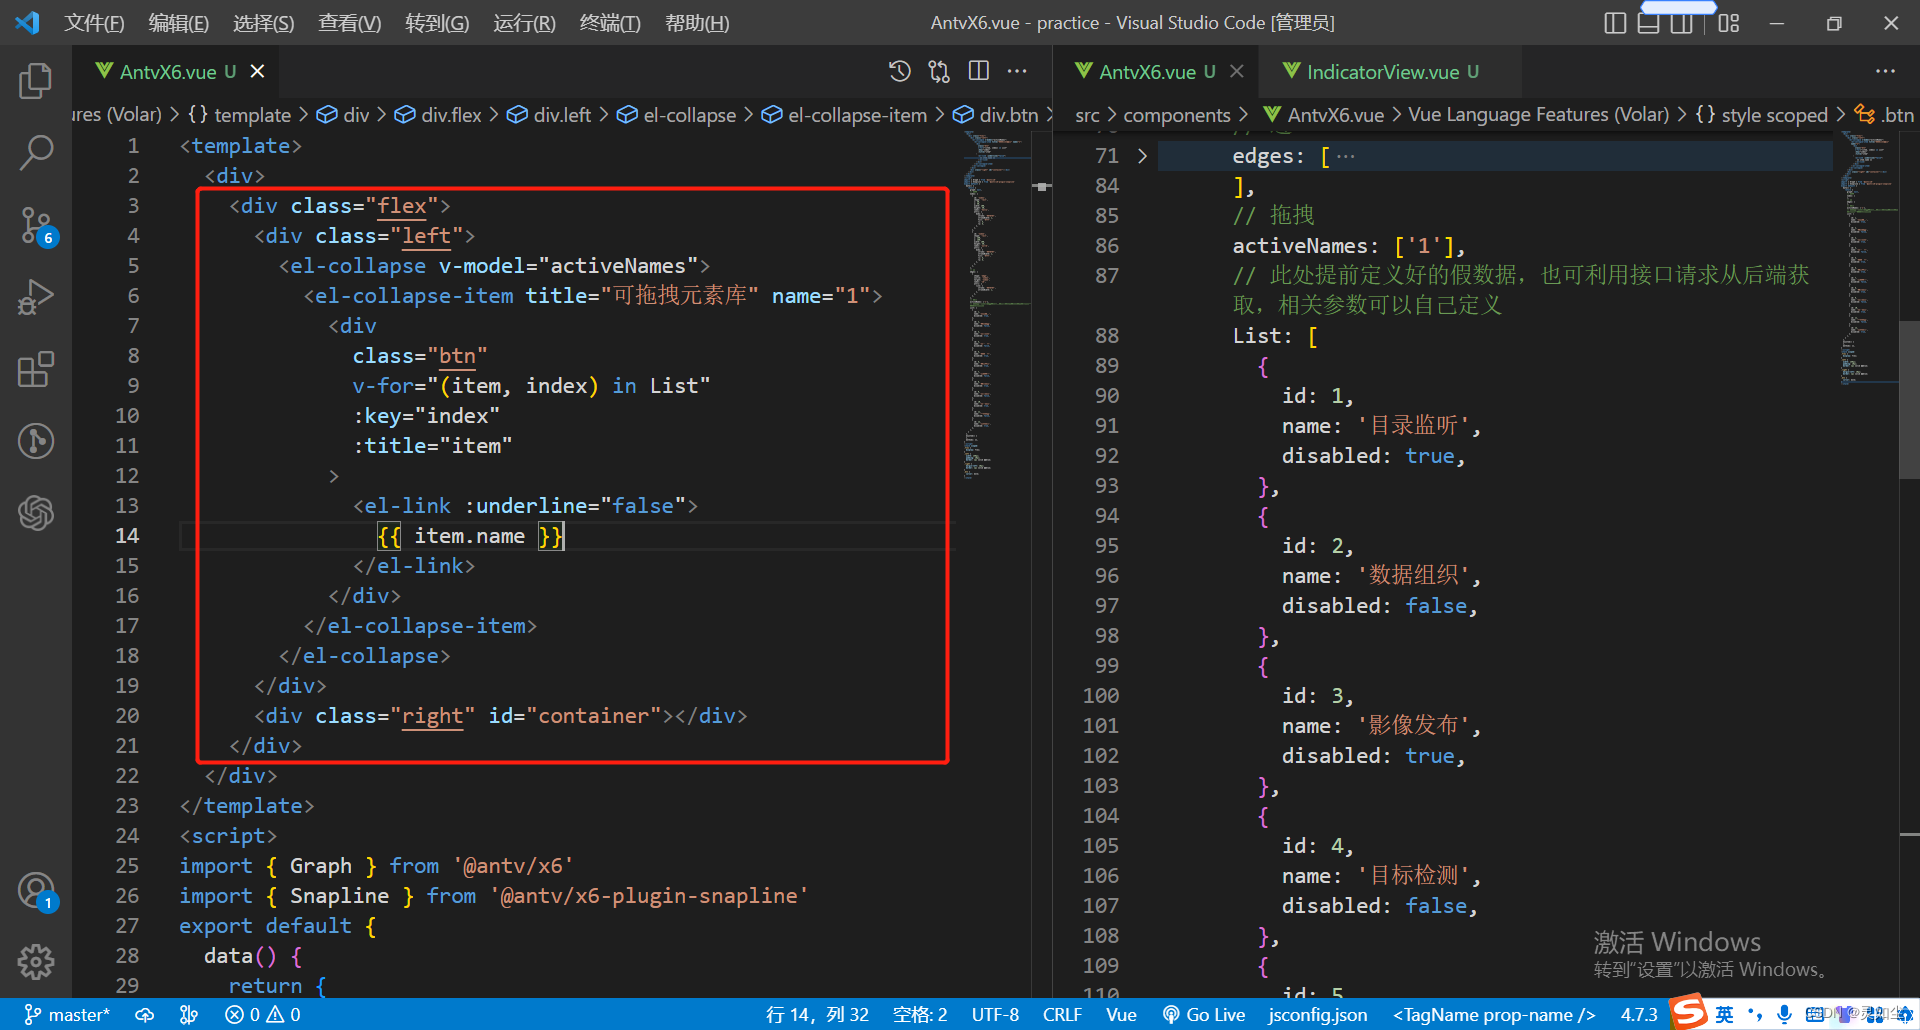
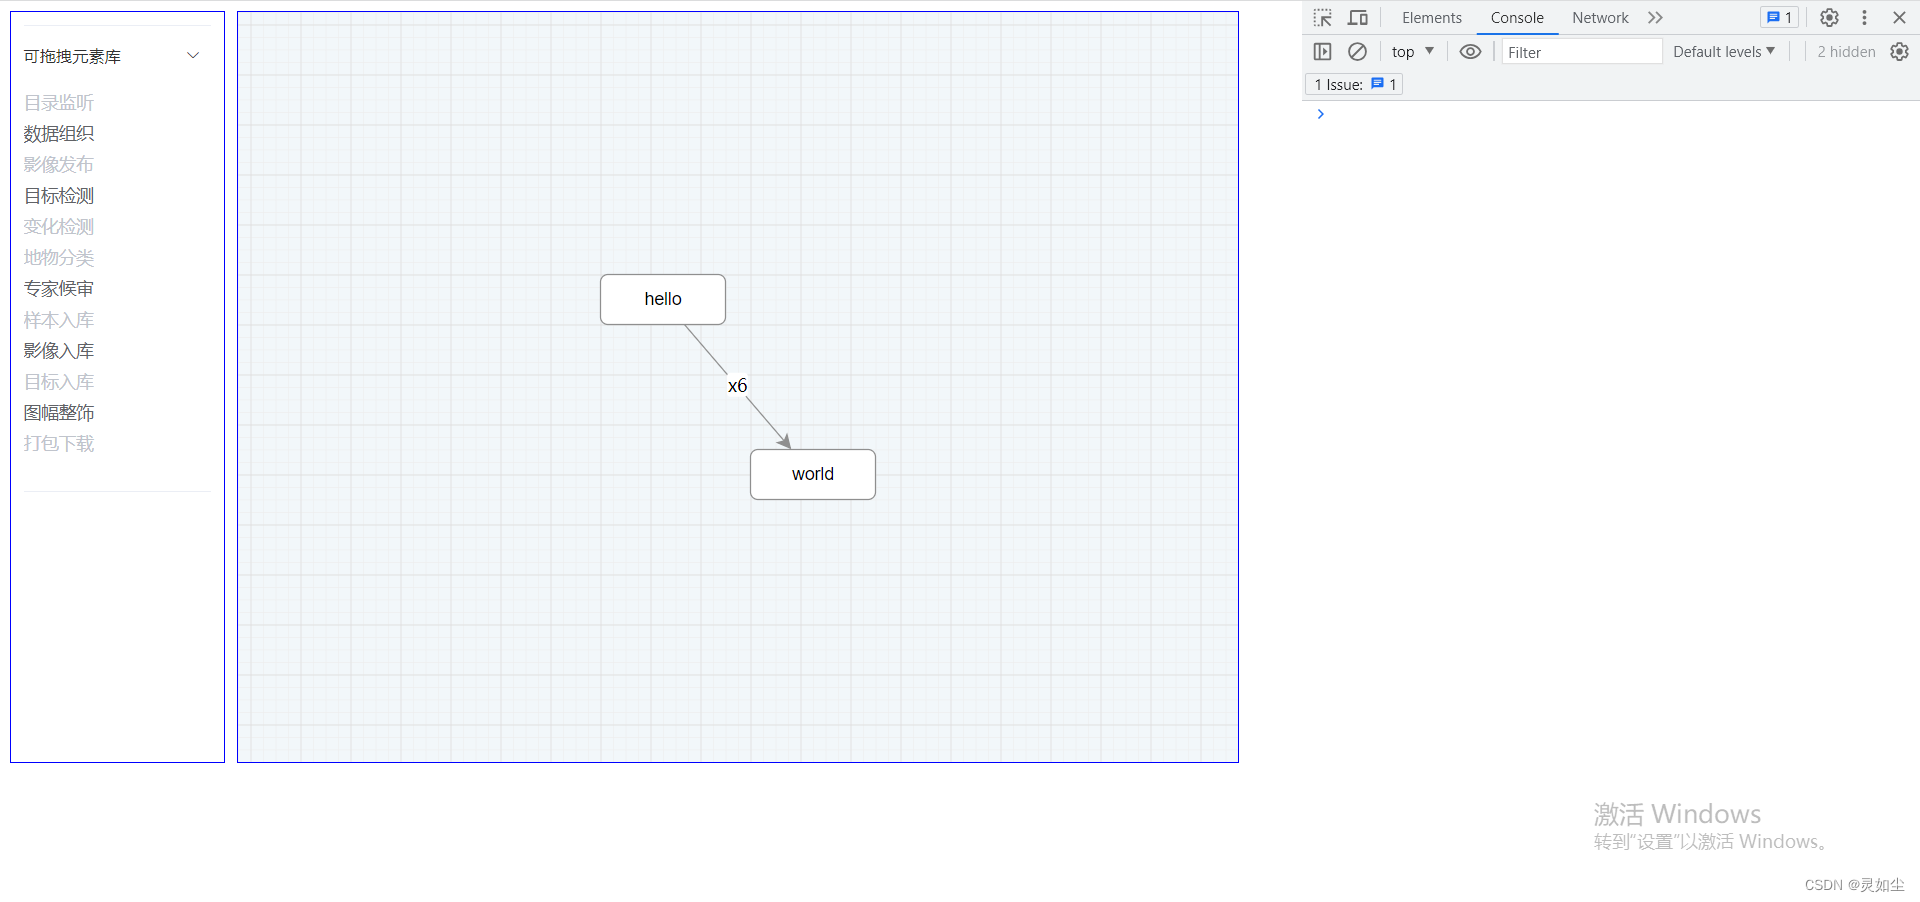
1.布局
不赘述,后面会附上详细代码。(ui库用的elementui)
如图所示:
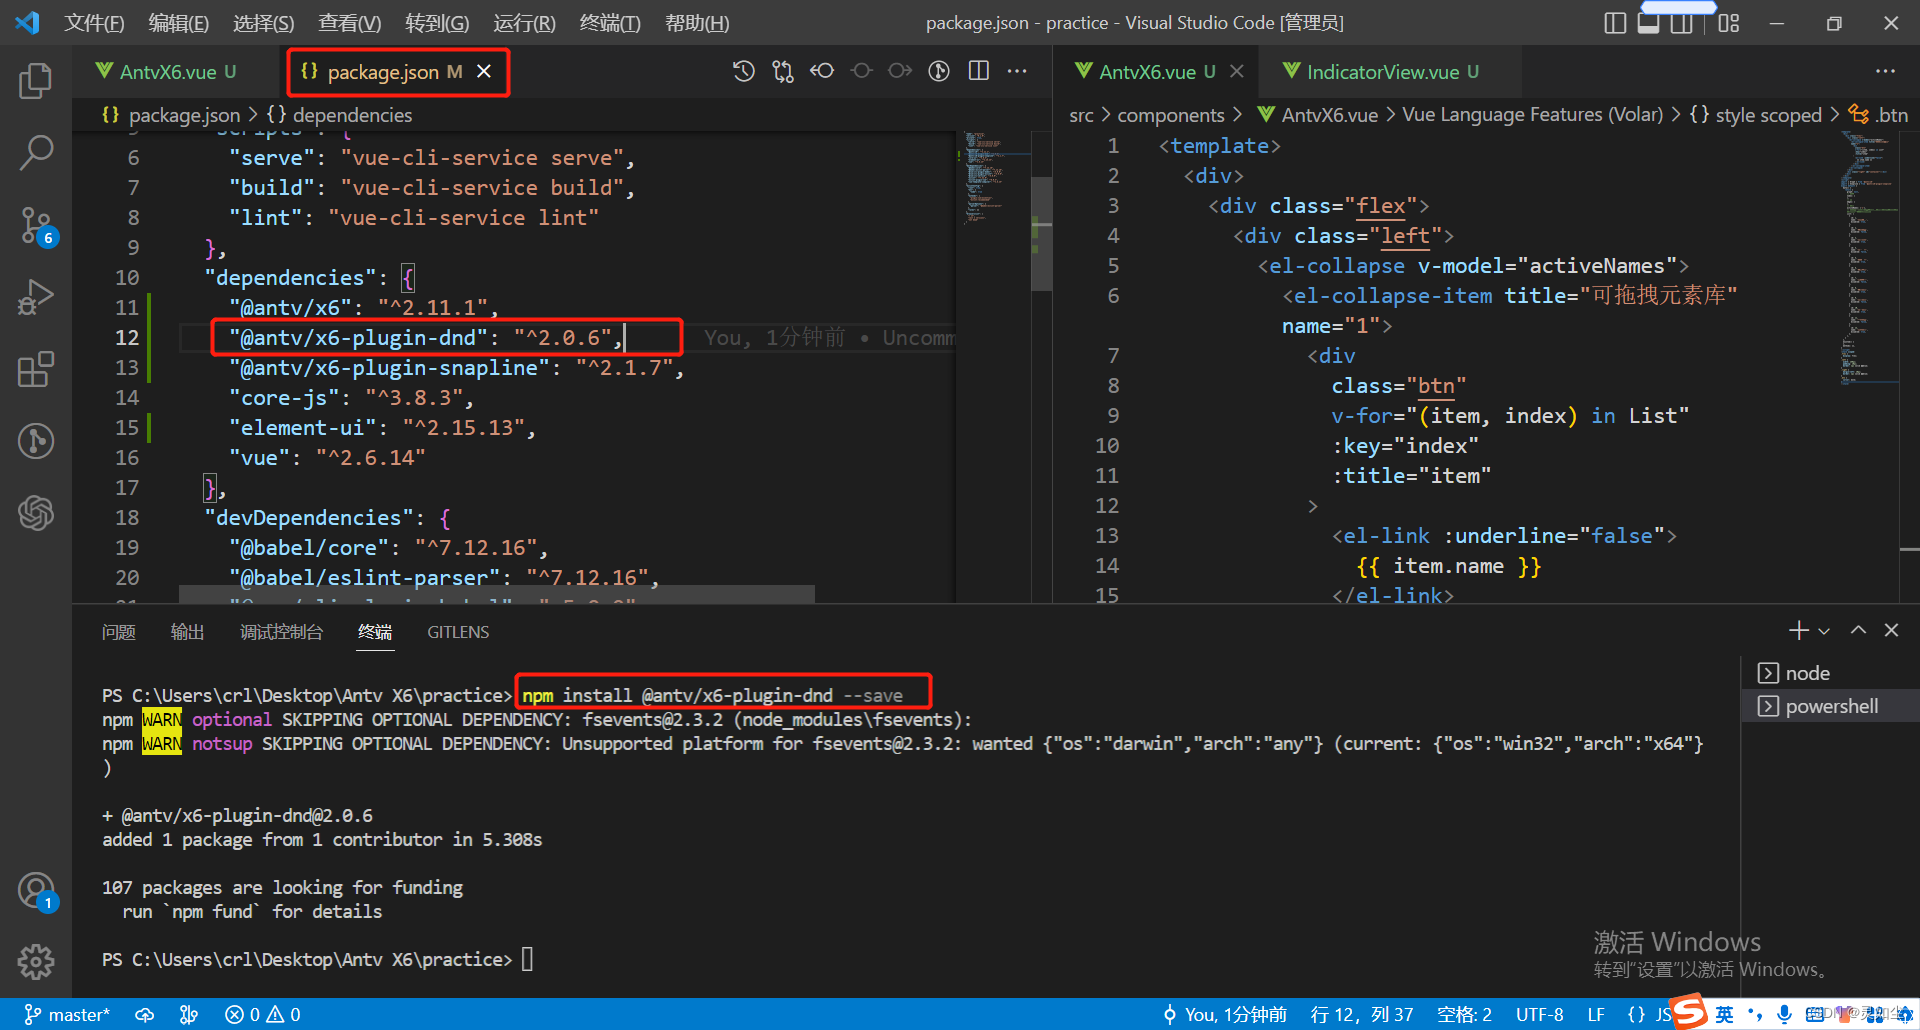
 2.下载Dnd插件
附上官网使用插件地址:https://x6.antv.antgroup.com/tutorial/plugins/dnd
通过 npm 或 yarn 命令安装 Dnd插件。命令如下:
# npm
$ npm install @antv/x6-plugin-dnd --save

# yarn
$ yarn add @antv/x6-plugin-dnd
安装成功,如图所示:
3.使用(Vue2中)
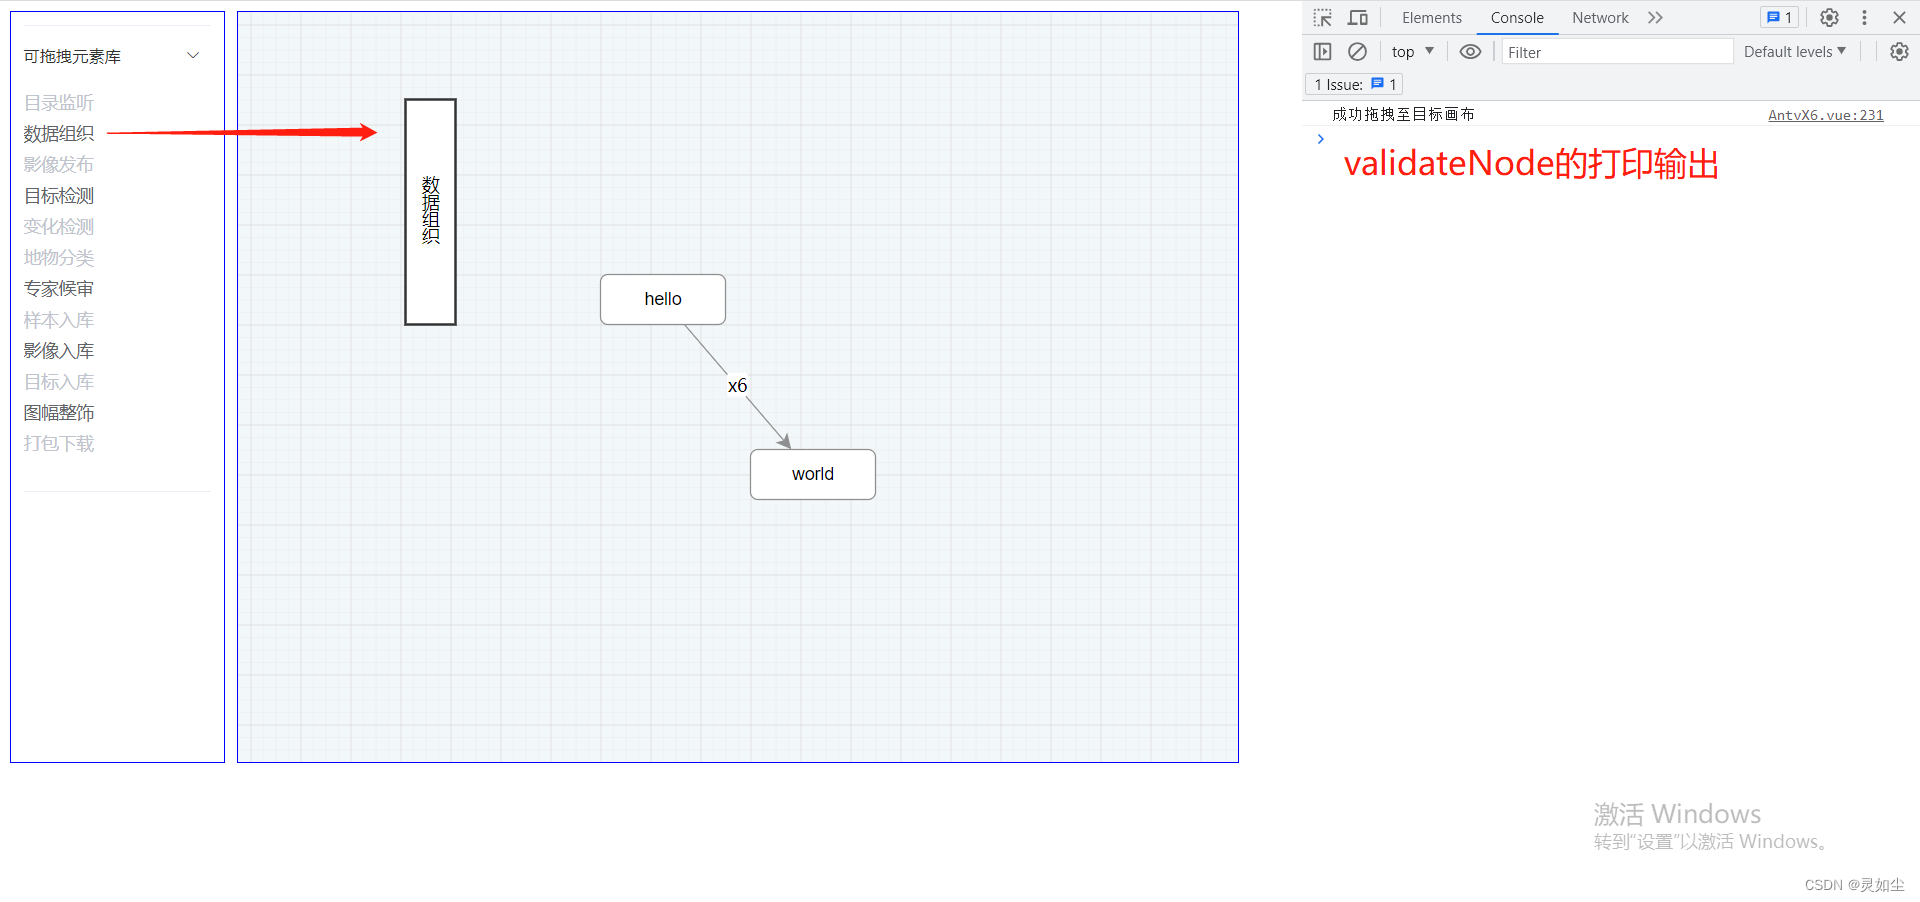
重点会标注出来,如图所示:
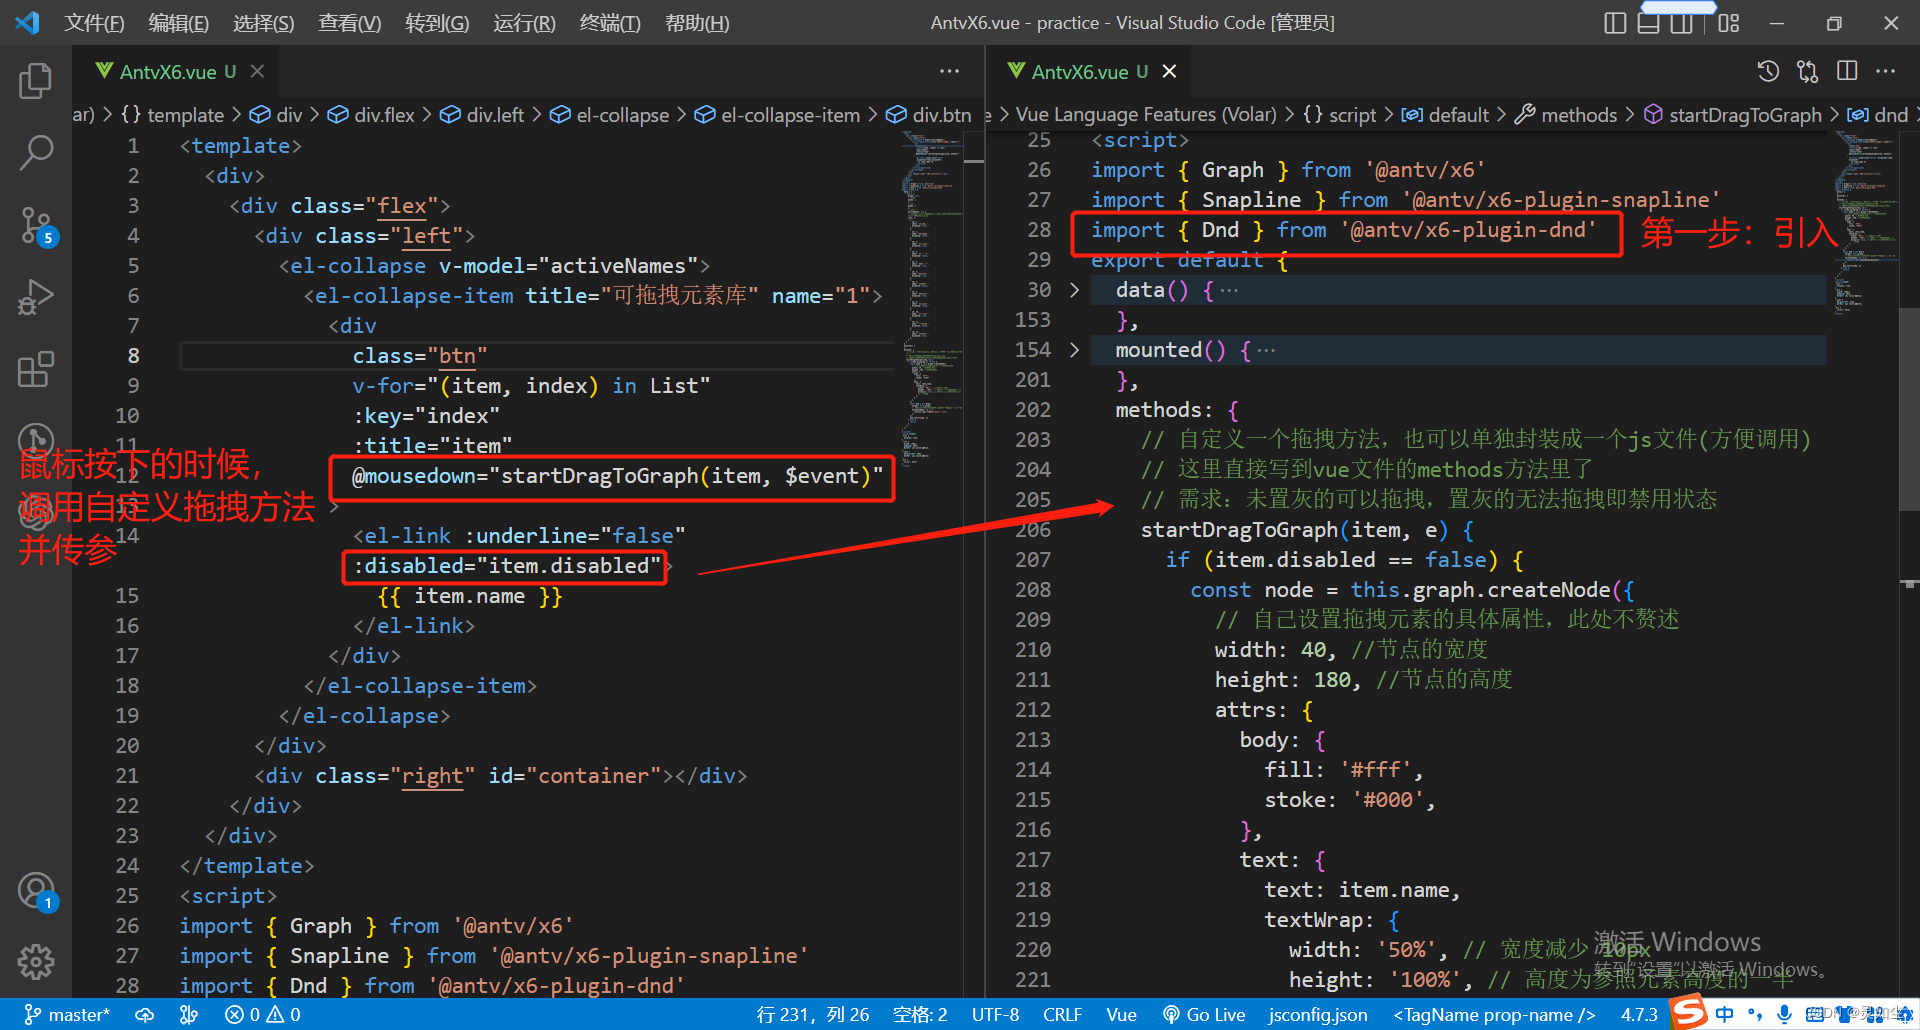
官网的案例是在React 中的使用,这里我用的是Vue2框架,基于这一专栏的上一篇文章代码。
4.实现效果:
5.附上完整代码
<template>
<div>
<div class="flex">
<div class="left">
<el-collapse v-model="activeNames">
<el-collapse-item title="可拖拽元素库" name="1">
<div
class="btn"
v-for="(item, index) in List"
:key="index"
:title="item"
@mousedown="startDragToGraph(item, $event)"
>
<el-link :underline="false" :disabled="item.disabled">
{{ item.name }}
</el-link>
</div>
</el-collapse-item>
</el-collapse>
</div>
<div class="right" id="container"></div>
</div>
</div>
</template>
<script>
import { Graph } from '@antv/x6'
import { Snapline } from '@antv/x6-plugin-snapline'
import { Dnd } from '@antv/x6-plugin-dnd'
export default {
data() {
return {
graph: null,
// 节点
nodes: [
{
id: 'node1',
shape: 'rect',
x: 40,
y: 40,
width: 100,
height: 40,
label: 'hello',
attrs: {
body: {
stroke: '#8f8f8f',
strokeWidth: 1,
fill: '#fff',
rx: 6,
ry: 6,
},
},
},
{
id: 'node2',
shape: 'rect',
x: 160,
y: 180,
width: 100,
height: 40,
label: 'world',
attrs: {
body: {
stroke: '#8f8f8f',
strokeWidth: 1,
fill: '#fff',
rx: 6,
ry: 6,
},
},
},
],
// 边
edges: [
{
shape: 'edge',
source: 'node1',
target: 'node2',
label: 'x6',
attrs: {
line: {
stroke: '#8f8f8f',
strokeWidth: 1,
},
},
},
],
// 拖拽
activeNames: ['1'],
// 此处提前定义好的假数据,也可利用接口请求从后端获取,相关参数可以自己定义
List: [
{
id: 1,
name: '目录监听',
disabled: true,
},
{
id: 2,
name: '数据组织',
disabled: false,
},
{
id: 3,
name: '影像发布',
disabled: true,
},
{
id: 4,
name: '目标检测',
disabled: false,
},
{
id: 5,
name: '变化检测',
disabled: true,
},
{
id: 6,
name: '地物分类',
disabled: true,
},
{
id: 7,
name: '专家候审',
disabled: false,
},
{
id: 8,
name: '样本入库',
disabled: true,
},
{
id: 9,
name: '影像入库',
disabled: false,
},
{
id: 10,
name: '目标入库',
disabled: true,
},
{
id: 11,
name: '图幅整饰',
disabled: false,
},
{
id: 12,
name: '打包下载',
disabled: true,
},
],
}
},
mounted() {
this.graph = new Graph({
container: document.getElementById('container'),
width: 800,
height: 600,
background: {
color: '#F2F7FA',
},
// 网格线设置
grid: {
visible: true,
type: 'doubleMesh',
args: [
{
color: '#eee', // 主网格线颜色
thickness: 1, // 主网格线宽度
},
{
color: '#ddd', // 次网格线颜色
thickness: 1, // 次网格线宽度
factor: 4, // 主次网格线间隔
},
],
},
// 缩放与平移
mousewheel: true, //使用滚轮控制缩放
panning: {
enabled: true,
//触发键盘事件进行平移:'alt' | 'ctrl' | 'meta' | 'shift'
modifiers: [],
//触发鼠标事件进行平移:'leftMouseDown' | 'rightMouseDown' | 'mouseWheel'
eventTypes: ['leftMouseDown'],
},
})
// 渲染节点和边
this.graph.fromJSON({
nodes: this.nodes,
edges: this.edges,
})
// 实现画布内容居中
this.graph.centerContent()
//增加对齐线
this.graph.use(
new Snapline({
enabled: true,
})
)
},
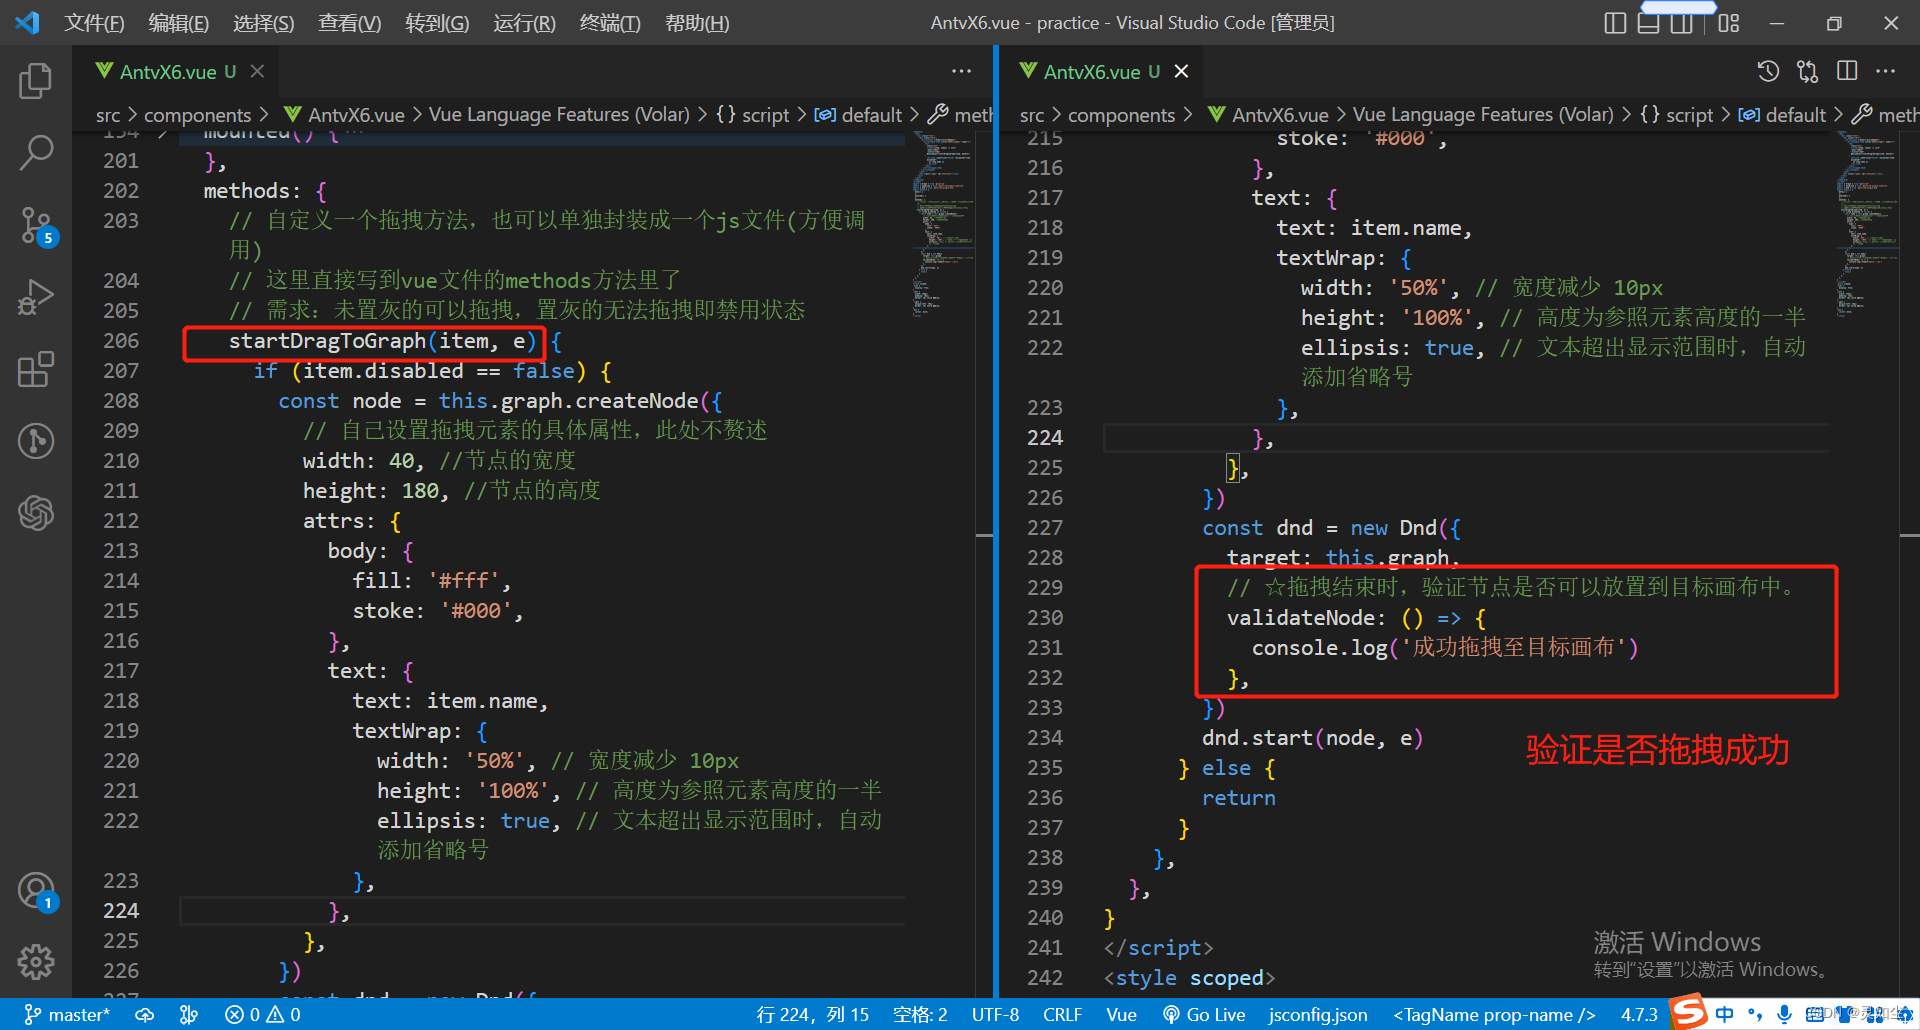
methods: {
// 自定义一个拖拽方法,也可以单独封装成一个js文件(方便调用)
// 这里直接写到vue文件的methods方法里了
// 需求:未置灰的可以拖拽,置灰的无法拖拽即禁用状态
startDragToGraph(item, e) {
if (item.disabled == false) {
const node = this.graph.createNode({
// 自己设置拖拽元素的具体属性,此处不赘述
width: 40, //节点的宽度
height: 180, //节点的高度
attrs: {
body: {
fill: '#fff',
stoke: '#000',
},
text: {
text: item.name,
textWrap: {
width: '50%', // 宽度减少 10px
height: '100%', // 高度为参照元素高度的一半
ellipsis: true, // 文本超出显示范围时,自动添加省略号
},
},
},
})
const dnd = new Dnd({
target: this.graph,
// ☆拖拽结束时,验证节点是否可以放置到目标画布中。
validateNode: () => {
console.log('成功拖拽至目标画布')
},
})
dnd.start(node, e)
} else {
return
}
},
},
}
</script>
<style scoped>
.flex {
display: flex;
}
.left {
width: 150px;
padding: 10px;
border: 1px solid blue;
}
.right {
margin-left: 10px;
border: 1px solid blue;
}
.btn {
cursor: move;
}
</style>


 1428
1428

 被折叠的 条评论
为什么被折叠?
被折叠的 条评论
为什么被折叠?
 到【灌水乐园】发言


