


前言
使用maven创建项目需要在有网的时候进行,建议在网络稳定时创建项目,因为创建项目需要更新一些配置,例如更新junit坐标和添加servlet坐标。
提示:以下是本篇文章正文内容,下面案例可供参考
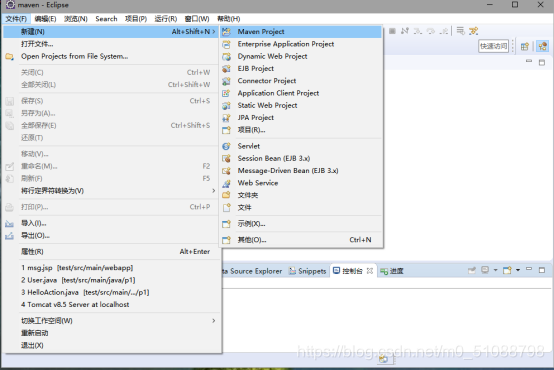
一、使用maven创建web项目
1.file(文件)---->new(新建)---->Maven project
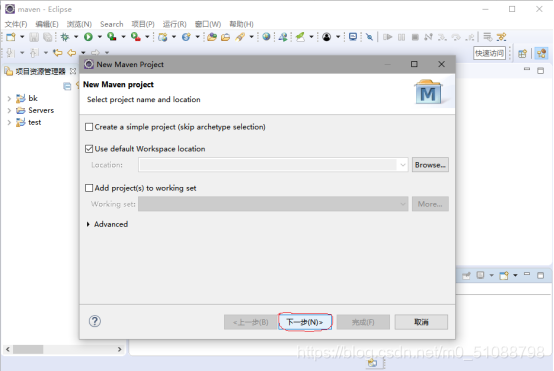
2.点击下一步,如下图:
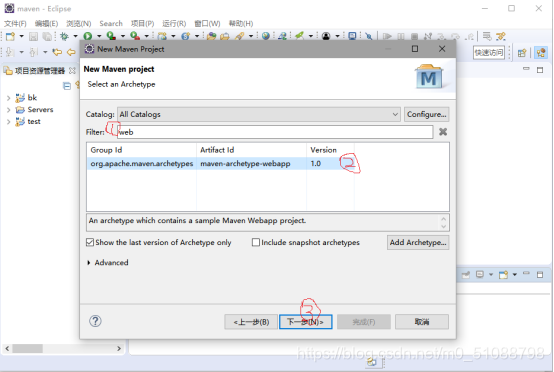
3.在Filter那一栏搜索web,并点击画②的地方,然后下一步。如下图:
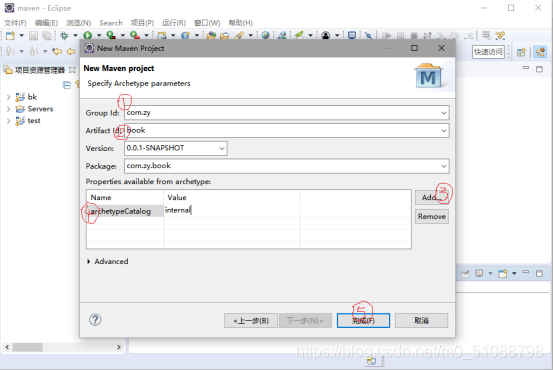
4.在①的部分填写组织id,②的部分填写项目名,③④添加的配置archetypeCatalog=internal可加快项目创建速度,archetypeCatalog用来指定maven-archetype-plugin读取archetype-catalog.xml文件的位置,internal——maven-archetype-plugin内置的,然后点击完成。如下图:
二、Eclipse使用maven将web版本设置成3.0,JDK设置成1.8
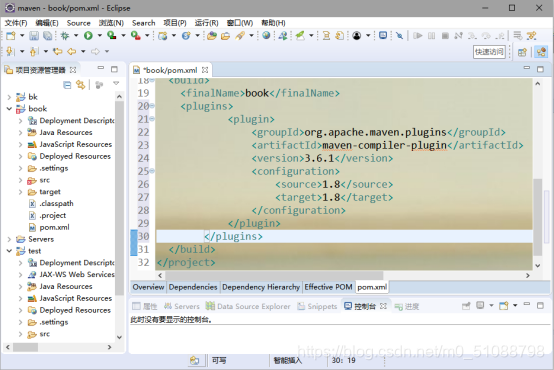
1.配置maven-compiler-plugin插件,打开pom.xml文件,在< build >内写上以下代码
<plugins>
			<plugin>
				<groupId>org.apache.maven.plugins</groupId>
				<artifactId>maven-compiler-plugin</artifactId>
				<version>3.6.1</version>
				<configuration>
					<source>1.8</source>
					<target>1.8</target>
				</configuration>
		</plugin>
</plugins>
如下图:
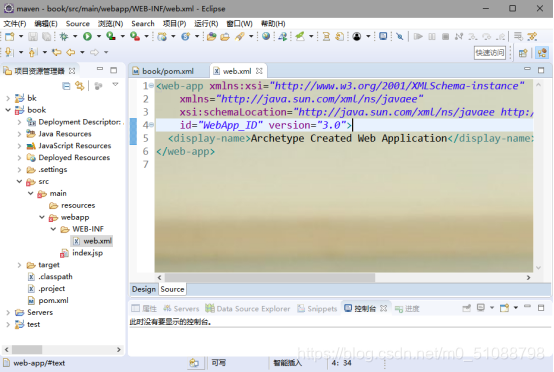
2.修改web.xml由2.3至3.0,替换填写以下代码:
<web-app xmlns:xsi="http://www.w3.org/2001/XMLSchema-instance"
	xmlns="http://java.sun.com/xml/ns/javaee"
	xsi:schemaLocation="http://java.sun.com/xml/ns/javaee http://java.sun.com/xml/ns/javaee/web-app_3_0.xsd"
	id="WebApp_ID" version="3.0">
如下图:
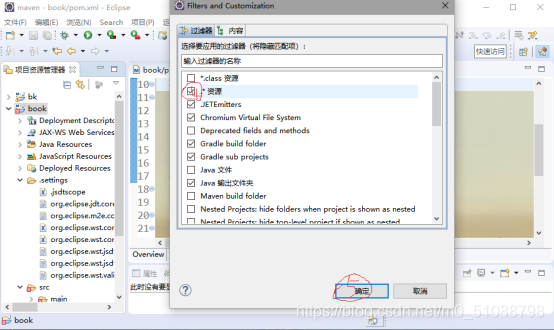
3.设置可以查看.settings文件,如图点击①---->②:
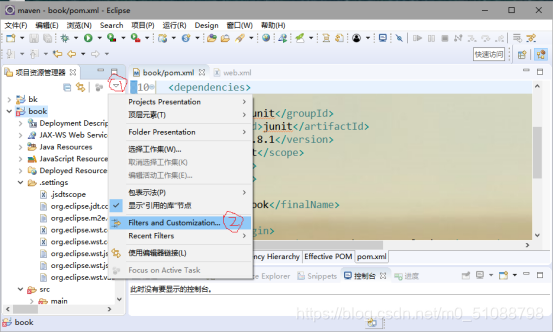
---->去掉勾选.class(.资源)---->然后点击确定,如下图:
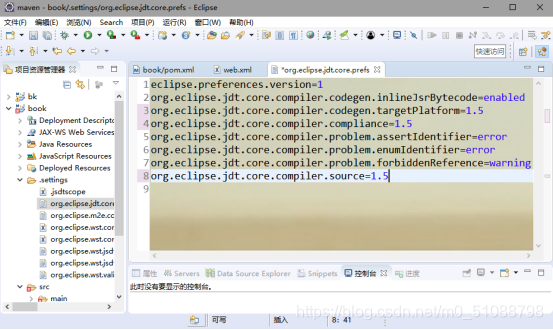
4.修改.settings中的org.eclipse.jdt.core.prefs文件,1.5的全部改为1.8,如下图:
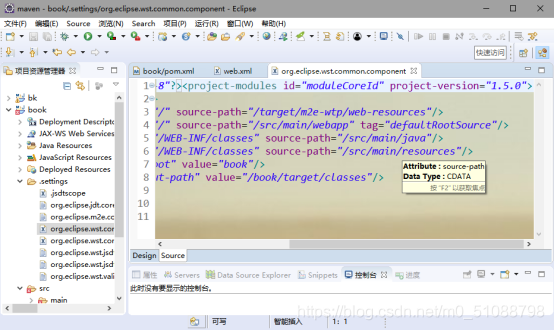
5.修改.settings中的org.eclipse.wst.common.component文件,将下面的version=”1.5.0”改为version=”1.8.0”
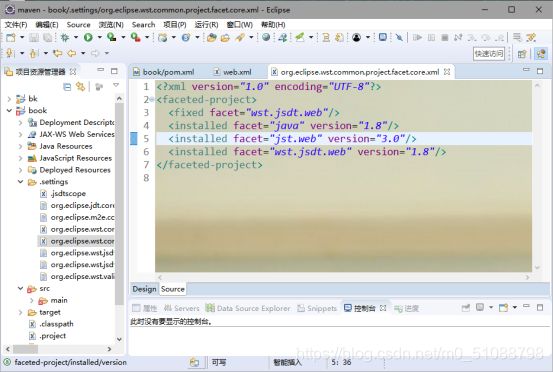
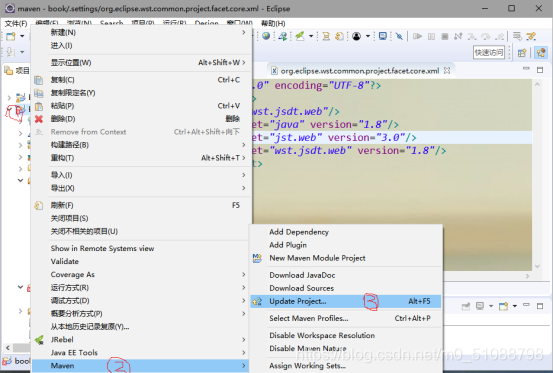
6.修改.settings中的org.eclipse.wst.common.project.facet.core.xml–>
将值改为下图所示:
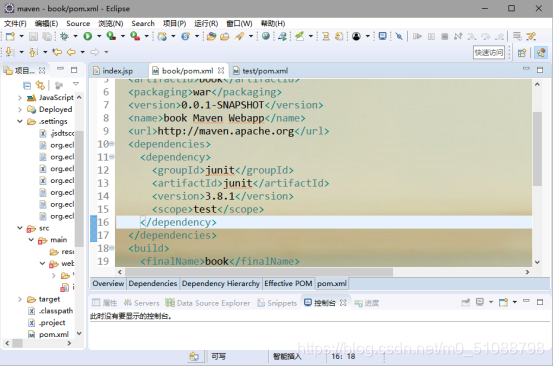
7.更改junit坐标,将以下代码替换如下图代码:
<dependency>
			<groupId>junit</groupId>
			<artifactId>junit</artifactId>
			<version>4.13</version>
			<scope>test</scope>
	</dependency>
8.添加servlet坐标,添加以下代码:
<dependency>
			<groupId>javax.servlet</groupId>
			<artifactId>javax.servlet-api</artifactId>
			<version>4.0.0</version>
			<scope>provided</scope>
</dependency>
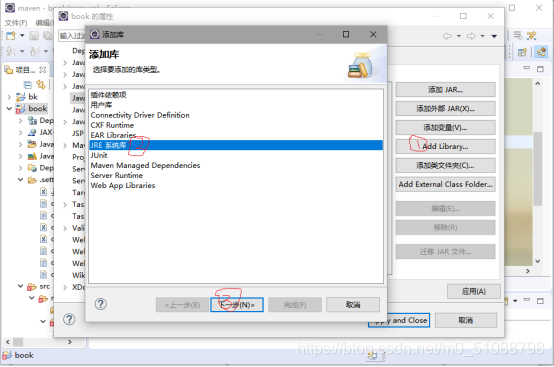
9.为项目构建路径,点击项目右键–>选择构建路径–>配置构建路径,如下图:

–>Add Library–>JRE 系统库–>下一步–>Apply and Close,如下图:
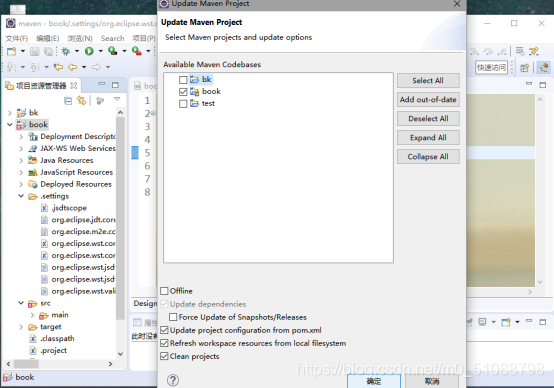
10.刷新一下项目设置,如下图:
点击确定,如下图:
总结
提示:这里对文章进行总结:
例如:以上就是今天要讲的内容,本文仅仅简单介绍了eclipse怎么使用maven创建web项目,希望能对需要的人有所帮助。


 152
152


 被折叠的 条评论
为什么被折叠?
被折叠的 条评论
为什么被折叠?
 到【灌水乐园】发言


