


一、注入分类
bean 实例在调用无参构造器创建对象后,就要对 bean 对象的属性进行初始化。初始化是由容器自动完成的,称为注入。根据注入方式的不同,常用的有两类:set 注入、构造注入。
二、set 注入
set 注入也叫设值注入,是指通过 setter 方法传入被调用者的实例。这种注入方式简单、直观,因而在 Spring 的依赖注入中大量使用。
(1) 简单类型
定义学生类
public class Student {
    private String name;
    private int age;

    public Student(String name, int age) {
        this.name = name;
        this.age = age;
    }

    public String getName() {
        return name;
    }

    public void setName(String name) {
        this.name = name;
    }

    public int getAge() {
        return age;
    }

    public void setAge(int age) {
        this.age = age;
    }
     @Override
    public String toString() {
        return "name : " + name + " | age : " + age;
    }
}
在 applicationContext.xml 文件中创建学生对象,并对其属性进行赋值(即注入)
在<bean> 标签中使用<property> 即可通过键值对的方式完成对于对象属性的赋值
<bean id="myStudent" class="com.fancy.Student">
     <property name="age" value="18"></property>
     <property name="name" value="zhang"></property>
</bean>
定义测试方法
 public void test01() {
        // 1. 指定 spring 配置文件的位置和名称
        String resource = "applicationContext.xml";
        // 2. 创建 spring 容器对象
        ApplicationContext ac = new ClassPathXmlApplicationContext(resource);
        // 3. 从 spring 容器中获取对象, 使用id
        Student student = (Student) ac.getBean("myStudent");
        // 4. 执行对象的业务方法
        System.out.println(student);
}

创建 java.util.Date 对象并设置初始日期时间
<bean id="myDate" class="java.util.Date">
      <property name="time" value="1000000"></property>
</bean>
定义测试类
 @Test
    public void test01() {
        // 1. 指定 spring 配置文件的位置和名称
        String resource = "applicationContext.xml";
        // 2. 创建 spring 容器对象
        ApplicationContext ac = new ClassPathXmlApplicationContext(resource);
        // 3. 从 spring 容器中获取对象, 使用id
       Date date = (Date) ac.getBean("myDate");
        // 4. 执行对象的业务方法
        System.out.println(date);
    }

(2) 引用类型
当指定 bean 的某属性值为另一 bean 的实例时,通过 ref 指定它们间的引用关系。ref 的值必须为某 bean 的 id 值。
定义学校类与学生类
package com.fancy;

public class School {
    private String name;
    private String address;

    public School() {
    }

    public School(String name, String address) {
        this.name = name;
        this.address = address;
    }

    public String getName() {
        return name;
    }

    public void setName(String name) {
        this.name = name;
    }

    public String getAddress() {
        return address;
    }

    public void setAddress(String address) {
        this.address = address;
    }
}
package com.fancy;
public class Student {
private String name;
private int age;
private School school;
public Student() {
}
public Student(String name, int age, School school) {
this.name = name;
this.age = age;
this.school = school;
}
public String getName() {
return name;
}
public void setName(String name) {
this.name = name;
}
public int getAge() {
return age;
}
public void setAge(int age) {
this.age = age;
}
public School getSchool() {
return school;
}
public void setSchool(School school) {
this.school = school;
}
@Override
public String toString() {
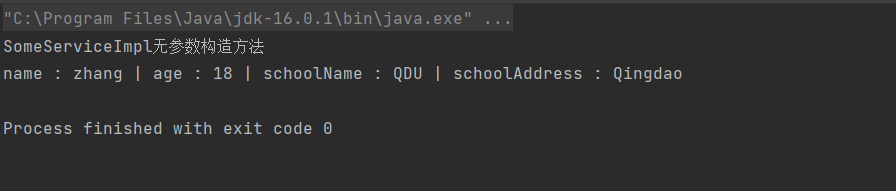
return "name : " + name + " | age : " + age + " | schoolName : " + school.getName() + " | schoolAddress : " + school.getAddress();
}
}
声明 School 类型对象
<bean id="mySchool" class="com.fancy.School">
        <property name="name" value="QDU"></property>
        <property name="address" value="Qingdao"></property>
</bean>
对于其它 Bean 对象的引用,使用<bean/>标签的 ref 属性
 <bean id="myStudent" class="com.fancy.Student">
          <property name="age" value="18"></property>
          <property name="name" value="zhang"></property>
          <property name="school" ref="mySchool"></property>
 </bean>
测试方法
	 @Test
	 public void test01() {
	    // 1. 指定 spring 配置文件的位置和名称
	    String resource = "applicationContext.xml";
	    // 2. 创建 spring 容器对象
	    ApplicationContext ac = new ClassPathXmlApplicationContext(resource);
	    // 3. 从 spring 容器中获取对象, 使用id
	    Student student = (Student) ac.getBean("myStudent");
	    // 4. 执行对象的业务方法
	    System.out.println(student);
	}

三、构造注入
构造注入是指,在构造调用者实例的同时,完成被调用者的实例化。即,使用构造器设置依赖关系。
(1)自定义类型构造注入
首先类中写出有参构造方法
public Student(String name, int age, School school) {
      this.name = name;
      this.age = age;
      this.school = school;
}
进行构造注入需要在<bean/> 中使用 <constructor-arg/>标签
<bean id="myStudent" class="com.fancy.Student">
        <constructor-arg name="age" value="18"></constructor-arg>
        <constructor-arg name="name" value="zhang"></constructor-arg>
        <constructor-arg name="school" ref="mySchool"></constructor-arg>
 </bean>
<constructor-arg />标签中用于指定参数的属性有:
➢ name:指定参数名称。
➢ index:指明该参数对应着构造器的第几个参数,从 0 开始。不过,该属性不要也行,但要注意,若参数类型相同,或之间有包含关系,则需要保证赋值顺序要与构造器中的参数顺序一致。
(2) 使用构造注入创建一个系统类 File 对象
<bean id="myFile" class="java.io.File">
        <!--创建一个File对象, 表示pom.xml-->
        <constructor-arg name="parent" value="F:\Spring\IoC控制反转"></constructor-arg>
        <constructor-arg name="child" value="pom.xml"></constructor-arg>
        <!-- parent用于指示文件所在目录的绝对路径 child表示文件名称-->
 </bean>
测试方法
  @Test
  public void test01() {
        // 1. 指定 spring 配置文件的位置和名称
        String resource = "applicationContext.xml";
        // 2. 创建 spring 容器对象
        ApplicationContext ac = new ClassPathXmlApplicationContext(resource);
        // 3. 从 spring 容器中获取对象, 使用id
        File file = (File) ac.getBean("myFile");
        // 4. 执行对象的业务方法
        System.out.println("文件路径 : " + file.getAbsolutePath());
        System.out.println("文件名称 : " + file.getName());
 }

四、自动注入
对于引用类型属性的注入,也可不在配置文件中显示的注入。可以通过为<bean/>标签设置 autowire 属性值,为引用类型属性进行隐式自动注入 ( 默认是不自动注入引用类型属性 ) 。根据自动注入判断标准的不同,可以分为两种:
- byName 方式自动注入
- byType 方式自动注入
(1) byName 方式自动注入
当配置文件中被调用者 bean 的 id 值与代码中调用者 bean 类的属性名相同时,可使用 byName 方式,让容器自动将被调用者 bean 注入给调用者 bean。容器是通过调用者的 bean类的属性名与配置文件的被调用者 bean 的 id 进行比较而实现自动注入的。
仍以学生类为例

我们在配置文件中创建id为school的学校对象
 <bean id="myStudent" class="com.fancy.Student" autowire="byName">
              <property name="age" value="18"></property>
              <property name="name" value="zhang"></property>
<!--              <property name="school" ref="mySchool"></property>-->
       </bean>
       <bean id="school" class="com.fancy.School">
              <property name="name" value="QDU"></property>
              <property name="address" value="Qingdao"></property>
       </bean>

输出结果与上面相同
(2) byType 方式自动注入
使用 byType 方式自动注入,要求:配置文件中被调用者 bean 的 class 属性指定的类,要与代码中调用者 bean 类的某引用类型属性类型同源。即要么相同,要么有 is-a 关系(子类,或是实现类)。但这样的同源的被调用 bean 只能有一个。多于一个,容器就不知该匹配哪一个了。

与 byName 不同的是,byType要求两者的class有关联
<bean id="myStudent" class="com.fancy.Student" autowire="byType">
        <property name="age" value="18"></property>
        <property name="name" value="zhang"></property>
<!--    <property name="school" ref="mySchool"></property>-->
</bean>
<bean id="mySchool" class="com.fancy.School">
        <property name="name" value="QDU"></property>
        <property name="address" value="Qingdao"></property>
</bean>

五、为应用指定多个 Spring 配置文件
在实际应用里,随着应用规模的增加,系统中 Bean 数量也大量增加,导致配置文件变得非常庞大、臃肿。为了避免这种情况的产生,提高配置文件的可读性与可维护性,可以将Spring 配置文件分解成多个配置文件。
包含关系的配置文件:
多个配置文件中有一个总文件,总配置文件将各其它子文件通过<import/>引入。在 Java代码中只需要使用总配置文件对容器进行初始化即可。
举例 :之前我们将Student类型对象和School类型对象放在同一个配置文件里,现在我们将其分别放入两个单独配置文件中,然后整合到total.xml这个总的配置文件里即可

即利用<import/>将两个配置文件导入即可

 <import resource="classpath:spring-school.xml"></import>
 <import resource="classpath:spring-student.xml"></import>
也可使用通配符 * 。但,此时要求父配置文件名不能满足 * 所能匹配的格式,否则将出现循环递归包含。就本例而言,父配置文件不能匹配 spring-*.xml 的格式,即不能起名为spring-total.xml。
<import resource="classpath:spring-*"></import>


 742
742


 被折叠的 条评论
为什么被折叠?
被折叠的 条评论
为什么被折叠?
 到【灌水乐园】发言


