


.
文章目录
一、认识搜索引擎
像百度、搜狗这些搜索引擎,输入一个搜索词就会出现若干条结果,每条结果包含标题,内容描述,展示url,图片等相关内容。
搜索引擎的本质就是输入一个查询词,得到若干个结果标题、描述、点击url。
搜索的核心思路
我们把一个网页称为一个文档;每一次搜索就是在所有文档中查找搜索词,检查文档中是否有搜索词。但是这种搜索方法很直接很暴力,开销很巨大,随着文档的增多,每次搜索的时间都会很长,而我们对搜索引擎的效率要求很高,试想一下你要搜索一个单词,要1分多钟的时间你还会选择这个搜索引擎吗?
所以我们引入倒排索引,这是针对搜索引擎而设计的数据结构。
倒排索引
文档:我们只检索html页面
正排索引:按照文档进行索引,一个文档中有哪些词,描述一个文档中有哪些信息,将文档中的词进行分词并处理。
倒排索引:按照词语进行分类,一个词被那些文档引用,储存了这些词在那些文档,并在这些文档中占据的重要程度。
二、项目介绍
我们针对Java API文档实现一个搜索引擎。
我们将需要的Java API文档保存到本地。
我们要实现搜索引擎需要实现以下模块:
- 构建索引模块:扫码下载好的文档,分析数据内容使用正排索引和倒排索引,并保存到本地文件。
- 搜索模块:加载索引,根据输入的查询词,基于正排和倒排索引进行检索得到检索结果。
- web模块:编写一个简单的web页面,展示搜索结果。
三、索引构建具体实现
1、分词
正排索引和倒排索引都要对内容进行分词处理,我们使用ansj_seg分词技术来进行分词操作。
我们要在pom.xml文件中插入如下代码:
<dependency>
            <groupId>org.ansj</groupId>
            <artifactId>ansj_seg</artifactId>
            <version>5.1.6</version>
        </dependency>
2、文件检索
在配置文件中配置要进行检索文件的地址,代码如下:
searcher:
  indexer:
    doc-root-path: D:\搜索引擎\docs\api
    url-prefix: https://docs.oracle.com/javase/8/docs/api/
使用rootPath作为根目录,开始进行文件扫描,把所有符合要求的File对象作为结果,以List形式进行返回。首先通过@Service注解将该类注册为Spring Bean ,采用深度优先遍历,使用递归完成。
代码如下:
public List<File> scanFile(String rootPath, FileFilter filter) {
        List<File> resultList = new ArrayList<>();
        File rootFile = new File(rootPath);
        traversal(rootFile, filter, resultList);
        return resultList;
        }
         private void traversal(File directoryFile, FileFilter filter, List<File> resultList) {
        // 1. 先通过目录,得到该目录下的孩子文件有哪些
        File[] files = directoryFile.listFiles();
        if (files == null) {

            return;
        }
        // 2. 遍历每个文件,检查是否符合条件
        for (File file : files) {
            if (filter.accept(file)) {
                resultList.add(file);
            }
        }
        // 3. 遍历每个文件,针对是目录的情况,继续深度优先遍历(递归)
        for (File file : files) {
            if (file.isDirectory()) {
                traversal(file, filter, resultList);
            }
        }
    }
}
这样我们就完成文件的扫描。
3、库表的建立
我们使用MySQL储存我们要储存的文档。通过设计需要两个表来进行储存。一是储存正排索引的表,二是储存倒排索引的表。建表语句如下:
CREATE TABLE `searcher`.`weights` (
  `wid` int(11) NOT NULL AUTO_INCREMENT,
  `docId` int(11) NOT NULL,
  `weight` int(11) NOT NULL COMMENT
)COMMENT='倒排索引中的权重信息,包含 docId + weight

CREATE TABLE `searcher`.`documents` (
  `docid` int(11) NOT NULL COMMENT
  `title` varchar(100) NOT NULL,
  `url` varchar(200) NOT NULL,
  `content` longtext NOT NULL,
  PRIMARY KEY (`docid`)
) COMMENT='文档表,也就是正排索引表';
正排索引表储存正排索引信息,倒排索引表储存倒排索引信息。同时在yml文件中配置关联MySQL。
4、对扫描的文件进行处理
第一步:扫描出来所有的html文件。代码如下:
List<File> htmlFileList = fileScanner.scanFile(properties.getDocRootPath(), file -> {
            return file.isFile() && file.getName().endsWith(".html");
        });
第二步:针对每个 html 文件,得到其 标题、URL、正文信息,把这些信息封装成一个对象(文档 Document)。代码如下:
File rootFile = new File(properties.getDocRootPath());
        List<Document> documentList = htmlFileList.stream()
                .parallel()         // 【注意】由于我们使用了 Stream 用法,所以,可以通过添加 .parallel(),使得整个操作变成并行,利用多核增加运行速度
                .map(file -> new Document(file, properties.getUrlPrefix(), rootFile))
                .collect(Collectors.toList());
1、分词处理
因为读取的文件都会带有.html的后缀,不能算作文件的标题,所以在计算分词之前首先要把获取文档的后缀去掉;代码如下:
 private String parseTitle(File file) {
        // 从文件名中,将 .html 后缀去掉,剩余的看作标题,进行简单的拼接即可。
        String name = file.getName();
        String suffix = ".html";
        return name.substring(0, name.length() - suffix.length());
    }
针对文档进行分词,并计算权重值(我们这里将在标题中出现的词权重10,在文档正文中出现的词权重1)。
标题分词处理
代码如下:
public Map<String, Integer> segWordAndCalcWeight() {
        // 统计标题中的每个词出现次数 | 分词:标题有哪些词
        List<String> wordInTitle = ToAnalysis.parse(title)
                .getTerms()
                .stream()
                .parallel()
                .map(Term::getName)
                .collect(Collectors.toList());
	// 统计标题中,每个词的出现次数 | 统计次数
        Map<String, Integer> titleWordCount = new HashMap<>();
        for (String word : wordInTitle) {
            int count = titleWordCount.getOrDefault(word, 0);
            titleWordCount.put(word, count + 1);
        }
内容分词处理
代码如下:
 // 统计内容中的词,以及词的出现次数
        List<String> wordInContent = ToAnalysis.parse(content)
                .getTerms()
                .stream()
                .parallel()
                .map(Term::getName)
                .collect(Collectors.toList());
        Map<String, Integer> contentWordCount = new HashMap<>();
        for (String word : wordInContent) {
            int count = contentWordCount.getOrDefault(word, 0);
            contentWordCount.put(word, count + 1);
        }
2、权重计算
权重的计算因为是不同的单词所以要进行去重 ,这里采用Set来去重。然后通过遍历然后计算获得该词的权重并放入List中。
// 计算权重值
        Map<String, Integer> wordToWeight = new HashMap<>();
        // 先计算出有哪些词,不重复
        Set<String> wordSet = new HashSet<>(wordInTitle);
        wordSet.addAll(wordInContent);

        for (String word : wordSet) {
            int titleCount = titleWordCount.getOrDefault(word, 0);
            int contentCount = contentWordCount.getOrDefault(word, 0);
            int weight = titleCount * 10 + contentCount;

            wordToWeight.put(word, weight);
        }

        return wordToWeight;
    }
3、url及文件中Js的处理
因为在yml文件中配置了前缀url为:https://docs.oracle.com/javase/8/docs/api/
所以要获得完整的url就要从文件路径中获取,又因为文件路径为"\“而url中为”/"所以要进行替换并把前缀url和绝对路径进行拼接,就是完整的url了
代码如下:
   // 需要得到一个相对路径,file 相对于 rootFile 的相对路径
        // 比如:rootFile 是 D:\docs\api
        //      file 是     D:\docs\api\javax\sql\DataSource.html
        // 则相对路径就是:javax\sql\DataSource.html
        // 把所有反斜杠(\) 变成正斜杠(/)
        // 最终得到 java/sql/DataSource.html
 private String parseUrl(File file, String urlPrefix, File rootFile) {
		String rootPath = rootFile.getCanonicalPath();
        rootPath = rootPath.replace("/", "\\");
        if (!rootPath.endsWith("\\")) {
            rootPath = rootPath + "\\";
        }
        String filePath = file.getCanonicalPath();
        String relativePath = filePath.substring(rootPath.length());
        relativePath = relativePath.replace("\\", "/");
      return urlPrefix + relativePath;
    }
Js处理
因为是html会带有JS代码,所以搜索的时候关键字中会由JS代码所以要把代码去除掉,这里采用正则表达式去除。
代码如下:
@SneakyThrows
   private String parseContent(File file) {
       StringBuilder contentBuilder = new StringBuilder();

       try (InputStream is = new FileInputStream(file)) {
           try (Scanner scanner = new Scanner(is, "ISO-8859-1")) {
               while (scanner.hasNextLine()) {
                   String line = scanner.nextLine();
                   contentBuilder.append(line).append(" ");
               }

               return contentBuilder.toString()
                // 首先去掉 <script ...>...</script>
                       .replaceAll("<script[^>]*>[^<]*</script>", " ")
                        // 去掉标签
                       .replaceAll("<[^>]*>", " ")
                         // 多带的空格的意思是,把 换行符 也视为空格了
                       .replaceAll("\\s+", " ")
                       //再去掉两边的空格
                       .trim();
           }
       }
   }
5、索引的构建
索引的构建需要对数据库进行操作这里我用MyBatis进行操作,我们生成一个接口将其注册为Spring Bean并与xml文件关联,通过java对象中sql的动态参数进行映射生产最终执行的sql语句,最后再由Mybatis框架执行sql并将结果映射为java对象并返回。
这里我还做了一些优化,使用线程池来进行操作可以减少插入索引所需的时间。代码如下:
@Configuration
public class AppConfig {
    @Bean
    public ExecutorService executorService() {
        ThreadPoolExecutor executor = new ThreadPoolExecutor(
                8, 20, 30, TimeUnit.SECONDS,
                new ArrayBlockingQueue<>(5000),
                (Runnable task) -> {
                    Thread thread = new Thread(task);
                    thread.setName("批量插入线程");
                    return thread;
                },
                new ThreadPoolExecutor.AbortPolicy()
        );

        return executor;
    }
}
1、正排索引
其xml中的配置语句为:
<insert id="batchInsertForwardIndexes" useGeneratedKeys="true" keyProperty="docId" keyColumn="docid">
        insert into forward_indexes (title, url, content) values
        <!-- 一共有多少条记录,得根据用户传入的参数来决定,所以这里采用动态 SQL 特性 -->
        <foreach collection="list" item="doc" separator=", ">
            (#{doc.title}, #{doc.url}, #{doc.content})
        </foreach>
    </insert>
在插入过程中我们采取批量插入来进行操作,减少操作所需的时间。因为正排索引插入的是文档,MySQL每次插入数据的大小有限制,所以我们每次插入数据的大小为10条。
代码如下:
@SneakyThrows
   public void saveForwardIndexesConcurrent(List<Document> documentList) {
       // 1. 批量插入时,每次插入多少条记录(由于每条记录比较大,所以这里使用 10 条就够了)
       int batchSize = 10;
       // 2. 一共需要执行多少次 SQL?   向上取整(documentList.size() / batchSize)
       int listSize = documentList.size();
       int times = (int) Math.ceil(1.0 * listSize / batchSize);    // ceil(天花板): 向上取整
       log.debug("一共需要 {} 批任务。", times);
       CountDownLatch latch = new CountDownLatch(times);   // 统计每个线程的完全情况,初始值是 times(一共多少批)
       // 3. 开始分批次插入
       for (int i = 0; i < listSize; i += batchSize) {
           // 从 documentList 中截取这批要插入的 文档列表(使用 List.subList(int from, int to)
           int from = i;
           int to = Integer.min(from + batchSize, listSize);
           Runnable task = () -> { // 内部类 / lambda 表达式里如果用到了外部变量,外部变量必须的 final(或者隐式 final 的变量)
               List<Document> subList = documentList.subList(from, to);
               // 针对这个 subList 做批量插入
               mapper.batchInsertForwardIndexes(subList);
               latch.countDown();      //  每次任务完成之后,countDown(),让 latch 的个数减一
           };
           executorService.submit(task);   // 主线程只负责把一批批的任务提交到线程池,具体的插入工作,由线程池中的线程完成
       }
       // 4. 循环结束,只意味着主线程把任务提交完成了,但任务有没有做完是不知道的
       // 主线程等在 latch 上,只到 latch 的个数变成 0,也就是所有任务都已经执行完了
       latch.await();
   }
这样正排索引就插入方法就完成了。
2、倒排索引
其xml文件中配置语句为:
<insert id="batchInsertInvertedIndexes">
        insert into inverted_indexes (word, docid, weight) values
        <foreach collection="list" item="record" separator=", ">
            (#{record.word}, #{record.docId}, #{record.weight})
        </foreach>
    </insert>
在插入过程中我们采取批量插入来进行操作,减少操作所需的时间。倒排索引每次插入数据大小较小,所以我们每次插入10,000条,在这里我创建一个单独的方法来处理插入。代码如下:
    static class InvertedInsertTask implements Runnable {
      private final CountDownLatch latch;
      private final int batchSize;
      private final List<Document> documentList;
      private final IndexDatabaseMapper mapper;

      InvertedInsertTask(CountDownLatch latch, int batchSize, List<Document> documentList, IndexDatabaseMapper mapper) {
          this.latch = latch;
          this.batchSize = batchSize;
          this.documentList = documentList;
          this.mapper = mapper;
      }

      @Override
      public void run() {
          List<InvertedRecord> recordList = new ArrayList<>();    // 放这批要插入的数据

          for (Document document : documentList) {
              Map<String, Integer> wordToWeight = document.segWordAndCalcWeight();
              for (Map.Entry<String, Integer> entry : wordToWeight.entrySet()) {
                  String word = entry.getKey();
                  int docId = document.getDocId();
                  int weight = entry.getValue();

                  InvertedRecord record = new InvertedRecord(word, docId, weight);

                  recordList.add(record);

                  // 如果 recordList.size() == batchSize,说明够一次插入了
                  if (recordList.size() == batchSize) {
                      mapper.batchInsertInvertedIndexes(recordList);  // 批量插入
                      recordList.clear();                             // 清空 list,视为让 list.size() = 0
                  }
              }
          }
          // recordList 还剩一些,之前放进来,但还不够 batchSize 个的,所以最后再批量插入一次
          mapper.batchInsertInvertedIndexes(recordList);  // 批量插入
          recordList.clear();

          latch.countDown();
      }
  }

  @Timing("构建 + 保存倒排索引 —— 多线程版本")
  @SneakyThrows
  public void saveInvertedIndexesConcurrent(List<Document> documentList) {
      int batchSize = 10000;  // 批量插入时,最多 10000 条
      int groupSize = 50;
      int listSize = documentList.size();
      int times = (int) Math.ceil(listSize * 1.0 / groupSize);
      CountDownLatch latch = new CountDownLatch(times);

      for (int i = 0; i < listSize; i += groupSize) {
          int from = i;
          int to = Integer.min(from + groupSize, listSize);
          List<Document> subList = documentList.subList(from, to);
          Runnable task = new InvertedInsertTask(latch, batchSize, subList, mapper);
          executorService.submit(task);
      }

      latch.await();
  }
这样倒排索引插入的方法就完成了。
6、索引的保存
使用创建好的正排索引和倒排索引的方法再将文件传入传入即可。代码如下:
// 3. 进行正排索引的保存
        indexManager.saveForwardIndexesConcurrent(documentList);
        log.debug("正排索引保存成功。");

        // 4. 进行倒排索引的生成核保存
        indexManager.saveInvertedIndexesConcurrent(documentList);
        log.debug("倒排索引保存成功。");
四、Web界面的构建
Web界面的构建是使用搜索引擎的关键,通过Web界面所构建的html文件来通过后端文件来进行搜索,简单来说就是根据用户所提交的搜索词通过Mybatis操作数据库并将搜索出来的数据传给前端来展示给用户。
1、前端与数据库的交互
1、注册SearchMapper接口通过@Repository和@Mapper共同作用于dao
层,获取数据库中的信息。
代码如下:
public class DocumentWightWeight {
    private int docId;
    private String title;
    private String url;
    private String content;
    public int weight;

    public DocumentWightWeight() {}
    public DocumentWightWeight(DocumentWightWeight documentWightWeight) {
        this.docId = documentWightWeight.docId;
        this.title = documentWightWeight.title;
        this.url = documentWightWeight.url;
        this.content = documentWightWeight.content;
        this.weight = documentWightWeight.weight;
    }
     public Document toDocument() {
        Document document = new Document();
        document.setDocId(this.docId);
        document.setTitle(this.title);
        document.setUrl(this.url);
        document.setContent(this.content);

        return document;
    }
 }
这些是想要从数据库中拿到的信息。
@Repository
@Mapper
public interface SearchMapper {
List<DocumentWightWeight> queryWithWeight(
            @Param("word") String word,
            @Param("limit") int limit,
            @Param("offset") int offset
    );
}
这是对数据库进行操作。这段代码所在的类会与xml文件关联。xml中代码如下:
<resultMap id="DocumentWithWeightResultMap" type="com.searcher.web.DocumentWightWeight">
        <id property="docId" column="docid" />
        <result property="title" column="title" />
        <result property="url" column="url" />
        <result property="content" column="content" />
        <result property="weight" column="weight" />
    </resultMap>
    <select id="queryWithWeight" resultMap="DocumentWithWeightResultMap">
        select ii.docid, title, url, content, weight
        from inverted_indexes ii
        join forward_indexes fi
        on ii.docid = fi.docid
        where word = #{word}
        order by weight desc
        limit ${limit}
        offset ${offset}
    </select>
sql语句中使用连表查询将正排索引和倒排索引关联起来。
2、对数据进行处理
通过传入的query来对数据库进行搜索,并进行分页操作。如果是多词查找就先分词然后对词语分别查找并进行聚合操作。
具体操作代码如下:
  public String search(String query, @RequestParam(value = "page", required = false) String pageString, Model model) {
//进行分词操作
 List<String> queryList = ToAnalysis.parse(query)
                .getTerms()
                .stream()
                .map(Term::getName)
                .collect(Collectors.toList());
                }
重新聚合每个词在不同文件中的权重,然后按照权重大小进行排序。
代码如下:
        List<DocumentWightWeight> totalList = new ArrayList<>();
        for (String s : queryList) {
            List<DocumentWightWeight> documentList = mapper.queryWithWeight(s, limit, offset);
            totalList.addAll(documentList);
        }
        // 针对所有文档列表,做权重聚合工作
        // 维护:
        // docId -> document 的 map
        Map<Integer, DocumentWightWeight> documentMap = new HashMap<>();
        for (DocumentWightWeight documentWightWeight : totalList) {
            int docId = documentWightWeight.getDocId();
            if (documentMap.containsKey(docId)) {
                DocumentWightWeight item = documentMap.get(docId);
                item.weight += documentWightWeight.weight;
                continue;
            }
            DocumentWightWeight item = new DocumentWightWeight(documentWightWeight);
            documentMap.put(docId, item);
        }
      Collection<DocumentWightWeight> values = documentMap.values();
        // Collection 没有排序这个概念(只有线性结构才有排序的概念),所以我们需要一个 List
        List<DocumentWightWeight> list = new ArrayList<>(values);
        // 按照 weight 的从大到小排序了
        Collections.sort(list, (item1, item2) -> {
            return item2.weight - item1.weight;
        });
        int from = (page - 1) * 20;
        int to = from + 20;
        // 从 list 中把分页区间取出来
        List<DocumentWightWeight> subList = list.subList(from, to);
        List<Document> documentList = subList.stream()
                .map(DocumentWightWeight::toDocument)
                .collect(Collectors.toList());
        // lambda 中无法使用非 final 变量
        List<String> wordList = queryList;
        documentList = documentList.stream()
                .map(doc -> descBuilder.build(wordList, doc))
                .collect(Collectors.toList());
        // 这里将数据添加到 model 中,是为了在 渲染模板的时候用到
        model.addAttribute("query", query);
        model.addAttribute("docList", documentList);
        model.addAttribute("page", page);
        }
这样之后就把多词查找分别单词的权重重新聚合并进行分页。
3、展示页
这里采用了thymeleaf语法来对展示页就行操作
代码如下
<!DOCTYPE html>
<html lang="zh-hans" xmlns:th="https://www.thymeleaf.org">
<head>
    <meta charset="UTF-8">
    <title th:text="${query} + ' - 学习搜索'"></title>
    <link rel="stylesheet" href="/query.css">
</head>
<body>
 <div class="header">
        <div class="brand"><a href="/">学习搜索</a></div>
        <form class="input-shell" method="get" action="/web">
            <input type="text" name="query" th:value="${query}">
            <button>搜索一下</button>
        </form>
    </div>
    <div class="result">
           <div class="result-item" th:each="doc : ${docList}">
            <a th:href="${doc.url}" th:text="${doc.title}"></a>
            <div class="desc" th:utext="${doc.desc}"></div>
            <div class="url" th:text="${doc.url}"></div>
        </div>
    </div>
    <div class="pagination">
        <a th:href="'/web?query=' + ${query} + '&page=' + ${page - 1}">上一页</a>
        <a th:href="'/web?query=' + ${query} + '&page=' + ${page + 1}">下一页</a>
    </div>
</body>
</html>
使用thymeleaf语法可以使展示页中展示出从数据库拿到的信息不如url,titile,简介等信息,使得查询界面更加丰富。
4、其他
还可以对搜索首页进行优化,网上有什么CSS样式,可以在B站上进行学习。
五、测试
1、当输入为空时,跳转到首页


2、当输入符号
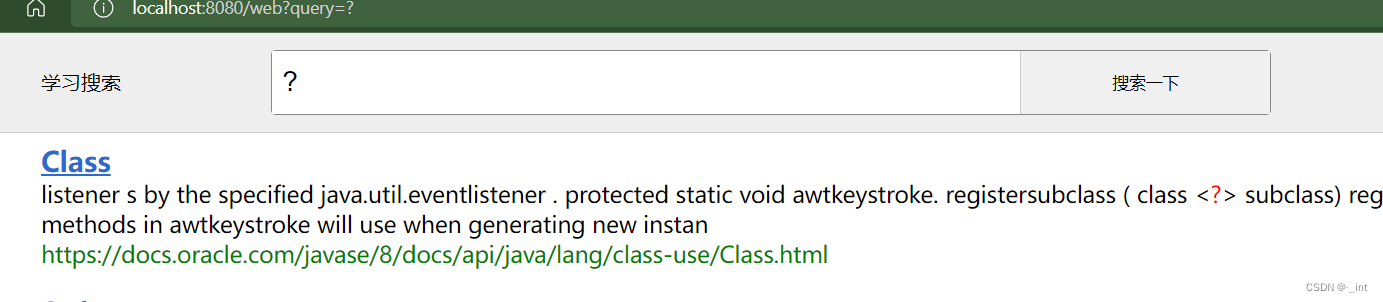
可以进行查找。
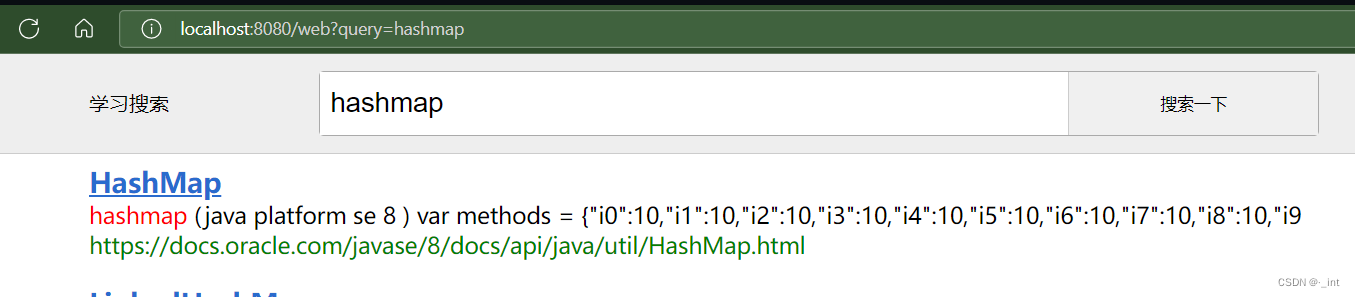
3、任意检索词
4、输入汉字

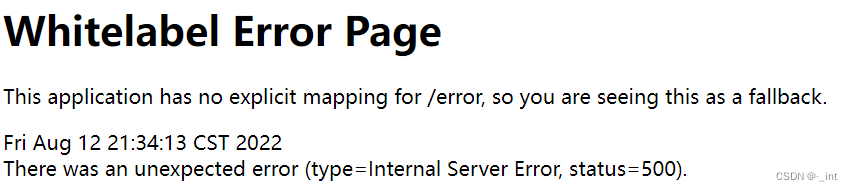
无法进行查询。


 1076
1076


 被折叠的 条评论
为什么被折叠?
被折叠的 条评论
为什么被折叠?
 到【灌水乐园】发言


