


目录
基本说明
为了加强自己对于spring的认识,决定看下spring源码,但是看完还是有点模糊,于是就决定自己来写一个简易的spring,实现IOC,AOP的基本功能。
手写spring准备分5篇文章进行说明,代码总计1000多行,里面的各种注解,容器,全部都是自定义的。在写完之后确实对spring有了一个清晰的认识!!!
基本思路
完成简易的spring容器,我准备分为5个步骤,如下
- 构建框架,实现包扫描
- 将bean信息封装成beanDefinition,然后存入Map
- 初始化单列池,提供getBean方法,解决依赖注入问题
- 实现后置处理器
- 实现AOP
画图就不画了,太麻烦了,下面就自己开始吧。(注意:该手写spring不使用xml,全部使用注解)
框架搭建
新建一个项目,创建如下package,名称随意

上面的myspring包下面就是写我们自己的spring代码的。下面的use包用于测试我们自己写的spring能否正常使用。看名称也能知道大概每个包是干嘛的了
自定义注解
由于注解包扫描的内容我以前已经写过并且发过文章,现在只是扩展下,所以有些内容不会详细说明,请参考手写spring注解扫描
定义ComponentScan注解,用于指定要进行包扫描的路径
@Target(value = {ElementType.TYPE})
@Retention(value = RetentionPolicy.RUNTIME)
public @interface ComponentScan {
    String path() default  "";
}
定义Conponent注解,表示该类是一个bean,这里我就不定义Repository,Service,Controller这些注解了,因为在一个单独的spring中也没什么区别,为了简化就定义一个Component。
@Target(value = {ElementType.TYPE})
@Retention(value = RetentionPolicy.RUNTIME)
public @interface Component {
    String value() default "";
}
创建路径配置类
在use/config包下面创建一个配置类,名称随意,加上@ComponentScan注解,指明要扫描的路径。
@ComponentScan(path = "com.ttpfx.use")
public class ComponentScanPathConfig {
}
搭建ApplicationContext容器
我们在myspring/context下面创建ApplicationContext类,这就是我们的主类,代码基本都是写在这个类里面的。
public class ApplicationContext {

}
定义config成员属性
这个属性用于接收创建ApplicationContext传过来的配置类,获取要进行扫描的包路径
    private Class<?> config;

    public ApplicationContext(Class<?> config) {
        this.config = config;
    }
获取包扫描,得到目标bean
首先定义一个成员属性,存放包扫描路径
private String classPath;
创建一个方法,可以通过配置类,得到要进行包扫描的路径
    protected void componentScanByPath(Class<?> config) {

        if (config.isAnnotationPresent(ComponentScan.class)) {
            //得到真实的类路径,并且去掉前置的/
            this.classPath = config.getResource("/").getPath().substring(1);
            //得到要扫描的相对路径,并使用/替换掉.分隔符
            String relativePath = config.getAnnotation(ComponentScan.class).path().replace(".", "/");
            //下面处理路径中文的问题
            try {
                this.classPath = URLDecoder.decode(this.classPath, "utf-8");
                relativePath = URLDecoder.decode(relativePath, "utf-8");
            } catch (UnsupportedEncodingException e) {
                e.printStackTrace();
            }
            //得到要扫描的绝对路径
            String absolutePath = classPath + relativePath;
            File rootDir = new File(absolutePath);
            //扫描该包及子包
            try {
                initBeanDefinitionMapByDir(rootDir);
            } catch (ClassNotFoundException e) {
                e.printStackTrace();
            }

        } else {
            throw new NullPointerException("必须指定要扫描的路径");
        }
    }
上面代码中有一个initBeanDefinitionMapByDir,这个方法是用于对指定路径进行递归扫描,并且构建BeanDefinition。该方法内容如下
    protected void initBeanDefinitionMapByDir(File file) throws ClassNotFoundException {
        if (file.isDirectory()) {
            //对该目录中的每个文件进行处理
            for (File childFile : Objects.requireNonNull(file.listFiles())) {
                //进行递归处理,解决子包问题
                initBeanDefinitionMapByDir(childFile);
            }
        } else {
            //如果不是目录,判断是不是一个java文件
            String fileName = file.getPath();
            if (fileName.endsWith(".class")) {
                //得到该类的绝对路径,去掉扩展名
                String classFullName = fileName.substring(0, fileName.lastIndexOf(".class"));
                //得到com.xxx.xxx的形式,然后进行反射
                String classReflectName = classFullName.replace("\\", "/")
                        .replace(this.classPath, "").replace("/", ".");
                //得到类的classLoader
                Class<?> aClass = Class.forName(classReflectName);
                //判断是否存在@Component注解
                if (aClass.isAnnotationPresent(Component.class)) {
                    //得到该注解的value
                    String beanName = aClass.getAnnotation(Component.class).value();
                    //如果注解value没有指定,使用类名小写作为beanName
                    if (Objects.equals(beanName, "")) {
                        String className = classReflectName.substring(classReflectName.lastIndexOf(".") + 1);
                        beanName = className.substring(0, 1).toLowerCase() + className.substring(1);
                    }
                    System.out.println(beanName);
                }
            }
        }
    }
上面的代码,我们在获取到beanName后将其输出到控制台,看是否正确扫描到了。
基本代码写完之后,将ComponentScanByPath方法在构造器方法中进行调用
    public ApplicationContext(Class<?> config) {
        this.config = config;
        componentScanByPath(config);
    }
测试
我们在use这个包下面的dao,service,controller创建几个类,如下
@Component
public class UserDao {
}
@Component
public class UserService {
}@Component
public class UserController {
}然后在test下面创建一个测试类,用于测试自己写的代码是否正确
public class MySpringTest {

    public static void main(String[] args) {
        ApplicationContext ioc = new ApplicationContext(ComponentScanPathConfig.class);
    }
}
代码的总体结构如下
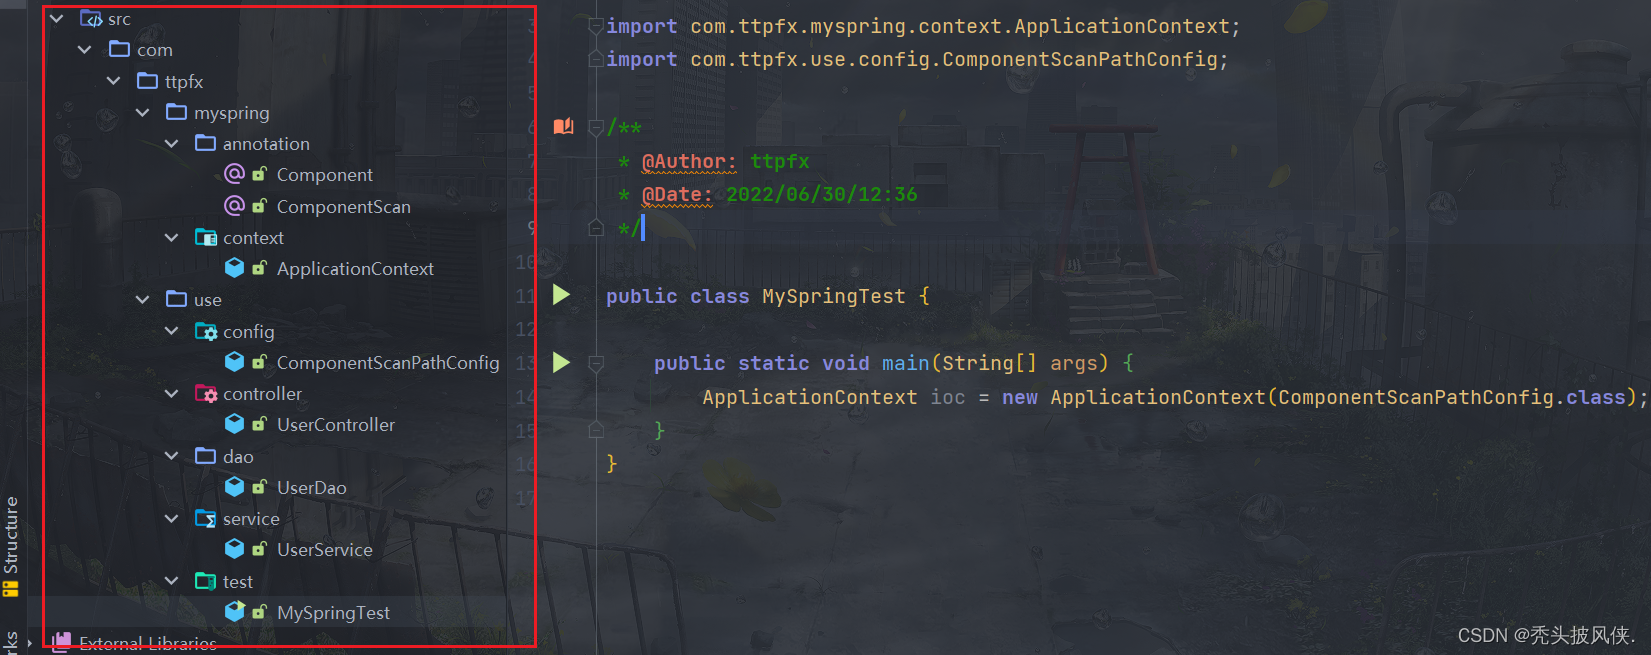
执行测试类,查看控制台输出

由于我们没有指定bean的名称,使用bean首字母小写作为名称,没有问题,我们对UserDao指定名称,如下
@Component("myUserDao")
public class UserDao {
}
我们在Conponent注解中将UserDao的名称指定为了myUserDao,运行测试类,查看控制台输出
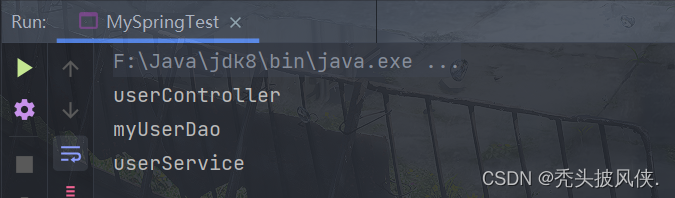
正常输出,说明我们代码没有问题!!!
总结
由于手写spring难度比较大,要进行调试的bug也多,我就不进行详细说明了,就说一下大概的流程,代码里面写有详细的注释,如果感兴趣可以参考下。下一篇文章中将会实现BeanDefinitionMap的初始化。
手写spring系列
[手写spring](1)构建框架,实现包扫描
[手写spring](2)初始化BeanDefinitionMap


 759
759


 被折叠的 条评论
为什么被折叠?
被折叠的 条评论
为什么被折叠?
 到【灌水乐园】发言


