


名称:
构建一个keepalived高可用的 lvs (DR模式) 四层负载均衡加nginx七层的web集群,并搭建DNS服务器进行域名访问,且使用open-falcon对整个nginx集群进行监控,并对这个集群进行压力测试,falcon配置告警
项目拓扑图:

环境:
1、web环境:centos-7.9+nginx-1.19.2 (IP: 192.168.1.7、192.168.1.8、192.168.1.9)
2、监控环境:centos-7.9+open-falcon-0.2.0(IP: 192.168.1.60)
3、堡垒机:centos-7.9+ansible-2.9.23(IP: 192.168.1.80)
4、DNS服务器:centos-7.9+bind-9.11.4(IP: 192.168.1.70)
5、lvs四层负载均衡:centos-7.9+ipvs(IP: 192.168.1…10、192.168.1.20)
6、nginx七层负载均衡:centos-7.9+nginx-1.19.2 (IP: 192.168.1.30、192.168.1.40)
7、nfs服务器:centos-7.9 + nfs-utils-1.3.0(IP: 192.168.1.50)
8、所有的机器均已关闭防火墙和selinux
脚本准备:
1、一键编译安装部署nginx
2、一键部署agent
3、一键安装部署ngx_metric采集nginx数据
4、一键修改主机名脚本
1、使用ansible批量部署好环境
每台机器与中控机之间建立免密连接
具体步骤:https://blog.csdn.net/m0_52904076/article/details/118270569
每台主机使用脚本修改hostname为 profix+ip
2台nginx-LB和3台web服务器使用脚本编译安装好nginx
脚本:
#!/bin/bash

# 解决依赖关系
yum install gcc pcre-devel openssl-devel -y

# 创建工作文件夹并cd进入
mkdir -p /home/work && cd /home/work

# 下载nginx安装包
curl -O http://nginx.org/download/nginx-1.19.2.tar.gz

# 解压
tar -xf nginx-1.19.2.tar.gz

# 建立一个用户
useradd nginx
echo "123456" |passwd nginx --stdin

cd nginx-1.19.2

# 编译前的配置
./configure --prefix=/usr/local/nginx --user=nginx --group=nginx --with-threads --with-http_ssl_module --with-http_realip_module --with-stream  --with-http_stub_status_module

# 编译和编译安装
make && make install

# 修改环境变量PATH
echo "PATH=$PATH:/usr/local/nginx/sbin" >>/etc/bashrc

# 关闭防火墙和selinux
service firewalld stop
systemctl disable firewalld
setenforce 0
sed -i '/^SELINUX/ s/enforcing/disabled' /etc/sysconfig/selinux

# 开启nginx服务
/usr/local/nginx/sbin/nginx
在中控机上使用ansible进行安装
[root@local-192-168-1-80 work]# ansible nginx -m script -a "/home/work/onekey_install_nginx.sh"
可查看80端口和nginx进程判断服务是否开启

2、 lvs四层负载均衡
在中控机上使用ansible批量安装ipvsadm工具
[root@local-192-168-1-80 work]# ansible LB -m shell -a "yum install ipvsadm -y"
lvs配置脚本,可使用ansible批量配置
#!/bin/bash

# 安装net-tools
yum install net-tools -y

vip="192.168.1.100"

# 在ens33上绑定虚拟ip
ifconfig ens33:0 $vip broadcast $vip netmask 255.255.255.255 up

# 添加路由规则
route add -host $vip dev ens33:0

# 启动系统包的转发功能
echo 1 > /proc/sys/net/ipv4/ip_forward

# 清除原来的转发规则
ipvsadm -C

# 添加虚拟ip规则
ipvsadm -A -t $vip:80 -s rr

# 在虚拟ip中添加服务规则
ipvsadm -a -t $vip:80 -r 192.168.1.30:80 -g
ipvsadm -a -t $vip:80 -r 192.168.1.40:80 -g

# 重启ipvs
ipvsadm
配置nginx负载均衡器
#!/bin/bash

vip="192.168.1.100"

# 在回环设备上绑定一个虚拟ip地址
ifconfig lo:0 $vip broadcast $vip netmask 255.255.255.255 up

# 添加路由
/sbin/route add -host $vip dev lo:0

# arp_ignore:当ARP请求发过来后发现自己正是请求的地址是否响应
# arp_announce :定义不同级别:当ARP请求通过某个端口进来是否利用这个接口来回应
echo "1" >/proc/sys/net/ipv4/conf/lo/arp_ignore

echo "2" >/proc/sys/net/ipv4/conf/lo/arp_announce

echo "1" >/proc/sys/net/ipv4/conf/all/arp_ignore

echo "2" >/proc/sys/net/ipv4/conf/all/arp_announce

#使用修改生效
sysctl -p
3、nginx七层负载均衡
nginx配置文件详解:
#user  nobody; 	  # 以哪个用户启动nginx,默认情况下使用nobody启动nginx
worker_processes  1;	#启动多少个工作进程,进程数建议和cpu核心数量一致,如果你的主机是8核的,启动8个进程

#error_log  logs/error.log;		#   指定错误日志的路径和名字
#error_log  logs/error.log  notice;		#  记录notice以上消息级别的日志
#error_log  logs/error.log  info;

#pid        logs/nginx.pid;  #存放nginx的master进程的pid


events {
    worker_connections  1024;     #最大的连接数是1024,同时最多处理1024个请求,一个worker进程启动1024个线程
}


http {
    include       mime.types;
    default_type  application/octet-stream;
    # 定义一个负载均衡器
    upstream nginx_server_pool {
	server 192.168.1.7 weight=1;
	server 192.168.1.8 weight=1;
	server 192.168.1.9 weight=1;
    }
    log_format  main  '$remote_addr - $remote_user [$time_local] "$request" '
                      '$status $body_bytes_sent "$http_referer" '
                     '"$http_user_agent" "$http_x_forwarded_for"';
		#定义日志记录的格式,记录那些内容,remote_addr 用户的ip地址,request  用户访问的页面地址->url,http_user_agent  -->浏览器和系统

    access_log  logs/access.log  main;   #指定访问日志的路径和格式

    sendfile        on;
    #tcp_nopush     on;

    #keepalive_timeout  0;
    keepalive_timeout  65;

    #gzip  on;

    server {
        listen       80;	 #指定监听的端口
        server_name  localhost;	  #指定网站对应的域名

        #charset koi8-r;

        #access_log  logs/host.access.log  main;

        location / {
            index  index.html index.htm;		#指定首页为index.html或者index.htm
            proxy_pass http://nginx_server_pool;
        }

        #location / {
         #   root   html;
          #  index  index.html index.htm;
        #}

        error_page  404              /404.html;		#404 错误的时候,当页面不存在的时候,就返回这个这个页面

        # redirect server error pages to the static page /50x.html
        #
        error_page   500 502 503 504  /50x.html;		  #500 502 503 504 错误 ,返回/50x.html页面
        location = /50x.html {
            root   html;
        }
修改nginx-LB上配置文件,轮询后端3台real server(访问本机的80端口,转发到real server)


测试:
将real server的index.html文件添加1,2,3标签,方便访问时判断
每访问一次vip,lvs-LB就转发到nginx-LB,nginx-LB再轮询到后端的real server:


4、搭建nfs服务器
服务器端
安装nfs和rpc
[root@nfs-192-168-1-50 ~]# yum install nfs-utils rpcbind -y
启动rpc和nfs服务,并设置开机启动(注意先启动rpc,再启动nfs)
# 启动rpc服务并设置开机启动
[root@nfs-192-168-1-50 ~]# systemctl start rpcbind
[root@nfs-192-168-1-50 ~]# systemctl enable rpcbind
# 启动nfs服务并设置开机启动
[root@nfs-192-168-1-50 ~]# systemctl start nfs-server
[root@nfs-192-168-1-50 ~]# systemctl enable nfs-server
配置共享目录以及配置文件
# 创建共享目录
[root@nfs-192-168-1-50 ~]# mkdir /share
# 配置/etc/exports文件,设置192.168.1.0/24网段的只读模式
[root@nfs-192-168-1-50 ~]# cat /etc/exports
/share 192.168.1.0/24(ro)
# 刷新nfs服务
[root@nfs-192-168-1-50 ~]# systemctl reload nfs
# 创建一个index.html文件为web服务器提供访问主页
[root@nfs-192-168-1-50 share]# cat index.html
<!DOCTYPE html>
<html>
<head>
<title>Welcome to nginx!</title>
<style>
    body {
        width: 35em;
        margin: 0 auto;
        font-family: Tahoma, Verdana, Arial, sans-serif;
    }
</style>
</head>
<body>
<h1>Welcome to nginx_nfs!!!!!</h1>

</body>
</html>
web服务器端
安装nfs
[root@web-192-168-1-8 ~]# yum install nfs-utils -y
查看服务端挂载信息
# showmount命令要先安装nfs-utils
[root@web-192-168-1-8 ~]# showmount -e 192.168.1.50
Export list for 192.168.1.50:
/share 192.168.1.0/24
在客户端创建目录并挂载
# 创建挂载目录
[root@web-192-168-1-8 ~]# mkdir /share
# 配置挂载文件
[root@web-192-168-1-8 ~]# tail -1 /etc/fstab
192.168.1.50:/share 	/share		nfs	defaults	0 0
# 使挂载配置生效
[root@web-192-168-1-8 ~]# mount -a
挂载效果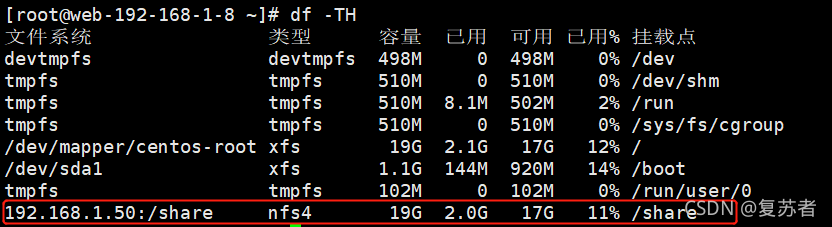
配置nginx
# 修改nginx配置文件
[root@web-192-168-1-8 ~]# vim /usr/local/nginx/conf/nginx.conf
# 检查配置文件语法
[root@web-192-168-1-8 ~]# nginx -t
nginx: the configuration file /usr/local/nginx/conf/nginx.conf syntax is ok
nginx: configuration file /usr/local/nginx/conf/nginx.conf test is successful
# 重启nginx服务
[root@web-192-168-1-8 ~]# nginx -s reload

测试访问效果

5、实现keepalived高可用
安装keepalived
[root@local-192-168-1-80 work]# ansible LB -m shell -a "yum install keepalived -y"
配置keepalived
配置文件详解:
! Configuration File for keepalived

global_defs {
   notification_email {
     acassen@firewall.loc
     failover@firewall.loc
     sysadmin@firewall.loc
   }
   notification_email_from Alexandre.Cassen@firewall.loc
   smtp_server 192.168.200.1
   smtp_connect_timeout 30
   router_id LVS_DEVEL
   vrrp_skip_check_adv_addr
   # vrrp_strict			vrrp_strict 需要注释: 因为会在iptables里添加一条规则,阻止网络通信,会导致脑裂现象
   vrrp_garp_interval 0
   vrrp_gna_interval 0
}

vrrp_instance VI_1 {
    state MASTER	# 标示为主lvs
    interface ens33		 # HA检测端口
    virtual_router_id 51	 # 主备的virtual_router_id 必须相同
    priority 100		 # 优先级,备lvs要比主lvs稍小
    advert_int 1		 # VRRP Multicast 广播周期秒数
    authentication {      # 定义认证
        auth_type PASS		# 认证方式
        auth_pass 1111		# 认证密码
    }
    virtual_ipaddress {
        192.168.1.100			# 定义vip
    }
}

virtual_server 192.168.1.100 80 {
    delay_loop 6		 # 每隔6秒查看realserver状态
    lb_algo wlc		  # 调度算法为加权最小连接数
    lb_kind DR			 # lvs工作模式为DR(直接路由)模式
    persistence_timeout 50		# 同一IP 的连接50秒内被分配到同一台realserver
    protocol TCP		  # 用TCP监测realserver的状态

    real_server 192.168.1.30 80 {    # 定义realserver
        weight 1			# 定义权重值
        TCP_CHECK {			# 注意TCP_CHECK和{之间的空格,如果没有的话只会添加第一个realserver
            connect_timeout 3		# 超时时间为3秒
            nb_get_retry 3
            delay_before_retry 3
            connect_port 80
        }
    }
    real_server 192.168.1.40 80 {
        weight 1
        TCP_CHECK {
            connect_timeout 3
            nb_get_retry 3
            delay_before_retry 3
            connect_port 80
        }
    }
}
两台lvs服务器启动keepalived
master上有vip:

backup上无vip

模拟主机宕机(在master上关闭keepalived)
主上无vip:

备上有vip:

主机恢复,vip又飘到主LB上
6、搭建本地主域名服务器
配置主域名服务器,使得web可通过域名访问
具体步骤:https://blog.csdn.net/m0_52904076/article/details/118066454
测试

7、open-falcon监控
每台主机上都跑一个agent,push数据到open-falcon监控服务器上

nginx服务监控

配置主机宕机告警,nginx服务告警

8、项目心得
1、深度学习了lvs的3中工作模式,以及lvs四层和nginx七层负载均衡的区别。
2、更深入地学习和理解了nginx的集群架构和高可用,同时提升了troubleshooting的能力。
3、了解了nginx的认证,防盗链,路由,限速,rewrite, 下载,https等功能
3、对open-falcon的监控架构有了一定了解
4、整个web和监控集群的最大并发量进行了测试


 1880
1880

 被折叠的 条评论
为什么被折叠?
被折叠的 条评论
为什么被折叠?
 到【灌水乐园】发言


