


ELK专栏之Java API操作-02
Java API实现文档管理
ES的技术特点
● ES技术比较特殊,不像其他分布式、大数据方便的技术,比如Hadoop、Spark和Habase等。ES代码层面很好写,难的是概念的理解。
● ES最重要的是它的REST API,是跨语言的。在真实的生产中,探查数据、分析数据,使用REST更方便。
Java客户端简单获取数据
Java API文档
https://www.elastic.co/guide/en/elasticsearch/client/java-rest/7.3/java-rest-overview.html
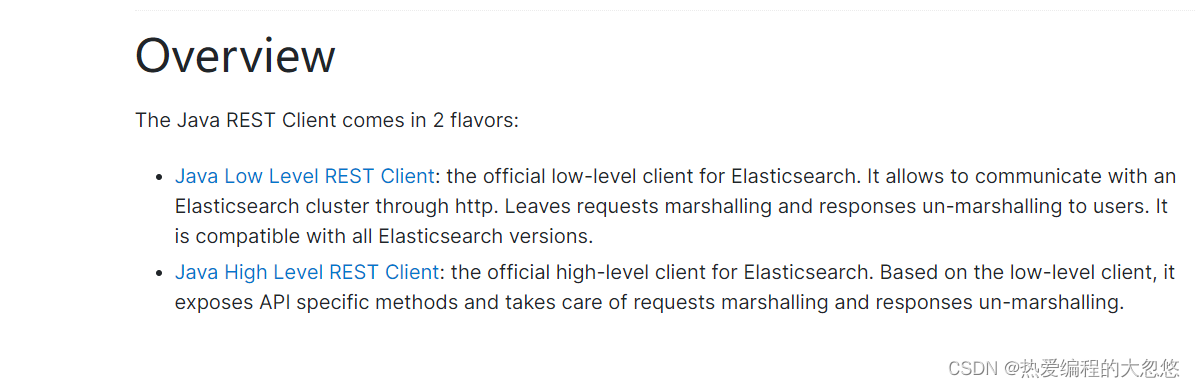
- Java Low Level REST Client:底层客户端,偏向底层。
- Java High Level REST Client:高级客户端,高级封装。
准备工作
● 导入ES相关的jar包:
<dependency>
    <groupId>org.elasticsearch.client</groupId>
    <artifactId>elasticsearch-rest-high-level-client</artifactId>
    <version>7.10.1</version>
    <exclusions>
        <exclusion>
            <groupId>org.elasticsearch</groupId>
            <artifactId>elasticsearch</artifactId>
        </exclusion>
    </exclusions>
</dependency>
<dependency>
    <groupId>org.elasticsearch</groupId>
    <artifactId>elasticsearch</artifactId>
    <version>7.10.1</version>
</dependency>
使用Java客户端操作ES
开发步骤:
● 获取连接客户端。
● 构建请求。
● 执行。
● 获取结果。
示例:
package com.dhy;

import org.apache.http.HttpHost;
import org.elasticsearch.action.get.GetRequest;
import org.elasticsearch.action.get.GetResponse;
import org.elasticsearch.client.RequestOptions;
import org.elasticsearch.client.RestClient;
import org.elasticsearch.client.RestHighLevelClient;
import org.junit.jupiter.api.Test;

import java.io.IOException;
import java.util.List;
import java.util.Map;

public class ElkApplicationTests {

    @Test
    public void test() throws IOException {
        //获取连接客户端
        List<HttpHost> httpHostList = List.of(new HttpHost("es服务器地址", 9200, "http"));
        RestHighLevelClient client = new RestHighLevelClient(RestClient.builder(httpHostList.toArray(HttpHost[]::new)));
        //构建请求
        GetRequest getRequest = new GetRequest("book", "1");
        //发送请求
        GetResponse response = client.get(getRequest, RequestOptions.DEFAULT);
        //获取结果
        if(response.isExists()){
            String id = response.getId();
            System.out.println("id = " + id);
            String sourceAsString = response.getSourceAsString();
            System.out.println("sourceAsString = " + sourceAsString);
            Map<String, Object> source = response.getSource();
            System.out.println("source = " + source);
        }
    }

}

结合Spring-boot-test测试文档
准备工作
- 导入SpringBoot相关的jar包:
<parent>
    <groupId>org.springframework.boot</groupId>
    <artifactId>spring-boot-starter-parent</artifactId>
    <version>2.3.6.RELEASE</version>
    <relativePath/> <!-- lookup parent from repository -->
</parent>

<properties>
    <!-- 这边使用的JDK11 -->
    <java.version>11</java.version>
</properties>

<dependencies>
    <dependency>
        <groupId>org.springframework.boot</groupId>
        <artifactId>spring-boot-starter</artifactId>
    </dependency>

    <dependency>
        <groupId>org.springframework.boot</groupId>
        <artifactId>spring-boot-devtools</artifactId>
        <scope>runtime</scope>
        <optional>true</optional>
    </dependency>
    <dependency>
        <groupId>org.springframework.boot</groupId>
        <artifactId>spring-boot-configuration-processor</artifactId>
        <optional>true</optional>
    </dependency>
    <dependency>
        <groupId>org.projectlombok</groupId>
        <artifactId>lombok</artifactId>
        <optional>true</optional>
    </dependency>
    <dependency>
        <groupId>org.springframework.boot</groupId>
        <artifactId>spring-boot-starter-test</artifactId>
        <scope>test</scope>
        <exclusions>
            <exclusion>
                <groupId>org.junit.vintage</groupId>
                <artifactId>junit-vintage-engine</artifactId>
            </exclusion>
        </exclusions>
    </dependency>
    <dependency>
        <groupId>org.elasticsearch.client</groupId>
        <artifactId>elasticsearch-rest-high-level-client</artifactId>
        <version>7.10.1</version>
        <exclusions>
            <exclusion>
                <groupId>org.elasticsearch</groupId>
                <artifactId>elasticsearch</artifactId>
            </exclusion>
        </exclusions>
    </dependency>
    <dependency>
        <groupId>org.elasticsearch</groupId>
        <artifactId>elasticsearch</artifactId>
        <version>7.10.1</version>
    </dependency>
</dependencies>

<build>
    <plugins>
        <plugin>
            <groupId>org.springframework.boot</groupId>
            <artifactId>spring-boot-maven-plugin</artifactId>
        </plugin>
    </plugins>
</build>
- 修改配置文件application.yml:
server:
  port: 8088

spring:
  application:
    name: elk

# ES配置
es:
  hostlist: xxx:9200 # 多个节点之间使用,分隔
- 编写启动类:
import org.springframework.boot.SpringApplication;
import org.springframework.boot.autoconfigure.SpringBootApplication;

@SpringBootApplication
public class ElkApplication {
    public static void main(String[] args) {
        SpringApplication.run(ElkApplication.class, args);
    }
}
- 编写配置类:
@Configuration
public class ESConfig {

    @Value("${es.hostlist}")
    private String esHostList;

    /**
     * 配置RestHighLevelClient
     *
     * @return
     */
    @Bean(destroyMethod = "close")
    public RestHighLevelClient restHighLevelClient() {
        List<HttpHost> httpHostList = Arrays.stream(esHostList.split(",")).map(s -> new HttpHost(s.split(":")[0], Integer.valueOf(s.split(":")[1]), "http")).collect(Collectors.toList());
        return new RestHighLevelClient(RestClient.builder(httpHostList.toArray(HttpHost[]::new)));
    }

}
查询
示例:查询指定的字段,类似于select id,name from book,而不是类似于select * from book
import org.elasticsearch.action.get.GetRequest;
import org.elasticsearch.action.get.GetResponse;
import org.elasticsearch.client.RequestOptions;
import org.elasticsearch.client.RestHighLevelClient;
import org.elasticsearch.common.Strings;
import org.elasticsearch.search.fetch.subphase.FetchSourceContext;
import org.junit.jupiter.api.Test;
import org.springframework.beans.factory.annotation.Autowired;
import org.springframework.boot.test.context.SpringBootTest;

import java.io.IOException;
import java.util.List;
import java.util.Map;

/**
 * ES的开发步骤:
 * ①获取连接客户端
 * ②构建请求
 * ③发送请求,获取响应
 * ④从响应中拿出结果
 */
@SpringBootTest(classes = ElkApplication.class)
public class ElkApplicationTests {

    @Autowired
    private RestHighLevelClient restHighLevelClient;

    /**
     * 查询指定的字段:GET /book/_doc/1?_source_includes=name,age
     *
     * @throws IOException
     */
    @Test
    public void test() throws IOException {
        GetRequest getRequest = new GetRequest("book", "1");
        //指定要查询的字段
        String[] includes = List.of("name", "price").toArray(String[]::new);
        //指定排除查询的字段为空数组
        String[] excludes = Strings.EMPTY_ARRAY;
        FetchSourceContext fetchSourceContext = new FetchSourceContext(true, includes, excludes);
        getRequest.fetchSourceContext(fetchSourceContext);

        GetResponse response = restHighLevelClient.get(getRequest, RequestOptions.DEFAULT);
        if (response.isExists()) {
            String id = response.getId();
            System.out.println("id = " + id);
            String sourceAsString = response.getSourceAsString();
            System.out.println("sourceAsString = " + sourceAsString);
            Map<String, Object> source = response.getSource();
            System.out.println("source = " + source);
        }
    }

}

- 示例:同步查询
    @Test
    public void test() throws IOException {
        GetRequest getRequest = new GetRequest("book", "1");

        //同步查询
        GetResponse response = restHighLevelClient.get(getRequest, RequestOptions.DEFAULT);

        if (response.isExists()) {
            String id = response.getId();
            System.out.println("id = " + id);
            String sourceAsString = response.getSourceAsString();
            System.out.println("sourceAsString = " + sourceAsString);
            Map<String, Object> source = response.getSource();
            System.out.println("source = " + source);
        }
    }
- 示例:异步查询
    @Test
    public void test() throws IOException {
        GetRequest getRequest = new GetRequest("book", "1");

        restHighLevelClient.getAsync(getRequest, RequestOptions.DEFAULT, new ActionListener<>() {
            @Override
            public void onResponse(GetResponse response) {
                if (response.isExists()) {
                    String id = response.getId();
                    System.out.println("id = " + id);
                    String sourceAsString = response.getSourceAsString();
                    System.out.println("sourceAsString = " + sourceAsString);
                    Map<String, Object> source = response.getSource();
                    System.out.println("source = " + source);
                }
            }

            @Override
            public void onFailure(Exception e) {
                System.out.println("失败" + e);
            }
        });

        try {
            Thread.sleep(5000);
        } catch (InterruptedException e) {
            e.printStackTrace();
        }
    }
新增
● REST API形式新增数据:
PUT /test_post/_doc/2
{
  "user":"tomas",
  "postDate":"2019-07-18",
  "message":"trying out es1"
}
示例:以JSON字符串的格式新增数据
/**
* 插入数据
*
* @throws IOException
*/
@Test
public void test() throws IOException {
IndexRequest indexRequest = new IndexRequest("test_post");
indexRequest.id("1");
//构建文档数据
//以json串的格式
String jsonString = "{\n" +
" \"user\":\"tomas\",\n" +
" \"postDate\":\"2019-07-18\",\n" +
" \"message\":\"trying out es1\"\n" +
"}";
// XContentType.JSON 指定插入的数据是JSON格式
indexRequest.source(jsonString, XContentType.JSON);
//可选参数
//设置超时时间
// indexRequest.timeout("1s");
indexRequest.timeout(TimeValue.timeValueSeconds(1)); //超时时间
//手动维护版本号
indexRequest.version(2);
indexRequest.versionType(VersionType.EXTERNAL);
//发送请求
IndexResponse response = restHighLevelClient.index(indexRequest, RequestOptions.DEFAULT);
//获取结果
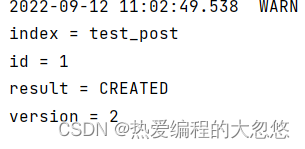
String index = response.getIndex();
System.out.println("index = " + index);
String id = response.getId();
System.out.println("id = " + id);
DocWriteResponse.Result result = response.getResult();
System.out.println("result = " + result);
long version = response.getVersion();
System.out.println("version = " + version);
}
- 示例:以Map格式新增数据
    /**
     * 插入数据
     *
     * @throws IOException
     */
    @Test
    public void test() throws IOException {
        IndexRequest indexRequest = new IndexRequest("test_post");
        indexRequest.id("1");
        //构建文档数据
        //方法:以Map的格式
        Map<String, String> jsonMap = Map.of("user", "tomas", "postDate", "2019-07-18", "message", "trying out es1");
        indexRequest.source(jsonMap);

        //可选参数
        //设置超时时间
//        indexRequest.timeout("1s");
        indexRequest.timeout(TimeValue.timeValueSeconds(1)); //超时时间
        //手动维护版本号
//        indexRequest.version(2);
//        indexRequest.versionType(VersionType.EXTERNAL);

        //发送请求
        IndexResponse response = restHighLevelClient.index(indexRequest, RequestOptions.DEFAULT);

        //获取结果
        String index = response.getIndex();
        System.out.println("index = " + index);
        String id = response.getId();
        System.out.println("id = " + id);
        DocWriteResponse.Result result = response.getResult();
        System.out.println("result = " + result);
        long version = response.getVersion();
        System.out.println("version = " + version);
    }
- 示例:以XContentBuilder格式新增数据
    @Test
    public void test() throws IOException {
        IndexRequest indexRequest = new IndexRequest("test_post");
        indexRequest.id("1");
        //构建文档数据
        //以XContentBuilder插入数据
        XContentBuilder builder = XContentFactory.jsonBuilder();
        builder.startObject();
        {
            builder.field("user", "tomas");
            builder.timeField("postDate", "2019-07-18");
            builder.field("message", "trying out es1");
        }
        builder.endObject();
        indexRequest.source(builder);

        //可选参数
        //设置超时时间
//        indexRequest.timeout("1s");
        indexRequest.timeout(TimeValue.timeValueSeconds(1)); //超时时间
        //手动维护版本号
//        indexRequest.version(2);
//        indexRequest.versionType(VersionType.EXTERNAL);

        //发送请求
        IndexResponse response = restHighLevelClient.index(indexRequest, RequestOptions.DEFAULT);

        //获取结果
        String index = response.getIndex();
        System.out.println("index = " + index);
        String id = response.getId();
        System.out.println("id = " + id);
        DocWriteResponse.Result result = response.getResult();
        System.out.println("result = " + result);
        long version = response.getVersion();
        System.out.println("version = " + version);
    }
- 示例:直接新增数据,类似于JSON字符串的格式新增数据
    /**
     * 插入数据
     *
     * @throws IOException
     */
    @Test
    public void test() throws IOException {
        IndexRequest indexRequest = new IndexRequest("test_post");
        indexRequest.id("1");
        //构建文档数据
        //直接插入数据
        indexRequest.source("user", "tomas", "postDate", "2019-07-18", "message", "trying out es1");

        //可选参数
        //设置超时时间
//        indexRequest.timeout("1s");
        indexRequest.timeout(TimeValue.timeValueSeconds(1)); //超时时间
        //手动维护版本号
//        indexRequest.version(2);
//        indexRequest.versionType(VersionType.EXTERNAL);

        //发送请求
        IndexResponse response = restHighLevelClient.index(indexRequest, RequestOptions.DEFAULT);

        //获取结果
        String index = response.getIndex();
        System.out.println("index = " + index);
        String id = response.getId();
        System.out.println("id = " + id);
        DocWriteResponse.Result result = response.getResult();
        if (result == DocWriteResponse.Result.CREATED) {
            System.out.println("是新增操作");
        } else {
            System.out.println("是更新操作");
        }
        System.out.println("result = " + result);
        long version = response.getVersion();
        System.out.println("version = " + version);
        //获取分片信息
        /*
        *
        {
          "_index" : "test_post",
          "_type" : "_doc",
          "_id" : "2",
          "_version" : 1,
          "result" : "created",
          "_shards" : {
            "total" : 2,
            "successful" : 1,
            "failed" : 0
          },
          "_seq_no" : 9,
          "_primary_term" : 1
        }
        * */
        ReplicationResponse.ShardInfo shardInfo = response.getShardInfo();
        if (shardInfo.getTotal() != shardInfo.getSuccessful()) {
            System.out.println("处理成功的分片数小于总分片,请运维人员调查原因");
        }
        if (shardInfo.getFailed() > 0) {
            ReplicationResponse.ShardInfo.Failure[] failures = shardInfo.getFailures();
            for (ReplicationResponse.ShardInfo.Failure failure : failures) {
                String reason = failure.reason();
                System.out.println("错误的原因 = " + reason);
            }
        }

    }
修改
● 局部更新的REST API形式:
POST /test_post/_update/2
{
  "doc":{
      "user":"呵呵哒"
  }
}
- 示例:
    /**
     * 局部更新
     * POST /test_post/_update/2
     * {
     * "doc":{
     * "user":"呵呵哒"
     * }
     * }
     *
     * @throws IOException
     */
    @Test
    public void test() throws IOException {
        //构建请求
        UpdateRequest request = new UpdateRequest("test_post", "1");
        //请求体
        request.doc(Map.of("user", "呵呵哒"));
        //可选参数
        request.timeout(TimeValue.timeValueSeconds(3)); //超时时间
        request.retryOnConflict(3); //重试次数
        //发送请求
        UpdateResponse response = restHighLevelClient.update(request, RequestOptions.DEFAULT);
        //获取结果
        if (response.getResult() == DocWriteResponse.Result.UPDATED) {
            System.out.println("数据更新啦");
        } else if (response.getResult() == DocWriteResponse.Result.CREATED) {
            System.out.println("数据新增了");
        } else if (response.getResult() == DocWriteResponse.Result.DELETED) {
            System.out.println("数据删除了");
        } else if (response.getResult() == DocWriteResponse.Result.NOOP) {
            System.out.println("没有操作");
        }
    }
删除
● 删除的REST API形式:
DELETE /test_post/_doc/2
示例:
    @Test
    public void test() throws IOException {
        //构建请求
        DeleteRequest Request = new DeleteRequest("test_post");
        Request.id("1");
        //发送数据
        DeleteResponse response = restHighLevelClient.delete(Request, RequestOptions.DEFAULT);
        //获取结果
        if (response.getResult() == DocWriteResponse.Result.UPDATED) {
            System.out.println("数据更新啦");
        } else if (response.getResult() == DocWriteResponse.Result.CREATED) {
            System.out.println("数据新增了");
        } else if (response.getResult() == DocWriteResponse.Result.DELETED) {
            System.out.println("数据删除了");
        } else if (response.getResult() == DocWriteResponse.Result.NOOP) {
            System.out.println("没有操作");
        }
    }
批量增删改bulk
● 批量增删改bulk的REST API形式:
POST /_bulk
{"action": {"metadata"}}
{"data"}
- 示例:
    @Test
    public void test() throws IOException {
        //创建请求
        BulkRequest bulkRequest = new BulkRequest();
        bulkRequest.add(new IndexRequest("bulk_add1").id("1").source(Map.of("bulk_add_key", "bulk_add_value")));
        bulkRequest.add(new IndexRequest("bulk_add2").id("1").source(Map.of("bulk_add_key", "bulk_add_value")));
        bulkRequest.add(new UpdateRequest("bulk_add1", "1").doc(Map.of("bulk_add_key", "bulk_update_value")));
        bulkRequest.add(new DeleteRequest("bulk_add2", "1"));
        //执行
        BulkResponse bulkResponse = restHighLevelClient.bulk(bulkRequest, RequestOptions.DEFAULT);
        //获取结果
        BulkItemResponse[] items = bulkResponse.getItems();
        for (BulkItemResponse response : items) {
            if (response.getOpType() == DocWriteRequest.OpType.CREATE) {
                System.out.println("强制新增数据成功啦");
            } else if (response.getOpType() == DocWriteRequest.OpType.DELETE) {
                System.out.println("删除数据成功啦");
            } else if (response.getOpType() == DocWriteRequest.OpType.UPDATE) {
                System.out.println("更新数据成功啦");
            }else if (response.getOpType() == DocWriteRequest.OpType.INDEX) {
                System.out.println("新增数据成功啦");
            }
        }
    }


 809
809


 被折叠的 条评论
为什么被折叠?
被折叠的 条评论
为什么被折叠?
 到【灌水乐园】发言


