


 该文详细介绍了在Linux系统中安装nginx1.23.3的步骤,包括下载安装包,解压,安装依赖,配置编译选项,创建用户,进行编译和安装,以及启动、停止nginx服务。配置选项涉及HTTPS支持,HTTP/2协议,线程池,状态统计模块和流模块,还提供了一键安装脚本。
Linux高级—nginx安装
文章目录
一、下载安装包nginx-1.23.3.tar.gz
[root@localhost nginx]# wget http://nginx.org/download/nginx-1.23.3.tar.gz
--2023-03-14 11:03:20--  http://nginx.org/download/nginx-1.23.3.tar.gz
正在解析主机 nginx.org (nginx.org)... 52.58.199.22, 3.125.197.172, 2a05:d014:edb:5702::6, ...
正在连接 nginx.org (nginx.org)|52.58.199.22|:80... 已连接。
已发出 HTTP 请求,正在等待回应... 200 OK
长度:1108958 (1.1M) [application/octet-stream]
正在保存至: “nginx-1.23.3.tar.gz”

100%[====================================================================================================================================>] 1,108,958    186KB/s 用时 5.8s

2023-03-14 11:03:28 (186 KB/s) - 已保存 “nginx-1.23.3.tar.gz” [1108958/1108958])

[root@localhost nginx]# ls
nginx-1.23.3.tar.gz
[root@localhost nginx]#
二、解压nginx-1.23.3.tar.gz
# 解压
[root@localhost nginx]# tar xf nginx-1.23.3.tar.gz
[root@localhost nginx]# ls
nginx-1.23.3  nginx-1.23.3.tar.gz  onekey_install_nginx.sh
[root@localhost nginx]# cd nginx-1.23.3
[root@localhost nginx-1.23.3]# ls
auto  CHANGES  CHANGES.ru  conf  configure  contrib  html  LICENSE  man  README  src
[root@localhost nginx-1.23.3]#
三、安装相关软件
[root@localhost nginx]# yum  install gcc   openssl openssl-devel  pcre pcre-devel automake make -y
# make 其实就是安装Makefile的配置去编译程序成二进制文件,二进制文件就是执行可以运行的程序
# make install   就是将编译好的二进制文件复制到指定的安装路径目录下
四、configure 配置,编译前的配置
configure 是一个配置的脚本文件,nginx给我们提供的,这个脚本会收集我们指定的配置,然后生成一个Makefile的文件
这个Makefile会告诉后面的make命令,如何去编译。理解为一个设计图纸
--prefix=path
	defines a directory that will keep server files.   指定安装路径
		--prefix=/usr/local/scnginx99
--conf-path=path  指定配置文件的路径
	--conf-path=/usr/local/scnginx99/conf
--user=name  指定启动nginx worker 进程的用户
--with-http_ssl_module  开启https的功能
--without-http_memcached_module  禁用http_memcached功能

	--with开头的表示开启某个功能   --》表示默认不安装,需要指定开启
	--without开头的表示禁用某个功能 ---》表示默认是安装的

--with-http_ssl_module  对开启https的功能
--with-threads   支持线程池技术
--with-http_v2_module  对http 2.0版本的支持   http 1.1
--with-http_stub_status_module  开启nginx的状态统计功能,可以知道有多少人访问你的nginx
--with-stream  支持tcp/udp反向代理    load balancing  负载均衡
[root@localhost nginx-1.23.3]# ls
auto  CHANGES  CHANGES.ru  conf  configure  contrib  html  LICENSE  man  README  src
[root@localhost nginx-1.23.3]# pwd
/nginx/nginx-1.23.3
[root@localhost nginx-1.23.3]# ./configure  --prefix=/usr/local/xwnginx  --user=xiaowei  --with-http_ssl_module  --with-http_v2_module   --with-threads    --with-http_stub_status_module   --with-stream
五、创建用户
# 新建用户
[root@localhost nginx-1.23.3]# useradd  -s /sbin/nologin  xiaowei
六、编译和安装
# 编译,开启2个进程同时编译,速度会快些
[root@localhost nginx-1.23.3]# make -j 2
# 安装
[root@localhost nginx-1.23.3]# make install
七、启动nginx,并访问
[root@localhost sbin]# pwd
/usr/local/xwnginx/sbin
[root@localhost sbin]# ./nginx
[root@localhost sbin]# ps aux | grep nginx
root      18171  0.0  0.1  46236  1168 ?        Ss   13:21   0:00 nginx: master process ./nginx
xiaowei   18172  0.0  0.1  46696  1920 ?        S    13:21   0:00 nginx: worker process
root      18174  0.0  0.0 112824   980 pts/0    R+   13:21   0:00 grep --color=auto nginx
[root@localhost sbin]# netstat -anplut | grep nginx
tcp        0      0 0.0.0.0:80              0.0.0.0:*               LISTEN      18171/nginx: master
[root@localhost sbin]#
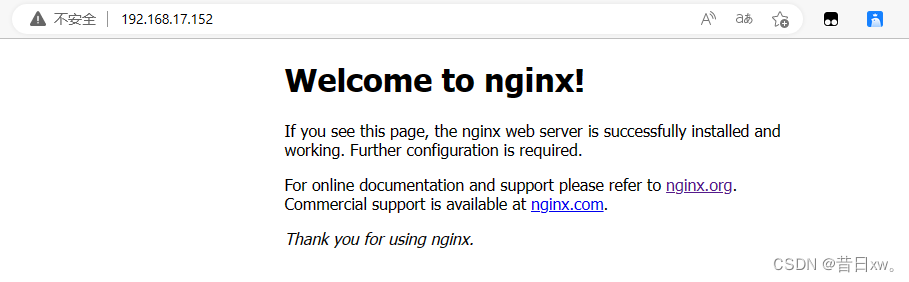
访问:
ip:80 即可访问,默认就是80端口,所以可不接
如果访问不了,记得关一下防火墙!!!
八、停止nginx
[root@localhost sbin]# ./nginx -s stop
[root@localhost sbin]# ps aux | grep nginx
root      18182  0.0  0.0 112824   980 pts/0    R+   13:24   0:00 grep --color=auto nginx
[root@localhost sbin]#
关于nginx的启动和停止也可使用绝对路径来完成
/usr/local/xwnginx/sbin/nginx -s stop
/usr/local/xwnginx/sbin/nginx
九、一键安装脚本
[root@localhost ~]# cat onekey_install_nginx.sh
#!/bin/bash

# 新建 一个文件夹来存放下载的nginx源码包
mkdir -p /xiaowei_nginx
cd /xiaowei_nginx

# 下载nginx
curl -O http://nginx.org/download/nginx-1.23.3.tar.gz

# 解压
tar xf nginx-1.23.3.tar.gz

# 进入目录
cd nginx-1.23.3

# 新建用户
useradd  -s /sbin/nologin  xiaowei

# 解决依赖关系
yum  install gcc   openssl openssl-devel  pcre pcre-devel automake make -y

# 编译前的配置
./configure  --prefix=/usr/local/xwnginx   --user=xiaowei  --with-http_ssl_module  --with-http_v2_module   --with-threads    --with-http_stub_status_module   --with-stream

# 编译,开启2个进程同时编译,速度会快些
make -j 2

# 安装
make install

# 启动nginx
/usr/local/xwnginx/sbin/nginx

# 修改PATH变量
PATH=$PATH:/usr/local/xwnginx/sbin
echo "PATH=$PATH:/usr/local/xwnginx/sbin" >> /root/.bashrc

# 设置nginx开机自启
echo "/usr/local/xwnginx/sbin/nginx" >> /etc/rc.local
chmod +x /etc/rc.d/rc.local

# 关闭selinux和firewall防火墙
service firewalld stop
systemctl disable firewalld

# 临时关闭selinux
setenforce 0

# 永久关闭
sed -i '/^SELINUX=/ s/enforcing/disabled/' /etc/selinux/config
[root@localhost ~]#


 1395
1395

 被折叠的 条评论
为什么被折叠?
被折叠的 条评论
为什么被折叠?
 到【灌水乐园】发言


