


1需求
这个功能的起因是有一个需求:页面有两个元素,一个是地图,另一个是一个列表(列表上显示地图上的点的信息),类似下图这样。
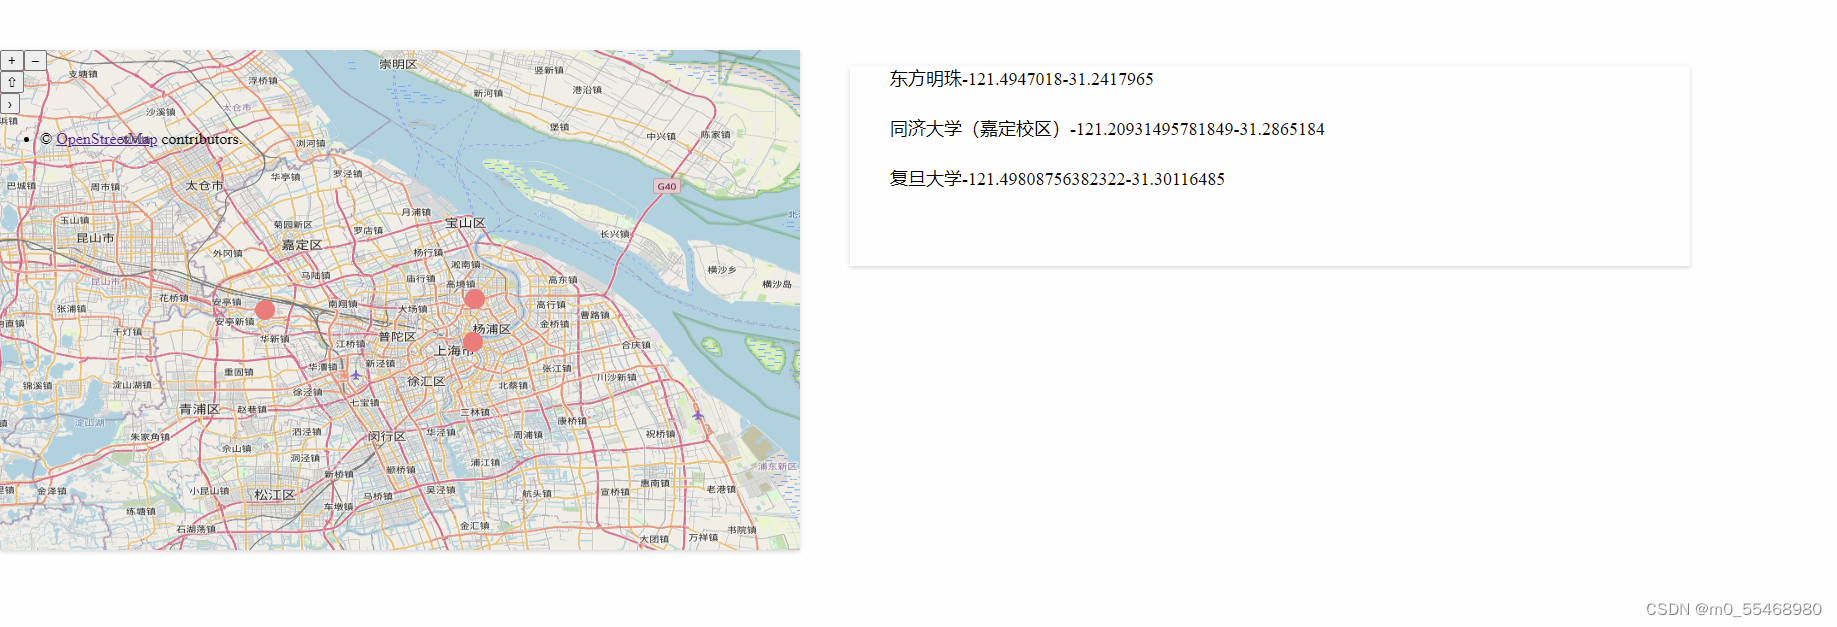
然后需要我们实现当用户的鼠标移动到右边列表上时,地图上对应的点高亮显示
2实现
实现这个功能首先要获取到用户将鼠标移动到列表上的事件,获取到该行的下标,进而访问到对应的点,最后修改点的样式即可。
2.1实现获取鼠标移动
鼠标移到这个元素可以使用@mouseenter来获取,移出这个元素可以使用@mouseleave来获取。因此html部分代码如下
<div class="container">
    <div class="map" id="map-container"></div>
    <ul class="text-container">
      <li class="text" @mouseenter="mouseenter1(index)" @mouseleave="mouseleave1(index)" v-for="(item,index) in list">{{item.display_name}}-{{item.lon}}-{{item.lat}}</li>
    </ul>
  </div>
2.2实现设置鼠标移入与移出的函数
鼠标移入
当鼠标移入时,我们将pointFeatures中对应的点用下标取出,接着对它设置样式,将颜色改为红色实现高亮
mouseenter1(index){
      this.pointFeatures[index].setStyle(
          new Style({
            image: new CircleStyle({
              fill: new Fill({
                color: 'red',
              }),
              radius: 10,
            }),

          })
        );

    },
鼠标移出
当鼠标移出时,同样需要从pointFeatures中对应的点用下标取出,接着把点的颜色设置为初始的1样式即可。
mouseleave1(index){
this.pointFeatures[index].setStyle(
new Style({
image: new CircleStyle({
fill: new Fill({
color: '#FC7C7C',
}),
radius: 10,
}),
})
);
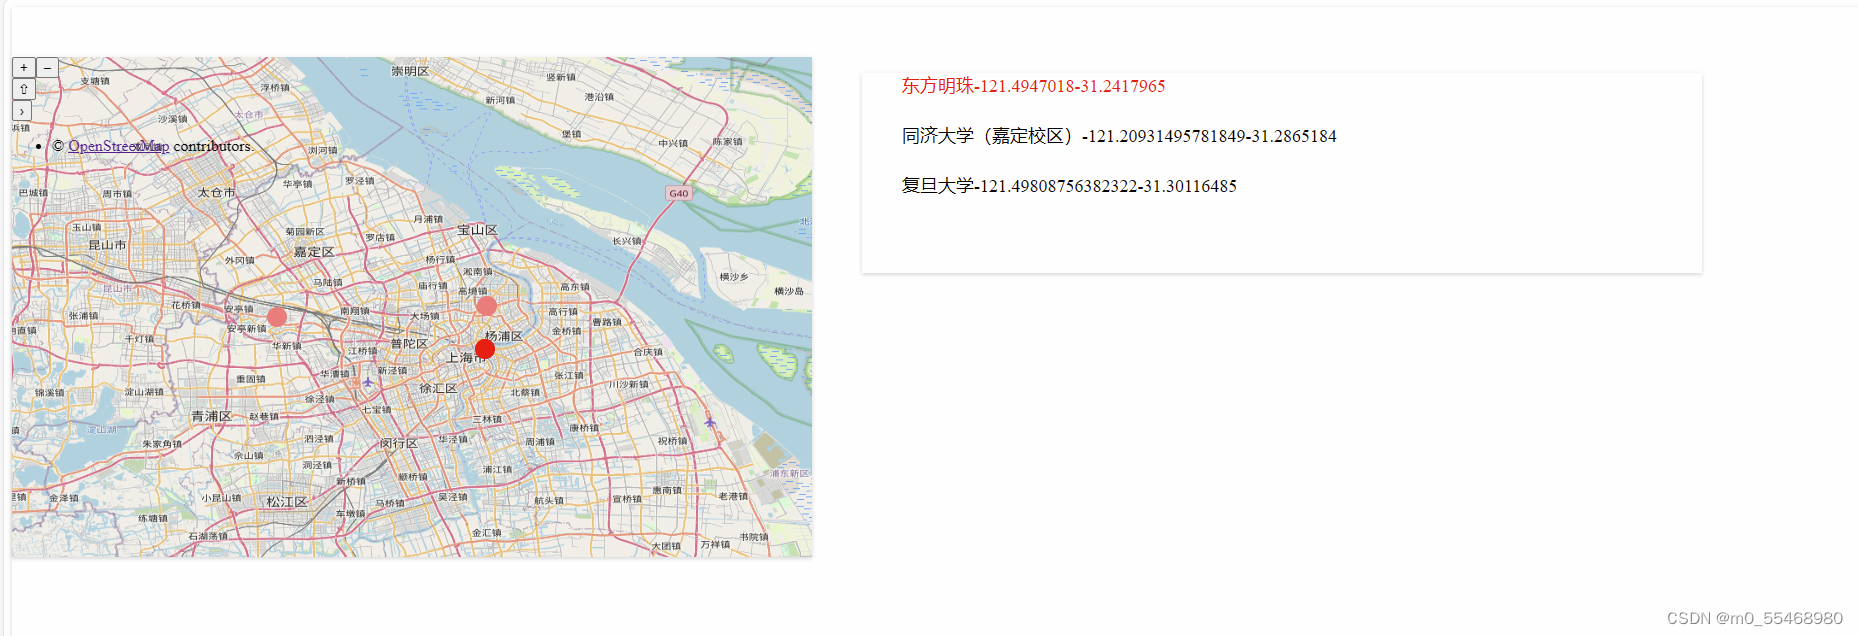
},2.3实现结果如图
当用户将鼠标放在右侧列表的某一行上时,该行对应的点高亮显示
3完整代码
<template>
  <div class="container">
    <div class="map" id="map-container"></div>
    <ul class="text-container">
      <li class="text" @mouseenter="mouseenter1(index)" @mouseleave="mouseleave1(index)" v-for="(item,index) in list">{{item.display_name}}-{{item.lon}}-{{item.lat}}</li>
    </ul>
  </div>


</template>

<script>
import { Feature, Map, View,Overlay } from "ol";//地图,视图
import OSM from "ol/source/OSM"; //可以理解为数据源,就是一张图片
import TileLayer from "ol/layer/Tile"; //可以理解为图层
import {Point} from 'ol/geom';
import {Stroke, Style, Icon, Text, Fill} from "ol/style";
import {Vector as VectorLayer} from "ol/layer";
import { Vector as VectorSource } from 'ol/source.js';  //Vector是用于加载 "矢量数据"(在本项目中主要是GeoJson) 数据源的一个类
import CircleStyle from "ol/style/Circle";

export default {
  data() {
    return {
      layer1:null,
      map: null,

      list:[
      {
        display_name: "东方明珠",
        lon: "121.4947018",
        lat: "31.2417965"
      },
      {
        display_name: "同济大学(嘉定校区), 4800, 曹安公路, 许家村, 嘉定区, 201804, 中国",
        lon: "121.20931495781849",
        lat: "31.2865184"
      },

      {
        display_name:"复旦大学, 220, 邯郸路, 五角场街道, 杨浦区, 200433, 中国",
        lon: "121.49808756382322",
        lat: "31.30116485"
      }],
      pointFeatures:[],
    };
  },
  methods: {
    //创建地图
    createMap() {
      this.map = new Map({
        target: "map-container",
        layers: [
            new TileLayer({
            source: new OSM({}),
          }),
        ],
        view: new View({
          center: [121.394926, 31.3],
          projection: "EPSG:4326",
          zoom: 10,

        }),
      });
    },
    /绘制点
    drawPoint() {
      this.list.forEach((item) => {
        const feature = new Feature({
          title: item.display_name,
          geometry: new Point([item.lon, item.lat]),
        });
        feature.setStyle(
          new Style({
            image: new CircleStyle({
              fill: new Fill({
                color: '#FC7C7C',
              }),
              radius: 10,
            }),
          })
        );
        this.pointFeatures.push(feature);
      });
      var pointSource=new VectorSource();
      // 添加要素到VectorSource
      pointSource.addFeatures(this.pointFeatures);

      this.layer1 = new VectorLayer({
        source: pointSource, // 使用VectorSource作为数据源
      });
      this.map.addLayer(this.layer1);
    },
    //鼠标移入
    mouseenter1(index){
      this.pointFeatures[index].setStyle(
          new Style({
            image: new CircleStyle({
              fill: new Fill({
                color: 'red',
              }),
              radius: 10,
            }),
          })
        );

    },
     //鼠标移出
    mouseleave1(index){
      this.pointFeatures[index].setStyle(
          new Style({
            image: new CircleStyle({
              fill: new Fill({
                color: '#FC7C7C',
              }),
              radius: 10,
            }),
          })
        );
    },
    //分隔display_name
    splitDisplay_name(){
      for(let i=0;i< this.list.length;i++) {
        this.list[i].display_name = this.list[i].display_name.split(',')[0];
      }
    },
  },
  mounted() {
    this.splitDisplay_name();
    this.createMap();
    this.drawPoint();

  },
};


</script>

<style scoped>

.container{
  height:600px;
  padding-top: 50px;
  box-shadow: 0 2px 4px rgba(0, 0, 0, .12), 0 0 6px rgba(0, 0, 0, .04);
}
.map{
  height:500px;
  width:800px;
  box-shadow: 0 2px 4px rgba(0, 0, 0, .12), 0 0 6px rgba(0, 0, 0, .04);
  display: inline-block;
}
.text-container
{
  height:200px;
  width:800px;
  box-shadow: 0 2px 4px rgba(0, 0, 0, .12), 0 0 6px rgba(0, 0, 0, .04);
  margin-left: 50px;
  display: inline-block;
  position: absolute;
}
.text{
  height:50px;
  font-size: large;
  list-style: none;
}
.text:hover{
  color: red;

}
</style>
4总结
以上就是如何实现地图上的点高亮显示的内容,如果想要用户交互更加友好的话其实可以在高亮时将对应的点放大,这样效果会更好。
需要注意的是,由于地图底层的layer的source是OSM,在国内由于网络问题可能有时候无法显示。读者可以更换成高德或者百度地图源来解决这个问题


 300
300


 被折叠的 条评论
为什么被折叠?
被折叠的 条评论
为什么被折叠?
 到【灌水乐园】发言


