


1.创建loopback App
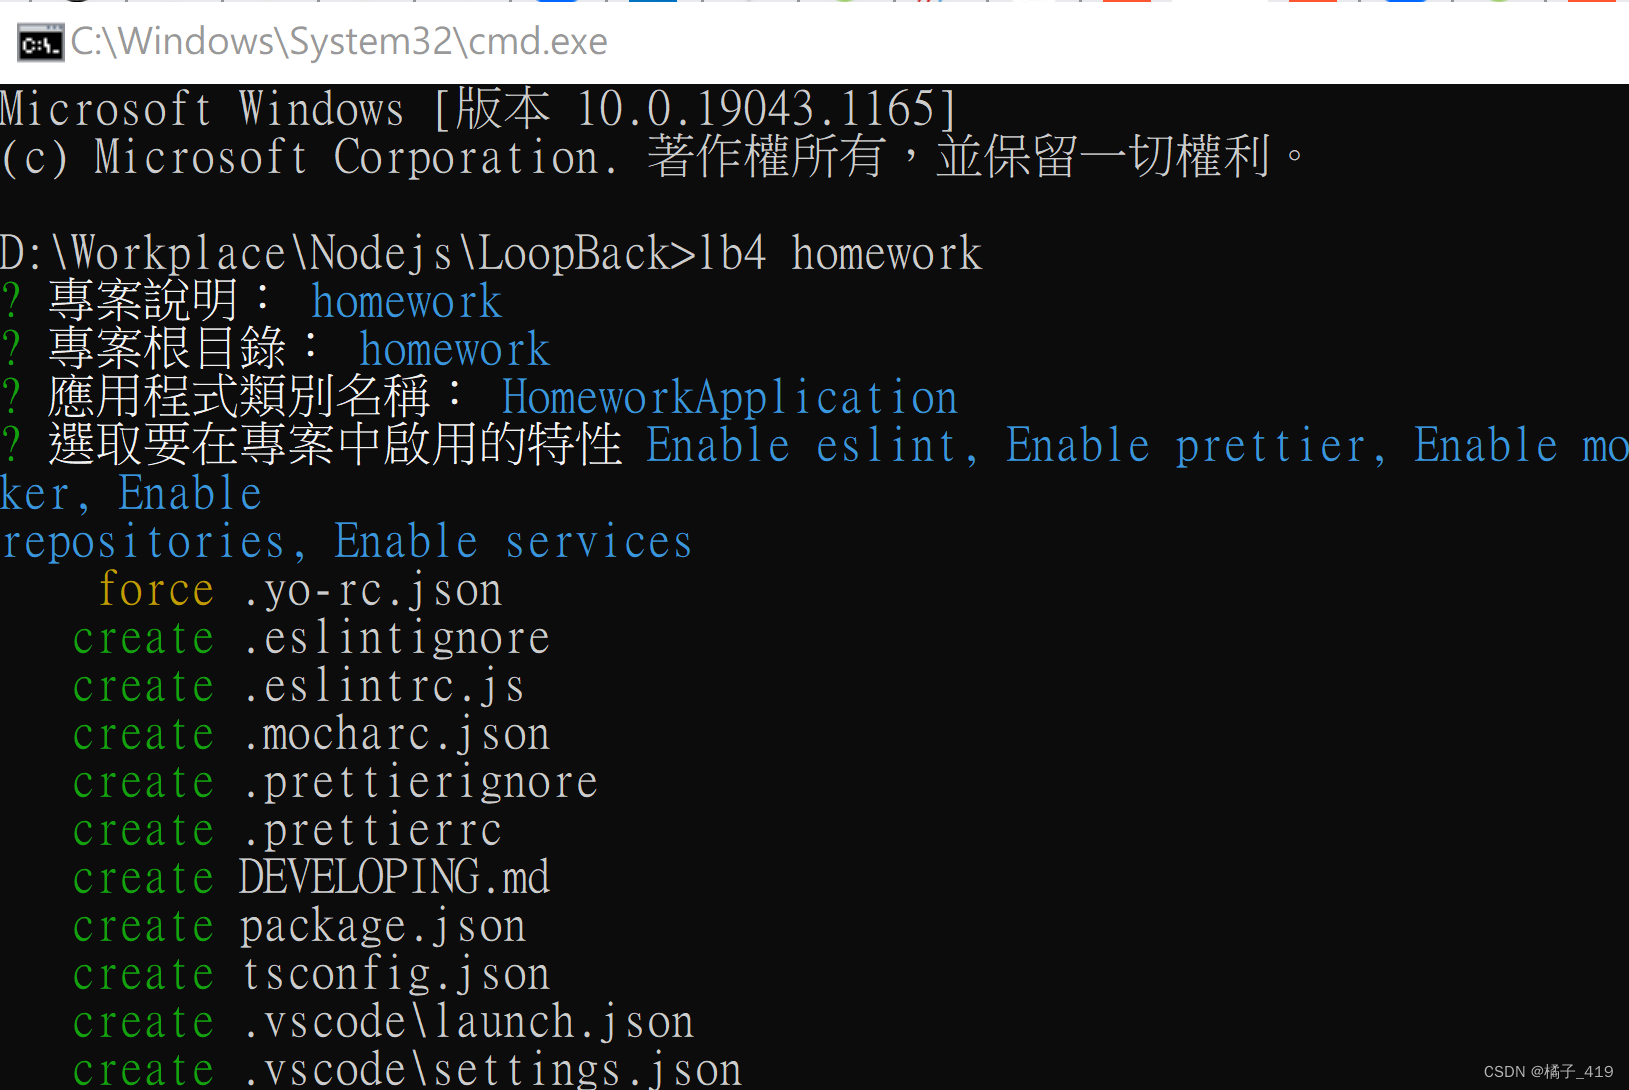
等待npm模块安装完成
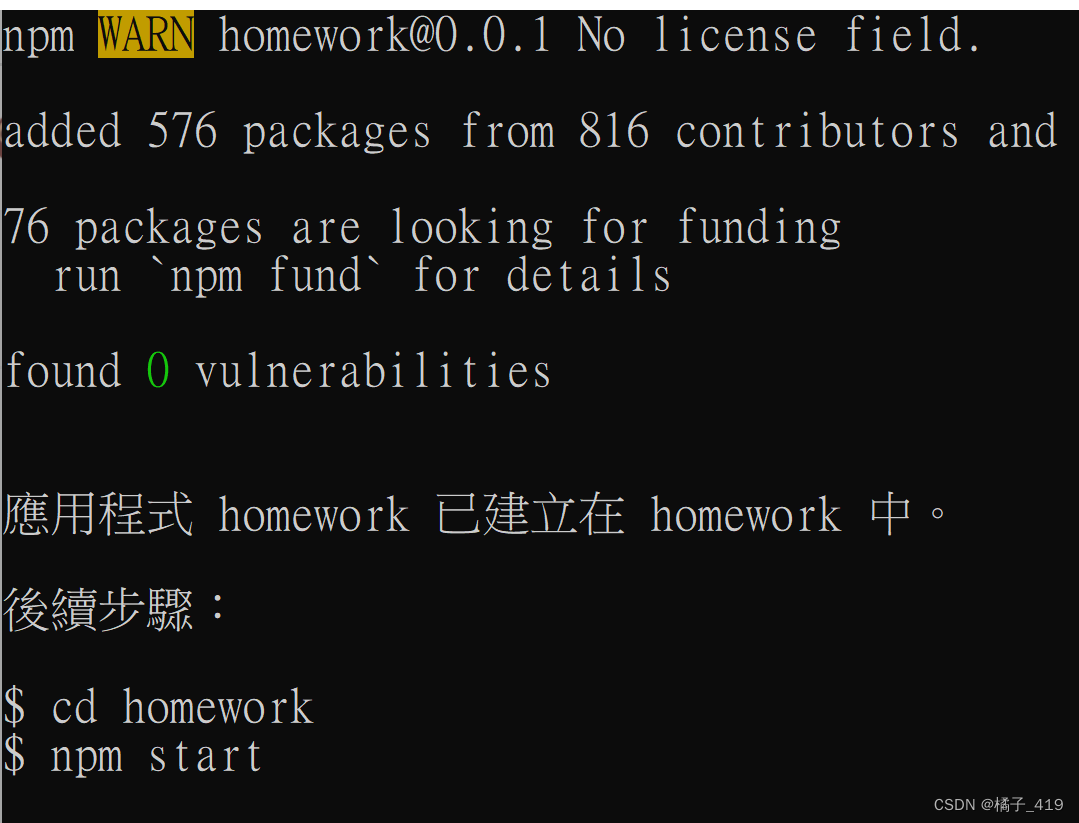
创建完成,执行npm start运行测试:
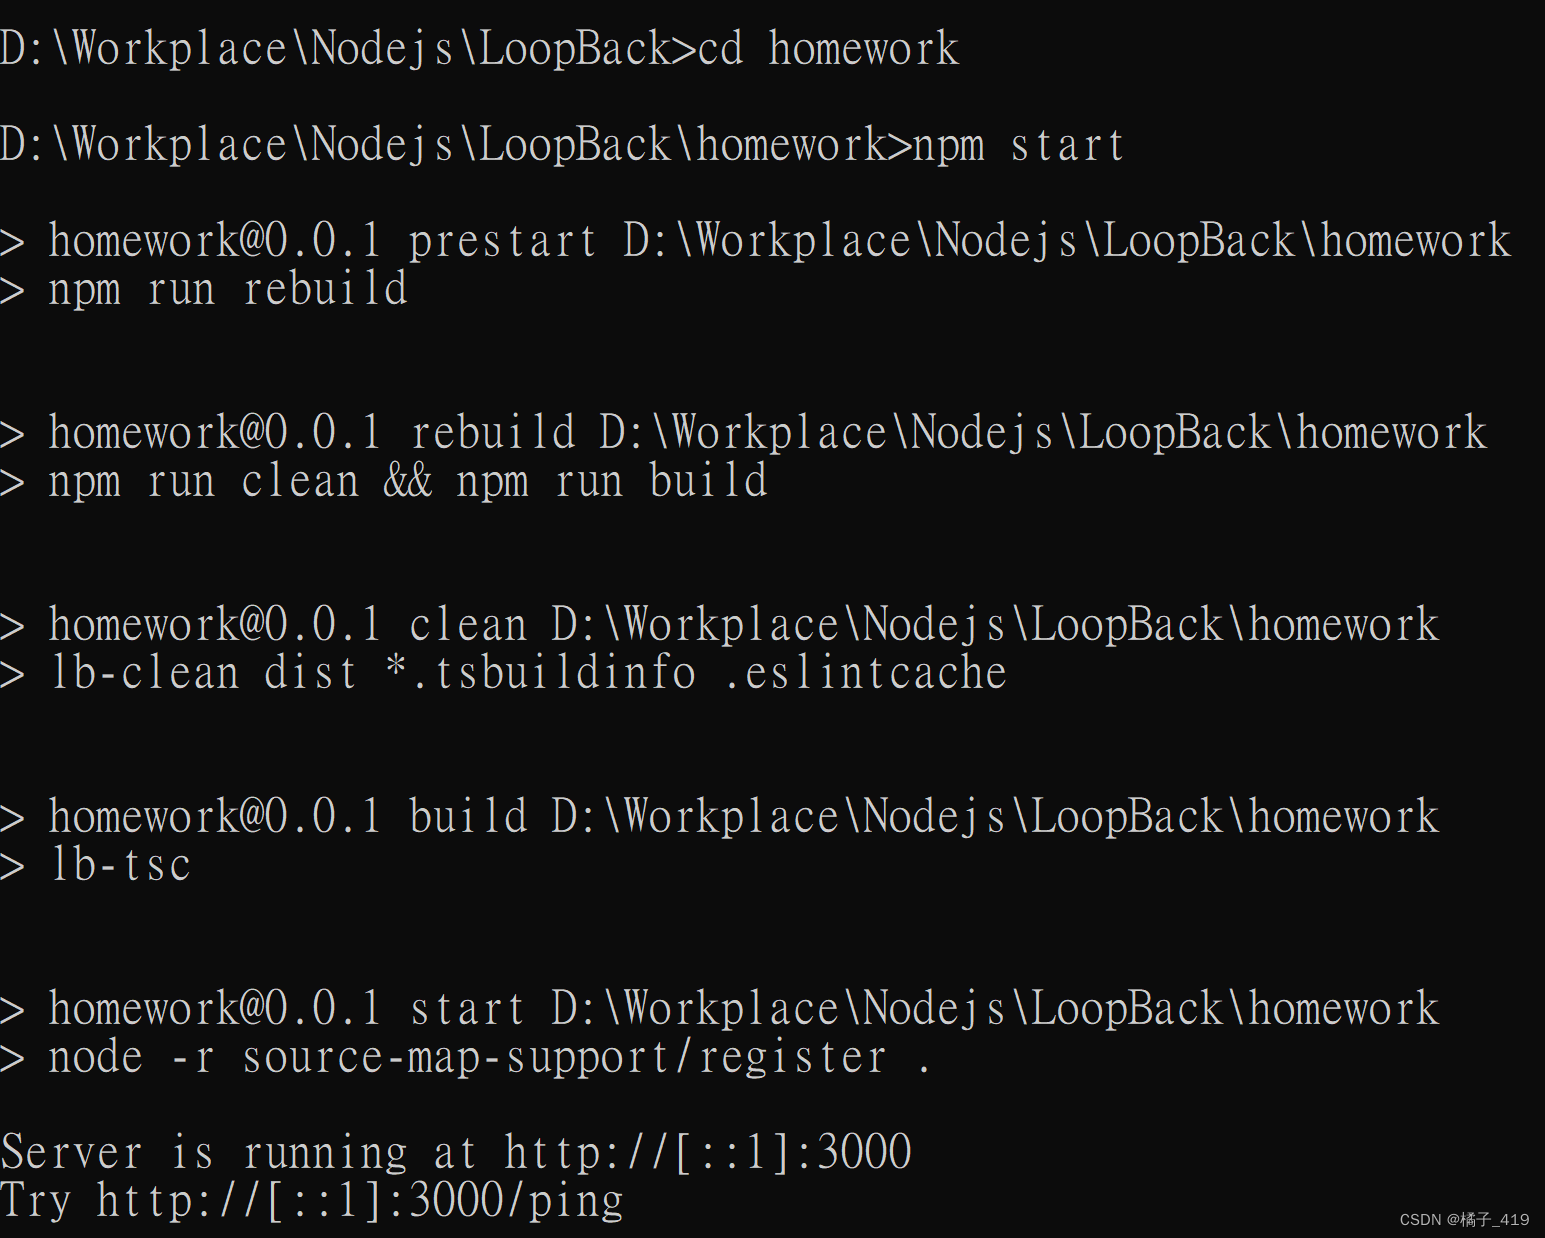
访问localhost:3000:

2.基本开发框架搭建
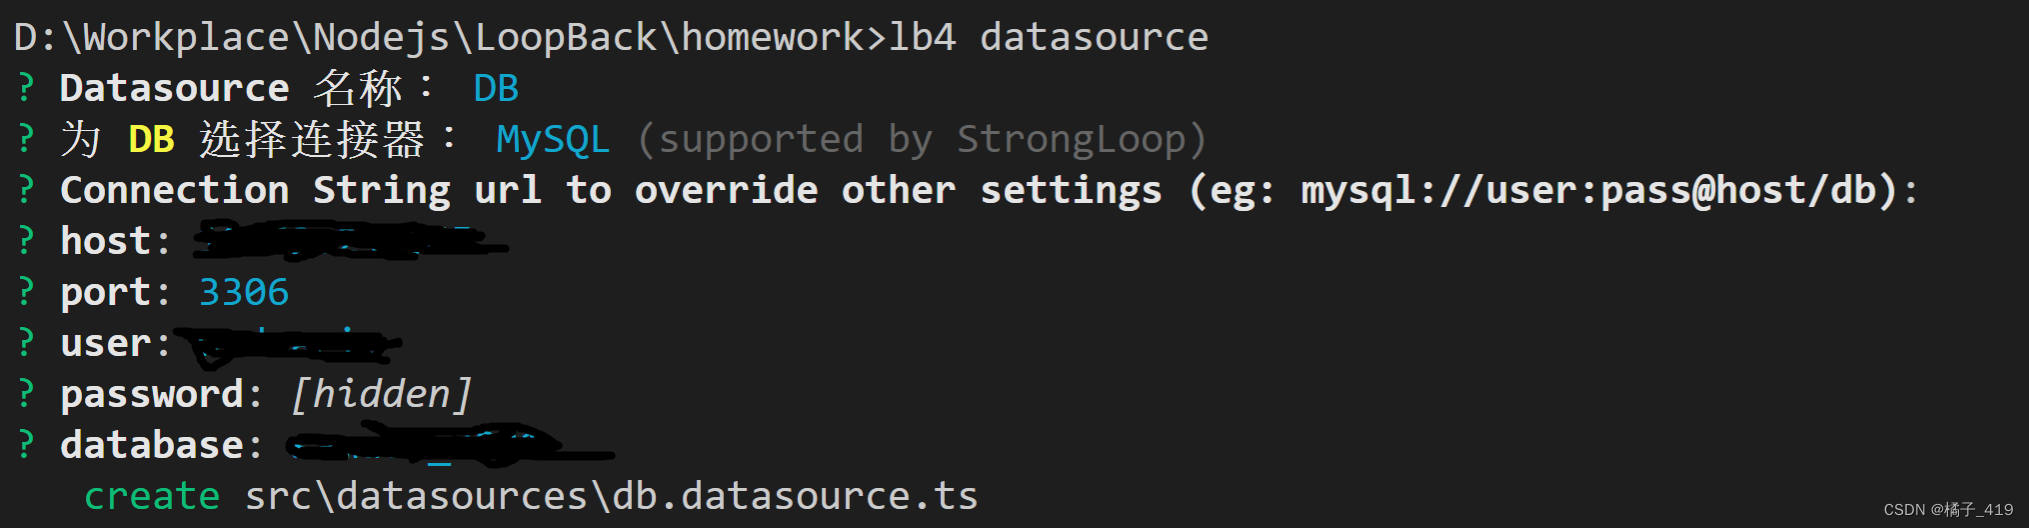
1.配置DataSource数据库连接
2.根据数据库表结构创建model
注:执行lb4 discover前记得npm start一下确保上述db连接正常
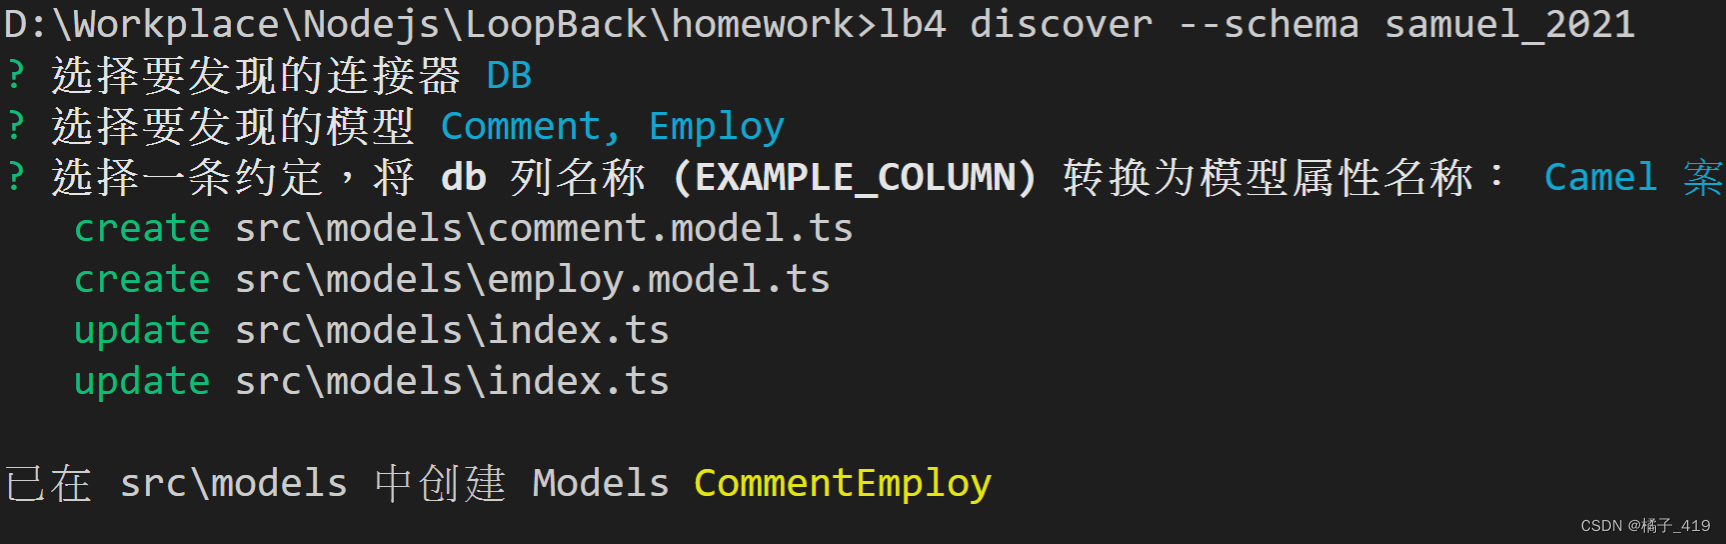
一定要加上--schema databasename,连接到正确的数据库(ps:dataresource config里那个database属性不知道有什么含义,这里不加--schema就不行)
执行上述命令后会自动根据数据库表结构构建model类:
import {Entity, model, property} from '@loopback/repository';

@model({
  settings: {idInjection: false, mysql: {schema: 'samuel_2021', table: 'Employ'}}
})
export class Employ extends Entity {
  @property({
    type: 'number',
    required: true,
    precision: 10,
    scale: 0,
    id: 1,
    mysql: {columnName: 'id', dataType: 'int', dataLength: null, dataPrecision: 10, dataScale: 0, nullable: 'N'},
  })
  id: number;

  @property({
    type: 'string',
    required: true,
    length: 256,
    mysql: {columnName: 'employ_no', dataType: 'varchar', dataLength: 256, dataPrecision: null, dataScale: null, nullable: 'N'},
  })
  employNo: string;

  @property({
    type: 'string',
    length: 256,
    mysql: {columnName: 'name', dataType: 'varchar', dataLength: 256, dataPrecision: null, dataScale: null, nullable: 'Y'},
  })
  name?: string;

  @property({
    type: 'number',
    precision: 10,
    scale: 0,
    mysql: {columnName: 'team', dataType: 'int', dataLength: null, dataPrecision: 10, dataScale: 0, nullable: 'Y'},
  })
  team?: number;

  // Define well-known properties here

  // Indexer property to allow additional data
  // eslint-disable-next-line @typescript-eslint/no-explicit-any
  [prop: string]: any;

  constructor(data?: Partial<Employ>) {
    super(data);
  }
}

export interface EmployRelations {
  // describe navigational properties here
}

export type EmployWithRelations = Employ & EmployRelations;
3.根据model创建Repository
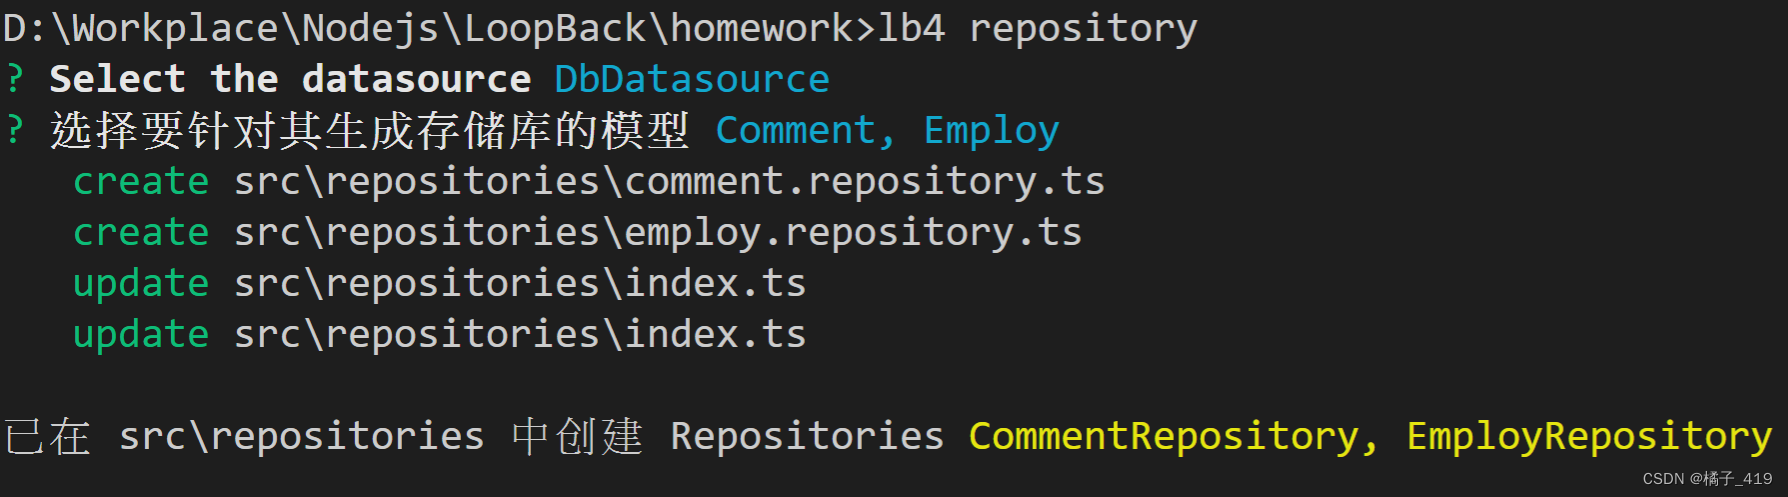
同样会自动生成repository:
import {inject} from '@loopback/core';
import {DefaultCrudRepository} from '@loopback/repository';
import {DbDataSource} from '../datasources';
import {Employ, EmployRelations} from '../models';
export class EmployRepository extends DefaultCrudRepository<
Employ,
typeof Employ.prototype.id,
EmployRelations
> {
constructor(
@inject('datasources.DB') dataSource: DbDataSource,
) {
super(Employ, dataSource);
}
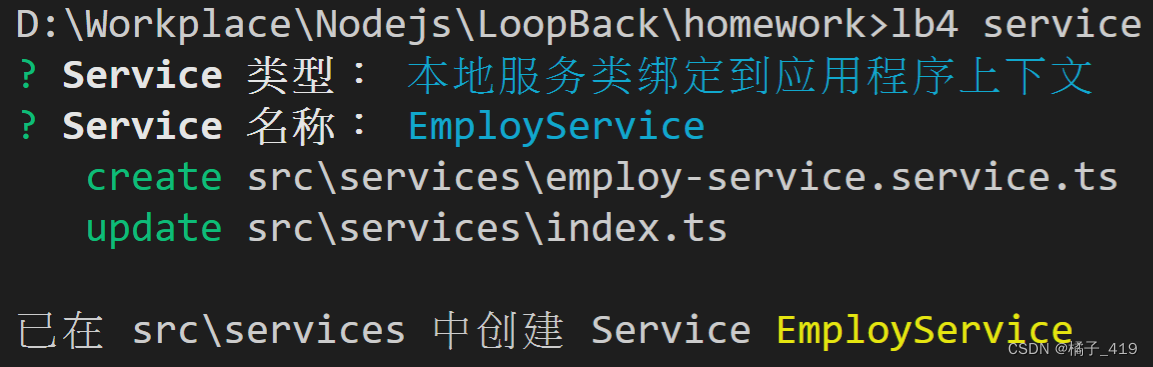
}4.创建Service
5.创建Controller

这里选择自动生成具有CRUD接口的Controller
至此项目基本框架已经构建好了,接下来实现具体接口。
3.实现CRUD Service
1.在Service类中封装逻辑处理代码
首先在service类中使用@repository注入Repository类:
@repository(EmployRepository) private empRep: EmployRepository然后写一个insert方法,这个方法调用repository的create()方法:
insertEmp(emp: Employ) {
    console.log(emp)
    return this.empRep.create(emp);
  }
2.在Controller中实现http接口
同样,在controller中注入使用@service注入Service类:
@service(EmployService)
    public employService: EmployService
再编写一个处理post请求的方法(实现向数据库insert操作):
@post('/employs')
@response(200, {
description: 'Employ model instance',
content: {'application/json': {schema: getModelSchemaRef(Employ)}},
})
async create(
@requestBody({
content: {
'application/json': {
schema: getModelSchemaRef(Employ, {
title: 'NewEmploy',
// exclude: ['id'],
}),
},
},
})
employ: Employ,
): Promise<Employ> {
return this.employService.insertEmp(employ);
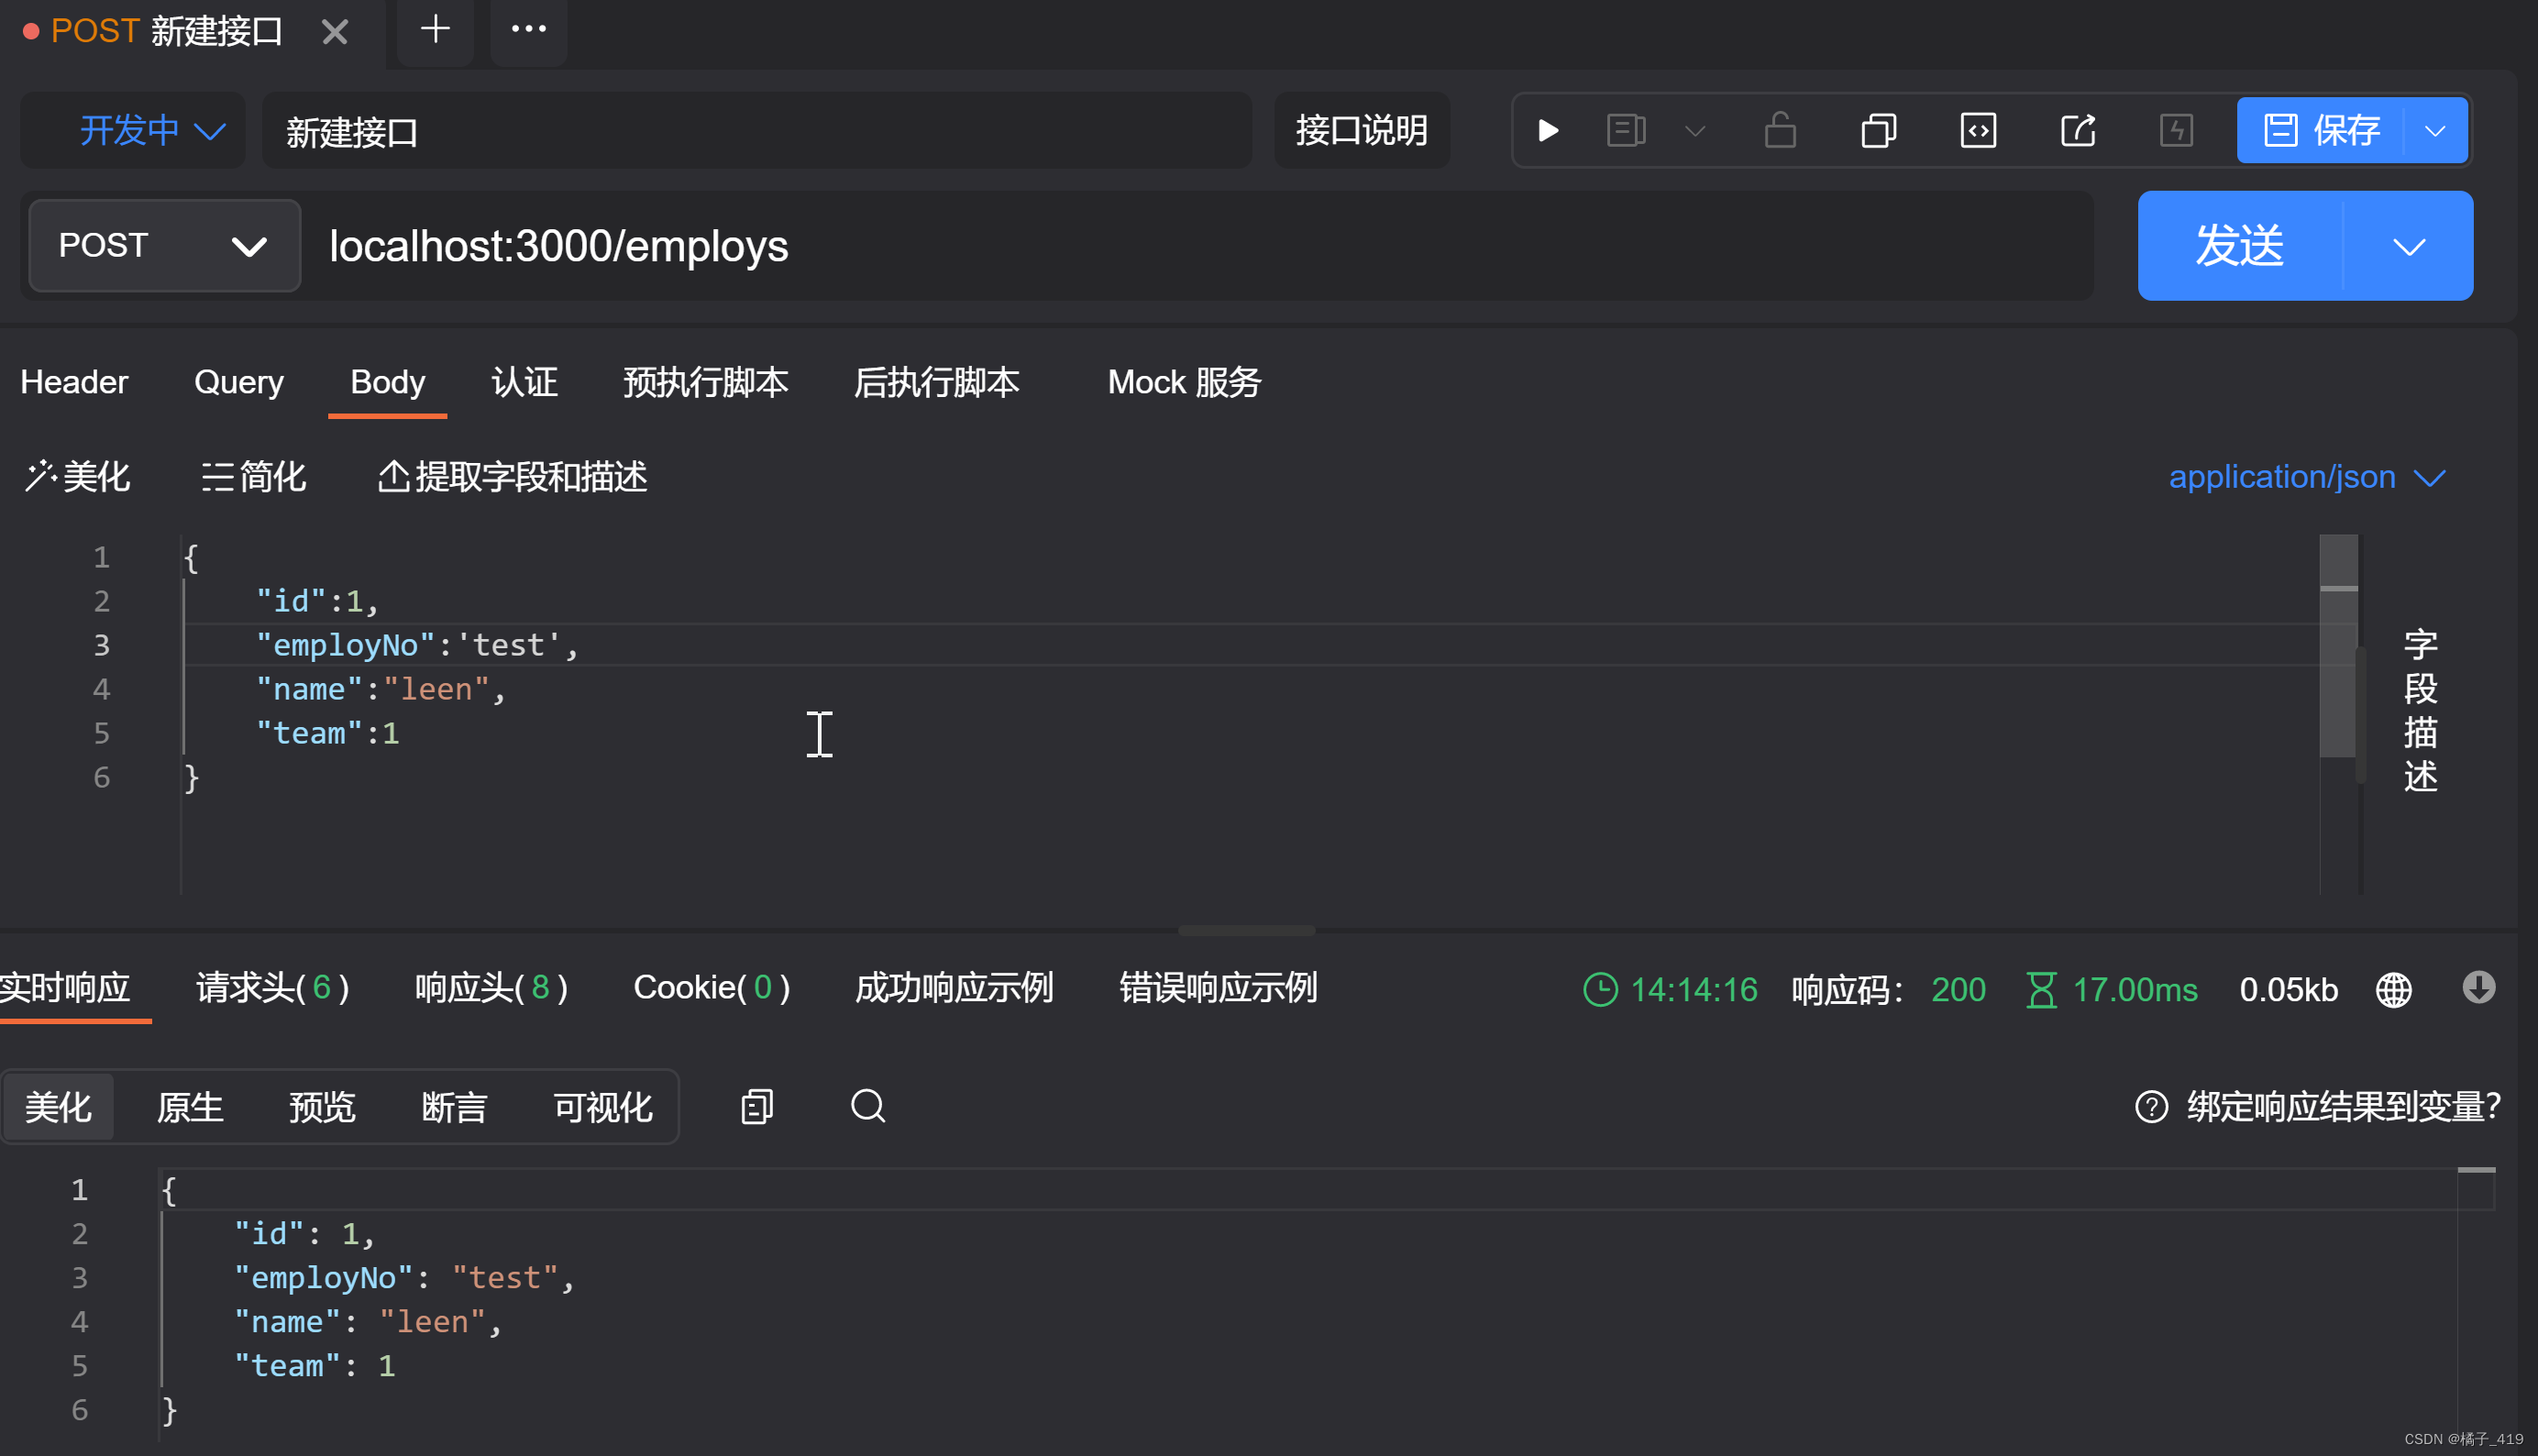
}3.测试
使用AirPost(PostMan也一样)进行接口测试,测试结果如下:
看看数据库有没有更新:
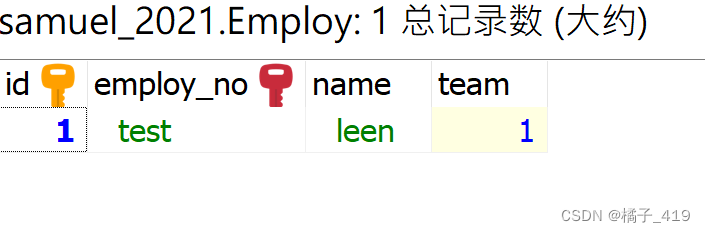
插入成功,其他CRUD操作也能类似实现。


 3596
3596


 被折叠的 条评论
为什么被折叠?
被折叠的 条评论
为什么被折叠?
 到【灌水乐园】发言


