


目录
实现效果
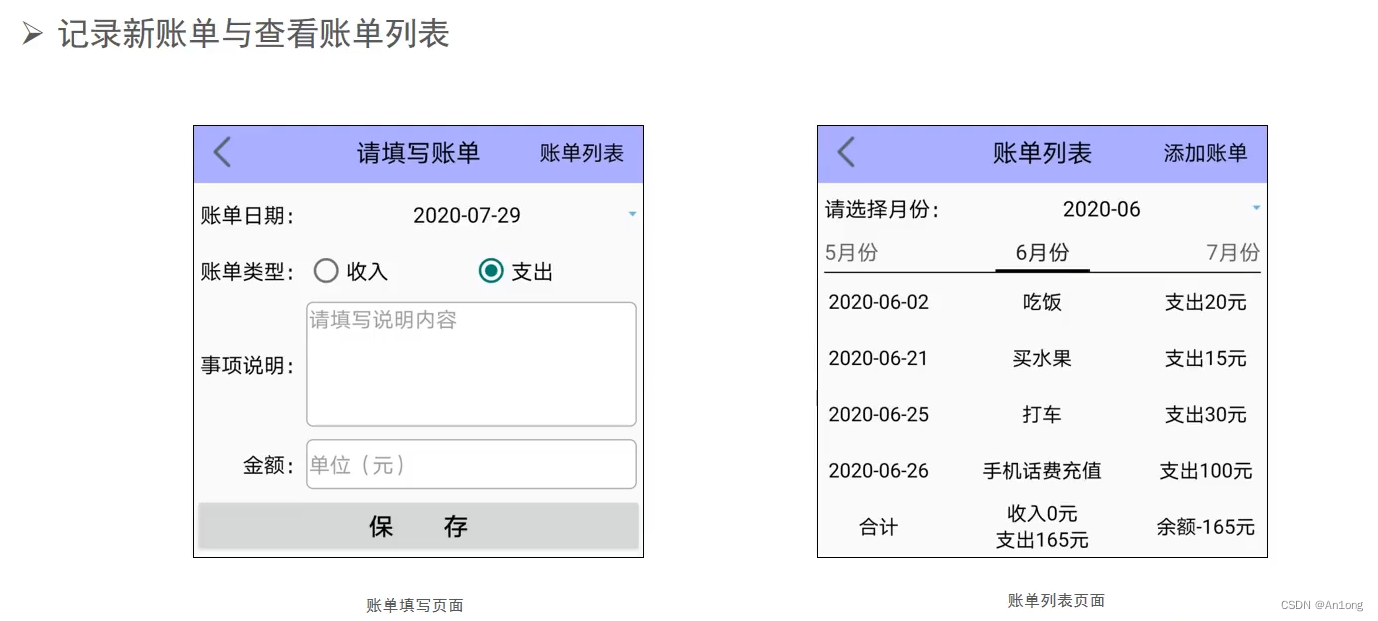
添加账单
添加账单月份选择
先来写出上方功能栏

<RelativeLayout xmlns:android="http://schemas.android.com/apk/res/android"
    xmlns:tools="http://schemas.android.com/tools"
    android:layout_width="match_parent"
    android:layout_height="50dp"
    android:background="#aaaaff">

    <ImageView
        android:id="@+id/iv_back"
        android:layout_width="50dp"
        android:layout_height="match_parent"
        android:layout_alignParentLeft="true"
        android:padding="10dp"
        android:scaleType="fitCenter"
        android:src="@drawable/ic_back" />

    <TextView
        android:id="@+id/tv_title"
        android:layout_width="wrap_content"
        android:layout_height="match_parent"
        android:layout_centerInParent="true"
        android:gravity="center"
        android:textColor="@color/black"
        android:textSize="20sp"
        tools:text="账单列表" />

    <TextView
        android:id="@+id/tv_option"
        android:layout_width="wrap_content"
        android:layout_height="match_parent"
        android:layout_alignParentRight="true"
        android:layout_marginRight="15dp"
        android:gravity="center"
        android:textColor="@color/black"
        android:textSize="17sp"
        tools:text="添加账单" />

</RelativeLayout>
注意,上方的账单列表和添加账单字样时tools:text的效果,程序启动时并不会携带上去,仅作为当前效果预览展示,所以在使用的时候需要手动为这两个部分设置内容,因为添加账单页和账单列表使用的是同一个这个条目,所以这样设计。
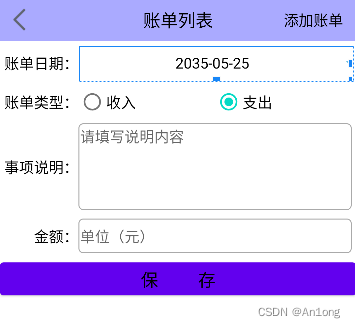
以及账单添加自己的组件
<LinearLayout xmlns:android="http://schemas.android.com/apk/res/android"
    xmlns:tools="http://schemas.android.com/tools"
    android:layout_width="match_parent"
    android:layout_height="match_parent"
    android:orientation="vertical">

    <include layout="@layout/title_booking" />

    <LinearLayout
        android:layout_width="match_parent"
        android:layout_height="40dp"
        android:layout_margin="5dp"
        android:orientation="horizontal">

        <TextView
            android:layout_width="wrap_content"
            android:layout_height="match_parent"
            android:gravity="center|end"
            android:text="账单日期:"
            android:textColor="@color/black"
            android:textSize="17sp" />

        <TextView
            android:id="@+id/tv_date"
            android:layout_width="0dp"
            android:layout_height="match_parent"
            android:layout_weight="2"
            android:drawableRight="@drawable/arrow_down"
            android:gravity="center"
            android:textColor="@color/black"
            android:textSize="17sp"
            tools:text="2035-05-25" />
    </LinearLayout>

    <RadioGroup
        android:id="@+id/rg_type"
        android:layout_width="match_parent"
        android:layout_height="30dp"
        android:layout_margin="5dp"
        android:orientation="horizontal">

        <TextView
            android:layout_width="wrap_content"
            android:layout_height="match_parent"
            android:gravity="center|end"
            android:text="账单类型:"
            android:textColor="@color/black"
            android:textSize="17sp" />

        <RadioButton
            android:id="@+id/rb_income"
            android:layout_width="0dp"
            android:layout_height="wrap_content"
            android:layout_weight="1"
            android:checked="false"
            android:gravity="start|center"
            android:text="收入"
            android:textColor="#000000"
            android:textSize="17sp" />

        <RadioButton
            android:id="@+id/rb_cost"
            android:layout_width="0dp"
            android:layout_height="wrap_content"
            android:layout_weight="1"
            android:checked="true"
            android:gravity="start|center"
            android:text="支出"
            android:textColor="#000000"
            android:textSize="17sp" />
    </RadioGroup>

    <LinearLayout
        android:layout_width="match_parent"
        android:layout_height="100dp"
        android:layout_margin="5dp"
        android:orientation="horizontal">

        <TextView
            android:layout_width="wrap_content"
            android:layout_height="match_parent"
            android:gravity="center|end"
            android:text="事项说明:"
            android:textColor="@color/black"
            android:textSize="17sp" />

        <EditText
            android:id="@+id/et_remark"
            android:layout_width="0dp"
            android:layout_height="match_parent"
            android:layout_weight="2"
            android:background="@drawable/editext_selector"
            android:gravity="start|top"
            android:hint="请填写说明内容"
            android:textColor="@color/black"
            android:textSize="17sp" />
    </LinearLayout>

    <LinearLayout
        android:layout_width="match_parent"
        android:layout_height="40dp"
        android:layout_margin="5dp"
        android:orientation="horizontal">

        <TextView
            android:layout_width="wrap_content"
            android:layout_height="match_parent"
            android:gravity="center|end"
            android:text="  金额:"
            android:textColor="@color/black"
            android:textSize="17sp" />

        <EditText
            android:id="@+id/et_amount"
            android:layout_width="0dp"
            android:layout_height="match_parent"
            android:layout_weight="2"
            android:background="@drawable/editext_selector"
            android:hint="单位(元)"
            android:inputType="number"
            android:textColor="@color/black"
            android:textSize="17sp" />
    </LinearLayout>

    <Button
        android:id="@+id/btn_save"
        android:layout_width="match_parent"
        android:layout_height="wrap_content"
        android:gravity="center"
        android:text="保  存"
        android:textColor="@color/black"
        android:textSize="20sp" />

</LinearLayout>
注:calent可以获取当前日期
我们的添加单信息是组成了一个对象的形式进行保存的,故我们需要一个账单实体类
package com.example.androidapp.entity;

public class BillInfo {

    public int id;
    public String date;
    public int type;
    public double amount;
    public String remark;

    // 账单类型,0 收入,1 支出
    public static final int BILL_TYPE_INCOME = 0;
    public static final int BILL_TYPE_COST = 1;

    @Override
    public String toString() {
        return "BillInfo{" +
                "id=" + id +
                ", date='" + date + '\'' +
                ", type=" + type +
                ", amount=" + amount +
                ", remark='" + remark + '\'' +
                '}';
    }
}
我们来创建一个数据库的SQLiteOpenHelper类,用于创建和管理数据库以及进行数据库操作。
ContentValues是Android提供的一个用于存储一组键值对数据的类。在数据库操作中,它通常用于存储要插入或更新到数据库表中的数据。ContentValues
package com.example.androidapp.database;
import android.annotation.SuppressLint;
import android.content.ContentValues;
import android.content.Context;
import android.database.Cursor;
import android.database.sqlite.SQLiteDatabase;
import android.database.sqlite.SQLiteOpenHelper;
import android.util.Log;
import com.example.androidapp.entity.BillInfo;
import java.util.ArrayList;
import java.util.List;
public class BillDBHelper extends SQLiteOpenHelper {
private static final String DB_NAME = "bill.db";
// 账单信息表
private static final String TABLE_BILLS_INFO = "bill_info";
private static final int DB_VERSION = 1;
private static BillDBHelper mHelper = null;
private SQLiteDatabase mRDB = null;
private SQLiteDatabase mWDB = null;
private BillDBHelper(Context context) {
super(context, DB_NAME, null, DB_VERSION);
}
// 利用单例模式获取数据库帮助器的唯一实例
public static BillDBHelper getInstance(Context context) {
if (mHelper == null) {
mHelper = new BillDBHelper(context);
}
return mHelper;
}
// 打开数据库的读连接
public SQLiteDatabase openReadLink() {
if (mRDB == null || !mRDB.isOpen()) {
mRDB = mHelper.getReadableDatabase();
}
return mRDB;
}
// 打开数据库的写连接
public SQLiteDatabase openWriteLink() {
if (mWDB == null || !mWDB.isOpen()) {
mWDB = mHelper.getWritableDatabase();
}
return mWDB;
}
// 关闭数据库连接
public void closeLink() {
if (mRDB != null && mRDB.isOpen()) {
mRDB.close();
mRDB = null;
}
if (mWDB != null && mWDB.isOpen()) {
mWDB.close();
mWDB = null;
}
}
// 创建数据库,执行建表语句
@Override
public void onCreate(SQLiteDatabase db) {
// 创建账单信息表
String sql = "CREATE TABLE IF NOT EXISTS " + TABLE_BILLS_INFO +
"(_id INTEGER PRIMARY KEY AUTOINCREMENT NOT NULL," +
" date VARCHAR NOT NULL," +
" type INTEGER NOT NULL," +
" amount DOUBLE NOT NULL," +
" remark VARCHAR NOT NULL);";
db.execSQL(sql);
}
@Override
public void onUpgrade(SQLiteDatabase db, int oldVersion, int newVersion) {
}
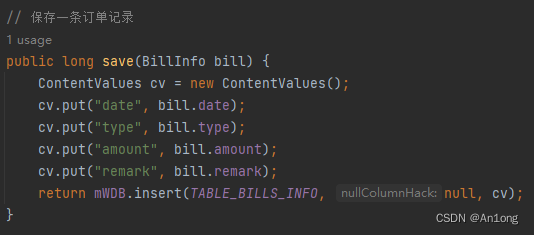
// 保存一条订单记录
public long save(BillInfo bill) {
ContentValues cv = new ContentValues();
cv.put("date", bill.date);
cv.put("type", bill.type);
cv.put("amount", bill.amount);
cv.put("remark", bill.remark);
return mWDB.insert(TABLE_BILLS_INFO, null, cv);
}
@SuppressLint("Range")
public List<BillInfo> queryByMonth(String yearMonth) {
List<BillInfo> list = new ArrayList<>();
// 2035-09-12
// select * from bill_info where date like '2035-09%'
String sql = "select * from " + TABLE_BILLS_INFO + " where date like '" + yearMonth + "%'";
Log.d("ning", sql);
Cursor cursor = mRDB.rawQuery(sql, null);
while (cursor.moveToNext()) {
BillInfo bill = new BillInfo();
bill.id = cursor.getInt(cursor.getColumnIndex("_id"));
bill.date = cursor.getString(cursor.getColumnIndex("date"));
bill.type = cursor.getInt(cursor.getColumnIndex("type"));
bill.amount = cursor.getDouble(cursor.getColumnIndex("amount"));
bill.remark = cursor.getString(cursor.getColumnIndex("remark"));
list.add(bill);
}
return list;
}
}
我们先来实现点击选择月份就弹出日历对话框
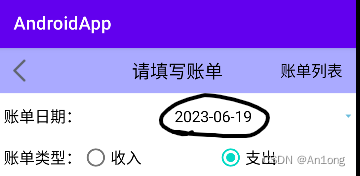

注:这个弹出来的对话框样式并不是我们书写的,是自带的DatePickerDialog对话框,我们使用时仅需要传入年月日即可
    TextView tv_month = findViewById(R.id.tv_month);

// 点击弹出日期对话框
    tv_month.setOnClickListener(this);


    @Override
       public void onClick(View v) {
        switch (v.getId()) {
            case R.id.tv_month:
                // 弹出日期对话框
                DatePickerDialog dialog = new DatePickerDialog(this, this,
                        //默认是当前时间
                        calendar.get(Calendar.YEAR),
                        calendar.get(Calendar.MONTH),
                        calendar.get(Calendar.DAY_OF_MONTH));
                dialog.show();
                break;
            case R.id.tv_option:
                // 跳转到添加账单页面
                Intent intent = new Intent(this, BillAddActivity.class);
                intent.setFlags(Intent.FLAG_ACTIVITY_CLEAR_TOP);
                startActivity(intent);
                break;

            case R.id.iv_back:
                // 关闭当前页面
                finish();
                break;
        }
    }
添加账单保存内容
来到add的活动里面
我们前面说过了,存储的信息会组合为一个实体类方便存储,我们已经创建了billnfo实体类
因此这里直接
           case R.id.btn_save:
                // 保存添加信息
                BillInfo bill = new BillInfo();
                bill.date = tv_date.getText().toString();
                bill.type = rg_type.getCheckedRadioButtonId() == R.id.rb_income  ?
                        BillInfo.BILL_TYPE_INCOME : BillInfo.BILL_TYPE_COST;
                bill.remark = et_remark.getText().toString();
                bill.amount = Double.parseDouble(et_amount.getText().toString());
                if (mDBHelper.save(bill) > 0){
                    ToastUtil.show(this, "添加账单成功");
                }
我们 由一个save方法,使用时直接创建db对象调用
我们在活动中创建对象
    mDBHelper = BillDBHelper.getInstance(this);
    mDBHelper.openReadLink();
    mDBHelper.openWriteLink();


    @Override
    protected void onDestroy() {
        super.onDestroy();
        mDBHelper.closeLink();
    }
然后书写添加逻辑
            case R.id.tv_option:
                // 跳转到添加账单页面
                Intent intent = new Intent(this, BillPagerActivity.class);
                intent.setFlags(Intent.FLAG_ACTIVITY_CLEAR_TOP);
                startActivity(intent);
                break;
这样我们就完成了添加页的全部内容
这部分(添加账单)的活动代码如下
package com.example.androidapp;

import android.app.DatePickerDialog;
import android.content.Intent;
import android.os.Bundle;
import android.view.View;
import android.widget.DatePicker;
import android.widget.EditText;
import android.widget.RadioGroup;
import android.widget.TextView;

import androidx.appcompat.app.AppCompatActivity;

import com.example.androidapp.database.BillDBHelper;
import com.example.androidapp.entity.BillInfo;
import com.example.androidapp.utils.DateUtil;
import com.example.androidapp.utils.ToastUtil;

import java.util.Calendar;

public class BillAddActivity extends AppCompatActivity implements View.OnClickListener, DatePickerDialog.OnDateSetListener {

    private TextView tv_date;
    private Calendar calendar;
    private EditText et_remark;
    private EditText et_amount;
    private RadioGroup rg_type;
    private BillDBHelper mDBHelper;

    @Override
    protected void onCreate(Bundle savedInstanceState) {
        super.onCreate(savedInstanceState);
        setContentView(R.layout.activity_bill_add);
        TextView tv_title = findViewById(R.id.tv_title);
        TextView tv_option = findViewById(R.id.tv_option);
        tv_title.setText("请填写账单");
        tv_option.setText("账单列表");

        tv_date = findViewById(R.id.tv_date);

        rg_type = findViewById(R.id.rg_type);       //单选按钮组
        et_remark = findViewById(R.id.et_remark);   //金额
        et_amount = findViewById(R.id.et_amount);   //说明框

        findViewById(R.id.btn_save).setOnClickListener(this);

        // 显示当前日期
        calendar = Calendar.getInstance();
        tv_date.setText(DateUtil.getDate(calendar));
        // 点击弹出日期对话框
        tv_date.setOnClickListener(this);

        tv_option.setOnClickListener(this);
        findViewById(R.id.iv_back).setOnClickListener(this);

        mDBHelper = BillDBHelper.getInstance(this);
        mDBHelper.openReadLink();
        mDBHelper.openWriteLink();
    }

    @Override
    public void onClick(View v) {
        switch (v.getId()) {
            case R.id.tv_date:
                // 弹出日期对话框
                DatePickerDialog dialog = new DatePickerDialog(this, this,
                        calendar.get(Calendar.YEAR),
                        calendar.get(Calendar.MONTH),
                        calendar.get(Calendar.DAY_OF_MONTH));
                dialog.show();
                break;

            case R.id.btn_save:
                // 保存添加信息
                BillInfo bill = new BillInfo();
                bill.date = tv_date.getText().toString();
                bill.type = rg_type.getCheckedRadioButtonId() == R.id.rb_income  ?
                        BillInfo.BILL_TYPE_INCOME : BillInfo.BILL_TYPE_COST;
                bill.remark = et_remark.getText().toString();
                bill.amount = Double.parseDouble(et_amount.getText().toString());
                if (mDBHelper.save(bill) > 0){
                    ToastUtil.show(this, "添加账单成功");
                }
                break;
            case R.id.tv_option:
                // 跳转到添加账单页面
                Intent intent = new Intent(this, BillPagerActivity.class);
                intent.setFlags(Intent.FLAG_ACTIVITY_CLEAR_TOP);
                startActivity(intent);
                break;

            case R.id.iv_back:
                // 关闭当前页面
                finish();
                break;
        }
    }

    @Override
    public void onDateSet(DatePicker view, int year, int month, int dayOfMonth) {
        // 设置给文本显示
        calendar.set(Calendar.YEAR, year);
        calendar.set(Calendar.MONTH, month);
        calendar.set(Calendar.DAY_OF_MONTH, dayOfMonth);
        tv_date.setText(DateUtil.getDate(calendar));
    }

    @Override
    protected void onDestroy() {
        super.onDestroy();
        mDBHelper.closeLink();
    }
}
账单列表
显示数据
我们先来书写账单列表页
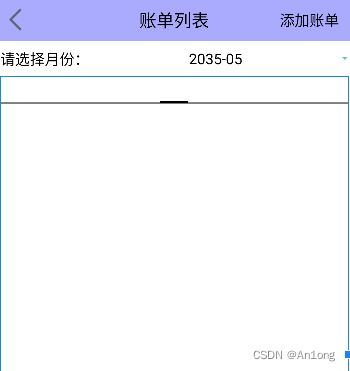 注:底下并不是空白,是一个PagerTapStrip和ViewPager,因此需要两个条目
初始化翻页视图
    // 初始化翻页视图
    private void initViewPager() {
        // 从布局视图中获取名叫pts_bill的翻页标签栏
        PagerTabStrip pts_bill = findViewById(R.id.pts_bill);
        // 设置翻页标签栏的文本大小
        pts_bill.setTextSize(TypedValue.COMPLEX_UNIT_SP, 17);
        vp_bill = findViewById(R.id.vp_bill);
        BillPagerAdpater adapter = new BillPagerAdpater(getSupportFragmentManager(), calendar.get(Calendar.YEAR));
        vp_bill.setAdapter(adapter);
        vp_bill.setCurrentItem(calendar.get(Calendar.MONTH));
    }
我们为viewpager设置一个适配器
package com.example.androidapp.adapter;

import android.util.Log;

import androidx.annotation.NonNull;
import androidx.annotation.Nullable;
import androidx.fragment.app.Fragment;
import androidx.fragment.app.FragmentManager;
import androidx.fragment.app.FragmentPagerAdapter;

import com.example.androidapp.fragments.BillFragment;

public class BillPagerAdpater extends FragmentPagerAdapter {


    private final int mYear;

    public BillPagerAdpater(@NonNull FragmentManager fm, int year) {
        super(fm, BEHAVIOR_RESUME_ONLY_CURRENT_FRAGMENT);
        this.mYear = year;
    }

    @NonNull
    @Override
    public Fragment getItem(int position) {
        int month = position + 1;
        // 9 -> 09 10 -> 10
        String zeroMonth = month < 10 ? "0" + month : String.valueOf(month);
        String yearMonth = mYear + "-" + zeroMonth;
        // 2035-09
        Log.d("ning", yearMonth);
        return BillFragment.newInstance(yearMonth);
    }

    @Override
    public int getCount() {
        return 12;
    }

    @Nullable
    @Override
    public CharSequence getPageTitle(int position) {
        return (position + 1) + "月份";
    }
}
12是因为12个月份,position+1是因为position初始下标是0,此处是设置月份标题显示
这样就可以使用这个适配器了
我们已经在数据库中定义过查询语句了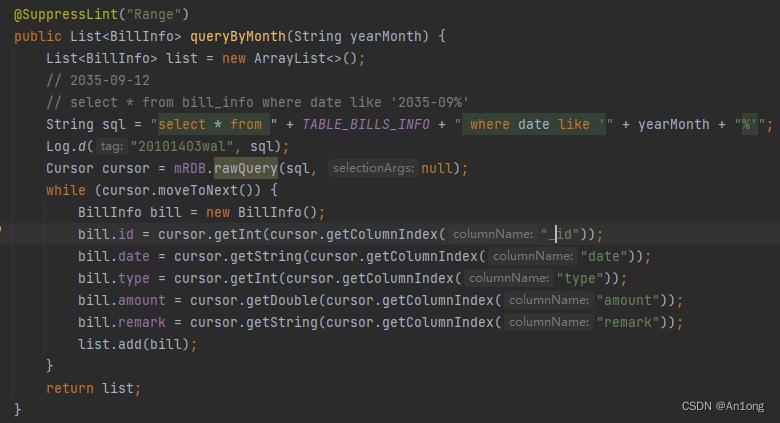
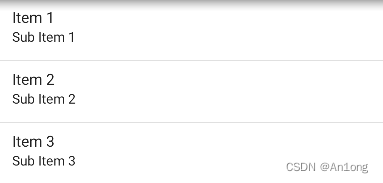
我们现在来书写fragment的布局(只有一个ListView)
<LinearLayout xmlns:android="http://schemas.android.com/apk/res/android"
    android:layout_width="match_parent"
    android:layout_height="match_parent"
    android:gravity="center|top"
    android:orientation="vertical">

    <ListView
        android:id="@+id/lv_bill"
        android:layout_width="match_parent"
        android:layout_height="wrap_content" />

</LinearLayout>
然后我们书写其中的条目
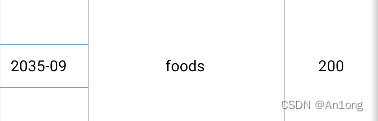
<LinearLayout xmlns:android="http://schemas.android.com/apk/res/android"
    xmlns:tools="http://schemas.android.com/tools"
    android:layout_width="match_parent"
    android:layout_height="match_parent"
    android:orientation="horizontal">

    <TextView
        android:id="@+id/tv_date"
        android:layout_width="0dp"
        android:layout_height="45dp"
        android:layout_weight="1"
        android:gravity="center"
        android:textColor="@color/black"
        android:textSize="16sp"
        tools:text="2035-09" />

    <TextView
        android:id="@+id/tv_remark"
        android:layout_width="0dp"
        android:layout_height="match_parent"
        android:layout_weight="2"
        android:gravity="center"
        android:textColor="@color/black"
        android:textSize="16sp"
        tools:text="foods" />

    <TextView
        android:id="@+id/tv_amount"
        android:layout_width="0dp"
        android:layout_height="match_parent"
        android:layout_weight="1"
        android:gravity="center"
        android:textColor="@color/black"
        android:textSize="16sp"
        tools:text="200" />

</LinearLayout>
使用适配器将条目塞进去
package com.example.androidapp.adapter;

import android.content.Context;
import android.view.LayoutInflater;
import android.view.View;
import android.view.ViewGroup;
import android.widget.BaseAdapter;
import android.widget.TextView;

import com.example.androidapp.R;
import com.example.androidapp.entity.BillInfo;

import java.util.List;

public class BillListAdapter extends BaseAdapter {


    private final Context mContext;
    private final List<BillInfo> mBillList;

    public BillListAdapter(Context context, List<BillInfo> billInfoList) {
        this.mContext = context;
        this.mBillList = billInfoList;
    }

    @Override
    public int getCount() {
        return mBillList.size();
    }

    @Override
    public Object getItem(int position) {
        return mBillList.get(position);
    }

    @Override
    public long getItemId(int position) {
        return mBillList.get(position).id;
    }

    @Override
    public View getView(int position, View convertView, ViewGroup parent) {
        ViewHolder holder;
        if (convertView == null) {
            holder = new ViewHolder();
            convertView = LayoutInflater.from(mContext).inflate(R.layout.item_bill, null);
            holder.tv_date = convertView.findViewById(R.id.tv_date);
            holder.tv_remark = convertView.findViewById(R.id.tv_remark);
            holder.tv_amount = convertView.findViewById(R.id.tv_amount);
            convertView.setTag(holder);
        } else {
            holder = (ViewHolder) convertView.getTag();
        }

        BillInfo bill = mBillList.get(position);
        holder.tv_date.setText(bill.date);
        holder.tv_remark.setText(bill.remark);
        holder.tv_amount.setText(String.format("%s%d元", bill.type == 0 ? "+" : "-", (int) bill.amount));
        return convertView;
    }

    public final class ViewHolder {
        public TextView tv_date;
        public TextView tv_remark;
        public TextView tv_amount;
    }
}
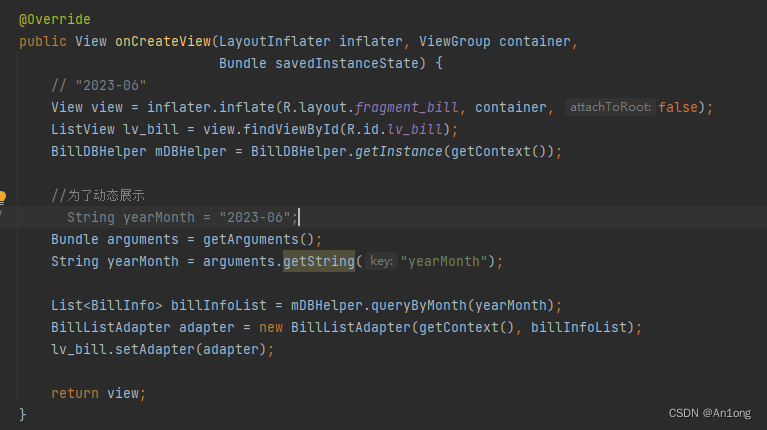
现在,我们可以书写fragment碎片了
package com.example.androidapp.fragments;

import android.os.Bundle;
import android.view.LayoutInflater;
import android.view.View;
import android.view.ViewGroup;
import android.widget.ListView;


import androidx.fragment.app.Fragment;

import com.example.androidapp.R;
import com.example.androidapp.adapter.BillListAdapter;
import com.example.androidapp.database.BillDBHelper;
import com.example.androidapp.entity.BillInfo;

import java.util.List;

public class BillFragment extends Fragment {

    public static BillFragment newInstance(String yearMonth) {
        BillFragment fragment = new BillFragment();
        Bundle args = new Bundle();
        args.putString("yearMonth", yearMonth);
        fragment.setArguments(args);
        return fragment;
    }

    @Override
    public View onCreateView(LayoutInflater inflater, ViewGroup container,
                             Bundle savedInstanceState) {
        // "2012-05"
        View view = inflater.inflate(R.layout.fragment_bill, container, false);
        ListView lv_bill = view.findViewById(R.id.lv_bill);
        BillDBHelper mDBHelper = BillDBHelper.getInstance(getContext());
        Bundle arguments = getArguments();
        String yearMonth = arguments.getString("yearMonth");
        List<BillInfo> billInfoList = mDBHelper.queryByMonth(yearMonth);
        BillListAdapter adapter = new BillListAdapter(getContext(), billInfoList);
        lv_bill.setAdapter(adapter);
        return view;
    }
}
你可能会好奇,我们在构建适配器时为什么要传入一个年份进去
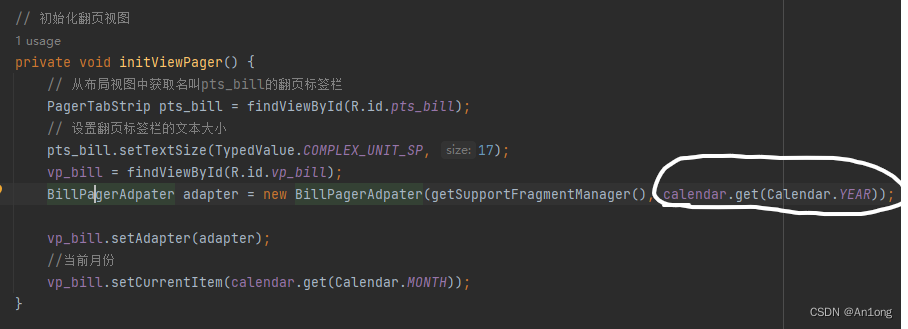
这是因为
我们的碎片中没有现成的动态年月份格式如"2023-06"可以使用从而动态的查询日期,只能使用静态的传入,月份我们可以通过position+1来获取动态月份,而年份没有,所以只能在创建的时候手动传入,
传入之后进入adapter中
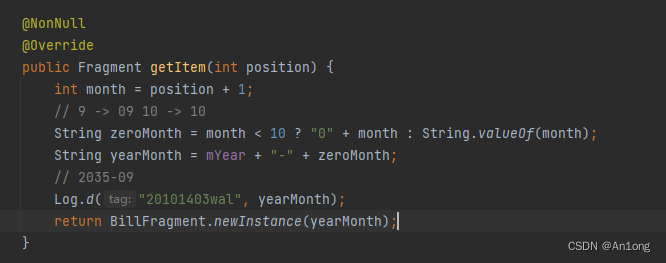
在这里进行现成年月字符串的搭建,将月份和年份搭建成"YYYY-MM"的形式
然后我们得到之后就存入数据包Bundle中可以使用了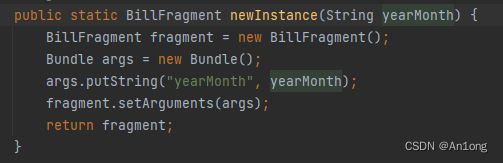
此部分(账单列表)的活动代码如下
package com.example.androidapp;

import android.app.DatePickerDialog;
import android.content.Intent;
import android.os.Bundle;
import android.util.TypedValue;
import android.view.View;
import android.widget.DatePicker;
import android.widget.TextView;

import androidx.appcompat.app.AppCompatActivity;
import androidx.viewpager.widget.PagerTabStrip;
import androidx.viewpager.widget.ViewPager;


import com.example.androidapp.adapter.BillPagerAdpater;
import com.example.androidapp.database.BillDBHelper;
import com.example.androidapp.utils.DateUtil;

import java.util.Calendar;

public class BillPagerActivity extends AppCompatActivity implements View.OnClickListener, DatePickerDialog.OnDateSetListener {

    private TextView tv_month;
    private Calendar calendar;
    private ViewPager vp_bill;
    private BillDBHelper mDBHelper;

    @Override
    protected void onCreate(Bundle savedInstanceState) {
        super.onCreate(savedInstanceState);
        setContentView(R.layout.activity_bill_pager);

        TextView tv_title = findViewById(R.id.tv_title);
        TextView tv_option = findViewById(R.id.tv_option);
        tv_title.setText("账单列表");
        tv_option.setText("添加账单");

        tv_month = findViewById(R.id.tv_month);
        // 显示当前日期
        calendar = Calendar.getInstance();
        tv_month.setText(DateUtil.getMonth(calendar));
        // 点击弹出日期对话框
        tv_month.setOnClickListener(this);

        tv_option.setOnClickListener(this);
        findViewById(R.id.iv_back).setOnClickListener(this);

        mDBHelper = BillDBHelper.getInstance(this);
        mDBHelper.openReadLink();
        mDBHelper.openWriteLink();

        // 初始化翻页视图
        initViewPager();
    }

    // 初始化翻页视图
    private void initViewPager() {
        // 从布局视图中获取名叫pts_bill的翻页标签栏
        PagerTabStrip pts_bill = findViewById(R.id.pts_bill);
        // 设置翻页标签栏的文本大小
        pts_bill.setTextSize(TypedValue.COMPLEX_UNIT_SP, 17);
        vp_bill = findViewById(R.id.vp_bill);
        BillPagerAdpater adapter = new BillPagerAdpater(getSupportFragmentManager(), calendar.get(Calendar.YEAR));

        vp_bill.setAdapter(adapter);
        //当前月份
        vp_bill.setCurrentItem(calendar.get(Calendar.MONTH));
    }

    @Override
    public void onClick(View v) {
        switch (v.getId()) {
            case R.id.tv_month:
                // 弹出日期对话框
                DatePickerDialog dialog = new DatePickerDialog(this, this,
                        //默认是当前时间
                        calendar.get(Calendar.YEAR),
                        calendar.get(Calendar.MONTH),
                        calendar.get(Calendar.DAY_OF_MONTH));
                dialog.show();
                break;
            case R.id.tv_option:
                // 跳转到添加账单页面
                Intent intent = new Intent(this, BillAddActivity.class);
                intent.setFlags(Intent.FLAG_ACTIVITY_CLEAR_TOP);
                startActivity(intent);
                break;

            case R.id.iv_back:
                // 关闭当前页面
                finish();
                break;
        }
    }

    @Override
    public void onDateSet(DatePicker view, int year, int month, int dayOfMonth) {
        // 设置给文本显示
        calendar.set(Calendar.YEAR, year);
        calendar.set(Calendar.MONTH, month);
        calendar.set(Calendar.DAY_OF_MONTH, dayOfMonth);
        tv_month.setText(DateUtil.getMonth(calendar));

        // 设置翻页视图显示第几页
        vp_bill.setCurrentItem(month);
    }

    @Override
    protected void onDestroy() {
        super.onDestroy();
        mDBHelper.closeLink();
    }
}
完成


 1951
1951


 被折叠的 条评论
为什么被折叠?
被折叠的 条评论
为什么被折叠?
 到【灌水乐园】发言


