


一、Celery 介绍
Celery 是一款非常简单、灵活、可靠的分布式系统,可用于处理大量消息,并且提供了一整套操作此系统的一系列工具。
Celery 是一款消息队列工具,可用于处理实时数据以及任务调度。
1.1 什么是任务队列
任务队列一般用于线程或计算机之间分配工作的一种机制。
任务队列的输入是一个称为任务的工作单元,有专门的职程(Worker)进行不断的监视任务队列,进行执行新的任务工作。
Celery 通过消息机制进行通信,通常使用中间人(Broker)作为客户端和职程(Worker)调节。启动一个任务,客户端向消息队列发送一条消息,然后中间人(Broker)将消息传递给一个职程(Worker),最后由职程(Worker)进行执行中间人(Broker)分配的任务。
Celery 可以有多个职程(Worker)和中间人(Broker),用来提高Celery的高可用性以及横向扩展能力。
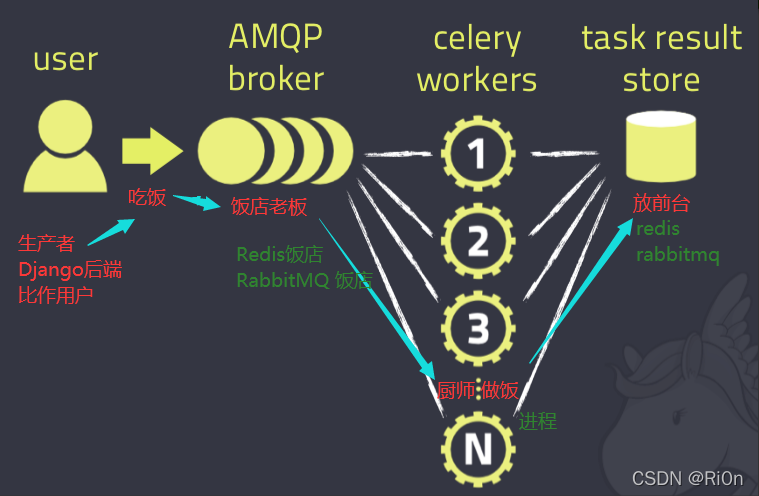
1.2 中间人Broker是什么
Celery 需要一个中间件来进行接收和发送消息,通常以独立的服务形式出现,成为 消息中间人(Broker)
常见的中间人有:
- RabbitMQ
- Redis
1.3 Celery 特点
- 高可用
如果出现丢失连接或连接失败,职程(Worker)和客户端会自动重试,并且中间人通过主/主 主/从的方式来进行提高可用性。 - 快速
单个 Celery 进行每分钟可以处理数以百万的任务,而且延迟仅为亚毫秒(使用 RabbitMQ、 librabbitmq 在优化过后)。 - 灵活
Celery 的每个部分几乎都可以自定义扩展和单独使用,例如自定义连接池、序列化方式、压缩方式、日志记录方式、任务调度、生产者、消费者、中间人(Broker)等。
二、Celery 使用
2.1 安装 Celery
- 安装Celery
pip install celery
pip install eventlet  # Windows平台下需要配合协程来执行任务
我们使用redis来作为中间人
pip install redis
- delay(arg, kwarg=value) 调用任务
需要调用我们创建的实例任务,可以通过delay()进行调用。
delay() 是 apply_async() 的快捷方法,可以更好的控制任务的执行(详情:调用任务:Calling Tasks):>>> from tasks import add >>> add.delay(4, 4)
2.2 简单使用
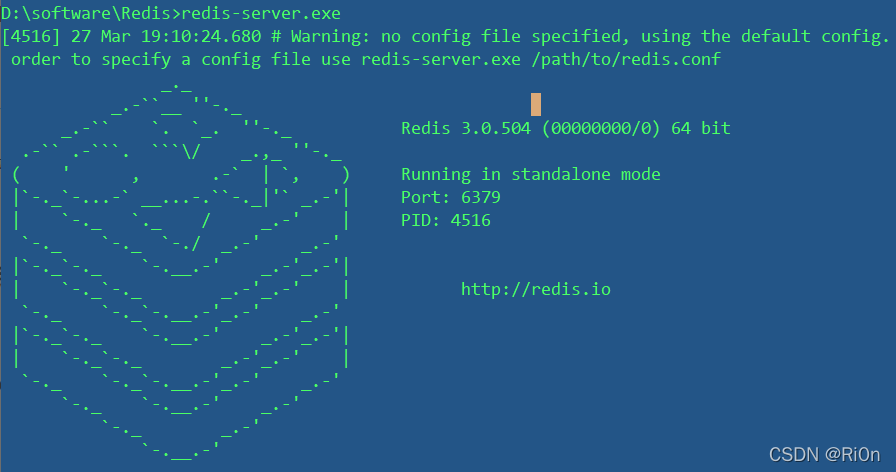
1. 配置broker
(1)启动redis服务端
(2)编写tasks.py
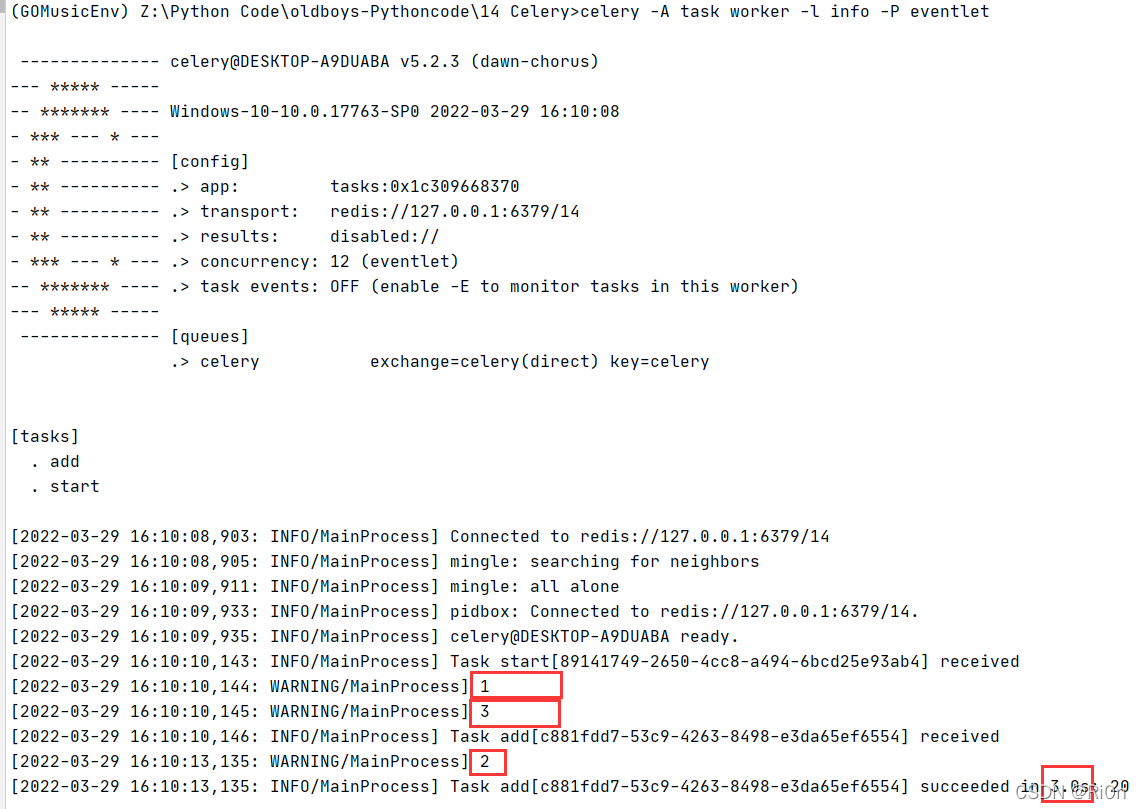
创建一个tasks.py 文件,创建了2个任务,一个用来执行add方法,一个是start方法,当我们执行start方法时,print(1) 之后执行add方法,将执行异步处理,则将add放入另一个进程,主进程会直接print(3) ,2秒之后在print(2)
from celery import Celery
import time
# 第一个参数为当前模块的名称;第二个参数为中间人(Broker)的链接 URL
app = Celery('tasks', broker='redis://127.0.0.1/14')

@app.task(name='add')
def add(x, y):		 # 创建了一个名称为 add 的任务,3秒后返回的俩个数字的和。
    time.sleep(2)
    print(2)
    return x + y

@app.task(name='start')
def start_celery():
    print(1)
    add.delay(10,10)
    print(3)
    time.sleep(400)

start_celery.delay()
(3)执行tasks.py
celery运行tasks.py
celery -A task worker -l info -P eventlet
2. 配置backend 实现存储直接结果
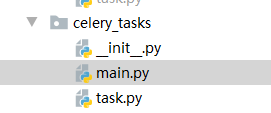
(1)创建文件包及其文件
我们创建一个celery_tasks包,包含入口文件main,和任务文件task
-
task.py 实现发送邮件的任务
import time from celery import Celery broker = 'redis://127.0.0.1/5' # redis数据库5来执行任务 (厨师) backend = 'redis://127.0.0.1/6' # redis数据库6来存储结果 (前台) app = Celery('Celery',broker=broker,backend=backend) @app.task(name='send_mail') def send_email(email): print('开始发送邮件......') time.sleep(3) print('邮件发送完成......') return {"status":"发送成功","email":email} -
main.py 入口文件,调用任务
from celery_tasks.task import send_email

result = send_email.delay('123456@qq.cm')
print(result)
print(result.id)
(2)执行程序
celery -A task worker -l info -P eventlet
右键运行main.py文件,返回结果

(3)获取数据
在celery_tasks包中创建get_result.py 文件
# get_result.py 文件
from celery.result import AsyncResult
from celery_tasks.task import app

async_result=AsyncResult(id="9ac6a4dc-38df-43d6-b328-27039d5ab7ee", app=app)

if async_result.successful():
    result = async_result.get()
    print(result)
    # result.forget() # 将结果删除
elif async_result.failed():
    print('执行失败')
elif async_result.status == 'PENDING':
    print('任务等待中被执行')
elif async_result.status == 'RETRY':
    print('任务异常后正在重试')
elif async_result.status == 'STARTED':
    print('任务已经开始被执行')
2.3 delay() 参数介绍
delay方法本质是调用了apply_async方法

在apply_async 方法定义了很多的接收参数
    def apply_async(self, args=None, kwargs=None, task_id=None, producer=None,
                    link=None, link_error=None, shadow=None, **options):
        """Apply tasks asynchronously by sending a message.

        Arguments:
            args (Tuple): 传递给任务的位置参数.

            kwargs (Dict): 传递给任务的关键字参数.

            countdown (float): 倒计时的秒数,应该执行的任务。默认立即执行

            eta (~datetime.datetime): 当任务的绝对时间和日期,应该被执行,接收 datetime 对象

            expires (float, ~datetime.datetime): 任务执行时间,超过该时间将过期被标记为revoke

            shadow (str): Override task name used in logs/monitoring.
                Default is retrieved from :meth:`shadow_name`.

            connection (kombu.Connection): 重用现有的代理连接,而不是从连接池中获取一个

            retry (bool): If enabled sending of the task message will be
                retried in the event of connection loss or failure.
                Default is taken from the :setting:`task_publish_retry`
                setting.  Note that you need to handle the
                producer/connection manually for this to work.

            retry_policy (Mapping): Override the retry policy used.
                See the :setting:`task_publish_retry_policy` setting.

            time_limit (int): If set, overrides the default time limit.

            soft_time_limit (int): If set, overrides the default soft
                time limit.

            queue (str, kombu.Queue): The queue to route the task to.
                This must be a key present in :setting:`task_queues`, or
                :setting:`task_create_missing_queues` must be
                enabled.  See :ref:`guide-routing` for more
                information.

            exchange (str, kombu.Exchange): Named custom exchange to send the
                task to.  Usually not used in combination with the ``queue``
                argument.

            routing_key (str): Custom routing key used to route the task to a
                worker server.  If in combination with a ``queue`` argument
                only used to specify custom routing keys to topic exchanges.

            priority (int): The task priority, a number between 0 and 9.
                Defaults to the :attr:`priority` attribute.

            serializer (str): Serialization method to use.
                Can be `pickle`, `json`, `yaml`, `msgpack` or any custom
                serialization method that's been registered
                with :mod:`kombu.serialization.registry`.
                Defaults to the :attr:`serializer` attribute.

            compression (str): Optional compression method
                to use.  Can be one of ``zlib``, ``bzip2``,
                or any custom compression methods registered with
                :func:`kombu.compression.register`.
                Defaults to the :setting:`task_compression` setting.

            link (Signature): A single, or a list of tasks signatures
                to apply if the task returns successfully.

            link_error (Signature): A single, or a list of task signatures
                to apply if an error occurs while executing the task.

            producer (kombu.Producer): custom producer to use when publishing
                the task.

            add_to_parent (bool): If set to True (default) and the task
                is applied while executing another task, then the result
                will be appended to the parent tasks ``request.children``
                attribute.  Trailing can also be disabled by default using the
                :attr:`trail` attribute

            ignore_result (bool): If set to `False` (default) the result
                of a task will be stored in the backend. If set to `True`
                the result will not be stored. This can also be set
                using the :attr:`ignore_result` in the `app.task` decorator.

            publisher (kombu.Producer): Deprecated alias to ``producer``.

            headers (Dict): Message headers to be included in the message.

        Returns:
            celery.result.AsyncResult: Promise of future evaluation.

        Raises:
            TypeError: If not enough arguments are passed, or too many
                arguments are passed.  Note that signature checks may
                be disabled by specifying ``@task(typing=False)``.
            kombu.exceptions.OperationalError: If a connection to the
               transport cannot be made, or if the connection is lost.

        Note:
            Also supports all keyword arguments supported by
            :meth:`kombu.Producer.publish`.
        """
    ......
- eta and countdown 倒计时
ETA(estimated time of arrival, 预计到底时间),让你设置一个日期和时间,在这个时间之前任务将被执行。countdown 是一种以秒为单位设置ETA的快捷方式。
>>> result = add.apply_async((2, 2), countdown=3)
>>> result.get()    # 3秒后执行
确保任务在指定的日期和时间之后的某个时间执行,但不一定在该时间执行。可能原因可能包括许多项目在队列中等待,或者严重的网络延迟。为了确保您的任务及时执行,你应该监视队列中的拥塞情况。使用Munin或类似工具来接收警报,因此可以采取适当的措施来减轻负载。
尽管 countdown 是整数,但eta必须是一个 datetime 对象,并指定确切的日期和时间(包括毫秒精度和时区信息):
>>> from datetime import datetime, timedelta

>>> tomorrow = datetime.utcnow() + timedelta(days=1)
>>> add.apply_async((2, 2), eta=tomorrow)
- expries
expries参数定义了一个可选的到期时间,既可以作为任务之后秒发布,或在特定日期和时间使用datetime
>>> # Task expires after one minute from now.
>>> add.apply_async((10, 10), expires=60)

>>> # Also supports datetime
>>> from datetime import datetime, timedelta
>>> add.apply_async((10, 10), kwargs,
...                 expires=datetime.now() + timedelta(days=1)
当 worker 收到过期的任务时,它将任务标记为REVOKED(TaskRevokedError)
三、Django使用Celery发送邮件
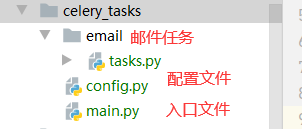
3.1 创建celery包,并创建对应的文件
-
main.py 入口文件
from celery import Celery # 为celery使用django配置文件进行设置 import os if not os.getenv('DJANGO_SETTINGS_MODULE'): os.environ['DJANGO_SETTINGS_MODULE'] = 'GOMusicApi.settings.dev' # 创建celery应用,启动时控制台输出的所指定的应用, app = Celery('GOMusic') # 导入celery配置 app.config_from_object('celery_tasks.config') # 自动注册celery任务 app.autodiscover_tasks(['celery_tasks.email']) -
config.py 配置文件
broker_url = "redis://127.0.0.1/11" result_backend ='redis://127.0.0.1:6379/12' -
email/task.py 任务文件
import logging
from django.core.mail import send_mail
from celery_tasks.main import app

logger = logging.getLogger("django")

@app.task(name='celery_email_verifycode')
def celery_email_verifycode(subject,Vocde,from_email,to_email):
    """
    发送邮箱验证码
    :param subject: 邮件主题
    :param Vocde: 验证码
    :param from_email: 发送方邮箱地址
    :param to_email: 接收方邮件地址
    :return: 成功 1 失败 -1
    """
    try:
        result = send_mail(subject,Vocde,from_email,to_email)
    except Exception as e:
        logger.error("send_email[failed][ email: %s, message: %s ]" % (to_email, e))
    else:
        if result == 1:
            logger.info("send_email[success][ email: %s ]" % to_email)
            return "send_email[success][ email: %s ]" % to_email
            # return 的结果存入redis,通过任务id来获取结果(result.id)
        else:
            logger.warning("send_email[failed][ email: %s ]" % to_email)
            return "send_email[failed][ email: %s ] error:" % to_email
3.2 书写视图
from rest_framework.response import Response
from rest_framework.views import APIView
from celery_tasks.email.tasks import celery_email_verifycode
class EmailView(APIView):
    """
    邮箱接口
    """
    def get(self, request):
    	# 1.获取email
        user_email = request.query_params.get('email')

        # 4.生成验证码
        vcode = random.randint(100000, 999999)
		celery_email_verifycode.delay('青橙音乐网登录/注册验证码', str(vcode_msg), '发送方的QQ邮箱', (user_email,))
		return Response("ok")
如何使用django发送QQ邮箱,后续会出教程,若使用第三方包发送邮件,参考链接:https://blog.csdn.net/m0_56966142/article/details/123603863?spm=1001.2014.3001.5501 里面介绍了如何使用第三方安装包发送QQ邮件
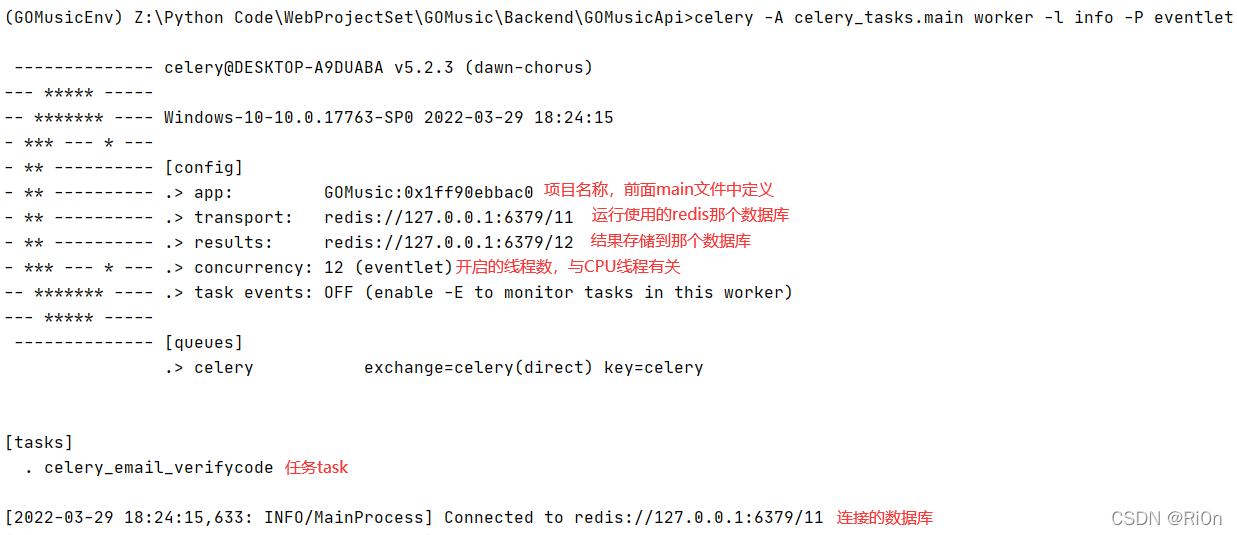
3.3 启动celery并测试
- 启动celery
celery -A celery_tasks.main worker -l info -P eventlet
- Postman发起请求
# 请求接口

http://127.0.0.1:8000/api/user/test/?email=920728039@qq.com
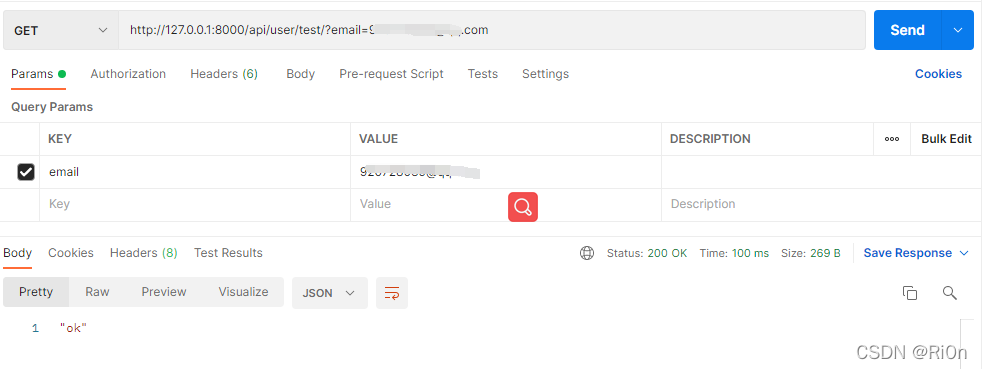
- 测试结果
成功接收短信

更详细的使用教程:
https://www.celerycn.io/fu-lu/django
https://www.cnblogs.com/pyedu/p/12461819.html
Celery的简单使用就到这里了,Celery定时任务的使用请参考上面提供的网址,写的很好。


 716
716


 被折叠的 条评论
为什么被折叠?
被折叠的 条评论
为什么被折叠?
 到【灌水乐园】发言


