


需求:点击按钮导入表格,将表格传入后段接口,获取返回值展示到表格

说明:原本可以前端导入表格后直接展示到页面,但由于表格中缺少后续操作所需的ID值,所以选用以上方法实现
代码:vue + elementUI
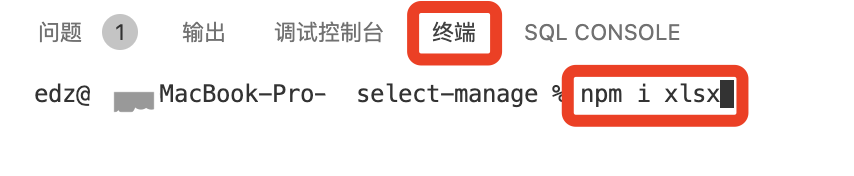
准备工作:引入xlsx
1、使用HTML <label> 标签的 for 属性(for 属性规定 label 与哪个表单元素绑定),绑定隐藏的 <input> 组件,样式自定义符合需求即可
详情:https://www.w3school.com.cn/tags/att_label_for.asp
<el-button>
    <label for="uploadEventFile">导入表格</label>
    <input
        style="display: none"
        id="uploadEventFile"
        name="fileinfo"
        type="file"
        @change="inputCustomProduct($event)"
    />
</el-button>
2、js部分
代码较长,耐心看完吧
<script>
    import xlsx from "xlsx";
    export default {
        methods: {
            // 生成表格
            getHeader(sheet) {
              const XLSX = xlsx;
              const headers = [];
              const range = XLSX.utils.decode_range(sheet["!ref"]);
              let C;
              const R = range.s.r; // 行 // C 列
              let i = 0;
              for (C = range.s.c; C <= range.e.c; ++C) {
                var cell =
                  sheet[
                    XLSX.utils.encode_cell({ c: C, r: R })
                  ];
                var hdr = "UNKNOWN" + C;
                // XLSX.utils.format_cell 生成单元格文本值
                if (cell && cell.t) hdr = XLSX.utils.format_cell(cell);
                // 表格内容为空时,该格自动填写__EMPTY
                if(hdr.indexOf('UNKNOWN') > -1){
                  if(!i) {
                    hdr = '__EMPTY';
                  }else {
                    hdr = '__EMPTY_' + i;
                  }
                  i++;
                }
                headers.push(hdr);
              }
              return headers;
            },
            // input 标签绑定的方法
            inputCustomProduct(e){
               const files = e.target.files;
               // console.log(files);
               if (!files.length) {
                   return ;
               } else if (!/\.(xls|xlsx)$/.test(files[0].name.toLowerCase())) {
                   return alert("上传格式不正确,请上传xls或者xlsx格式");
               }
               const fileReader = new FileReader();
               fileReader.onload = ev => {
                 try {
                   const data = ev.target.result;
                   const XLSX = xlsx;
                   const workbook = XLSX.read(data, {
                     type: "binary"
                   });
                   //取第一张表,wb.SheetNames[0]是获取Sheets中第一个Sheet的名字
                   const wsname = workbook.SheetNames[0];
                   //生成json表格内容,wb.Sheets[Sheet名]获取第一个Sheet的数据
                   const ws = XLSX.utils.sheet_to_json(workbook.Sheets[wsname]);
                   //清空接收数据
                   const excellist = [];
                   //编辑数据
                   for (var i = 0; i < ws.length; i++) {
                     excellist.push(ws[i]);
                   }
                   const a = workbook.Sheets[workbook.SheetNames[0]];
                   const headers = this.getHeader(a);
                   this.setTable(headers, excellist);
                   //导入成功调取后段接口
                   this.getSaveProduct();
                 } catch (e) {
                   return alert("读取失败!");;
                 }
               };
               fileReader.readAsBinaryString(files[0]);
               var input = document.getElementById("uploadEventFile");
               input.value = "";
             },

            setTable(headers, excellist) {
                // 存储表格表头数据
                const tableTitleData = [];
                // 设置表格内容中英文对照用
                const tableMapTitle = {};
                headers.forEach((_, i) => {
                    tableMapTitle[_] = "prop" + i;
                    tableTitleData.push({
                        prop: "prop" + i,
                        label: _,
                        width: 100
                    });
                });
               // 映射表格内容属性名为英文
               const newTableData = [];
               excellist.forEach(_ => {
                   const newObj = {};
                   Object.keys(_).forEach(key => {
                       newObj[tableMapTitle[key]] = _[key];
                   });
                   newTableData.push(newObj);
               });
               let newTableArry = [];
               newTableArry = newTableData.map(item => {
                   // 改变了一下生成数据的属性字段
                   return{
                       applyId:item.prop0,
                       productName:item.prop1,
                       esInfoId:item.prop2,
                       productPrice:item.prop3,
                       businessId: item.prop4,
                       businessName: item.prop5,
                       commissionStartTime: item.prop6,
                       commissionEndTime: item.prop7,
                       commission: item.prop8,
                       serviceChargeStr: item.prop9,
                       eventPrice: item.prop10,
                       surplusNumber: item.prop11,
                       giftInfo: item.prop11,
                       eventPriceMode: item.prop13,
                       extensionUrl: item.prop14
                    }
               })
               this.newTableArry = newTableArry;
               this.tableColumn = tableTitleData;
               this.dataArr = newTableData;
           },
           // 后端接口,按自己的封装请求接口
           getSaveProduct() {
              let userToken = localStorage.getItem("userToken"); // 接口需要传入token
              let data = {}; //接口所需传参
              let headers = { // 请求头,按接口需要传入
                "content-type": "application/json",
                Authorization: userToken,
              };
              this.$http
                .post(url.saveProduct, data, { headers })
                .then((res) => {
                    if (res.data.code === 0) {
                        this.$message({
                        message: res.data.msg,
                        type: "success",
                    });
                    // this.getGroupProductList();
                    } else {
                        this.$message({
                            message: res.data.msg,
                            type: "error",
                        });
                    }
               });
           },
         }
    }
</script>
3、调取后端接口部分,按照自己项目中已有的方法请求就可以,关键是在导入表格成功后写入该接口,实现调取
文章部分借鉴:https://blog.csdn.net/tangdou369098655/article/details/105852838/
欢迎大家提出问题!


 1392
1392


 被折叠的 条评论
为什么被折叠?
被折叠的 条评论
为什么被折叠?
 到【灌水乐园】发言


