


目录
接下来细化一下pinia的三大核心概念 state、action、getter
一、什么是store(如Pinia)
- 它是一个实体,它会持有为绑定到你组件树的状态和业务逻辑,也就是保存了全局状态。
- 它有点像始终存在,并且每个人都可以读取和写入的组件
- 你可以在你的应用程序中定义任意数量的store来管理你的状态
二、store有三个核心概念
- state、getter、actions;
- 等同于组件的data、computed、methods
- 一旦store被实例化、你就可以直接在store上访问state、getters和actions中定义的任何属性;
安装Pinia
npm install pinia
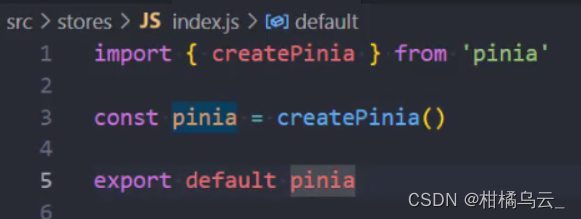
在src文件夹下创建stores文件夹,里面创建入口文件index.js
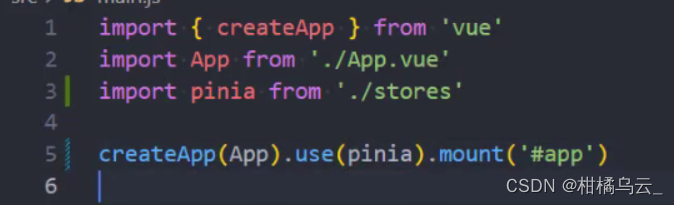
在main.js里面使用pinia
定义store
在深入研究核心概念之前,我们得知道 Store 是用 defineStore() 定义的,它的第一个参数要求是一个独一无二的名字:
import { defineStore } from 'pinia'

// 你可以对 `defineStore()` 的返回值进行任意命名,但最好使用 store 的名字,同时以 `use` 开头且以 `Store` 结尾。(比如 `useUserStore`,`useCartStore`,`useProductStore`)
// 第一个参数是你的应用中 Store 的唯一 ID。
export const useAlertsStore = defineStore('alerts', {
  // 其他配置...
})这个名字 ,也被用作 id ,是必须传入的, Pinia 将用它来连接 store 和 devtools。为了养成习惯性的用法,将返回的函数命名为 use... 是一个符合组合式函数风格的约定。
defineStore() 的第二个参数可接受两类值:Setup 函数或 Option 对象。
1.option对象写法:
与 Vue 的选项式 API 类似,我们也可以传入一个带有 state、actions 与 getters 属性的 Option 对象
export const useCounterStore = defineStore('counter', {
  state: () => ({ count: 0 }),
  getters: {
    double: (state) => state.count * 2,
  },
  actions: {
    increment() {
      this.count++
    },
  },
})
你可以认为 state 是 store 的数据 (data),getters 是 store 的计算属性 (computed),而 actions 则是方法 (methods)。
为方便上手使用,Option Store 应尽可能直观简单。
2.Setup 函数写法
也存在另一种定义 store 的可用语法。与 Vue 组合式 API 的 setup 函数 相似,我们可以传入一个函数,该函数定义了一些响应式属性和方法,并且返回一个带有我们想暴露出去的属性和方法的对象。
export const useCounterStore = defineStore('counter', () => {
  const count = ref(0)
  function increment() {
    count.value++
  }

  return { count, increment }
})
在 Setup Store 中:
ref()就是state属性computed()就是gettersfunction()就是actions
Setup store 比 Option Store 带来了更多的灵活性,因为你可以在一个 store 内创建侦听器,并自由地使用任何组合式函数。不过,请记住,使用组合式函数会让 SSR 变得更加复杂。
使用store
<script setup>
import { useCounterStore } from '@/stores/counter'
// 可以在组件中的任意位置访问 `store` 变量 ✨
const store = useCounterStore()
</script>
pinia建议定义多个store的话,分开写在不同文件里,目的为了比如允许构建工具自动进行代码分割以及 TypeScript 推断。
并且 store使用state的时候不能解构去使用,因为会破坏响应性
<script setup>
const store = useCounterStore()
// ❌ 这将不起作用,因为它破坏了响应性
// 这就和直接解构 `props` 一样
const { name, doubleCount } = store
name // 将始终是 "Eduardo"
doubleCount // 将始终是 0
setTimeout(() => {
  store.increment()
}, 1000)
// ✅ 这样写是响应式的
// 💡 当然你也可以直接使用 `store.doubleCount`
const doubleValue = computed(() => store.doubleCount)
</script>
但是可以通过storeToRefs()解构
<script setup>
import { storeToRefs } from 'pinia'
const store = useCounterStore()
// `name` 和 `doubleCount` 是响应式的 ref
// 同时通过插件添加的属性也会被提取为 ref
// 并且会跳过所有的 action 或非响应式 (不是 ref 或 reactive) 的属性
const { name, doubleCount } = storeToRefs(store)
// 作为 action 的 increment 可以直接解构
const { increment } = store
</script>以上就是pinia的简单使用,但是这是setup语法糖的使用方式,还有你也可以通过映射辅助函数来使用 Pinia
接下来细化一下pinia的三大核心概念 state、action、getter
一、state
import { defineStore } from 'pinia'

const useStore = defineStore('storeId', {
  // 为了完整类型推理,推荐使用箭头函数
  state: () => {
    return {
      // 所有这些属性都将自动推断出它们的类型
      count: 0,
      name: 'Eduardo',
      isAdmin: true,
      items: [],
      hasChanged: true,
    }
  },
})
如果你使用的是 Vue 2,你在
state中创建的数据与 Vue 实例中的data遵循同样的规则,即 state 对象必须是清晰的,当你想向其添加新属性时,你需要调用Vue.set()。参考:Vue#data。
访问 state
默认情况下,你可以通过 store 实例访问 state,直接对其进行读写。
const store = useStore()

store.count++
重置 state
使用选项式 API 时,你可以通过调用 store 的 $reset() 方法将 state 重置为初始值。
const store = useStore()

store.$reset()
setup方式 无法使用$reset() 解决办法:
import { createPinia } from 'pinia'

const store = createPinia()


store.use(({ store }) => {//因为setup语法不能使用$reset ,故重写该方法
  const initialState = JSON.parse(JSON.stringify(store.$state));
  store.$reset = () => {
    store.$patch(initialState);
  }
})


export {
  store
}
变更 state
除了用 store.count++ 直接改变 store,你还可以调用 $patch 方法。它允许你用一个 state 的补丁对象在同一时间更改多个属性:
store.$patch({
  count: store.count + 1,
  age: 120,
  name: 'DIO',
})
不过,用这种语法的话,有些变更真的很难实现或者很耗时:任何集合的修改(例如,向数组中添加、移除一个元素或是做 splice 操作)都需要你创建一个新的集合。因此,$patch 方法也接受一个函数来组合这种难以用补丁对象实现的变更。
store.$patch((state) => {
  state.items.push({ name: 'shoes', quantity: 1 })
  state.hasChanged = true
})
替换 state
你不能完全替换掉 store 的 state,因为那样会破坏其响应性。但是,你可以 patch 它。
// 这实际上并没有替换`$state`
store.$state = { count: 24 }
// 在它内部调用 `$patch()`:
store.$patch({ count: 24 })
你也可以通过变更 pinia 实例的 state 来设置整个应用的初始 state。这常用于 SSR 中的激活过程。
pinia.state.value = {}订阅 state
类似于 Vuex 的 subscribe 方法,你可以通过 store 的 $subscribe() 方法侦听 state 及其变化。比起普通的 watch(),使用 $subscribe() 的好处是 subscriptions 在 patch 后只触发一次 (例如,当使用上面的函数版本时)。
cartStore.$subscribe((mutation, state) => {
  // import { MutationType } from 'pinia'
  mutation.type // 'direct' | 'patch object' | 'patch function'
  // 和 cartStore.$id 一样
  mutation.storeId // 'cart'
  // 只有 mutation.type === 'patch object'的情况下才可用
  mutation.payload // 传递给 cartStore.$patch() 的补丁对象。

  // 每当状态发生变化时,将整个 state 持久化到本地存储。
  localStorage.setItem('cart', JSON.stringify(state))
})默认情况下,state subscription 会被绑定到添加它们的组件上 (如果 store 在组件的 setup() 里面)。这意味着,当该组件被卸载时,它们将被自动删除。如果你想在组件卸载后依旧保留它们,请将 { detached: true } 作为第二个参数,以将 state subscription 从当前组件中分离:
<script setup>
const someStore = useSomeStore()
// 此订阅器即便在组件卸载之后仍会被保留
someStore.$subscribe(callback, { detached: true })
</script>
tips : 你可以在
pinia实例上使用watch()函数侦听整个 state。watch( pinia.state, (state) => { // 每当状态发生变化时,将整个 state 持久化到本地存储。 localStorage.setItem('piniaState', JSON.stringify(state)) }, { deep: true } )
二、Getter
Getter 完全等同于 store 的 state 的计算值。可以通过 defineStore() 中的 getters 属性来定义它们。推荐使用箭头函数,并且它将接收 state 作为第一个参数:
export const useStore = defineStore('main', {
  state: () => ({
    count: 0,
  }),
  getters: {
    doubleCount: (state) => state.count * 2,
  },
})
大多数时候,getter 仅依赖 state,不过,有时它们也可能会使用其他 getter。因此,即使在使用常规函数定义 getter 时,我们也可以通过 this 访问到整个 store 实例,但(在 TypeScript 中)必须定义返回类型。这是为了避免 TypeScript 的已知缺陷,不过这不影响用箭头函数定义的 getter,也不会影响不使用 this 的 getter。
export const useStore = defineStore('main', {
  state: () => ({
    count: 0,
  }),
  getters: {
    // 自动推断出返回类型是一个 number
    doubleCount(state) {
      return state.count * 2
    },
    // 返回类型**必须**明确设置
    doublePlusOne(): number {
      // 整个 store 的 自动补全和类型标注 ✨
      return this.doubleCount + 1
    },
  },
})
然后你可以直接访问 store 实例上的 getter 了:
<script setup>
import { useCounterStore } from './counterStore'
const store = useCounterStore()
</script>
<template>
  <p>Double count is {{ store.doubleCount }}</p>
</template>
访问其他 getter
与计算属性一样,你也可以组合多个 getter。通过 this,你可以访问到其他任何 getter。即使你没有使用 TypeScript,你也可以用 JSDoc 来让你的 IDE 提示类型。
export const useStore = defineStore('main', {
  state: () => ({
    count: 0,
  }),
  getters: {
    // 类型是自动推断出来的,因为我们没有使用 `this`
    doubleCount: (state) => state.count * 2,
    // 这里我们需要自己添加类型(在 JS 中使用 JSDoc)
    // 可以用 this 来引用 getter
    /**
     * 返回 count 的值乘以 2 加 1
     *
     * @returns {number}
     */
    doubleCountPlusOne() {
      // 自动补全 ✨
      return this.doubleCount + 1
    },
  },
})
向 getter 传递参数
Getter 只是幕后的计算属性,所以不可以向它们传递任何参数。不过,你可以从 getter 返回一个函数,该函数可以接受任意参数:
export const useStore = defineStore('main', {
  getters: {
    getUserById: (state) => {
      return (userId) => state.users.find((user) => user.id === userId)
    },
  },
})
并在组件中使用:
<script setup>
import { useUserListStore } from './store'
const userList = useUserListStore()
const { getUserById } = storeToRefs(userList)
// 请注意,你需要使用 `getUserById.value` 来访问
// <script setup> 中的函数
</script>

<template>
  <p>User 2: {{ getUserById(2) }}</p>
</template>请注意,当你这样做时,getter 将不再被缓存,它们只是一个被你调用的函数。不过,你可以在 getter 本身中缓存一些结果,虽然这种做法并不常见,但有证明表明它的性能会更好:
export const useStore = defineStore('main', {
  getters: {
    getActiveUserById(state) {
      const activeUsers = state.users.filter((user) => user.active)
      return (userId) => activeUsers.find((user) => user.id === userId)
    },
  },
})
访问其他 store 的 getter
想要使用另一个 store 的 getter 的话,那就直接在 getter 内使用就好:
import { useOtherStore } from './other-store'

export const useStore = defineStore('main', {
  state: () => ({
    // ...
  }),
  getters: {
    otherGetter(state) {
      const otherStore = useOtherStore()
      return state.localData + otherStore.data
    },
  },
})
使用 setup() 时的用法
作为 store 的一个属性,你可以直接访问任何 getter(与 state 属性完全一样):
<script setup>
const store = useCounterStore()
store.count = 3
store.doubleCount // 6
</script>
使用选项式 API 的用法
// 示例文件路径:
// ./src/stores/counter.js

import { defineStore } from 'pinia'

export const useCounterStore = defineStore('counter', {
  state: () => ({
    count: 0,
  }),
  getters: {
    doubleCount(state) {
      return state.count * 2
    },
  },
})
使用 setup()
虽然并不是每个开发者都会使用组合式 API,但 setup() 钩子依旧可以使 Pinia 在选项式 API 中更易用。并且不需要额外的映射辅助函数!
<script>
import { useCounterStore } from '../stores/counter'

export default defineComponent({
  setup() {
    const counterStore = useCounterStore()

    return { counterStore }
  },
  computed: {
    quadrupleCounter() {
      return this.counterStore.doubleCount * 2
    },
  },
})
</script>
这在将组件从选项式 API 迁移到组合式 API 时很有用,但应该只是一个迁移步骤,始终尽量不要在同一组件中混合两种 API 样式。
不使用 setup()
你可以使用前一节的 state 中的 mapState() 函数来将其映射为 getters:
import { mapState } from 'pinia'
import { useCounterStore } from '../stores/counter'

export default {
  computed: {
    // 允许在组件中访问 this.doubleCount
    // 与从 store.doubleCount 中读取的相同
    ...mapState(useCounterStore, ['doubleCount']),
    // 与上述相同,但将其注册为 this.myOwnName
    ...mapState(useCounterStore, {
      myOwnName: 'doubleCount',
      // 你也可以写一个函数来获得对 store 的访问权
      double: store => store.doubleCount,
    }),
  },
}
三、Action
Action 相当于组件中的 method。它们可以通过 defineStore() 中的 actions 属性来定义,并且它们也是定义业务逻辑的完美选择。
export const useCounterStore = defineStore('main', {
  state: () => ({
    count: 0,
  }),
  actions: {
    increment() {
      this.count++
    },
    randomizeCounter() {
      this.count = Math.round(100 * Math.random())
    },
  },
})
类似 getter,action 也可通过 this 访问整个 store 实例,并支持完整的类型标注(以及自动补全✨)。不同的是,action 可以是异步的,你可以在它们里面 await 调用任何 API,以及其他 action!下面是一个使用 Mande 的例子。请注意,你使用什么库并不重要,只要你得到的是一个Promise,你甚至可以 (在浏览器中) 使用原生 fetch 函数:
import { mande } from 'mande'

const api = mande('/api/users')

export const useUsers = defineStore('users', {
  state: () => ({
    userData: null,
    // ...
  }),

  actions: {
    async registerUser(login, password) {
      try {
        this.userData = await api.post({ login, password })
        showTooltip(`Welcome back ${this.userData.name}!`)
      } catch (error) {
        showTooltip(error)
        // 让表单组件显示错误
        return error
      }
    },
  },
})
你也完全可以自由地设置任何你想要的参数以及返回任何结果。当调用 action 时,一切类型也都是可以被自动推断出来的。
Action 可以像函数或者通常意义上的方法一样被调用:
<script setup>
const store = useCounterStore()
// 将 action 作为 store 的方法进行调用
store.randomizeCounter()
</script>
<template>
  <!-- 即使在模板中也可以 -->
  <button @click="store.randomizeCounter()">Randomize</button>
</template>
访问其他 store 的 action
想要使用另一个 store 的话,那你直接在 action 中调用就好了:
import { useAuthStore } from './auth-store'

export const useSettingsStore = defineStore('settings', {
  state: () => ({
    preferences: null,
    // ...
  }),
  actions: {
    async fetchUserPreferences() {
      const auth = useAuthStore()
      if (auth.isAuthenticated) {
        this.preferences = await fetchPreferences()
      } else {
        throw new Error('User must be authenticated')
      }
    },
  },
})使用选项式 API 的用法
// 示例文件路径:
// ./src/stores/counter.js

import { defineStore } from 'pinia'

const useCounterStore = defineStore('counter', {
  state: () => ({
    count: 0
  }),
  actions: {
    increment() {
      this.count++
    }
  }
})
使用 setup()
虽然并不是每个开发者都会使用组合式 API,但 setup() 钩子依旧可以使 Pinia 在选项式 API 中更易用。并且不需要额外的映射辅助函数!
<script>
import { useCounterStore } from '../stores/counter'
export default defineComponent({
  setup() {
    const counterStore = useCounterStore()
    return { counterStore }
  },
  methods: {
    incrementAndPrint() {
      this.counterStore.increment()
      console.log('New Count:', this.counterStore.count)
    },
  },
})
</script>
不使用 setup()
如果你不喜欢使用组合式 API,你也可以使用 mapActions() 辅助函数将 action 属性映射为你组件中的方法。
import { mapActions } from 'pinia'
import { useCounterStore } from '../stores/counter'

export default {
  methods: {
    // 访问组件内的 this.increment()
    // 与从 store.increment() 调用相同
    ...mapActions(useCounterStore, ['increment'])
    // 与上述相同,但将其注册为this.myOwnName()
    ...mapActions(useCounterStore, { myOwnName: 'increment' }),
  },
}
订阅 action
你可以通过 store.$onAction() 来监听 action 和它们的结果。传递给它的回调函数会在 action 本身之前执行。after 表示在 promise 解决之后,允许你在 action 解决后执行一个回调函数。同样地,onError 允许你在 action 抛出错误或 reject 时执行一个回调函数。这些函数对于追踪运行时错误非常有用,类似于Vue docs 中的这个提示。
这里有一个例子,在运行 action 之前以及 action resolve/reject 之后打印日志记录。
const unsubscribe = someStore.$onAction(
  ({
    name, // action 名称
    store, // store 实例,类似 `someStore`
    args, // 传递给 action 的参数数组
    after, // 在 action 返回或解决后的钩子
    onError, // action 抛出或拒绝的钩子
  }) => {
    // 为这个特定的 action 调用提供一个共享变量
    const startTime = Date.now()
    // 这将在执行 "store "的 action 之前触发。
    console.log(`Start "${name}" with params [${args.join(', ')}].`)

    // 这将在 action 成功并完全运行后触发。
    // 它等待着任何返回的 promise
    after((result) => {
      console.log(
        `Finished "${name}" after ${
          Date.now() - startTime
        }ms.\nResult: ${result}.`
      )
    })

    // 如果 action 抛出或返回一个拒绝的 promise,这将触发
    onError((error) => {
      console.warn(
        `Failed "${name}" after ${Date.now() - startTime}ms.\nError: ${error}.`
      )
    })
  }
)

// 手动删除监听器
unsubscribe()默认情况下,action 订阅器会被绑定到添加它们的组件上(如果 store 在组件的 setup() 内)。这意味着,当该组件被卸载时,它们将被自动删除。如果你想在组件卸载后依旧保留它们,请将 true 作为第二个参数传递给 action 订阅器,以便将其从当前组件中分离:
<script setup>
const someStore = useSomeStore()
// 此订阅器即便在组件卸载之后仍会被保留
someStore.$onAction(callback, true)
</script>


 791
791


 被折叠的 条评论
为什么被折叠?
被折叠的 条评论
为什么被折叠?
 到【灌水乐园】发言


