


一、样式隔离方案
css 的样式是全局样式,在书写react组件时,如果写了相同的样式类名,很容易造成样式污染。
在 vue 中,vue 官方提供了样式隔离方法,在组件代码中的 style 标签中加入 scoped,可以让这部分样式代码只在当前作用域(也就是这个组件)中生效。而 react 官方并没有给出样式隔离方案,我们可以采用自定义命名规范,也可以使用第三方库来进行样式隔离。
react 中的样式隔离方案主要有以下三种:
(1) 自定义样式类命名规范,也可以直接使用 BEM 规范;
(2) css module;
(3) css-in-js。
二、BEM 规范
BEM是一种 css 命名方法论,样式类命名为块(Block)、元素(Element)、修饰符(Modifier)的简写。统一的样式类命名方法让 css 便于统一团队开发规范,方便维护。
样式类以 .block__element--modifier 的形式命名,即模块名 + 元素名 + 修饰名
如 .tab-container__item--active,代表 tab 页组件中激活的 tab 页。
三、css module
1. css module 简介
css module 是一种将 css 文件和组件关联起来的方案。它使用不同的命名约定,将 CSS 类名转换为局部作用域的类名,以确保样式仅应用于当前组件。使用 css module,我们可以在组件中导入样式文件,并使用导出的类名来应用样式。这种方式避免了全局样式冲突的问题。
css module 不是官方标准,也不是浏览器的特性,而是在构建步骤(如使用 webpack)中对 css 类名和选择器限定作用域(类似于命名空间)的一种方式。现在 webpack 已经默认开启 css module 功能。
2. css module 使用方法
使用 css module 需要新建一个 css 文件,命名为 组件名.moudle.css,在其中以类选择器和标签选择器的形式写样式代码。在组件代码中以模块的形式引入,然后用 className 使用样式类。
如下面是一个使用 css module 设置样式后的计数器组件:
// Counter.jsx
import {useState} from 'react';
import styles from './Counter.module.css';

export default function Counter() {
  const [count, setCount] = useState(0);
  return (
      <div className={styles.container}>
        <h3>这是一个计数器</h3>
        <span className={styles.number}>{count}</span>
        <button onClick={() => setCount(c => c + 1)}>+</button>
      </div>
  );
}
/* Counter.module.css */
.container {
margin-top: 20px;
}
h3 {
color: red;
}
.number {
color: red;
font-weight: bold;
margin-right: 10px;
}注意:
(1) 类名最好使用驼峰命名,因为最终类名会生成 styles 的一个属性。
(2) css 文件后缀一定要是 .module.css。
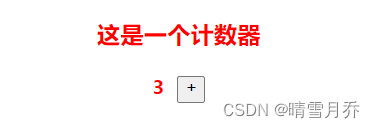
3. 效果演示
以下是上述计数器组件的效果展示:

四、emotion
css-in-js 是一种将样式直接写入组件代码中的方案。它通过在组件内部定义样式对象或使用特定的css-in-js 库,将样式与组件紧密集成在一起。这种方式通常使用 JavaScript 对象或模板字面量语法来描述样式,并在运行时将其转换为相应的 css。一些常见的 css-in-js 库有 styled components 和 emotion。这里详细介绍如何使用 emotion。
1. 引入 emotion
(1) 安装 emotion 依赖
yarn add @emotion/react
(2) 在组件代码中使用
/** @jsxRuntime classic */
/** @jsx jsx */
import {jsx, css} from '@emotion/react';
2. 简单使用
可以用 emotion 的语法,直接以行内样式的形式写样式代码。如:
/** @jsxRuntime classic */
/** @jsx jsx */
import {jsx, css} from '@emotion/react';
import {useState} from 'react';

export default function Counter() {
  const [count, setCount] = useState(0);
  return (
      <div css={css`margin-top: 20px;`}>
        <h3 css={css`color: red`}>这是一个计数器</h3>
        <span css={css`
          color: red;
          font-weight: bold;
          margin-right: 10px;
        `}>{count}</span>
        <button onClick={() => setCount(c => c + 1)}>+</button>
      </div>
  );
}
效果和上面使用 css module 一样。
3. 样式定义
使用样式定义的方法,可以实现样式的复用,写法更类似于 css 中得类选择器。
/** @jsxRuntime classic */
/** @jsx jsx */
import {jsx, css} from '@emotion/react';
import {useState} from 'react';

export default function Counter() {
  const styles = {
    container: css`
      margin-top: 20px;
    `,
    h3: css`
      color: red;
    `,
    number: css`
      color: red;
      font-weight: bold;
      margin-right: 10px;
    `
  }
  const [count, setCount] = useState(0);
  return (
      <div css={css`${styles.container}`}>
        <h3 css={css`${styles.h3}`}>这是一个计数器</h3>
        <span css={css`${styles.number}`}>{count}</span>
        <button onClick={() => setCount(c => c + 1)}>+</button>
      </div>
  );
}
可以先在 js 代码中进行样式定义,在 jsx 代码中使用,实现了样式复用。
4. 样式嵌套
emotion 支持样式嵌套,在一个组件的样式上定义其后代组件的样式。
/** @jsxRuntime classic */
/** @jsx jsx */
import {jsx, css} from '@emotion/react';
import {useState} from 'react';

export default function Counter() {
  const styles = {
    container: css`
      margin-top: 20px;
      h3 {
        color: red;
      }
      .number {
        color: red;
        font-weight: bold;
        margin-right: 10px;
      }
    `
  }
  const [count, setCount] = useState(0);
  return (
      <div css={css`${styles.container}`}>
        <h3>这是一个计数器</h3>
        <span className="number">{count}</span>
        <button onClick={() => setCount(c => c + 1)}>+</button>
      </div>
  );
}
5. 样式层叠
emotion 支持在一个组件上使用多个样式定义,相同样式后定义的会覆盖先定义的。
/** @jsxRuntime classic */
/** @jsx jsx */
import {jsx, css} from '@emotion/react';
import {useState} from 'react';

export default function Counter() {
  const styles = {
    container: css`
      margin-top: 20px;
    `,
    h3: css`
      color: red;
    `,
    number: css`
      color: red;
      font-weight: bold;
      margin-right: 10px;
    `,
    blue: css`
      color: blue;
    `
  }
  const [count, setCount] = useState(0);
  return (
      <div css={css`${styles.container}`}>
        <h3 css={css`${styles.h3} ${styles.blue}`}>这是一个计数器</h3>
        <span css={css`${styles.number} ${styles.blue}`}>{count}</span>
        <button onClick={() => setCount(c => c + 1)}>+</button>
      </div>
  );
}
如上所示,我们定义了样式 blue 将 color 设置为蓝色,覆盖了上面定义的红色样式。


 534
534

 被折叠的 条评论
为什么被折叠?
被折叠的 条评论
为什么被折叠?
 到【灌水乐园】发言


