XXL-JOB配置nacos看上一个文章:
这里有两种方法:
第一种:使用Spring框架的RestTemplate进行远程调用API
第二种:使用OpenFeign进行远程调用
本次远程调用其他服务,是在执行器的中使用的。
RestTemplate进行远程调用
- 使用RestTemplate需要在执行器中注入这个Bean(@Autowired),但是会报错
Consider defining a bean of type ‘org.springframework.web.client.RestTemplate‘ in your configuration
解决方法:
在config包下创建一个📎RestTemplateConfig.java,注入restTemplate对象
@Configuration
public class RestTemplateConfig {

    @Bean
    public RestTemplate restTemplate(RestTemplateBuilder builder){
        return builder.build();
    }

}
.
- 在执行器中注入DiscoverClient和RestTemplate,实现远程调用
    @Autowired
    private DiscoveryClient discoveryClient;

    @Autowired
    private RestTemplate restTemplate;


    // 这里写你具体需要实现的定时任务
    @XxlJob("selectShopJobHandler")
    public void selectShop() throws Exception {
        // 获取远程服务对象
        List<ServiceInstance> instances = discoveryClient.getInstances("hmdp-service");
        ServiceInstance instance = instances.get(0);

        // 执行远程服务对象的API
        ResponseEntity<Object> response = restTemplate.exchange(
                instance.getUri() + "/shop/1",
                HttpMethod.GET,
                null,
                new ParameterizedTypeReference<Object>() {
                }
        );

        // 输出数据
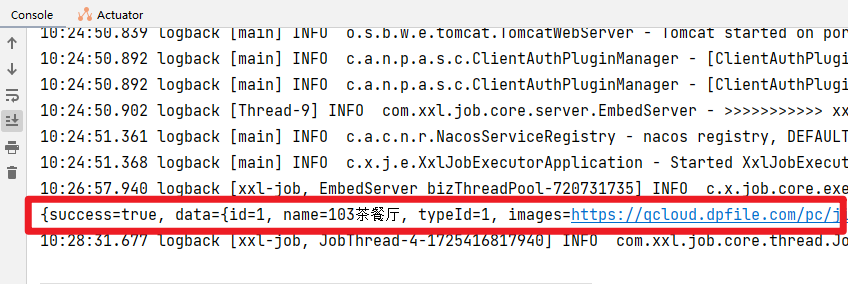
        System.out.println(response.getBody());

    }
OpenFeign进行远程调用
引入依赖
在cart-service服务的pom.xml中引入OpenFeign的依赖和loadBalancer依赖:
<!--负载均衡器-->
<dependency>
  <groupId>org.springframework.cloud</groupId>
  <artifactId>spring-cloud-starter-loadbalancer</artifactId>
  <version>3.1.7</version>
</dependency>
<!-- openfeign -->
<dependency>
  <groupId>org.springframework.cloud</groupId>
  <artifactId>spring-cloud-starter-openfeign</artifactId>
  <version>3.1.8</version>
</dependency>
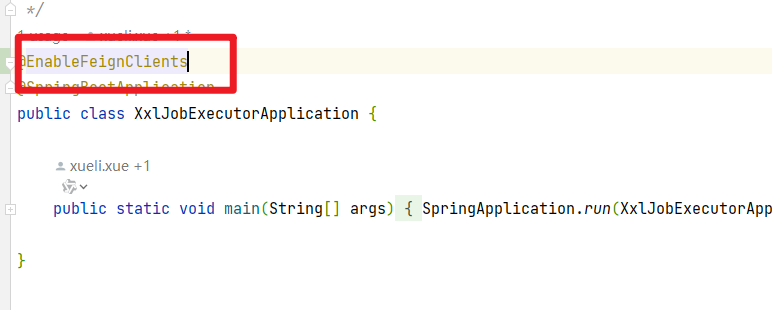
启用OpenFeign
我们在Application启动类上添加注解,启动OpenFeign功能:

编写OpenFeign客户端
其中代码如下:
@FeignClient("hmdp-service")
public interface HmdpClient {

    @GetMapping("shop/{id}")
    Result queryShopById(@PathVariable("id") Long id);

}
这里只需要声明接口,无需实现方法。接口中的几个关键信息:
- @FeignClient("hmdp-service") :声明服务名称
- @GetMapping :声明请求方式
- @GetMapping("shop/{id}") :声明请求路径
- @PathVariable("id") Long id :声明请求参数
- Result :返回值类型(这个是我自定义的)
Result类: 需要导入lombok依赖
package com.xxl.job.executor.feign;

import lombok.AllArgsConstructor;
import lombok.Data;
import lombok.NoArgsConstructor;

import java.util.List;

@Data
@NoArgsConstructor
@AllArgsConstructor
public class Result {
    private Boolean success;
    private String errorMsg;
    private Object data;
    private Long total;

    public static Result ok(){
        return new Result(true, null, null, null);
    }
    public static Result ok(Object data){
        return new Result(true, null, data, null);
    }
    public static Result ok(List<?> data, Long total){
        return new Result(true, null, data, total);
    }
    public static Result fail(String errorMsg){
        return new Result(false, errorMsg, null, null);
    }
}
我们只需要直接调用这个方法,即可实现远程调用了。
使用FeignClient
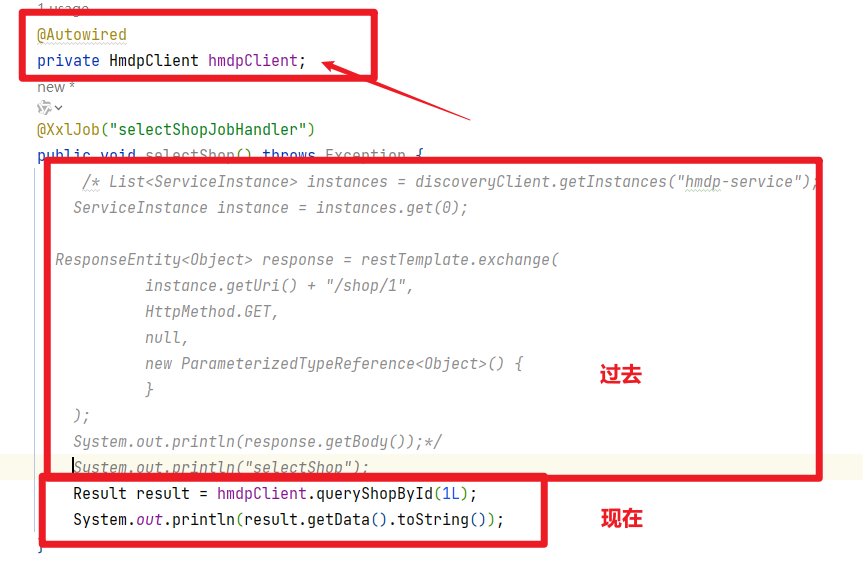
最后,改造代码,直接调用HmdpClient的方法:

feign替我们完成了服务拉取、负载均衡、发送http请求的所有工作,还省去了RestTemplate的注册。
连接池
Feign底层发起http请求,依赖于其它的框架。其底层支持的http客户端实现包括:
- HttpURLConnection:默认实现,不支持连接池
- Apache HttpClient :支持连接池
- OKHttp:支持连接池
因此我们通常会使用带有连接池的客户端来代替默认的HttpURLConnection。比如,我们使用OK Http.
引入依赖
在执行器xxl-job-executor-sample-springboot的pom.xml中引入依赖:
<!--OKHttp-->
<dependency>
  <groupId>io.github.openfeign</groupId>
  <artifactId>feign-okhttp</artifactId>
  <version>11.8</version>
</dependency>
开启连接池
在执行器xxl-job-executor-sample-springboo的application.properties配置文件中开启Feign的连接池功能:
# 开启okhttp
spring.cloud.openfeign.okhttp.enabled=true
重启服务,连接池就生效了。


 1839
1839

 被折叠的 条评论
为什么被折叠?


