


实验环境:一台FTP服务器,一台客户端
FTP服务器匿名访问
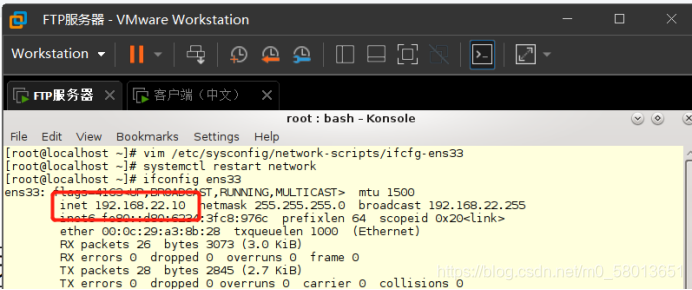
- 重启两台虚拟机的网络服务
FTP服务器的
[root@localhost ~]# systemctl restart network
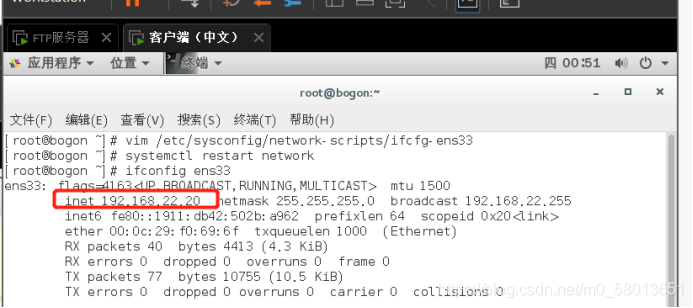
客户端的
[root@bogon ~]# systemctl restart network
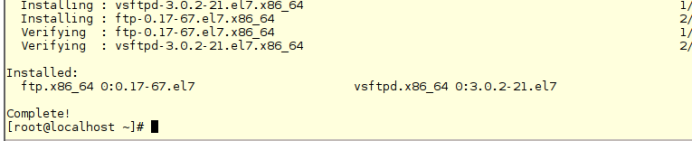
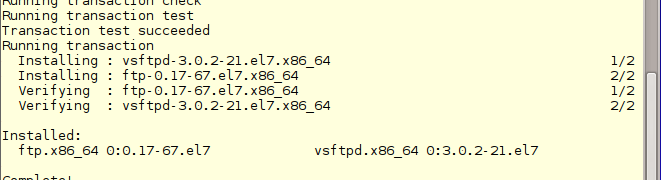
然后在FTP服务器上用yum安装VSFTPD及FTP服务器
[root@localhost ~]# yum -y install vsftpd ftp
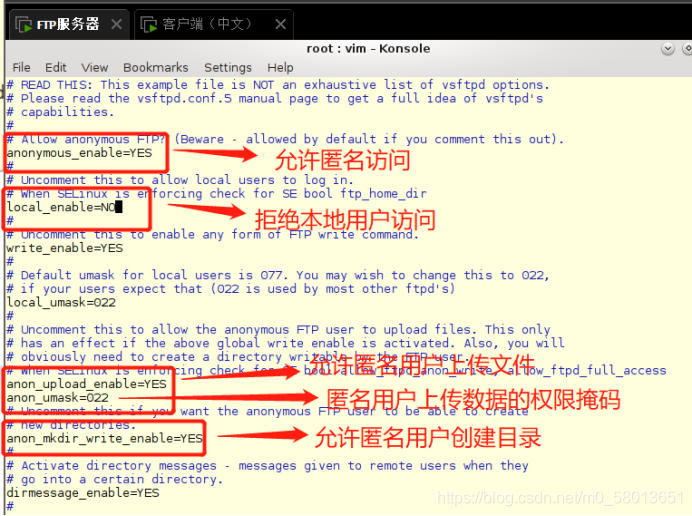
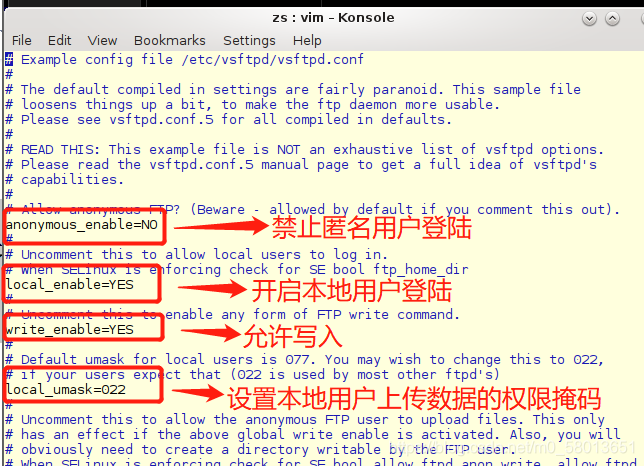
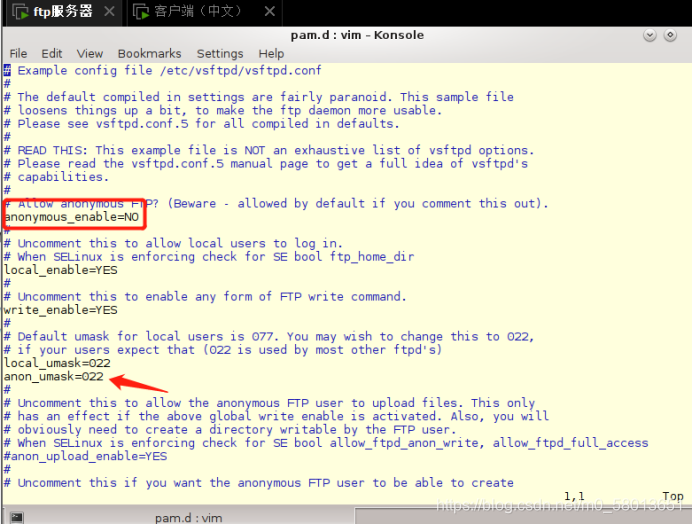
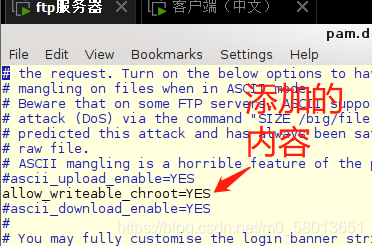
编辑主配置文件vsftpd.conf
[root@localhost ~]# vim /etc/vsftpd/vsftpd.conf
[root@localhost ~]# systemctl start vsftpd 开启ftp服务
[root@localhost ~]# systemctl stop firewalld 关闭防火墙
[root@localhost ~]# setenforce 0 降低沙盒级别
[root@localhost ~]# cd /var/ftp 切换到主目录下
[root@localhost ftp]# ls 查看
pub
[root@localhost ftp]# touch 1.txt 创建文件1.txt
[root@localhost ftp]# chmod 755 /var/ftp 给/ftp755的权限,因为客户端访问需要
2.切换到客户端来进行访问
[root@bogon ~]# yum -y install ftp 安装ftp服务

[root@bogon ~]# ftp 192.168.22.10 访问ftp服务器IP
Connected to 192.168.22.10 (192.168.22.10).
220 (vsFTPd 3.0.2)
Name (192.168.22.10:root): ftp ftp登陆
331 Please specify the password.
Password: 无密码
230 Login successful.
Remote system type is UNIX.
Using binary mode to transfer files.
ftp> ls 查看是有1.txt
227 Entering Passive Mode (192,168,22,10,124,89).
150 Here comes the directory listing.
-rw-r--r-- 1 0 0 0 Jun 16 16:59 1.txt
drwxr-xr-x 2 0 0 6 Nov 05 2016 pub
226 Directory send OK.
ftp> get 1.txt 下载到当前路径1.txt文件
local: 1.txt remote: 1.txt
227 Entering Passive Mode (192,168,22,10,156,161).
150 Opening BINARY mode data connection for 1.txt (0 bytes).
226 Transfer complete.
ftp> quit退出

[root@bogon ~]# touch 2.txt 在客户端当前路径创建2.txt文件来上传到ftp上
ftp> put 2.txt 上传
local: 2.txt remote: 2.txt 上传失败,因为权限不够
227 Entering Passive Mode (192,168,22,10,63,230).
553 Could not create file.
现在回到ftp服务器上给/ftp777权限
[root@localhost ftp]# chmod 777 /var/ftp
然后切换到客户端验证能否上传
ftp> put 2.txt
local: 2.txt remote: 2.txt
227 Entering Passive Mode (192,168,22,10,245,170).
150 Ok to send data.
226 Transfer complete.
ftp> ls
227 Entering Passive Mode (192,168,22,10,44,189).
150 Here comes the directory listing.
-rw-r--r-- 1 0 0 0 Jun 16 16:59 1.txt
-rw-r--r-- 1 14 50 0 Jun 16 17:07 2.txt
drwxr-xr-x 2 0 0 6 Nov 05 2016 pub
226 Directory send OK.
FTP服务器本地用户访问
实验环境:同上
- 安装ftp服务器并编辑ftp的主配置文件
[root@localhost ~]# yum -y install vsftpd ftp
[root@localhost zs]# vim /etc/vsftpd/vsftpd.conf
然后创建用户zs
[root@localhost ~]# useradd zs 创建用户zs
[root@localhost ~]# passwd zs 激活用户zs
Changing password for user zs.
New password: 密码123
BAD PASSWORD: The password is shorter than 8 characters
Retype new password:
passwd: all authentication tokens updated successfully.
[root@localhost ~]# systemctl start vsftpd 开启ftp服务器
[root@localhost ~]# systemctl stop firewalld 关闭防火墙
[root@localhost ~]# setenforce 0 降低沙盒级别
[root@localhost ~]# cd /home/zs 切换到zs用户下
[root@localhost zs]# touch 1.txt 创建1.txt文件
[root@localhost zs]# ls 查看
1.txt
2.切换到客户端(已经安装ftp)
[root@localhost ~]# ftp 192.168.22.10 访问ftp
Connected to 192.168.22.10 (192.168.22.10).
220 (vsFTPd 3.0.2)
Name (192.168.22.10:root): zs zs用户登陆
331 Please specify the password.
Password: 密码
230 Login successful.
Remote system type is UNIX.
Using binary mode to transfer files.
ftp> ls 查看
227 Entering Passive Mode (192,168,22,10,30,40).
150 Here comes the directory listing.
-rw-r--r-- 1 0 0 0 Jun 16 17:32 1.txt 有1.txt文件
226 Directory send OK.
ftp> get 1.txt 下载1.txt文件
local: 1.txt remote: 1.txt
227 Entering Passive Mode (192,168,22,10,84,239).
150 Opening BINARY mode data connection for 1.txt (0 bytes).
226 Transfer complete.
ftp> quit 退出
221 Goodbye.
[root@localhost ~]# ls 查看当前路径
1.txt initial-setup-ks.cfg 模板 图片 下载 桌面
anaconda-ks.cfg 公共 视频 文档 音乐
[root@localhost ~]# touch 2.txt 创建2.txt文件
[root@localhost ~]# ftp 192.168.22.10
Connected to 192.168.22.10 (192.168.22.10).
220 (vsFTPd 3.0.2)
Name (192.168.22.10:root): zs
331 Please specify the password.
Password:
230 Login successful.
Remote system type is UNIX.
Using binary mode to transfer files.
ftp> ls 查看
227 Entering Passive Mode (192,168,22,10,238,137).
150 Here comes the directory listing.
-rw-r--r-- 1 0 0 0 Jun 16 17:32 1.txt
226 Directory send OK.
ftp> put 2.txt 上传2.txt文件
local: 2.txt remote: 2.txt
227 Entering Passive Mode (192,168,22,10,242,234).
150 Ok to send data.
226 Transfer complete.
ftp> ls 查看
227 Entering Passive Mode (192,168,22,10,230,27).
150 Here comes the directory listing.
-rw-r--r-- 1 0 0 0 Jun 16 17:32 1.txt
-rw-r--r-- 1 1001 1001 0 Jun 16 17:36 2.txt 创建成功
226 Directory send OK.
切换到ftp服务器查看/home/zs下有没有2.txt文件
[root@localhost zs]# ls
1.txt 2.txt

验证成功
FTP服务器虚拟用户访问
实验环境:同上
- yum安装ftp服务器
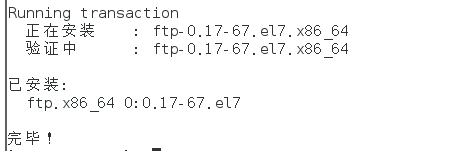
[root@localhost ~]# yum -y install vsftpd

[root@localhost ~]# cd /etc/vsftpd/ 切换到/etc/vsftpd路径
[root@localhost vsftpd]# vim vuser.list 编辑虚拟FTP用户账号数据库
xiaokui
123
xiaolu
123
~
~
[root@localhost vsftpd]# db_load -T -t hash -f vuser.list vuser.db db_load工具转换数据库文件
[root@bogon vsftpd]# chown 600 /etc/vsftpd/vuser.* 提高虚拟账号文件的安全性,修改权限
[root@localhost vsftpd]# useradd -d /wdnmd -s /sbin/nologin xk 创建本地用户
[root@bogon vsftpd]# cd /wdnmd
[root@bogon wdnmd]# touch 1.txt
[root@bogon wdnmd]# ls
1.txt
[root@localhost vsftpd]# chmod 755 /wdnmd 给目录权限
[root@localhost vsftpd]# cd /etc/pam.d 为虚拟用户建立pam认证文件
[root@localhost pam.d]# ls
atd gdm-launch-environment passwd setup system-auth
chfn gdm-password password-auth smartcard-auth system-auth-ac
chsh gdm-pin password-auth-ac smartcard-auth-ac systemd-user
config-util gdm-smartcard polkit-1 smtp vlock
crond kcheckpass postlogin smtp.postfix vmtoolsd
cups kscreensaver postlogin-ac sshd vsftpd
fingerprint-auth ksu ppp su xserver
fingerprint-auth-ac liveinst remote sudo
gdm-autologin login runuser sudo-i
gdm-fingerprint other runuser-l su-l
[root@localhost pam.d]# cp vsftpd vsftpd.conf 防止丢失或错误,复制一个先
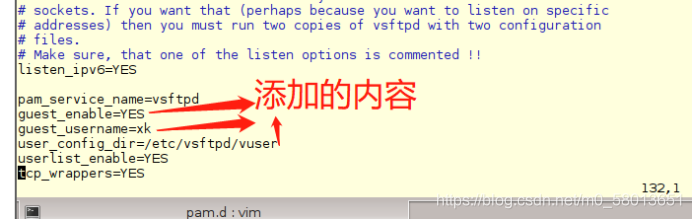
[root@localhost pam.d]# vim vsftpd 编辑

[root@localhost pam.d]# vim /etc/vsftpd/vsftpd.conf 编辑主配置文件
[root@localhost pam.d]# cd /etc/vsftpd/
[root@localhost vsftpd]# mkdir vuser_dir 为不同的用户建立独立的配置文件,设置不同访问权限
[root@localhost vsftpd]# cd vuser_dir/
[root@localhost vuser_dir]# touch xiaokui
[root@localhost vuser_dir]# touch xiaolu
[root@localhost vuser_dir]# vim xiaokui
anon_upload_enable=YES
anon_mkdir_write_enable=YES
~
[root@localhost pam.d]# setenforce 0 降低沙盒级别
[root@localhost pam.d]# systemctl stop firewalld
[root@localhost vuser_dir]# systemctl start vsftpd
2.切换到客户端验证
[root@localhost ~]#yum -y install ftp
[root@bogon ~]# ftp 192.168.22.132
Connected to 192.168.22.132 (192.168.22.132).
220 (vsFTPd 3.0.2)
Name (192.168.22.132:root): xiaokui xiaokui虚拟用户
331 Please specify the password.
Password:
230 Login successful.
Remote system type is UNIX.
Using binary mode to transfer files.
ftp> ls
227 Entering Passive Mode (192,168,22,132,208,51).
150 Here comes the directory listing.
-rw-r--r-- 1 0 0 0 Jun 18 16:33 1.txt
226 Directory send OK.
ftp> get 1.txt 可下载
local: 1.txt remote: 1.txt
227 Entering Passive Mode (192,168,22,132,197,144).
150 Opening BINARY mode data connection for 1.txt (0 bytes).
226 Transfer complete.
ftp> put 2.txt 可上传
local: 2.txt remote: 2.txt
227 Entering Passive Mode (192,168,22,132,36,12).
150 Ok to send data.
226 Transfer complete.
ftp> ls
227 Entering Passive Mode (192,168,22,132,71,38).
150 Here comes the directory listing.
-rw-r--r-- 1 0 0 0 Jun 18 16:33 1.txt
-rw-r--r-- 1 1001 1001 0 Jun 18 16:42 2.txt
226 Directory send OK.
![]()

Xiaokui虚拟用户可上传可下载
Xiaolu虚拟用户
[root@bogon ~]# ftp 192.168.22.132
Connected to 192.168.22.132 (192.168.22.132).
220 (vsFTPd 3.0.2)
Name (192.168.22.132:root): xiaolu
331 Please specify the password.
Password:
230 Login successful.
Remote system type is UNIX.
Using binary mode to transfer files.
ftp> ls
227 Entering Passive Mode (192,168,22,132,33,165).
150 Here comes the directory listing.
-rw-r--r-- 1 0 0 0 Jun 18 16:33 1.txt
-rw-r--r-- 1 1001 1001 0 Jun 18 16:42 2.txt
-rw-r--r-- 1 0 0 0 Jun 18 16:51 3.txt
226 Directory send OK.
ftp> get 3.txt 下载
local: 3.txt remote: 3.txt
227 Entering Passive Mode (192,168,22,132,175,137).
150 Opening BINARY mode data connection for 3.txt (0 bytes).
226 Transfer complete.
ftp> put 4.txt 不可上传,没给xiaolu虚拟用户权限
local: 4.txt remote: 4.txt
227 Entering Passive Mode (192,168,22,132,85,129).
550 Permission denied.
实验完成


 1083
1083

 被折叠的 条评论
为什么被折叠?
被折叠的 条评论
为什么被折叠?
 到【灌水乐园】发言


