


requests是http的一个客户端软件(python中的一个工具),可以用它来做爬虫、还可以进行接口的自动化测试。
python+requests+unittest+ddt+json等实现接口的自动化测试。
2、requests安装
cmd-->pip3 install requests
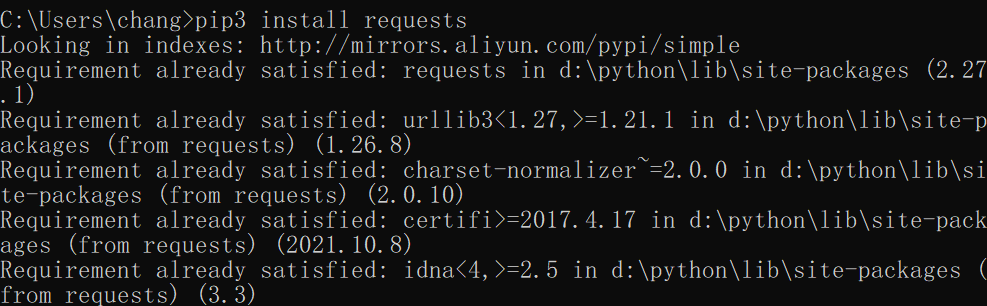
3、验证requests的安装

二、requests的基本用法
百度首页接口请求的实现。
1、使用命令行来实现(cmd)
通过下面的命令行,就可以获取响应报文中的基本所有数据了。
python
import requests
//res: 响应报文对象(响应报文的内容都保存在这个变量里了)
//requests.get() : 打包并发送请求的过程(postman,输入请求方式、url后点击send)
res = requests.get("https://www.baidu.com")
查看返回的响应状态码:print(res.status_code)
查看返回响应正文:print(res.text)
查看返回响应头部字段:print(res.headers)
查看返回响应头部Content-Type字段:print(res.headers["Content-Type"])
查看响应正文的编码信息:print(res.encoding)
2、安装IDE工具(vscode、pycharm等)
# 还是百度的首页接口
# 导包
import requests
# 打包并发送请求(get),返回响应结果保存在一个变量中(可以叫做响应报文对象)
# response:就是一个变量
response = requests.get("https://www.baidu.com")

# 先查看对象(<Response [200]>)
# print(response)
# 查看该响应结果对象中的状态码是多少
# print(response.status_code)
# 查看响应正文(以字符串的形式返回)
# print(response.text)
# ISO-8859-1:该编码格式的中文字符不能在控制台正常显示
# print(response.encoding
# 需要将字符集转为utf-8类型
# response.content是转为bytes字节码形式
# print(response.content.decode("utf-8"))
# 获取响应头部的所有的字段(text/html)
# print(response.headers["Content-Type"])
# 获取cookies和url
# <RequestsCookieJar[<Cookie BDORZ=27315 for .baidu.com/>]>
print(response.cookies)
# https://www.baidu.com/
print(response.url)
3、requests提供的常见请求方式
requests.request("GET",url,*args)
requests.get(url,*args) :处理http协议中的get请求
requests.post(url,*args): 处理http协议中post请求
requests.put(url,*args)
requests.delete(url,*args)
requests.head(url,*args)
三、使用requests实现http接口请求
# 百度翻译接口--get请求
# 打包这个请求,只需要提供url地址和请求方式(get)

from urllib import response
import requests

url = "https://fanyi-api.baidu.com/api/trans/vip/translate?q=apple2&from=auto&to=jp&appid=20190630000313415&salt=888888&sign=a9adc2d687fbacecc3b5059b9ccedc95"
method = "GET"
# 使用第一种范式发送该get请求
# requests.request():以位置参数的形式传递的数据
# request()的参数有十多个,如果你按照顺序传递,可以使用位置传参;如果不像按照顺序传只能使用关键字传参
# response = requests.request(method,url)

# 使用第二种范式发送该get请求
response = requests.get(url)
# <Response [200]>

# 符合json结构特点:只能由[]、{}、""组成的数据结构
# 如果你的响应正文是符合json结构特点的,可以使用text和json()
# 如果你的响应正文不符合json数据结构特点,只能使用text
# response.text : 将响应正文转为字符串格式
# {"error_code":"54001","error_msg":"Invalid Sign"}
# strData = response.text
# print(type(strData))
# print(strData)

# response.json():将符合json数据结构的数据转为python可处理的字典或者列表类型
jsonData = response.json()
# <class 'dict'>
print(type(jsonData))
# 54001
print(jsonData["error_code"])

# 断言
actualValue = jsonData["error_code"]
expectValue= "54001"
if actualValue==expectValue:
    print("用例通过")
else:
    print("用例失败")
3、视频评论接口(referer)
# 千锋视频评论接口-get
# 打包请求的要求:url地址、请求方式(get)、headers(referer)

import requests
# 定义url参数
url = "https://ke.qq.com/cgi-bin/comment_new/course_comment_list?cid=302090&count=5&page=1&filter_rating=1&bkn=&r=0.9658793132640322"

# 以字典的形式来定义请求头部中的字段
headers = {
    "referer":"https://ke.qq.com/course/302090?tuin=99579027&taid=2237639306812426"
}
# 直接打包该get请求,并发送
# 只能使用关键字传参的方式给值
# headers=headers:等号的前面是关键字(方法声明时候定义的形式参数名),等号的后面是该脚本中定义的变量
response = requests.get(url,headers=headers)

# 查看响应正文,以字符串形式显示
# {"msg":"refer错误","type":1,"retcode":100101}
# strData是大串,expectValue是小串
# strData = response.text
# expectValue = "超好 对小白来说 容易懂 感谢老王,老王辛苦了"

# # python中如何实现判断大串包含小串的用法?用成员运算符in
# if expectValue in strData:
#     print("测试用例通过")
# else:
#     print("测试用例失败")

# 将正文转为字典和列表形式,如何判断
jsonData = response.json()
# 第一条评论的实际值
actualValue = jsonData["result"]["items"][0]["first_comment"]
expectValue = "超好 对小白来说 容易懂 感谢老王,老王辛苦了"
if actualValue == expectValue:
    print("用例通过")
else:
    print("用例失败")
4、电商注册接口(post)
# 电商注册接口-post
# 打包该接口需要哪些参数:
# 请求地址(包括query string parameters)
# 请求方式
# 请求头部
# 请求的数据

import requests

# 请求地址(包括query string parameters)
url = "http://39.101.167.251/qftest/index.php?c=user&a=register&step=submit"
# 请求方式--post
# 请求头部
headers = {
    "Content-Type":"application/x-www-form-urlencoded"
}
# 请求的数据(相当于postman种的body),也是以字典的形式传参
# 该条是用户名为空的接口用例
data = {
    "username":"",
    "email":"bk2105_000@163.com",
    "password":"123456",
    "repassword":"123456",
    "agree":"on"
}

# 把上文参数打包在一起,并发送出去
# 可以全部使用关键字传参
response = requests.post(url=url,data=data,headers=headers)

# 查看响应正文,以字符串
strData = response.content.decode("utf-8")
# print(strData)

# 实际该接口返回的信息是:用户名不符合格式要求
expectValue= "请设置用户名"

if expectValue in strData:
    print("通过")
else:
    print("失败")
5、百度翻译接口的案例:
使用Python加requests库的方式实现翻译功能:
输入一种语言的字符串,通过百度翻译接口,输出其指定的输出语言的翻译内容。
采用的技术点:
1)定义翻译方法
2)使用input方法和requests的get/post请求
3)带参数(构造数据:一个是随机数函数;使用Python自带的md5的加密函数)
4)字符串的拼接
5)字符编码的转换。(输入的字符串必须转化为 utf-8)
6)只输出翻译的最终结果即可。(例如,输入 apple 输出:苹果)
7)使用函数的方式调用
import requests
import hashlib
import random
import sys
def trans():
    # 实现翻译的逻辑功能,循环运行代码块
    while True:
        print("==============百度通用翻译首页==================")
        print("==========1-翻译            2-退出=============")
        print("===============================================")
        # 定义一个变量作为选择的菜单编号
        choice = int(input("请输入菜单编号:"))
        if choice==1:
            # 打包并拼接百度翻译接口的所有参数
            # from 、to
            print("可以输入以下语言类型:auto、zh、jp、kor、yue等")
            fromStr = input("输入语言为:")
            print("可以输出以下语言类型:zh、jp、kor、yue等")
            toStr = input("输出语言为:")
            # q:待翻译的参数
            qStr = input("请输入你要翻译的字符串:")
            # 随机参数
            saltStr = str(random.randint(100000,999999))
            # appid和密钥
            appidStr= "20190630000313415"
            miyaoStr = "IL7VipagQVFGKlo8XMIr"

            # 制作签名
            data = appidStr +qStr+saltStr+miyaoStr
            # 将data进行md5加密,获取32位小写字符串
            signStr = hashlib.md5(data.encode(encoding="utf-8")).hexdigest()

            # 申请接口获得数据,使用post请求实现该接口
            # 指定content-type:application/x-www-form-urlencoded
            url = "https://fanyi-api.baidu.com/api/trans/vip/translate"
            headers={
                "Content-Type":"application/x-www-form-urlencoded"
            }
            data={
                "q":qStr,
                "from":fromStr,
                "to":toStr,
                "salt":saltStr,
                "appid":appidStr,
                "sign":signStr
            }

            # 打包并发送该请求
            response = requests.post(url=url,data=data,headers=headers)
            # print(response.json())
            # 输出结果
            print("翻译后的结果为:")
            print(response.json()["trans_result"][0]["dst"])
        elif choice==2:
            # 结束死循环wihle True
            print("欢迎再次使用百度翻译业务!!!!!!!")
            sys.exit(0)

        else:
            print("输入错误,请重新输入~~~~~~~~~~)
图片上传案例
import requests
url = 'http://39.101.167.251/xinhu2/index.php?a=upfile&m=upload&d=public&maxsize=80&uptype=image&thumbnail=150x150&ajaxbool=true&rnd=399978'
headers={
    "Cookie":"deviceid=1636372043281; xinhu_ca_adminuser=admin; xinhu_ca_rempass=0; FOOTPRINT=334%2C337; VDSSKEY=c86bvvp53vgrg533do7060hmv0; PHPSESSID=rgvfrra61bavqh3i9fohufkce6; xinhu_mo_adminid=kk0ddg0ig0dgv0kg0dgk0vi0ddo0ki0doo0ii0vm07"
}

# 对于文件上传功能,使用专门的字段files传递
files = {
    "file":open(r"e:/data/aaaaa.jpg","rb")
}

# 打包发送
response = requests.post(url=url,headers=headers,files=files)

dataStr = response.text
if "aaaaa.jpg" in dataStr:
    print("pass")
else:
    print("fail")
post+josh提交数据
import requests
import json
# 定义该接口的三个参数
url = "https://b.zhulogic.com/designer_api/account/login_quick"
headers = {
    "Content-Type":"application/json"
}

# 定义json变量,则需要json关键字来获取
# json = {
#     "phone":"18621984010",
#     "code":"12121212",
#     "messageType":3,
#     "key":"9a95f60f-343e-45b8-bcc0-7cd5d2cbb0e1",
#     "registration_type":1,
#     "channel":"zhulogic",
#     "unionid":""
#     }
# 定义data变量(值是字符串),则需要data关键字来获取
data = '{"phone":"18621984010","code":"12121212","messageType":3,"key":"9a95f60f-343e-45b8-bcc0-7cd5d2cbb0e1","registration_type":1,"channel":"zhulogic","unionid":""}'

# 打包发送
# response = requests.post(url=url,headers=headers,json=json)
response = requests.post(url=url,headers=headers,data=data)
# {'status_code': 1001, 'message': '验证码错误', 'data': None}

# response.json():json()是响应报文对象中提供的一个方法
# print(response.json())
# 也可以使用专门的json模块去处理,loads()
jsonData = json.loads(response.text)
print(jsonData['status_code'])
import requests
# 第一步:创建session对象:
session = requests.session()
# 先发登录请求
url1= "http://39.101.167.251/xinhu2/index.php?a=check&m=login&d=&ajaxbool=true&rnd=142167"
headers1={
"Content-Type":"application/x-www-form-urlencoded"
}
data1 = {
"rempass": "0",
"jmpass": "False",
"device":"1636372043281",
"ltype": "0",
"adminuser": "YWRtaW4:",
"adminpass": "YTg5ODM5ODM:",
"yanzm":""
}
# 打包并发送请求
# response1 = requests.post(url=url1,data=data1,headers=headers1)
response1 = session.post(url=url1,data=data1,headers=headers1)
print(response1.text)
# 再发传图片的接口
url2 = 'http://39.101.167.251/xinhu2/index.php?a=upfile&m=upload&d=public&maxsize=80&uptype=image&thumbnail=150x150&ajaxbool=true&rnd=399978'
# headers={
# "Cookie":"deviceid=1636372043281; xinhu_ca_adminuser=admin; xinhu_ca_rempass=0; FOOTPRINT=334%2C337; VDSSKEY=c86bvvp53vgrg533do7060hmv0; PHPSESSID=rgvfrra61bavqh3i9fohufkce6; xinhu_mo_adminid=kk0ddg0ig0dgv0kg0dgk0vi0ddo0ki0doo0ii0vm07"
# }
# 对于文件上传功能,使用专门的字段files传递
files2 = {
"file":open(r"e:/data/aaaaa.jpg","rb")
}
# 打包发送
# response2 = requests.post(url=url2,files=files2)
response2 = session.post(url=url2,files=files2)
print(response2.text)
print(session.cookies)
# <RequestsCookieJar[<Cookie PHPSESSID=499v5u65hfgtthbtsr290tdnb1 for 39.101.167.251/>,
# <Cookie xinhu_ca_adminuser=admin for 39.101.167.251/>,
# <Cookie xinhu_ca_rempass=0 for 39.101.167.251/>,
# <Cookie xinhu_mo_adminid=on0zd0ddq0pn0oz0dgj0dgz0dqg0dgg0jn0za0un014 for 39.101.167.251/>]>
session技术的使用(保存登录状态cookie值的保存)
import requests
# 第一步:创建session对象:
session = requests.session()
# 先发登录请求
url1= "http://39.101.167.251/xinhu2/index.php?a=check&m=login&d=&ajaxbool=true&rnd=142167"
headers1={
    "Content-Type":"application/x-www-form-urlencoded"
}

data1 = {
    "rempass": "0",
    "jmpass": "False",
    "device":"1636372043281",
    "ltype": "0",
    "adminuser": "YWRtaW4:",
    "adminpass": "YTg5ODM5ODM:",
    "yanzm":""
}

# 打包并发送请求
# response1 = requests.post(url=url1,data=data1,headers=headers1)
response1 = session.post(url=url1,data=data1,headers=headers1)
print(response1.text)

# 再发传图片的接口
url2 = 'http://39.101.167.251/xinhu2/index.php?a=upfile&m=upload&d=public&maxsize=80&uptype=image&thumbnail=150x150&ajaxbool=true&rnd=399978'
# headers={
#     "Cookie":"deviceid=1636372043281; xinhu_ca_adminuser=admin; xinhu_ca_rempass=0; FOOTPRINT=334%2C337; VDSSKEY=c86bvvp53vgrg533do7060hmv0; PHPSESSID=rgvfrra61bavqh3i9fohufkce6; xinhu_mo_adminid=kk0ddg0ig0dgv0kg0dgk0vi0ddo0ki0doo0ii0vm07"
# }

# 对于文件上传功能,使用专门的字段files传递
files2 = {
    "file":open(r"e:/data/aaaaa.jpg","rb")
}

# 打包发送
# response2 = requests.post(url=url2,files=files2)
response2 = session.post(url=url2,files=files2)
print(response2.text)


print(session.cookies)
# <RequestsCookieJar[<Cookie PHPSESSID=499v5u65hfgtthbtsr290tdnb1 for 39.101.167.251/>,
# <Cookie xinhu_ca_adminuser=admin for 39.101.167.251/>,
# <Cookie xinhu_ca_rempass=0 for 39.101.167.251/>,
# <Cookie xinhu_mo_adminid=on0zd0ddq0pn0oz0dgj0dgz0dqg0dgg0jn0za0un014 for 39.101.167.251/>]>
正则表达式截取字符串,当做后续登录条件
请求一:获取数据
import requests
import re
# 先创建session对象
session = requests.session()
# 先解决首页数据
url1 = "http://39.101.167.251/qftest/index.php?m=backend&c=main&a=index"
response = session.get(url1)
strData = response.text
# print(strData)
# 通过正则表达式,提取strData中的两个数据
data = re.findall('name="(.*?)" value="(.*?)"',strData)
# [('hY9XN', '658697686'), ('stay" type="checkbox', '1')]
name = data[0][0]
value = data[0][1]

请求二,根据获取的数据发送请求
url2 = "http://39.101.167.251/qftest/index.php?m=backend&c=main&a=login"
headers2 = {
    "Content-Type":"application/x-www-form-urlencoded"
}
data2 = {
    name:value,
    "username":"student1",
    "password":"091bfa87c505bba664b431baf83cbc19"
}
# 打包登录请求并发送
response2 = session.post(url=url2,headers=headers2,data=data2)
# <html><head><meta http-equiv='refresh' content='0;url=/qftest/index.php?m=backend&c=main&a=panel'></head><body></body></html>
print(response2.text)
Token鉴权,完成后续信息的获取
# 云学习平台的接口(掌握的一个,最常见的用法:requests+json+token+session+关联技术)
# 要想学习、刷题-->登录--->就必须先获取验证码
# 登录token --> 验证码token --> 获取验证码及其token值的
# 关联和session技术
import requests
import json

session = requests.session()
# 一、先获取云学习的验证码接口(获取验证码及其token值)
# 1、接口说明:云学习平台首页刷新获得验证码图片token和验证码的接口
# 2、接口的地址:http://study.qfedu.com/student/api/capchaRestController/captcha
# 3、请求方式:Post
# 4、请求参数:无
# 5、请求数据:无
# 6、头部信息:无
# 7、响应数据:Content-Type: application/html
urlYZM = "http://study.qfedu.com/student/api/capchaRestController/captcha"
responseYZM = session.post(url=urlYZM)
dataYZM = responseYZM.json()
# code表示验证码值
code = dataYZM["data"]["code"]
# 验证图片的token值
imgAuthCodeToken = dataYZM["data"]["imgAuthCodeToken"]

# 二、登录接口
# 1、接口说明:云学习平台登录接口(需要验证码接口提供的imgToken和imgCode字段)
# 2、接口的地址:http://study.qfedu.com/student/api/login
# 3、请求方式:Post
# 4、请求参数:无
urlLogin = "http://study.qfedu.com/student/api/login"
dataLogin = {
    "imgCode":code,
    "imgToken":imgAuthCodeToken,
    "mobile":"18621984010",
    "password":"123456"
}
headersLogin={
    "Content-Type":"application/json;charset=UTF-8"
}
# 打包发送
# 如果dataLogin是字符串,可以使用关键字data接收
# 如果是字典,必须使用json接收
responseLogin = session.post(url=urlLogin,headers=headersLogin,json=dataLogin)
# 后续的所有接口都要在请求的头部中带上token的值
token = responseLogin.json()["data"]["token"]


# 三、云学习首页接口(登录后的首页)
# 1、接口说明:云学习平台登录后首页接口(需要提供登录的token)
# 2、接口的地址:http://study.qfedu.com/student/api/home/list
# 3、请求方式:Post
urlSY = "http://study.qfedu.com/student/api/home/list"
headersSY = {
    "Authorization":token
}
responseSY = session.post(urlSY,headers=headersSY)
# print(responseSY.json())

# 四、云学习开始学习接口
# 1、接口说明:云学习平台开始学习接口
# 2、接口的地址:http://study.qfedu.com/student/api/line/list/75
# 3、请求方式:Post
urlXX = "http://study.qfedu.com/student/api/line/list/75"
headersXX = {
    "Authorization":token
}
responseXX = session.post(urlXX,headers=headersXX)
print(responseXX.json())
单元测试框架unittext
实现接口requests+unittext
# unittest单元测试框架
# 组成:TestCase、TestSuite、TestRunner、TestResult,TestLoader(将用例加载到集合的工具)
# 1、结合unittest创建接口用例
import unittest
import requests

class unittestDemo(unittest.TestCase):
    # unittest中的测试用例是包括三部分
    def setUp(self):
        # 请求地址(包括query string parameters)
        self.url = "http://39.101.167.251/qftest/index.php?c=user&a=register&step=submit"
        # 请求方式--post
        # 请求头部
        self.headers = {
            "Content-Type":"application/x-www-form-urlencoded"
        }

    # 测试用例方法(接口先定义在test开头的方法)
    def test_api_1(self):

        # 请求的数据(相当于postman种的body),也是以字典的形式传参
        # 该条是用户名为空的接口用例
        data = {
            "username":"",
            "email":"bk2105_000@163.com",
            "password":"123456",
            "repassword":"123456",
            "agree":"on"
        }
        # 打包发送请求
        response = requests.post(url=self.url,headers=self.headers,data=data)
        # 断言
        expectValue = "请设置用户名"
        acutalValue = response.content.decode(encoding="utf-8")
        self.assertIn(expectValue,acutalValue)


    # 测试用例方法(接口先定义在test开头的方法)
    def test_api_2(self):

        # 请求的数据(相当于postman种的body),也是以字典的形式传参
        # 该条是用户名为空的接口用例
        data = {
            "username":"test",
            "email":"bk2105_000@163.com",
            "password":"123456",
            "repassword":"123456",
            "agree":"on"
        }
        # 打包发送请求
        response = requests.post(url=self.url,headers=self.headers,data=data)
        # 断言
        expectValue = "用户名不符合格式要求"
        acutalValue = response.content.decode(encoding="utf-8")
        self.assertIn(expectValue,acutalValue)

    # 测试用例方法(接口先定义在test开头的方法)
    def test_api_3(self):
        # 请求的数据(相当于postman种的body),也是以字典的形式传参
        # 该条是用户名为空的接口用例
        data = {
            "username":"12test",
            "email":"bk2105_000@163.com",
            "password":"123456",
            "repassword":"123456",
            "agree":"on"
        }
        # 打包发送请求
        response = requests.post(url=self.url,headers=self.headers,data=data)
        # 断言
        expectValue = "用户名不符合格式要求"
        acutalValue = response.content.decode(encoding="utf-8")
        self.assertIn(expectValue,acutalValue)

    # 资源释放方法
    def tearDown(self):
        pass

if __name__=="__main__":
    unittest.main()
ddt实现数据驱动用例
# 结合requests+unittest+ddt+json(json模块,json文件)+HTMLTestRunnner实现数据驱动测试
# 1、导包:requests、unittest、ddt、json、HTMLTestRunnner
# 2、数据驱动,就需要数据源(从外部json文件读取数据作为数据源)
# 3、requests+unittest实现接口的测试用例
# 4、使用ddt模块实现数据驱动:
# 使用@ddt修饰单元测试类
# 使用@data修饰单元测试用例方法
import requests
import json
import unittest
from  ddt import data,ddt
from HTMLTestRunner import HTMLTestRunner

# 定义一个方法,来获取数据源
def getData():
    with open(r"e:\postmanJson.json","r",encoding="utf-8") as f:
        jsonData = json.load(f)
        # print(jsonData)
        return jsonData

@ddt
class unittestDemo2(unittest.TestCase):
    # 获取数据源的数据jsonData
    jsonData = getData()
    def setUp(self):
        # 请求地址(包括query string parameters)
        self.url = "http://39.101.167.251/qftest/index.php?c=user&a=register&step=submit"
        # 请求方式--post
        # 请求头部
        self.headers = {
            "Content-Type":"application/x-www-form-urlencoded"
        }

    # 指定数据源,数据源列表中有几个字典,此处就会循环执行面的方法几次,每次使用一组数据
    # jsondata:  [{"":"","":""},{"":"","":""},{"":"","":""}]
    @data(*jsonData)
    def test_reg(self,jd):#jd的作用,每次循环从jsonData中拿出一组数据

        # 请求的数据(相当于postman种的body),也是以字典的形式传参
        # 该条是用户名为空的接口用例
        data = {
            "username":jd["username"],
            "email":jd["email"],
            "password":jd["password"],
            "repassword":"123456",
            "agree":"on"
        }
        # 打包发送请求
        response = requests.post(url=self.url,headers=self.headers,data=data)
        # 断言(预期结果也是来自于数据源)
        expectValue = jd["expect"]
        acutalValue = response.content.decode(encoding="utf-8")
        self.assertIn(expectValue,acutalValue)

if __name__=="__main__":
    unittest.main()
maintest主运行文件实现
# 主运行文件:可以将使用了unittest框架设计的用例,打包在一个测试集合中统一运行。
# 使用TestLoader模块,将符合要求的测试用例导入测试集合
# 使用HTMLTestRunner运行测试集合
import requests
import unittest
from HTMLTestRunner import HTMLTestRunner

# 使用TestLoader模块,将符合要求的测试用例导入测试集合
# discover是测试集合(是个列表,里面的元素是测试用例)变量
# ./表示的requestsDemo这个目录
# 在r"./verydows"路径下,找文件名符合pattern="very*.py"规范的文件,并把文件中符合unittest框架的
# 单元测试用例提取并返回给变量
discover = unittest.defaultTestLoader.discover(r"./verydows",pattern="very*.py")
# discover中只有使用了unittest框架缩写的用例。
# 线性的verydowsBack.py和verydowsReg.py在读取的时候就直接执行了
# print(discover)

# 使用HTMLTestRunner运行测试集合,输出可视化的报告
strTime = time.strftime("%Y-%m-%d-%H-%M")+r".html"
fileName =r"./verydows/"+strTime
with open(fileName,"wb") as f:
    runner = HTMLTestRunner(f,verbosity=1,title="接口测试报告")
    runner.run(discover)
四、持续集成
python+requests(selenium)+unittest+ddt+HTMLTestRunner+Jenkins集成在一起的。
1、jenkins环境配置
path里添加python的根目录
2、创建freestyle类型项目
3、配置项目
创建定时触发器:1 0 * * *
构建命令:批处理命令,类似在cmd下运行的命令
e:
cd xxxx(python运行maintest的上级目录)
python maintest.py
4、保存退出
5、定时运行(手动立马执行)


 685
685


 被折叠的 条评论
为什么被折叠?
被折叠的 条评论
为什么被折叠?
 到【灌水乐园】发言


