


通过微信小程序的网络请求去访问springboot跑在本地服务器的接口上,获取返回的接口json数据并渲染在小程序的主页。我们学习微信小程序的js函数发现可以通过微信API直接去请求一个网络接口,当然需要先勾选(不通过合法校验......),不然会查你的HTTPS协议证书。
首先我们需要搭建一个简单的springboot框架
1、数据库代码
create schema getMsqlConnection;
use getMsqlConnection;
create table device(
  deviceId varchar(5) not null comment '设备号=楼号+座位号',
  deviceState boolean not null comment '设备状态,空闲为true',
  primary key (deviceId)
);
2、pojo层
@Data
public class Device {
    private String deviceId;
    private boolean deviceState;
}
3、mapper层
@Mapper
public interface ManagerMapper {
    /**
     * 查询所有设备信息
     */
    @Select("select * from getmsqlconnection.device")
    List<Device> findAllDevice();

    /**
     * 添加新设备
     */
    @Insert("insert into getmsqlconnection.device values (#{deviceId},#{deviceState})")
    Boolean insertNewDevice(String deviceId,boolean deviceState);
}
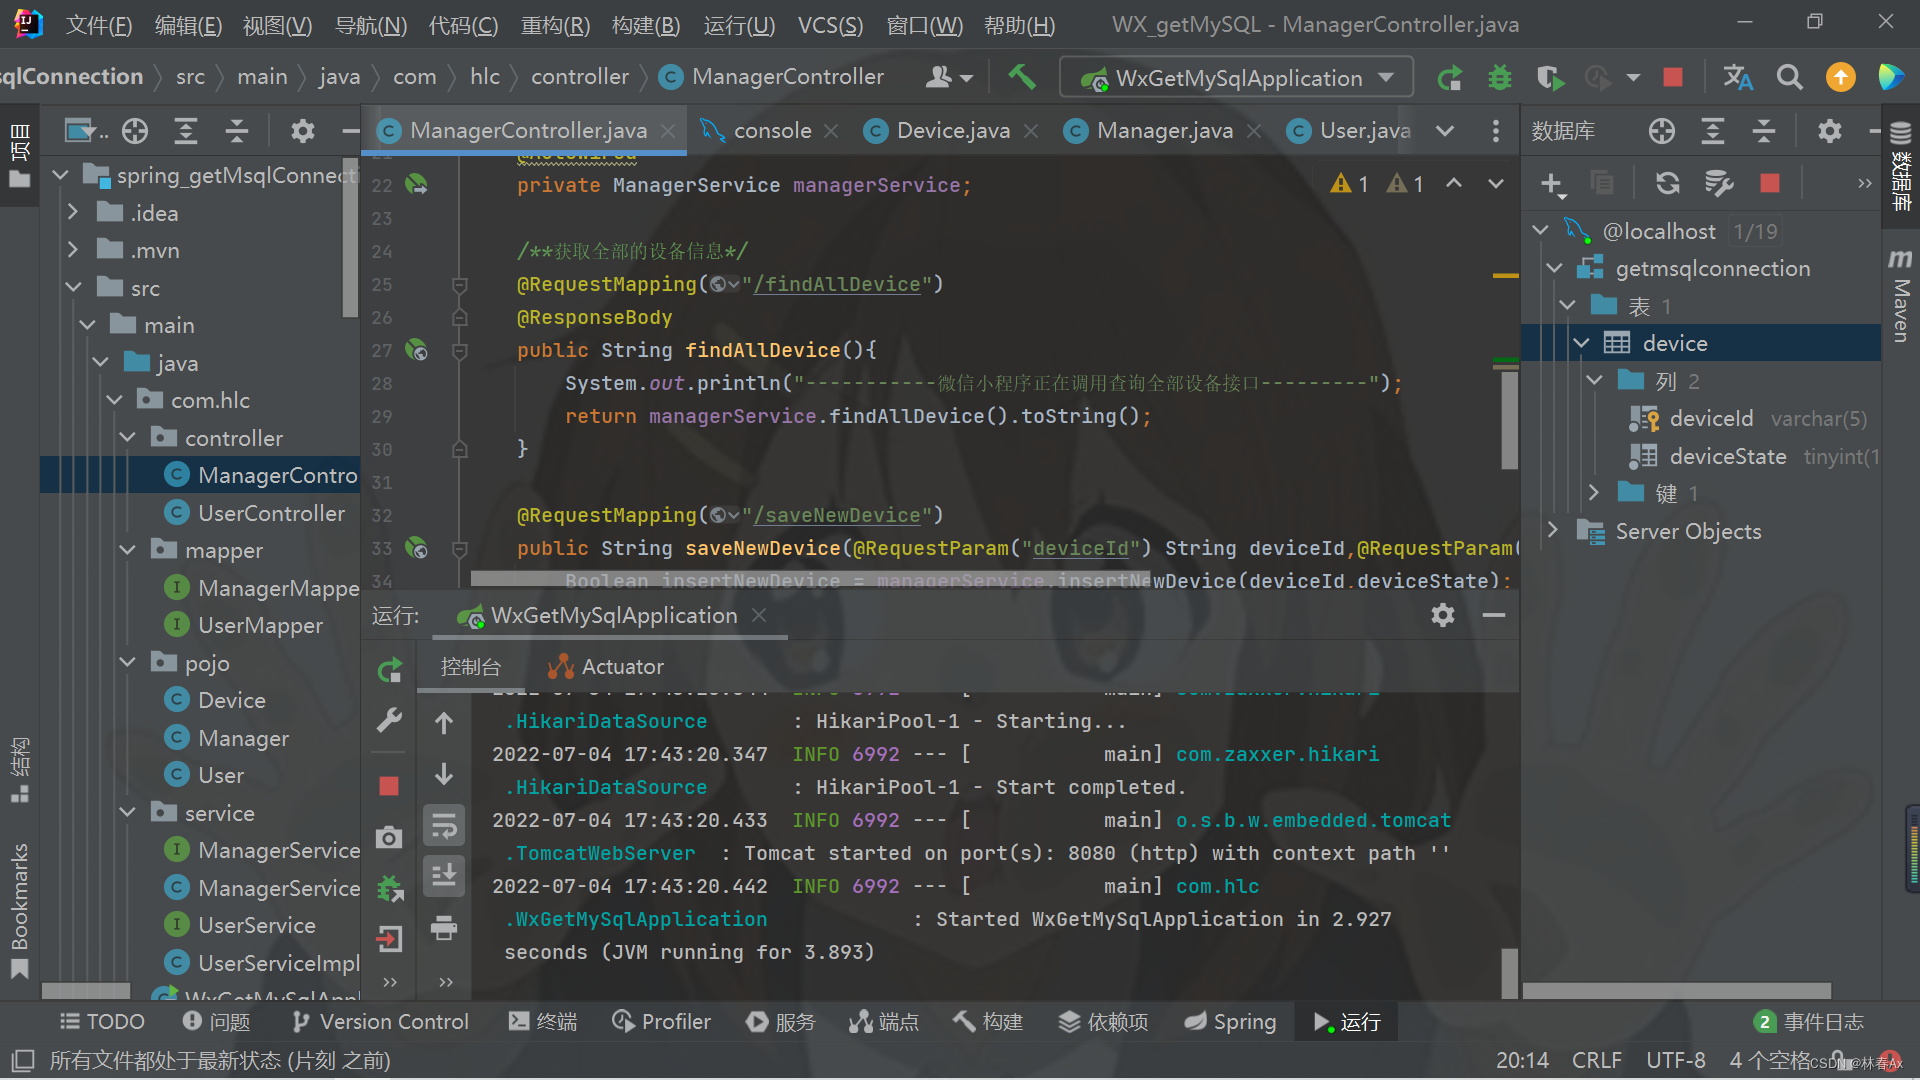
4、service层略,controller层
@RestController
public class ManagerController {
    @Autowired
    private ManagerService managerService;


    @RequestMapping("/findAllDevice")
    @ResponseBody
    public String findAllDevice(){
        System.out.println("-----------微信小程序正在调用查询全部设备接口---------");
        return managerService.findAllDevice().toString();
    }

    @RequestMapping("/saveNewDevice")
    public String saveNewDevice(@RequestParam("deviceId") String deviceId,@RequestParam("deviceState") boolean deviceState){
        Boolean insertNewDevice = managerService.insertNewDevice(deviceId,deviceState);
        System.out.println("--------------小程序正在调用添加设备接口--------------");
        if (insertNewDevice)
            return "添加成功";
        else
            return "添加异常";
    }

}
5、application.yml
spring:
  application:
    name: spring_getMsqlConnection
  mvc:
    static-path-pattern: /static/**
  datasource:
      username: root
      driver-class-name: com.mysql.cj.jdbc.Driver
      url: jdbc:mysql://localhost:3306/getmsqlconnection?serverTimezone=UTC
      password: 123456
      dbcp2:
        max-wait-millis: 30000
        max-idle: 32
        min-idle: 8
        max-conn-lifetime-millis: 60000
#先写数据源信息再写数据库获取连接信息,会报URL未找到的错!连门都不知道能不能打开,你还祈求立刻给你创建一个装钥匙的池子吗?
  thymeleaf:
    cache: false
    mode: HTML5
server:
  port: 8080
其次我们需要创建一个测试用的简单的微信小程序
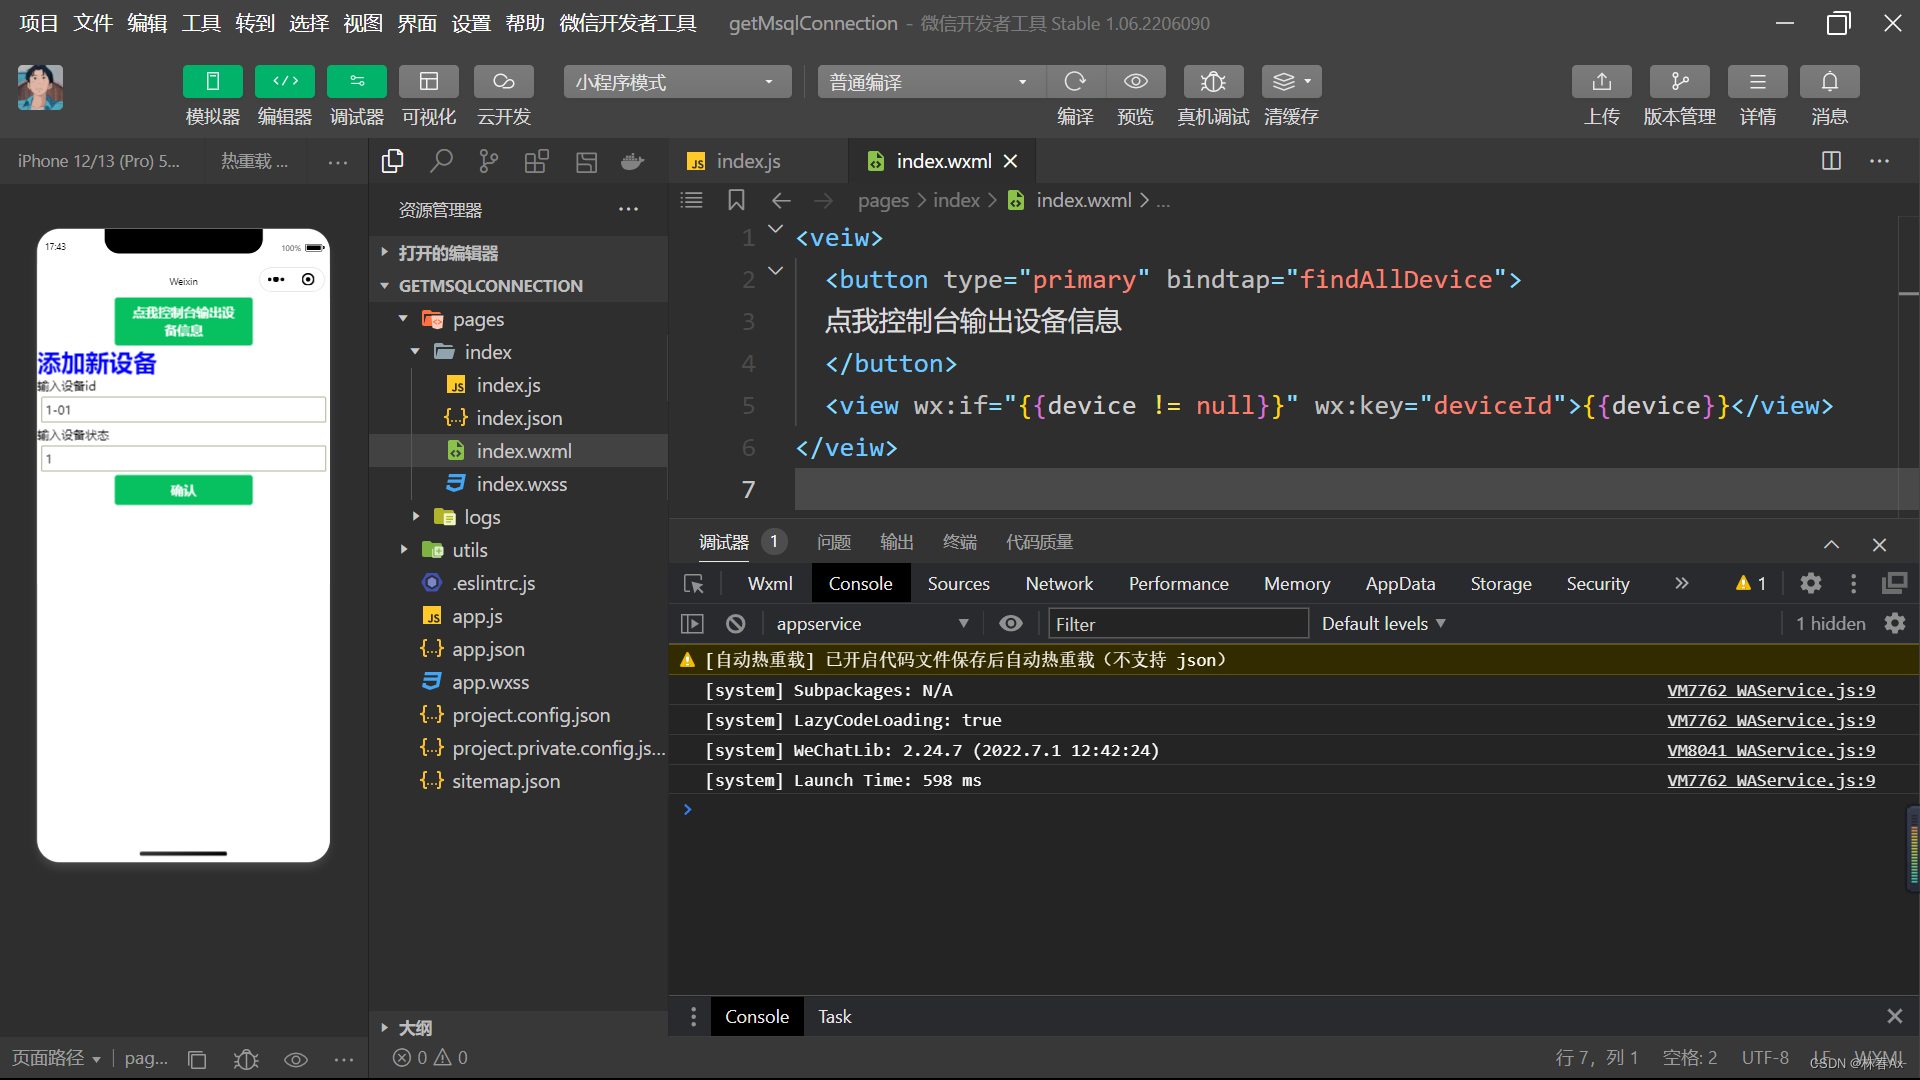
wxml
<veiw>
	<button type="primary" bindtap="findAllDevice">
	点我控制台输出设备信息
	</button>
	<view wx:if="{{device != null}}" wx:key="deviceId">{{device}}</view>
</veiw>

<block>
  <rich-text nodes="<h1 style='color: blue'>添加新设备<h1>"></rich-text>
	输入设备id<input class="input" value="{{deviceId}}" bindinput="oninput1"></input>
	输入设备状态<input class="input" value="{{deviceState}}" bindinput="oninput2"></input>
  <button type="primary" bindtap="saveNewDevice">确认</button>
  <view wx:if="{{saveMassage != null}}">{{saveMassage}}</view>
</block>
js
const app = getApp()
Page({
  data: {
    device:"",
    deviceState: 1,
    deviceId: "1-01",
    saveMassage:""
  },

  //网路连接请求springboot本地接口添加新设备
  oninput1(e){
    this.setData({
      deviceId: e.detail.data
    })
  },
  oninput2(e){
    this.setData({
      deviceState: e.detail.data
    })
  },
  saveNewDevice(){
//这里一定要使用缓存去创建一个指向this的对象。再去请求函数内部去调取它使用。
    var th = this;
    wx.request({
      url: 'http://192.168.100.216:8080/saveNewDevice/',
      method:"POST",
//POST请求的header于GET方式的不同,具体的在微信小程序的开放文档查看
      data: {
        deviceId: JSON.stringify(this.data.deviceId) ,
        deviceState: this.data.deviceState
      },
      header: {
        "Content-Type": "application/x-www-form-urlencoded"
      },
      success(res){
        console.log(res.data),
        th.setData({
          saveMassage: res.data
        })
      }
    })
  },
	// 网络连接请求springboot后端接口查询全部设备
	findAllDevice(){
		var th = this;
		console.log('正在查询全部设备信息')
		wx.request({
			url: 'http://192.168.100.216:8080/findAllDevice',
			method: "GET",
			header: {
				'content-type': 'application/json'
			},
			success(res){
				console.log(res.data),
				th.setData({
					device: res.data
				})
			}
		})
	}
})
wxss
.input{
  border:  1px solid darkolivegreen;
  margin: 5px;
  padding: 5px;
  border-radius: 3px;
}
最后我们去测试
首先需要在本地的8080端口让我们的springboot微服务跑起来
其次我们将微信小程序也编译一下
 点击小程序页面里的按钮查看设备信息(可以发现确实是显示了我们数据库表里的所有设备信息)
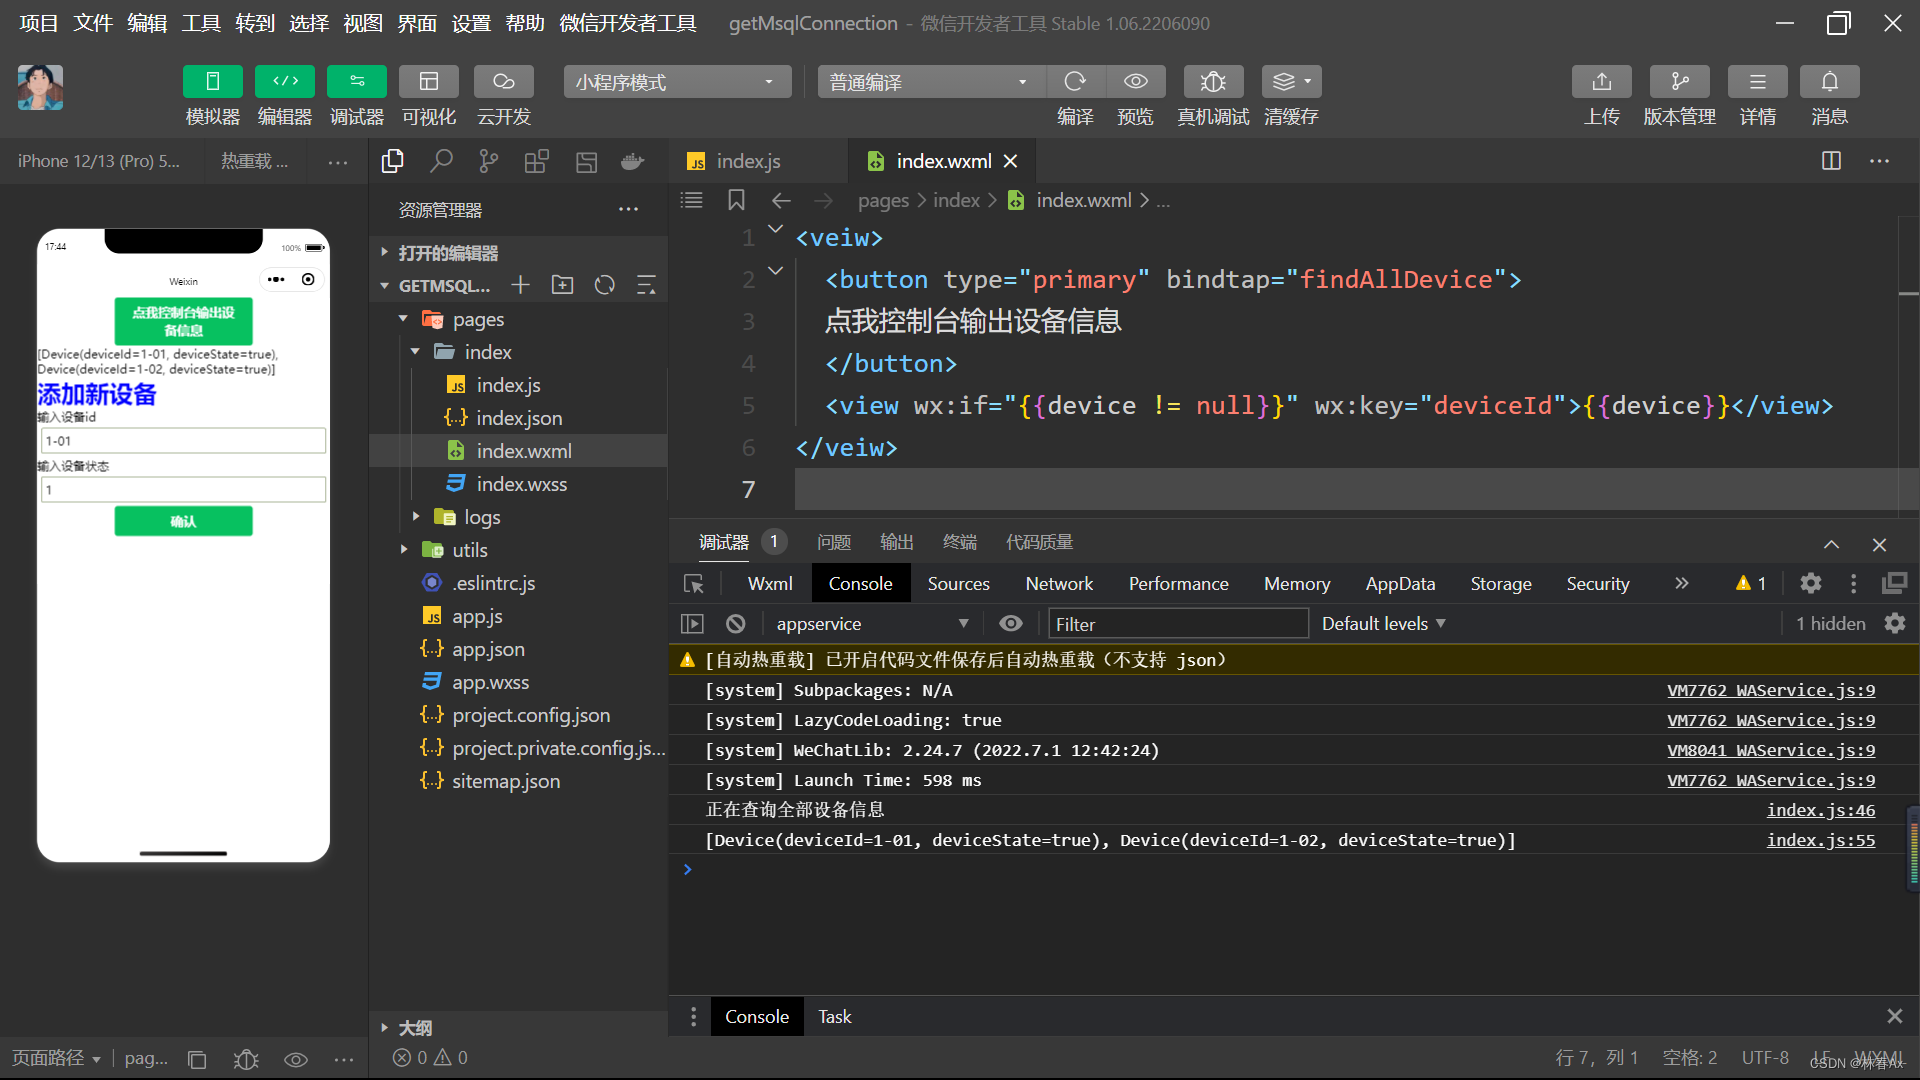
控制台正常打印设备信息数据!


 1248
1248


 被折叠的 条评论
为什么被折叠?
被折叠的 条评论
为什么被折叠?
 到【灌水乐园】发言


