


项目中的全局配置文件:application.properties、application.yml
通过配置文件可更改项目中的自动配置属性
一、YAML基本语法
(1)YAML基本格式:k: v(注意冒号后面必须加空格)
字符串默认不加双引号或单引号
双引号:\表示转义字符
单引号:\表示一般字符
(2)YAML支持的三种数据结构
1、字面量:数字、字符串、布尔型
key: value
2、对象、Map(YAML中对象与Map的表现形式一致)
#方式一
person:
  name: liusl
  age: 88
  sex: 女
#方式二
map: {key1: value1,key2: value2}
3、数组、集合(List、Set)(YAML语法中,两者表现形式一致)
#方式一
studentList:
  - student1
  - student2
#方式二
studentList1: [student1,student2]
二、配置文件值注入方式
2.1、@ConfigurationProperties
编写相关yml配置文件,创建一个类与配置文件绑定,并通过@ConfigurationProperties获取配置
(1)配置文件
student:
  name: liusl
  age: 21
  map: {key1: value1,key2: value2}
  lists:
    - teacher1
- teacher2(2)创建类;使用@ConfigurationProperties注解将本类的所有属性与配置文件配置进行绑定,指定prefix读取指定前缀配置值,组合@Component注解,将本注解下的pojo实例化到容器中(相当于配置文件中的<bean id="" class=""/>)(@Component替换成@Configuration也有相同效果,但两者有不同,具体参考:@Component和@Configuration作为配置类的差别_一号搬砖手的博客-CSDN博客_configuration和component)
package com.example.demo;

import lombok.Data;
import org.springframework.boot.context.properties.ConfigurationProperties;
import org.springframework.stereotype.Component;

import java.util.List;
import java.util.Map;

@Data
@Component
@ConfigurationProperties(prefix = "student")
public class Student {
    private String name;
    private Integer age;
    private Map<String,Object> map;
    private List<Object>  lists;
}
(3)导入配置文件处理器依赖
<!--导入配置文件处理器-->
        <dependency>
            <groupId>org.springframework.boot</groupId>
            <artifactId>spring-boot-configuration-processor</artifactId>
            <optional>true</optional>
        </dependency>
2.2、@Value
@Value单独获取配置文件的某个值,一一对应
(1)编写形式
@Value("字面量")
@Value("#{SpEL}"),SpEL表达式
@Value("${key}"),获取环境变量、配置文件值
(2)示例:
Student.class
@Data
@Component
public class Student {
    //从环境变量、配置文件中获取注入值
    @Value("${student.name}")
    private String name;
    @Value("${student.number}")
    private Double number;
    //SpEL表达式
    @Value("#{6*2}")
    private Integer years;
    //注入其他bean属性
    @Value("#{person.sex}")
    private String sex;
    //字面量
    @Value("false")
    private boolean graduation;
}
application.yml
student:
  name: liusl
  number: 19140
  date: 2022/09
  subject:
    - math
    - soft_engineer
测试代码:
@SpringBootTest
class DemoApplicationTests {
    @Autowired
    Student student;
    @Autowired
    Person person;
    @Test
    void contextLoads() {
        System.out.println(person);
        System.out.println(student);
    }
}
测试结果:

2.3、@PropertySource
使用@PropertySource指定配置文件,仅支持properties文件。注解指定的路径以全局配置文件所作为classpath,再拼接上相对路径。
(1)@PropertySource和@Value
@PropertySource和@Value组合使用可以将自定义配置文件中的属性变量值注入到当前类中
示例:
Students.class
@Data
@Component
@PropertySource(value={"classpath:demo1/test.properties"})
public class Student2 {
    @Value("${student2.name}")
    private String name;
    @Value("${student2.number}")
    private Integer number;
    @Value("${student2.date}")
    private Date date;
    @Value("${student2.age}")
    private Integer age;
}
demo1/test.properties
student2.name=liusl
student2.number=19140
student2.date=2022/10/24
student2.age=21
测试代码:
@SpringBootTest
class DemoApplicationTests {
    Student2 student2;
    @Test
    void contextLoads() {
        System.out.println(student2);
    }
}
测试结果如下:

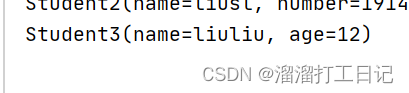
(2)@PropertySource和@ConfigurationProperties
@PropertySource和@ConfigurationProperties组合使用可以将属性值与Java类绑定, @ConfigurationProperties优先级高于@PropertySource,属性值可互补
示例:
student2.class
@Data
@Component
@PropertySource(value={"classpath:demo1/test.properties"})
@ConfigurationProperties(prefix = "student")
public class Student2 {
    private String name;
    private Integer number;
    private Date date;
    private Integer age;
}
demo1/test.properties
student.name=liusl2
student.number=191402
student.date=2022/10/24
student.age=21
application.yml
student:
  name: liusl
  number: 19140
  date: 2022/09/21
2.4、@ImportResource
@ImportResource导入配置文件值,使得值生效
示例:
Student3.class
@Data
public class Student3 {
    private String name;
    private Integer age;
}
demo1/bean.xml
<?xml version="1.0" encoding="UTF-8"?>
<beans xmlns="http://www.springframework.org/schema/beans"
       xmlns:xsi="http://www.w3.org/2001/XMLSchema-instance"
       xsi:schemaLocation="http://www.springframework.org/schema/beans http://www.springframework.org/schema/beans/spring-beans.xsd">


    <bean id="student3" class="com.example.demo.Student3">
        <property name="age" value="12"></property>
        <property name="name" value="liuliu"></property>
    </bean>
</beans>
SpringBootApplication
@SpringBootApplication
@ImportResource(locations = {"classpath:demo1/bean.xml"})
public class DemoApplication {

    public static void main(String[] args) { SpringApplication.run(DemoApplication.class, args); }

}
测试结果如下:


 608
608


 被折叠的 条评论
为什么被折叠?
被折叠的 条评论
为什么被折叠?
 到【灌水乐园】发言


