


1、安装nuxt3报错:Error: Failed to download template from registry: fetch failed
(1)以管理员身份打开cmd
(2)进入hosts所在目录,默认是在C:\Windows\System32\drivers\etc下:
cd C:\Windows\System32\drivers\etc(3)用记事本打开hosts文件:
notepad hosts(4)在最下面添加:
185.199.108.133 raw.githubusercontent.com(5)保存后退出就可以了
2、已安装对应模块,报错无法找到模块“xxx”的声明文件
安装了某个模块,报错:
无法找到模块“postcss-pxtorem”的声明文件。“d:/soft/node_modules/postcss-pxtorem/index.js”隐式拥有 "any" 类型。
尝试使用 `npm i --save-dev @types/postcss-pxtorem` (如果存在),或者添加一个包含 `declare module 'postcss-pxtorem';` 的新声明(.d.ts)文件ts(7016)
nuxt3在根目录下(如果是vue3则是在src目录下)新建 type.d.ts 文件

在 type.d.ts 写上:declare module 'xxx',xxx就是你安装的模块
declare module 'postcss-pxtorem'3、Nuxt使用document 或 window
在 nuxt 中直接使用 window 或 document 会报 ReferenceError: window is not defined。
原因: 由于 nuxt 是服务端渲染,它会预渲染页面后生成 HTML,然后再将其发送给客户端,而document 和 window 是浏览器环境特有的全局对象,在服务器端渲染期间是不可用的。
因此要使用 document 或 window 时,要先判断是否是浏览器环境,判断方法:
(1)process.client 为 true
4、Nuxt3引入swiper并使用
(1)安装
npm install nuxt-swiper(2)nuxt.config.ts(Nuxt 配置)
export default defineNuxtConfig({
    modules: [['nuxt-swiper', {
        // Swiper options
    }]],
})
(3)在页面中使用:
<template>
  <div>
    <Swiper
      :height="300"
      :modules="[SwiperAutoplay, SwiperEffectCreative]"
      :slides-per-view="1"
      :loop="true"
      :effect="'creative'"
      :autoplay="{
        delay: 8000,
        disableOnInteraction: true,
      }"
      :creative-effect="{
        prev: {
          shadow: false,
          translate: ['-20%', 0, -1],
        },
        next: {
          translate: ['100%', 0, 0],
        },
      }"
    >
      <SwiperSlide
        v-for="(slide, idx) in slides"
        :key="idx"
        :style="`background-color: ${slide.bg}; color: ${slide.color}`"
      >
        {{ idx }}
      </SwiperSlide>
    </Swiper>
  </div>
</template>

<script setup lang="ts">
const slides = ref(
  Array.from({ length: 10 }, () => {
    const r = Math.floor(Math.random() * 256)
    const g = Math.floor(Math.random() * 256)
    const b = Math.floor(Math.random() * 256)
    // Figure out contrast color for font
    const contrast = r * 0.299 + g * 0.587 + b * 0.114 > 186 ? 'black' : 'white'

    return { bg: `rgb(${r}, ${g}, ${b})`, color: contrast }
  })
)
</script>

<style scoped>
.swiper-slide {
  display: flex;
  justify-content: center;
  align-items: center;
  font-size: 18px;
  height: 20vh;
  font-size: 4rem;
  font-weight: bold;
  font-family: 'Roboto', sans-serif;
}
.swiper-wrapper {
  min-width: 100vh;
  width: 100vh;
}
</style>
5、Nuxt3使用百度地图
1)在这里注册一个账号:百度地图开放平台 | 百度地图API SDK | 地图开发
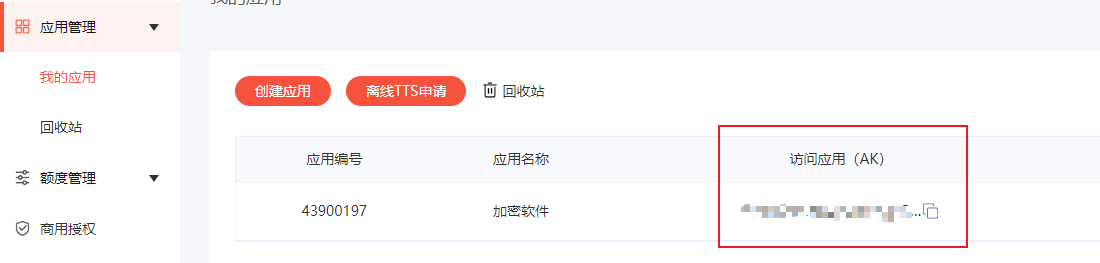
2)创建应用:


创建完之后会得到AK:
3) 引入:(全局引入写在app.vue里)
<script setup lang="ts">
useHead({
  script: [
    {
      src: 'https://api.map.baidu.com/api?v=3.0&ak=你的密钥',
      id: 'LA_COLLECT',
    },
  ],
})
</script>
4)使用:
4.1 创建一个的容器
<div id="container" style="width: 660px;height: 400px"></div>4.2 创建地图
<script setup lang="ts">
import positionfrom '../assets/img/position.png'
onMounted(() => {
	var map = new BMap.Map('container')// 创建Map实例
	var point = new BMap.Point(113.00696,21.66523) // 经度,纬度
	map.centerAndZoom(point, 15)  // 初始化地图,设置中心点坐标和地图级别
	map.enableScrollWheelZoom(true) // 开启鼠标滚轮缩放
	var myIcon = new BMap.Icon(position, new BMap.Size(31, 64))
	var marker = new BMap.Marker(point, { icon: myIcon }); // 创建标注
	map.addOverlay(marker); // 将标注添加到地图中
})
</script>
参考:
https://lbsyun.baidu.com/index.php?title=jspopular3.0/guide/getkey
6、Nuxt部署时报错

报错1:
0|NuxtAppN | [Vue Router warn]: No match found for location with path "xxx"
这个是由于没有error.vue页面,在根目录下加error.vue文件,写点东西就可以
报错2:
0|NuxtAppN | [Vue warn]:Component <Anonymous> is missing template or render function
这个可能是部署时的node版本太低,例如开发时使用的node版本是20.9.0,而部署时使用的是16.13.0,就会出现这个错误
7、Nuxt伪静态
静态就是我们常说的HTML文件,后缀是.html或.htm
什么是伪静态文件?
伪静态文件是指在不改变网站动态页面的情况下,通过服务器配置对页面的链接进行重写,使得页面的链接看起来像静态页面的链接。这样可以提高网站的访问速度和搜索引擎的抓取效果。伪静态文件一般采用URL重写或URL映射的方式实现。
为什么要配置伪静态文件?
相比动态页面,静态页面具有更快的加载速度和更好的用户体验。伪静态文件可以将动态页面的链接转化为静态页面的链接,减少页面的加载时间,并提高页面的响应速度。此外,伪静态文件还可以提高搜索引擎的抓取效果,有利于网站的SEO优化。

nuxt2写法:

nuxt.config.js 加入这段:
router: {
  extendRoutes(routes, resolve) {
    routes.push({
      name: 'user-id-html',
      path: '/user/:id.html',
      component: resolve(__dirname, 'pages/user/_id.vue')
    },{
      name: 'user-html',
      path: '/user.html',
      component: resolve(__dirname, 'pages/user/index.vue')
    });
  }
},
pages/index.vue 代码:
<template>
  <div>
    <button @click="$router.push(`/user.html`)">跳转至user</button>
    <button @click="$router.push(`/user/1.html`)">跳转至user下的动态id页面</button>
  </div>
</template>
pages/user/index.vue 代码:
<template>
	<div>
		user
	</div>
</template>pages/user/_id.vue 代码:
<template>
	<div>
		id = 1
	</div>
</template>
nuxt3写法:
nuxt.config.js 加入这段:
hooks: {
    'pages:extend'(pages) {
        // 添加一个路由
        pages.push({
            name: 'user',
            path: '/user.html',
            file: '~/pages/user/index.vue'
        })
    }
}
pages/index.vue 代码:
<template>
  <div>
    <button @click="$router.push(`/user.html`)">跳转至user</button>
    <button @click="$router.push(`/user/1.html`)">跳转至user下的动态id页面</button>
  </div>
</template>
用 navigateTo({ path: /user.html }) 等其他的路由跳转方式都是可以的
pages/user/index.vue 代码:
<template>
	<div>
		user
	</div>
</template>pages/user/[id].vue 代码:
<template>
	<div>
		id = 1
	</div>
</template>
8、 首屏加载及路由跳转时执行loading动画
1)编写 loading 页面
项目根目录下创建 components/Loading.vue
<template>
  <div class="loading-spinner">
    <div class="sk-chase">
      <div class="sk-chase-dot"></div>
      <div class="sk-chase-dot"></div>
      <div class="sk-chase-dot"></div>
      <div class="sk-chase-dot"></div>
      <div class="sk-chase-dot"></div>
      <div class="sk-chase-dot"></div>
    </div>
  </div>
</template>

<script setup></script>

<style lang="scss" scoped>
.loading-spinner {
  width: 100%;
  height: 100%;
  position: fixed;
  left: 0;
  top: 0;
  right: 0;
  bottom: 0;
  background: rgba(0, 0, 0);
  opacity: .7;
  display: flex;
  align-items: center;
  justify-content: center;
  z-index: 99999999999;
}

.sk-chase {
  width: 60px;
  height: 60px;
  position: relative;
  animation: sk-chase 2.5s infinite linear both;
}

.sk-chase-dot {
  width: 100%;
  height: 100%;
  position: absolute;
  left: 0;
  top: 0;
  animation: sk-chase-dot 2.0s infinite ease-in-out both;
}

.sk-chase-dot:before {
  content: '';
  display: block;
  width: 30%;
  height: 30%;
  background-color: #407e03;
  border-radius: 100%;
  animation: sk-chase-dot-before 2.0s infinite ease-in-out both;
}

.sk-chase-dot:nth-child(1) {
  animation-delay: -1.1s;
}

.sk-chase-dot:nth-child(2) {
  animation-delay: -1.0s;
}

.sk-chase-dot:nth-child(3) {
  animation-delay: -0.9s;
}

.sk-chase-dot:nth-child(4) {
  animation-delay: -0.8s;
}

.sk-chase-dot:nth-child(5) {
  animation-delay: -0.7s;
}

.sk-chase-dot:nth-child(6) {
  animation-delay: -0.6s;
}

.sk-chase-dot:nth-child(1):before {
  animation-delay: -1.1s;
}

.sk-chase-dot:nth-child(2):before {
  animation-delay: -1.0s;
}

.sk-chase-dot:nth-child(3):before {
  animation-delay: -0.9s;
}

.sk-chase-dot:nth-child(4):before {
  animation-delay: -0.8s;
}

.sk-chase-dot:nth-child(5):before {
  animation-delay: -0.7s;
}

.sk-chase-dot:nth-child(6):before {
  animation-delay: -0.6s;
}

@keyframes sk-chase {
  100% {
    transform: rotate(360deg);
  }
}

@keyframes sk-chase-dot {

  80%,
  100% {
    transform: rotate(360deg);
  }
}

@keyframes sk-chase-dot-before {
  50% {
    transform: scale(0.4);
  }

  100%,
  0% {
    transform: scale(1.0);
  }
}

.spinner {
  width: 40px;
  height: 40px;
  background-color: #033779;
  margin: 100px auto;
  -webkit-animation: sk-rotateplane 1.2s infinite ease-in-out;
  animation: sk-rotateplane 1.2s infinite ease-in-out;
}

@-webkit-keyframes sk-rotateplane {
  0% {
    -webkit-transform: perspective(120px)
  }

  50% {
    -webkit-transform: perspective(120px) rotateY(180deg)
  }

  100% {
    -webkit-transform: perspective(120px) rotateY(180deg) rotateX(180deg)
  }
}

@keyframes sk-rotateplane {
  0% {
    transform: perspective(120px) rotateX(0deg) rotateY(0deg);
    -webkit-transform: perspective(120px) rotateX(0deg) rotateY(0deg)
  }

  50% {
    transform: perspective(120px) rotateX(-180.1deg) rotateY(0deg);
    -webkit-transform: perspective(120px) rotateX(-180.1deg) rotateY(0deg)
  }

  100% {
    transform: perspective(120px) rotateX(-180deg) rotateY(-179.9deg);
    -webkit-transform: perspective(120px) rotateX(-180deg) rotateY(-179.9deg);
  }
}</style>
2)在store(pinia)中存储 loading 变量
store/useStore.js
import { defineStore } from 'pinia'

export const useLoading = defineStore('loading', {
	state: () => ({
		value: true // loading初始化为true
	}),
	actions: {
		changeLoading(prop: boolean){
			this.value = prop
		}
	},
})
3)新增 loading 插件,通过 Nuxt 的生命周期钩子来控制 loading 的改变
plugins/loading.ts
import { useLoading } from '~/store/useStore'

export default defineNuxtPlugin((nuxtApp) => {
	const loading = useLoading();
	// hook函数用于在特定点上的渲染生命周期中添加自定义逻辑。当创建Nuxt插件时,通常使用hook函数
	// 查看钩子:https://www.nuxt.com.cn/docs/api/advanced/hooks#app-hooks-runtime
	nuxtApp.hooks.hook('page:start', () => {
	  loading.changeLoading(true)
	});

	nuxtApp.hooks.hook('page:finish', () => {
        setTimeout(() => {
		    loading.changeLoading(false)
        },500);
	});
});
4)在 app.vue 中使用 loading 组件
<template>
  <div id="app">
    <NuxtLayout>
      <Loading v-if="loading" />
      <NuxtPage  />
    </NuxtLayout>
  </div>
</template>

<script setup lang="ts">
import { useLoading } from '~/store/useStore'

const _loading = useLoading()

let loading = computed(() => {
  return _loading.value;
})
</script>


 2711
2711


 被折叠的 条评论
为什么被折叠?
被折叠的 条评论
为什么被折叠?
 到【灌水乐园】发言


