


}
###### 然后通过springboot的自动配置实现将核心配置类注入 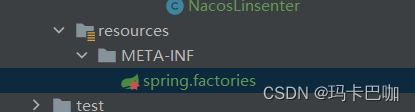 然后写入以下代码org.springframework.boot.autoconfigure.EnableAutoConfiguration=com.laoyang.dtp.DtpExecutorAutoConfiguration
######         创建nacos的监听类并实现动态绑定


        通过nacos的 **Listener** 接口实现相应的方法编写动态变换逻辑,同时实现spring提供的
InitializingBean接口将当前监听类通过nacos的ConfigService的addListener()方法与dataId一一绑定。(只要dataId的配置文件发生改变,当前绑定的监听类就会调用相应的方法),最终注入线程池对象Bean,将修改的配置文件值再注入进线程池对象Bean,就实现动态线程池。
|  |  |
| --- | --- |
|
getExecutor()
|创建一个线程池供下面的调用
 |
|
receiveConfigInfo()
|每次当前的dataId只要改变,就会调用这个方法
|package com.laoyang.dtp;
import com.alibaba.nacos.api.annotation.NacosInjected;
import com.alibaba.nacos.api.config.ConfigService;
import com.alibaba.nacos.api.config.listener.Listener;
import org.springframework.beans.factory.InitializingBean;
import org.springframework.beans.factory.annotation.Autowired;
import org.springframework.beans.factory.config.YamlPropertiesFactoryBean;
import org.springframework.core.io.ByteArrayResource;import java.util.Properties;
import java.util.concurrent.Executor;
import java.util.concurrent.Executors;/**
- @author:Kevin
- @create: 2023-10-24 19:56
- @Description: nacos自带监听器
*/public class NacosLinsenter implements Listener, InitializingBean {
@NacosInjected
private ConfigService configService;

@Autowired
private DtpExecutor executor;

//nacos的dataId的名称
private static final String DATA_ID = "dtp.yaml";

private static final String GROUP = "DEFAULT_GROUP";
//最大核心数
private static final String CORE_POOL_SIZE = "dtp.core-pool-size";
//最大线程数
private static final String MAXIMUM_POOL_SIZE = "dtp.maximum-pool-size";


//创建一个线程池供下面的调用
@Override
public Executor getExecutor() {
    return Executors.newFixedThreadPool(1);
}

//每次当前的dataId只要改变,就会调用这个方法
//但是调用这个方法的线程需要上面的方法创建一个线程池
@Override
public void receiveConfigInfo(String s) {
    //首先需要将字符串yml格式转化为map的格式
    YamlPropertiesFactoryBean factoryBean = new YamlPropertiesFactoryBean();
    factoryBean.setResources(new ByteArrayResource(s.getBytes()));
    //使用springboot内置工具类转换为Properties类似于map的格式
    Properties object = factoryBean.getObject();
    //获取更新后的数据
    String corePoolSize = object.getProperty(CORE_POOL_SIZE);
    String maximumPoolSize = object.getProperty(MAXIMUM_POOL_SIZE);
    //直接更新数据
    executor.setCorePoolSize(Integer.parseInt(corePoolSize));
    executor.setMaximumPoolSize(Integer.parseInt(maximumPoolSize));

}

@Override
public void afterPropertiesSet() throws Exception {
    //将这个NacosLinsenter与当前的dataId一一绑定
    configService.addListener(DATA_ID,GROUP,this);
}
}
3. 开始在user模块使用 dtp-spring-boot-starter模块
创建启动Springboot配置类
package com.laoyang;

import com.alibaba.nacos.spring.context.annotation.config.NacosPropertySource;
import com.alibaba.nacos.spring.context.annotation.discovery.EnableNacosDiscovery;
import com.laoyang.dtp.DtpExecutor;
import org.springframework.beans.factory.annotation.Autowired;
import org.springframework.boot.SpringApplication;
import org.springframework.boot.autoconfigure.SpringBootApplication;
import org.springframework.context.annotation.Bean;
import org.springframework.core.env.Environment;


/**
 * @author:Kevin
 * @create: 2023-10-24 17:04
 * @Description:
 */
@SpringBootApplication
@NacosPropertySource(dataId = "dtp.yaml", autoRefreshed = true)
public class UserApplication {

    public static void main(String[] args) {
        SpringApplication.run(UserApplication.class, args);
    }
}
创建Controller注入动态线程池对象来使用
package com.laoyang.Controller;

import com.laoyang.dtp.DtpExecutor;
import org.springframework.beans.factory.annotation.Autowired;
import org.springframework.stereotype.Controller;
import org.springframework.web.bind.annotation.GetMapping;

import java.util.concurrent.ThreadPoolExecutor;

/**
 * @author:Kevin
 * @create: 2023-10-24 17:05
 * @Description: 视图层
 */
@Controller
public class UserController {

    @Autowired
    private DtpExecutor executor;

    @GetMapping
    public Integer test(){
        executor.execute(() -> dotest());
        return 1;
    }

    public void dotest(){
        System.out.println("dotest");
    }


}
到此大功告成 !!
二,改进
优化1: 假如我们没有配置核心线程数或者最大线程数的话会报错,所以我们要优雅的创建默认值。
步骤:创建配置文件对象(
@ConfigurationProperties("dtp")这个注解会根据参数,找到nacos的配置文件的yml格式的字段,并变成Bean对象。
)
package com.laoyang.dtp;

import org.springframework.boot.context.properties.ConfigurationProperties;

/**
 * @author:Kevin
 * @create: 2023-10-24 21:29
 * @Description: 创建配置文件对象
 */
@ConfigurationProperties("dtp")
public class DtpProperties {

    private String corePoolSize = "10";
    private String maximumPoolSize = "100";

    public String getCorePoolSize() {
        return corePoolSize;
    }

    public void setCorePoolSize(String corePoolSize) {
        this.corePoolSize = corePoolSize;
    }

    public String getMaximumPoolSize() {
        return maximumPoolSize;
    }

    public void setMaximumPoolSize(String maximumPoolSize) {
        this.maximumPoolSize = maximumPoolSize;
    }
}
然后在DtpExecutorAutoConfiguration核心配置类中加上@EnableConfigurationProperties(DtpProperties.class) 注解
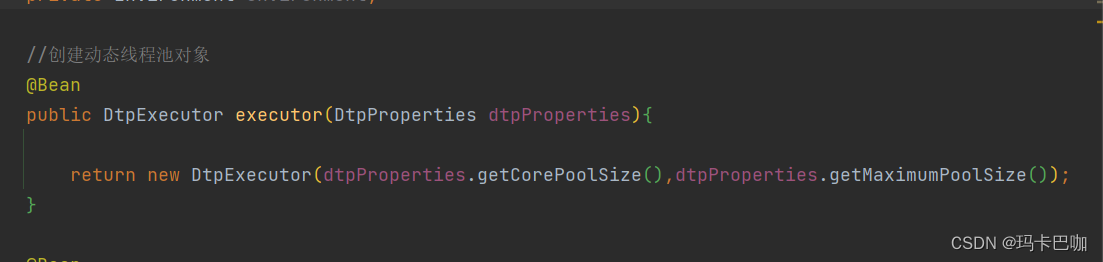
然后通过传参的形式优化
优化2. 上面的只能实现一个线程池对象,但是实际项目中并不只是这一个线程池对象,所以接下来我们需要进行优化!
创建一个DtpUtil 将来用来存放创建的多个线程池对象
package com.laoyang.dtp;

import java.util.HashMap;
import java.util.concurrent.ConcurrentHashMap;

/**
 * @author:Kevin
 * @create: 2023-10-24 22:29
 * @Description:    线程安全的ConcurrentHashMap
 */

public class DtpUtil {

//    public static ConcurrentHashMap<String,DtpExecutor> map = new ConcurrentHashMap<>();
    public static HashMap<String,DtpExecutor> map = new HashMap<>();

    public static void set(String name,DtpExecutor dtpExecutor){
        map.put(name,dtpExecutor);
    }

    public static DtpExecutor get(String name) {
        return map.get(name);
    }

}
实现手动注册bean对象
package com.laoyang.dtp;

import org.springframework.beans.factory.support.AbstractBeanDefinition;
import org.springframework.beans.factory.support.BeanDefinitionBuilder;
import org.springframework.beans.factory.support.BeanDefinitionRegistry;
import org.springframework.beans.factory.support.BeanNameGenerator;
import org.springframework.boot.context.properties.bind.Bindable;
import org.springframework.boot.context.properties.bind.Binder;
import org.springframework.context.EnvironmentAware;
import org.springframework.context.annotation.ImportBeanDefinitionRegistrar;
import org.springframework.core.ResolvableType;
import org.springframework.core.env.Environment;
import org.springframework.core.type.AnnotationMetadata;

/**
 * @author:Kevin
 * @create: 2023-10-24 21:57
 * @Description: 注册配置文件bean
 */

public class DtpImportBeanDefinationRegister implements ImportBeanDefinitionRegistrar, EnvironmentAware {

    //传入配置文件对象
    private Environment environment;

    @Override
    public void registerBeanDefinitions(AnnotationMetadata importingClassMetadata, BeanDefinitionRegistry registry, BeanNameGenerator importBeanNameGenerator) {
        //注册bean,读取用户配置的dtp后面定义的线程池列表,然后转换为DtpProperties对象
        DtpProperties dtpProperties = new DtpProperties();

        Binder binder = Binder.get(environment);
        ResolvableType type = ResolvableType.forClass(DtpProperties.class);
        Bindable<?> target = Bindable.of(type).withExistingValue(dtpProperties);
        binder.bind("dtp",target);

        //遍历配置,拿到所有的线程池列表
        for (DtpProperties.DtpExecutorProperties executorProperties : dtpProperties.getDtpExecutors()) {
            AbstractBeanDefinition beanDefinition = BeanDefinitionBuilder.genericBeanDefinition().getBeanDefinition();
            beanDefinition.setBeanClass(DtpExecutor.class);
            //往这个DtpExecutor的有参函数中传入两个值
            beanDefinition.getConstructorArgumentValues().addGenericArgumentValue(executorProperties.getCorePoolSize());
            beanDefinition.getConstructorArgumentValues().addGenericArgumentValue(executorProperties.getMaximumPoolSize());

            registry.registerBeanDefinition(executorProperties.getName(),beanDefinition);

        }


    }

    //
    @Override
    public void setEnvironment(Environment environment) {
        this.environment = environment;
    }
}
同时不要忘了在核心配置类注入这个配置
创建bean的后置处理器
package com.laoyang.dtp;

import org.springframework.beans.BeansException;
import org.springframework.beans.factory.config.BeanPostProcessor;

/**
 * @author:Kevin
 * @create: 2023-10-25 10:29
 * @Description: bean的后置处理器:用于注入我们的多动态线程池对象
 */

public class DtpBeanPostProcessor implements BeanPostProcessor {

    /**
     *         注入这个对象 DtpExecutor
     * @param bean
     * @param beanName
     * @return
     * @throws BeansException
     */
    @Override
    public Object postProcessAfterInitialization(Object bean, String beanName) throws BeansException {

        if (bean instanceof DtpExecutor){
            DtpUtil.set(beanName,(DtpExecutor)bean);
        }

        return bean;
    }
}
也需要导入该配置类
最后在监听类修改代码(NacosLinsenter)
package com.laoyang.dtp;

import com.alibaba.nacos.api.annotation.NacosInjected;
import com.alibaba.nacos.api.config.ConfigService;
import com.alibaba.nacos.api.config.listener.Listener;
import org.springframework.beans.factory.InitializingBean;
import org.springframework.beans.factory.annotation.Autowired;
import org.springframework.beans.factory.config.YamlPropertiesFactoryBean;
import org.springframework.boot.context.properties.bind.Bindable;
import org.springframework.boot.context.properties.bind.Binder;
import org.springframework.boot.context.properties.source.MapConfigurationPropertySource;
import org.springframework.core.ResolvableType;
import org.springframework.core.io.ByteArrayResource;

import java.util.List;
import java.util.Properties;
import java.util.concurrent.Executor;
import java.util.concurrent.Executors;


/**
 * @author:Kevin
 * @create: 2023-10-24 19:56
 * @Description: nacos自带监听器
 */

public class NacosLinsenter implements Listener, InitializingBean {

    @NacosInjected
    private ConfigService configService;

    //nacos的dataId的名称
    private static final String DATA_ID = "dtp.yaml";

    private static final String GROUP = "DEFAULT_GROUP";


    //创建一个线程池供下面的调用
    @Override
    public Executor getExecutor() {
        return Executors.newFixedThreadPool(1);
    }


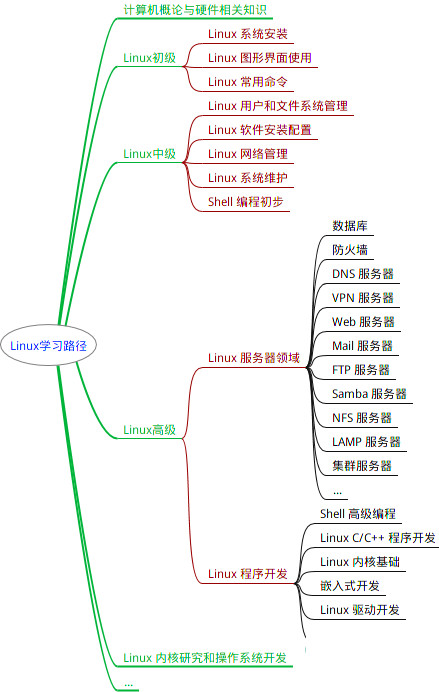
最全的Linux教程,Linux从入门到精通
======================
-
linux从入门到精通(第2版)
-
Linux系统移植
-
Linux驱动开发入门与实战
-
LINUX 系统移植 第2版
-
Linux开源网络全栈详解 从DPDK到OpenFlow
第一份《Linux从入门到精通》466页
====================
内容简介
====
本书是获得了很多读者好评的Linux经典畅销书**《Linux从入门到精通》的第2版**。本书第1版出版后曾经多次印刷,并被51CTO读书频道评为“最受读者喜爱的原创IT技术图书奖”。本书第﹖版以最新的Ubuntu 12.04为版本,循序渐进地向读者介绍了Linux 的基础应用、系统管理、网络应用、娱乐和办公、程序开发、服务器配置、系统安全等。本书附带1张光盘,内容为本书配套多媒体教学视频。另外,本书还为读者提供了大量的Linux学习资料和Ubuntu安装镜像文件,供读者免费下载。

本书适合广大Linux初中级用户、开源软件爱好者和大专院校的学生阅读,同时也非常适合准备从事Linux平台开发的各类人员。
需要《Linux入门到精通》、《linux系统移植》、《Linux驱动开发入门实战》、《Linux开源网络全栈》电子书籍及教程的工程师朋友们劳烦您转发+评论
网上学习资料一大堆,但如果学到的知识不成体系,遇到问题时只是浅尝辄止,不再深入研究,那么很难做到真正的技术提升。
一个人可以走的很快,但一群人才能走的更远!不论你是正从事IT行业的老鸟或是对IT行业感兴趣的新人,都欢迎加入我们的的圈子(技术交流、学习资源、职场吐槽、大厂内推、面试辅导),让我们一起学习成长!


 612
612

 被折叠的 条评论
为什么被折叠?
被折叠的 条评论
为什么被折叠?
 到【灌水乐园】发言


