


在 Qt Quick 中有两套与布局管理相关的类库,一套叫作 Item Positioner(定位器),一套叫作 Item Layout(布局)。
- 定位器包括 Row(行定位器)、Column(列定位器)、Grid(表格定位器)、Flow(流式定位器)。
- 布局管理器包括行布局(RowLayout)、列布局(ColumnLayout)、表格布局(GridLayout)。
另外还有一种锚布局,这里我们先介绍这个。
1、简介
anchors 提供了一种方式,让你可以通过指定一个元素与其他元素的关系来确定元素在界面中的位置,即锚布局。
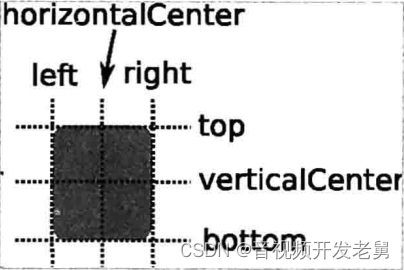
你可以想象一下,每个 Item 都有 7 条不可见的辅线:左(left)、水平中心(horizontalCenter)、 上(top)、下(bottom)、右(right)、垂直中心(verticalCenter)、基线(baseline)。如下图所示:
本文福利,莬费领取Qt开发学习资料包、技术视频,内容包括(C++语言基础,Qt编程入门,QT信号与槽机制,QT界面开发-图像绘制,QT网络,QT数据库编程,QT项目实战,QSS,OpenCV,Quick模块,面试题等等)↓↓↓↓↓↓见下面↓↓文章底部点击莬费领取↓↓
使用 anchors 布局时,除了对齐锚线,还可以指定上(topMargin)、下(bottomMargin)、 左(leftMargin)、右(rightMargin)四个边的留白。如下图所示:
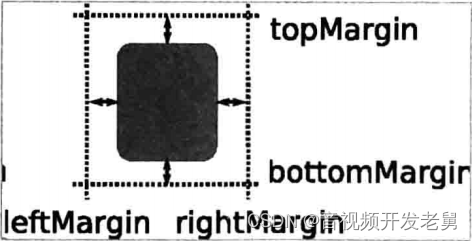
而如果你想懒省事儿,也可以使用 margins 属性将四个边的留白设置成一样。
锚布局是最灵活的一种 Qt Quick 布局方式,使用它你可以随意摆布界面上那些可见元素,不过,如果你的界面元素很多,它也将是代码量最大的一种布局方式。
2、各种例子
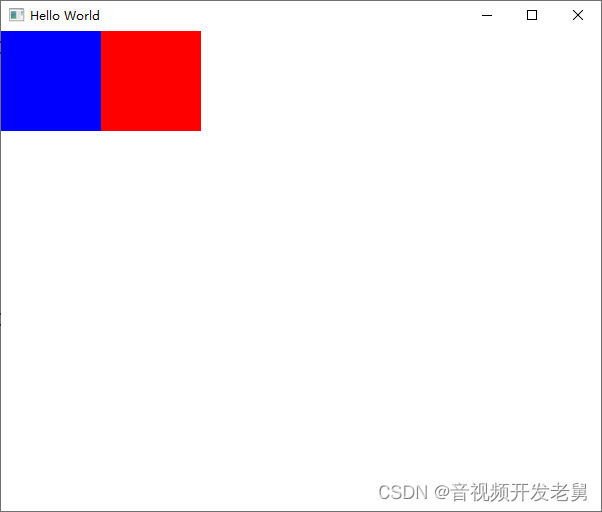
例子1,两个矩形在窗口左侧,无间距:
import QtQuick 2.9
import QtQuick.Window 2.2
import QtQuick.Controls 2.4

Window {
    visible: true
    width: 600
    height: 480
    title: qsTr("Hello World")

    Rectangle {
        id: rect1
        width: 100
        height: 100
        color: "blue"
        anchors.left: parent.left
    }

    Rectangle {
        id: rect2
        width: 100
        height: 100
        color: "red"
        anchors.left: rect1.right
    }
}
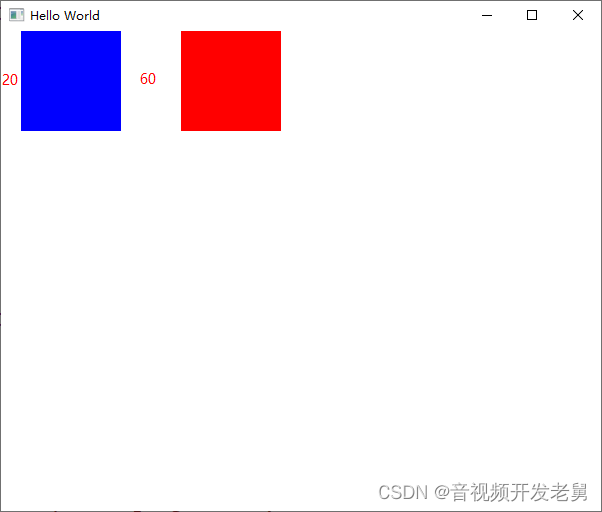
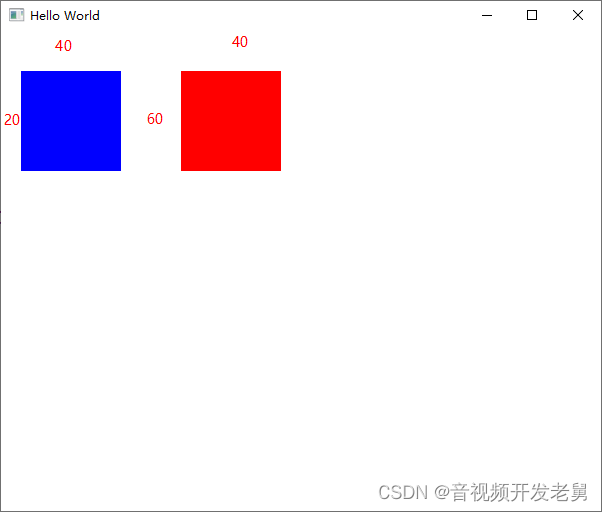
例子2,上面的两个矩形挨得太紧了,要留点间距,可以通过指定 anchors.leftMargin 的留白来实现:
import QtQuick 2.9
import QtQuick.Window 2.2
import QtQuick.Controls 2.4

Window {
    visible: true
    width: 600
    height: 480
    title: qsTr("Hello World")

    Rectangle {
        id: rect1
        width: 100
        height: 100
        color: "blue"
        anchors.left: parent.left
        anchors.leftMargin: 20
    }

    Rectangle {
        id: rect2
        width: 100
        height: 100
        color: "red"
        anchors.left: rect1.right
        anchors.leftMargin: 60
    }
}
例子3,同时在上方也留点间距:
import QtQuick 2.9
import QtQuick.Window 2.2
import QtQuick.Controls 2.4

Window {
    visible: true
    width: 600
    height: 480
    title: qsTr("Hello World")

    Rectangle {
        id: rect1
        width: 100
        height: 100
        color: "blue"
        anchors.left: parent.left
        anchors.leftMargin: 20
        anchors.top: parent.top
        anchors.topMargin: 40
    }

    Rectangle {
        id: rect2
        width: 100
        height: 100
        color: "red"
        anchors.left: rect1.right
        anchors.leftMargin: 60
        anchors.top: parent.top
        anchors.topMargin: 40
    }
}
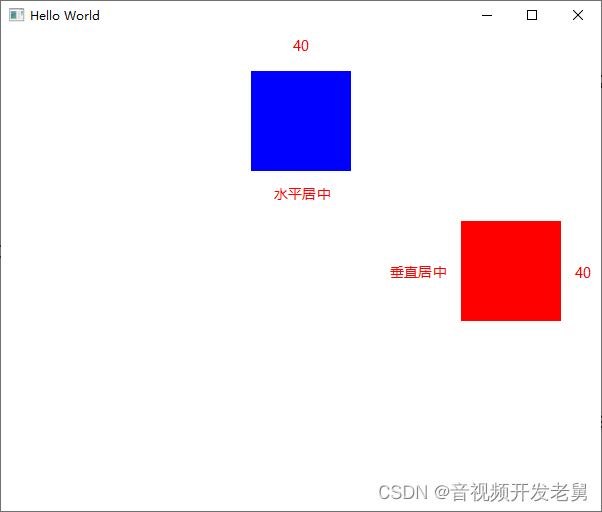
例子4,一个矩形水平居中,另一个矩形垂直居中:
import QtQuick 2.9
import QtQuick.Window 2.2
import QtQuick.Controls 2.4

Window {
    visible: true
    width: 600
    height: 480
    title: qsTr("Hello World")

    Rectangle {
        id: rect1
        width: 100
        height: 100
        color: "blue"
        anchors.horizontalCenter: parent.horizontalCenter
        anchors.top: parent.top
        anchors.topMargin: 40
    }

    Rectangle {
        id: rect2
        width: 100
        height: 100
        color: "red"
        anchors.verticalCenter: parent.verticalCenter
        anchors.right: parent.right
        anchors.rightMargin: 40
    }
}
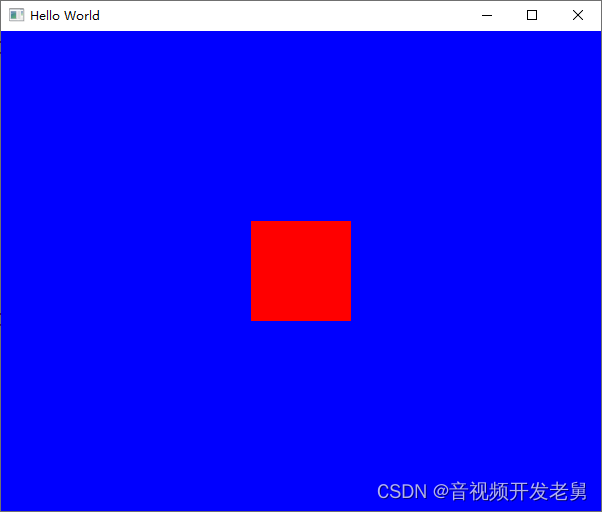
例子5,centerln 表示将一个 Item 居中放置到一个 Item 内;fill 表示充满某个 Item:
import QtQuick 2.9
import QtQuick.Window 2.2
import QtQuick.Controls 2.4

Window {
    visible: true
    width: 600
    height: 480
    title: qsTr("Hello World")

    Rectangle {
        id: rect1
        color: "blue"
        anchors.fill: parent
    }

    Rectangle {
        id: rect2
        width: 100
        height: 100
        color: "red"
        anchors.centerIn: parent
    }
}
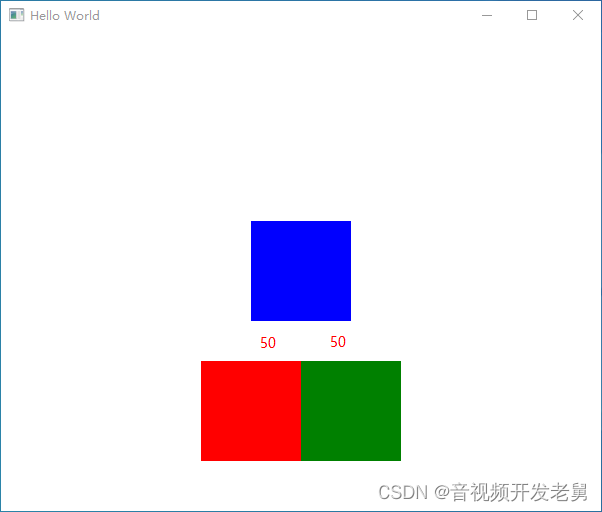
例子6,三个矩形摆放成"三头犬"的形式:
import QtQuick 2.9
import QtQuick.Window 2.2
import QtQuick.Controls 2.4

Window {
    visible: true
    width: 600
    height: 480
    title: qsTr("Hello World")

    Rectangle {
        id: rect1
        width: 100
        height: 100
        color: "blue"
        anchors.centerIn: parent
    }

    Rectangle {
        id: rect2
        width: 100
        height: 100
        color: "red"
        anchors.top: rect1.bottom
        anchors.topMargin: 40
        anchors.right: rect1.left
        anchors.rightMargin: -50 // 可以使用负值
    }

    Rectangle {
        id: rect3
        width: 100
        height: 100
        color: "green"
        anchors.top: rect1.bottom
        anchors.topMargin: 40
        anchors.left: rect1.left
        anchors.leftMargin: 50
    }
}
本文福利,莬费领取Qt开发学习资料包、技术视频,内容包括(C++语言基础,Qt编程入门,QT信号与槽机制,QT界面开发-图像绘制,QT网络,QT数据库编程,QT项目实战,QSS,OpenCV,Quick模块,面试题等等)↓↓↓↓↓↓见下面↓↓文章底部点击莬费领取↓↓


 9228
9228


 被折叠的 条评论
为什么被折叠?
被折叠的 条评论
为什么被折叠?
 到【灌水乐园】发言


