


InsertAsyncTask(NoteDao noteDao) {
this.noteDao = noteDao;
}
@Override
protected Void doInBackground(Note… notes) {
noteDao.insertNotes(notes);
return null;
}
}
static class UpdateAsyncTask extends AsyncTask<Note, Void, Void>{
private NoteDao noteDao;
UpdateAsyncTask(NoteDao noteDao) {
this.noteDao = noteDao;
}
@Override
protected Void doInBackground(Note… notes) {
noteDao.updateNotes(notes);
return null;
}
}
static class DeleteAllAsyncTask extends AsyncTask<Note, Void, Void>{
private NoteDao noteDao;
DeleteAllAsyncTask(NoteDao noteDao) {
this.noteDao = noteDao;
}
@Override
protected Void doInBackground(Note… notes) {
noteDao.deleteAllNotes();
return null;
}
}
static class DeleteAsyncTask extends AsyncTask<Note, Void, Void>{
private NoteDao noteDao;
DeleteAsyncTask(NoteDao noteDao) {
this.noteDao = noteDao;
}
@Override
protected Void doInBackground(Note… notes) {
noteDao.deleteNotes(notes);
return null;
}
}
}
为什么要使用ViewModel?
ViewModel 是数据与 UI 分离的中间层,提供了一个将数据转换为 UI 友好型数据的场所。其次,它也提供了多 Fragment 复用相同 ViewModel 的机制。
为什么要使用LiveData?
LiveData 是一个可以感知 Activity 、Fragment生命周期的数据容器。当 LiveData 所持有的数据改变时,它会通知相应的界面代码进行更新。
此处为了方便,数据和界面的交互放在了Activity中,读者有需要可以使用Databinding对Activity进行进一步解耦.
public class NoteViewModel extends AndroidViewModel {
/**
- 使用数据仓库处理好的数据库交互逻辑
*/
private NoteRepository repository;
public NoteViewModel(@NonNull Application application) {
super(application);
repository = new NoteRepository(application);
}
public LiveData<List> getAllNoteLive() {
return repository.getAllWordLive();
}
public LiveData<List> queryNotesWithPattern(String pattern){
return repository.queryNotesWithPattern(pattern);
}
public void insertNotes(Note… notes){
repository.insertNotes(notes);
}
public void updateNotes(Note… notes){
repository.updateNotes(notes);
}
public void deleteNotes(Note… notes){
repository.deleteNotes(notes);
}
public void deleteAllNotes(){
repository.deleteAllNotes();
}
}
界面引入了RecyclerView,代替了传统ListView。如果没有使用过RecyclerView可以参照
其中涉及到矢量图的使用,如果没有使用过矢量图可以参照
4.1 编写主页的Fragment
fragment_notes.xml
<?xml version="1.0" encoding="utf-8"?><androidx.coordinatorlayout.widget.CoordinatorLayout xmlns:android=“http://schemas.android.com/apk/res/android”
xmlns:app=“http://schemas.android.com/apk/res-auto”
xmlns:tools=“http://schemas.android.com/tools”
android:id=“@+id/mainFragment”
android:layout_width=“match_parent”
android:layout_height=“match_parent”
tools:context=“.base.NotesFragment”>
<androidx.recyclerview.widget.RecyclerView
android:id=“@+id/recyclerView”
android:layout_width=“match_parent”
android:layout_height=“match_parent” />
<com.google.android.material.floatingactionbutton.FloatingActionButton
android:id=“@+id/floatingActionButton”
android:layout_width=“wrap_content”
android:layout_height=“wrap_content”
android:layout_gravity=“bottom|center”
android:layout_margin=“16dp”
android:clickable=“true”
app:srcCompat=“@drawable/ic_add_white_24dp” />
</androidx.coordinatorlayout.widget.CoordinatorLayout>
cell_card.xml
<?xml version="1.0" encoding="utf-8"?><LinearLayout xmlns:android=“http://schemas.android.com/apk/res/android”
xmlns:app=“http://schemas.android.com/apk/res-auto”
xmlns:tools=“http://schemas.android.com/tools”
android:layout_width=“match_parent”
android:layout_height=“wrap_content”
android:clickable=“true”
android:orientation=“vertical”>
<androidx.cardview.widget.CardView
android:layout_width=“match_parent”
android:layout_height=“match_parent”
android:layout_marginLeft=“8dp”
android:layout_marginTop=“8dp”
android:layout_marginRight=“8dp”
android:foreground=“?selectableItemBackground”>
<androidx.constraintlayout.widget.ConstraintLayout
android:layout_width=“match_parent”
android:layout_height=“match_parent”>
<androidx.constraintlayout.widget.Guideline
android:id=“@+id/guideline1”
android:layout_width=“wrap_content”
android:layout_height=“wrap_content”
android:orientation=“vertical”
app:layout_constraintGuide_percent=“0.85” />
<ImageView
android:id=“@+id/imageView”
android:layout_width=“wrap_content”
android:layout_height=“wrap_content”
app:layout_constraintBottom_toBottomOf=“parent”
app:layout_constraintEnd_toEndOf=“parent”
app:layout_constraintStart_toStartOf=“@+id/guideline1”
app:layout_constraintTop_toTopOf=“parent”
app:srcCompat=“@drawable/ic_keyboard_arrow_right_black_24dp” />
<TextView
android:id=“@+id/textView_title”
android:layout_width=“0dp”
android:layout_height=“wrap_content”
android:layout_marginStart=“8dp”
android:layout_marginLeft=“8dp”
android:layout_marginTop=“8dp”
android:text=“TextView”
android:textSize=“24sp”
app:layout_constraintBottom_toTopOf=“@+id/textView_time”
app:layout_constraintEnd_toStartOf=“@+id/guideline1”
app:layout_constraintHorizontal_bias=“0.05”
app:layout_constraintStart_toStartOf=“parent”
app:layout_constraintTop_toTopOf=“parent” />
<TextView
android:id=“@+id/textView_time”
android:layout_width=“0dp”
android:layout_height=“wrap_content”
android:layout_marginBottom=“8dp”
android:text=“TextView”
app:layout_constraintBottom_toBottomOf=“parent”
app:layout_constraintEnd_toStartOf=“@+id/guideline1”
app:layout_constraintStart_toStartOf=“@+id/textView_title”
app:layout_constraintTop_toBottomOf=“@+id/textView_title” />
</androidx.constraintlayout.widget.ConstraintLayout>
</androidx.cardview.widget.CardView>
4.2 编写主界面映射Fragment界面
为什么要这样处理?
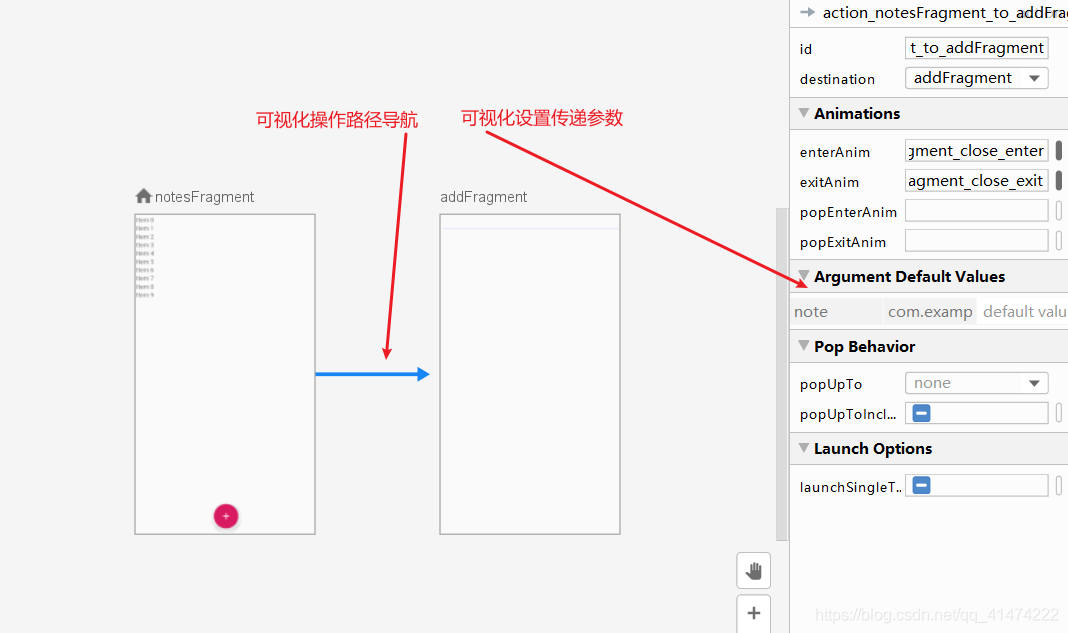
在fragment中编写好界面后,只需要在main_activity将界面映射过来,之后页面的切换与数据传递交由Navigation作为导航管理Fragment。期间你的路径与与数据设置只需在可视化中简单操作即可。在main_activity只需要做很少的处理即可
main_activity.xml
<?xml version="1.0" encoding="utf-8"?><androidx.constraintlayout.widget.ConstraintLayout xmlns:android=“http://schemas.android.com/apk/res/android”
xmlns:app=“http://schemas.android.com/apk/res-auto”
xmlns:tools=“http://schemas.android.com/tools”
android:layout_width=“match_parent”
android:layout_height=“match_parent”
tools:context=“.MainActivity”>
<fragment
android:id=“@+id/fragment”
android:name=“androidx.navigation.fragment.NavHostFragment”
android:layout_width=“0dp”
android:layout_height=“0dp”
app:defaultNavHost=“true”
app:layout_constraintBottom_toBottomOf=“parent”
app:layout_constraintEnd_toEndOf=“parent”
app:layout_constraintStart_toStartOf=“parent”
app:layout_constraintTop_toTopOf=“parent”
app:navGraph=“@navigation/navigation” />
</androidx.constraintlayout.widget.ConstraintLayout>
public class MyAdapt extends ListAdapter<Note, MyAdapt.MyViewHolder> {
public MyAdapt() {
super(new DiffUtil.ItemCallback() {
@Override
public boolean areItemsTheSame(@NonNull Note oldItem, @NonNull Note newItem) {
return oldItem.getId() == newItem.getId();
}
@Override
public boolean areContentsTheSame(@NonNull Note oldItem, @NonNull Note newItem) {
return oldItem.getContent().equals(newItem.getContent()) &&
oldItem.getLastUpdateTime().equals(newItem.getLastUpdateTime());
}
});
}
/**
- 在适配器中创建 ViewHolder,选择item注入
*/
@NonNull
@Override
public MyViewHolder onCreateViewHolder(@NonNull ViewGroup parent, int viewType) {
LayoutInflater layoutInflater = LayoutInflater.from(parent.getContext());
View itemView = layoutInflater.inflate(R.layout.cell_card, parent, false);
return new MyViewHolder(itemView);
}
/**
-
对每条item进行数据绑定
-
经常被呼叫,每次滚入滚出都会调用,所以监听绑定放入onCreateViewHolder中
*/
@Override
public void onBindViewHolder(@NonNull MyViewHolder holder, int position) {
Note note = getItem(position);
holder.textView_title.setText(note.getTitle());
//对日期格式化再输出
@SuppressLint(“SimpleDateFormat”) SimpleDateFormat simpleDateFormat = new SimpleDateFormat(“yyyy-MM-dd HH:mm:ss”);
holder.textView_time.setText(simpleDateFormat.format(note.getLastUpdateTime()));
holder.itemView.setOnClickListener(v -> {
Bundle bundle = new Bundle();
bundle.putSerializable(“note”, note);
//传递参数
NavController navController = Navigation.findNavController(v);
navController.navigate(R.id.action_notesFragment_to_addFragment, bundle);
});
}
/**
-
自定义 holder对应 item
-
内部类最好使用static修饰,防止内存泄漏
*/
static class MyViewHolder extends RecyclerView.ViewHolder {
TextView textView_title, textView_time;
MyViewHolder(@NonNull View itemView) {
super(itemView);
textView_title = itemView.findViewById(R.id.textView_title);
textView_time = itemView.findViewById(R.id.textView_time);
}
}
}
6.编写Fragment(对不同Fragment功能进行简要介绍)
6.1 编写主界面Fragment逻辑
主界面一些逻辑处理比较复杂,涉及到一些功能如
搜索、清空、数据观察、观察移除(数据观察这块需要注意传入的环境,博主之前没传好出现一些比较奇怪的bug,注释有标明)。包括扩展功能如:撤销删除、滑动删除、矢量图定点绘制(需要有一定的图形代码编写基础)
public class NotesFragment extends Fragment {
//final String TAG = “mainTag”;
//视图层
private NoteViewModel noteViewModel;
private RecyclerView recyclerView;
private MyAdapt myAdapt;
//数据层
private LiveData<List> noteLive;
private FragmentActivity fragmentActivity;
//操作标识,只有更新时候才上移。更新删除保持不动
private boolean undoAction;
/**
-
实时保存数据列表,防止通过liveData时直接获取元素时因为异步获取,发生空指针异常
-
主要用于标记滑动删除中的撤销
*/
private List allNotes;
public NotesFragment() {
// 显示菜单栏目
setHasOptionsMenu(true);
}
/**
- 当复合的选项菜单被选中,其监听在此处处理。如:清空数据功能
*/
@Override
public boolean onOptionsItemSelected(@NonNull MenuItem item) {
//多个选项菜单,根据不同菜单项的R.id进行匹配操作
if (item.getItemId() == R.id.clear_data) {//清空数据前需要弹窗确认
AlertDialog.Builder builder = new AlertDialog.Builder(fragmentActivity);
builder.setTitle(“清空数据”);
builder.setPositiveButton(“确定”, (dialog, which) -> noteViewModel.deleteAllNotes());
builder.setNegativeButton(“取消”, (dialog, which) -> {
});
builder.create();
builder.show();
}
return super.onOptionsItemSelected(item);
}
/**
- 初始化菜单栏,并实现显式菜单项功能show
*/
@Override
public void onCreateOptionsMenu(@NonNull Menu menu, @NonNull MenuInflater inflater) {
super.onCreateOptionsMenu(menu, inflater);
inflater.inflate(R.menu.main_menu, menu);
//搜索
SearchView searchView = (SearchView) menu.findItem(R.id.app_bar_search).getActionView();
//控制搜索框长度
int maxWidth = searchView.getMaxWidth();
searchView.setMaxWidth((int) (0.5 * maxWidth));
//设置搜索框的实时监听
searchView.setOnQueryTextListener(new SearchView.OnQueryTextListener() {
@Override
public boolean onQueryTextSubmit(String query) {
return false;
}
@Override
public boolean onQueryTextChange(String newText) {
//去除多余前后空格
String pattern = newText.trim();
noteLive = noteViewModel.queryNotesWithPattern(pattern);
/*
注意:重新赋予LiveData后最好先移除之前的观察。
大坑:观察的移除和注入都必须是getViewLifecycleOwner获取的LifecycleOwner。其对应fragment的生命周期
*/
noteLive.removeObservers(getViewLifecycleOwner());
//对LiveData重新进行观察,注意Owner的生命周期,需要注入fragment的owner
noteLive.observe(getViewLifecycleOwner(), notes -> {
//备份列表
allNotes = notes;
//将观察的数据注入RecycleAdapt中
myAdapt.submitList(notes);
});
//修改为返回true后事件不会再向下传递,默认false会继续传递
return true;
}
});
}
@Override
public View onCreateView(LayoutInflater inflater, ViewGroup container,
Bundle savedInstanceState) {
// Inflate the layout for this fragment
return inflater.inflate(R.layout.fragment_notes, container, false);
}
@Override
public void onActivityCreated(@Nullable Bundle savedInstanceState) {
super.onActivityCreated(savedInstanceState);
fragmentActivity = requireActivity();
//初始化当前页面所用ViewModel,注入activity
noteViewModel = new ViewModelProvider(fragmentActivity).get(NoteViewModel.class);
//初始化recyclerView
recyclerView = fragmentActivity.findViewById(R.id.recyclerView);
myAdapt = new MyAdapt();
//recyclerView.setLayoutManager(new StaggeredGridLayoutManager(2, StaggeredGridLayoutManager.VERTICAL));//大坑
recyclerView.setLayoutManager(new LinearLayoutManager(fragmentActivity));//大坑,不设置布局不显示
recyclerView.setAdapter(myAdapt);
//观察数据列表
noteLive = noteViewModel.getAllNoteLive();
//需要注入fragment的owner
noteLive.observe(getViewLifecycleOwner(), notes -> {
//Log.d(TAG, "onChanged: " + notes);
//读取当前显示列表的个数
int temp = myAdapt.getItemCount();
//备份列表
allNotes = notes;
//如果数据变化后的元素 > 变化前的个数 说明是添加操作,进行
if (notes.size() > temp && !undoAction) {
/*
滚动到首部,增强视觉效果
注意定时任务,否则太快会定位到第二行
*/
new Timer().schedule(new TimerTask() {
public void run() {
recyclerView.smoothScrollToPosition(0);
}
}, 300);
}
//如果是撤销删除任务调用观察,撤销后需要恢复undoAction状态
if (undoAction) {
undoAction = false;
}
//将观察的数据注入RecycleAdapt中
myAdapt.submitList(notes);
});
//初始化floatingActionButton浮动按钮
FloatingActionButton floatingActionButton = fragmentActivity.findViewById(R.id.floatingActionButton);
floatingActionButton.setOnClickListener(v -> {
NavController navController = Navigation.findNavController(v);
navController.navigate(R.id.action_notesFragment_to_addFragment);
});
//滑动删除
/*
参数简介:
@param dragDirs Binary OR of direction flags in which the Views can be dragged.
(上下拖动 ItemTouchHelper.UP | ItemTouchHelper.DOWN)
@param swipeDirs Binary OR of direction flags in which the Views can be swiped.
(左右滑动 ItemTouchHelper.START | ItemTouchHelper.END)
*/
new ItemTouchHelper(new ItemTouchHelper.SimpleCallback(0, ItemTouchHelper.START | ItemTouchHelper.END) {
@Override
public boolean onMove(@NonNull RecyclerView recyclerView, @NonNull RecyclerView.ViewHolder viewHolder, @NonNull RecyclerView.ViewHolder target) {
//处理上下拖动
return false;
}
@Override
public void onSwiped(@NonNull RecyclerView.ViewHolder viewHolder, int direction) {
//处理左右滑动
//通过提前备份note处理空指针异常,通过viewHolder.getAdapterPosition()定位元素位置
Note deleteNote = allNotes.get(viewHolder.getAdapterPosition());
//删除滑出元素
noteViewModel.deleteNotes(deleteNote);
//提供撤销操作,此处需要更改fragment中的布局为CoordinatorLayout,否则会被浮动按钮遮挡
Snackbar.make(fragmentActivity.findViewById(R.id.mainFragment), “删除了一个笔记”, Snackbar.LENGTH_SHORT)
.setAction(“撤销”, v -> {
//与添加进行区分,防止添加的上移动作混入
undoAction = true;
//添加回删除的元素
noteViewModel.insertNotes(deleteNote);
}).show();
}
//在滑动的时候,画出浅灰色背景和垃圾桶图标,增强删除的视觉效果
Drawable icon = ContextCompat.getDrawable(requireActivity(), R.drawable.ic_delete_black_24dp);
Drawable background = new ColorDrawable(Color.LTGRAY);
@Override
public void onChildDraw(@NonNull Canvas c, @NonNull RecyclerView recyclerView, @NonNull RecyclerView.ViewHolder viewHolder, float dX, float dY, int actionState, boolean isCurrentlyActive) {
super.onChildDraw(c, recyclerView, viewHolder, dX, dY, actionState, isCurrentlyActive);
View itemView = viewHolder.itemView;
int iconMargin = (itemView.getHeight() - icon.getIntrinsicHeight()) / 2;
int iconLeft, iconRight, iconTop, iconBottom;
int backTop, backBottom, backLeft, backRight;
backTop = itemView.getTop();
backBottom = itemView.getBottom();
iconTop = itemView.getTop() + (itemView.getHeight() - icon.getIntrinsicHeight()) / 2;
iconBottom = iconTop + icon.getIntrinsicHeight();
if (dX > 0) {
backLeft = itemView.getLeft();
backRight = itemView.getLeft() + (int) dX;
background.setBounds(backLeft, backTop, backRight, backBottom);
iconLeft = itemView.getLeft() + iconMargin;
iconRight = iconLeft + icon.getIntrinsicWidth();
icon.setBounds(iconLeft, iconTop, iconRight, iconBottom);
} else if (dX < 0) {
backRight = itemView.getRight();
自我介绍一下,小编13年上海交大毕业,曾经在小公司待过,也去过华为、OPPO等大厂,18年进入阿里一直到现在。
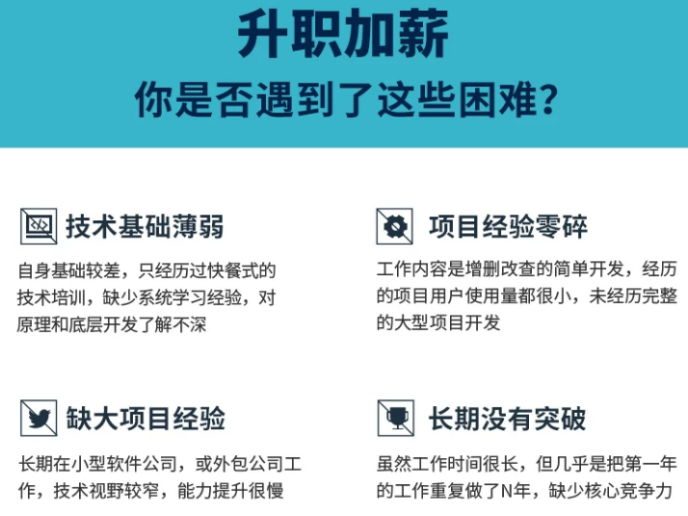
深知大多数初中级安卓工程师,想要提升技能,往往是自己摸索成长,但自己不成体系的自学效果低效又漫长,而且极易碰到天花板技术停滞不前!
因此收集整理了一份《2024年最新Android移动开发全套学习资料》送给大家,初衷也很简单,就是希望能够帮助到想自学提升又不知道该从何学起的朋友,同时减轻大家的负担。
由于文件比较大,这里只是将部分目录截图出来,每个节点里面都包含大厂面经、学习笔记、源码讲义、实战项目、讲解视频
如果你觉得这些内容对你有帮助,可以添加下面V无偿领取!(备注Android)

backBottom = itemView.getBottom();
iconTop = itemView.getTop() + (itemView.getHeight() - icon.getIntrinsicHeight()) / 2;
iconBottom = iconTop + icon.getIntrinsicHeight();
if (dX > 0) {
backLeft = itemView.getLeft();
backRight = itemView.getLeft() + (int) dX;
background.setBounds(backLeft, backTop, backRight, backBottom);
iconLeft = itemView.getLeft() + iconMargin;
iconRight = iconLeft + icon.getIntrinsicWidth();
icon.setBounds(iconLeft, iconTop, iconRight, iconBottom);
} else if (dX < 0) {
backRight = itemView.getRight();
自我介绍一下,小编13年上海交大毕业,曾经在小公司待过,也去过华为、OPPO等大厂,18年进入阿里一直到现在。
深知大多数初中级安卓工程师,想要提升技能,往往是自己摸索成长,但自己不成体系的自学效果低效又漫长,而且极易碰到天花板技术停滞不前!
因此收集整理了一份《2024年最新Android移动开发全套学习资料》送给大家,初衷也很简单,就是希望能够帮助到想自学提升又不知道该从何学起的朋友,同时减轻大家的负担。
[外链图片转存中…(img-CVi41R51-1711290057149)]
[外链图片转存中…(img-CTUAnP0U-1711290057150)]
[外链图片转存中…(img-fUEoeyQ5-1711290057150)]
[外链图片转存中…(img-bAgS3RIT-1711290057150)]
由于文件比较大,这里只是将部分目录截图出来,每个节点里面都包含大厂面经、学习笔记、源码讲义、实战项目、讲解视频
如果你觉得这些内容对你有帮助,可以添加下面V无偿领取!(备注Android)
[外链图片转存中…(img-4o09XljX-1711290057151)]


 3840
3840


 被折叠的 条评论
为什么被折叠?
被折叠的 条评论
为什么被折叠?
 到【灌水乐园】发言


