


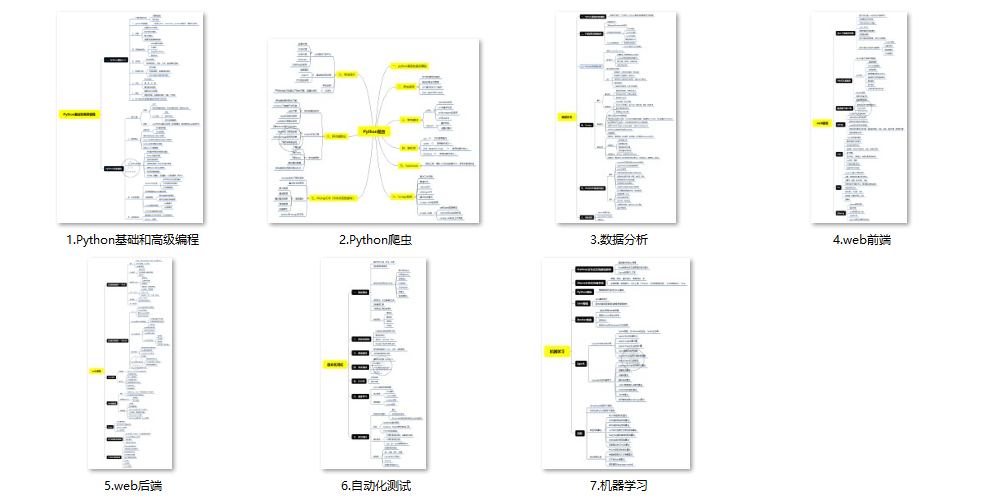
(1)Python所有方向的学习路线(新版)
这是我花了几天的时间去把Python所有方向的技术点做的整理,形成各个领域的知识点汇总,它的用处就在于,你可以按照上面的知识点去找对应的学习资源,保证自己学得较为全面。
最近我才对这些路线做了一下新的更新,知识体系更全面了。
(2)Python学习视频
包含了Python入门、爬虫、数据分析和web开发的学习视频,总共100多个,虽然没有那么全面,但是对于入门来说是没问题的,学完这些之后,你可以按照我上面的学习路线去网上找其他的知识资源进行进阶。

(3)100多个练手项目
我们在看视频学习的时候,不能光动眼动脑不动手,比较科学的学习方法是在理解之后运用它们,这时候练手项目就很适合了,只是里面的项目比较多,水平也是参差不齐,大家可以挑自己能做的项目去练练。

网上学习资料一大堆,但如果学到的知识不成体系,遇到问题时只是浅尝辄止,不再深入研究,那么很难做到真正的技术提升。
一个人可以走的很快,但一群人才能走的更远!不论你是正从事IT行业的老鸟或是对IT行业感兴趣的新人,都欢迎加入我们的的圈子(技术交流、学习资源、职场吐槽、大厂内推、面试辅导),让我们一起学习成长!
dct = {}
type(dct)
<class ‘dict’>
### 21.1创建一个类


要创建一个类,我们需要关键字类,后跟名称和冒号。类名应该是CamelCase。
#语法
class ClassName:
code goes here
**例子:**
class Person:
pass
print(Person)
<main.Person object at 0x10804e510>
### 21.2创建对象


我们可以通过调用类来创建一个对象。
p = Person()
print§
### 21.3类构造函数


在上面的例子中,我们从 Person 类创建了一个对象。然而,没有构造函数的类在实际应用中并没有真正的用处。让我们使用构造函数使我们的类更有用。与Java或JavaScript中的构造函数一样,Python也有内置的init ()构造函数。的初始化构造函数有自参数这对类的当前实例的引用
 **实施例:**
class Person:
def __init__ (self, name):
# self 允许将参数附加到类
self.name =name
p = Person(‘Asabeneh’)
print(p.name)
print§
#输出
Asabeneh
<main.Person object at 0x2abf46907e80>
让我们向构造函数添加更多参数。
class Person:
def __init__(self, firstname, lastname, age, country, city):
self.firstname = firstname
self.lastname = lastname
self.age = age
self.country = country
self.city = city
p = Person(‘Asabeneh’, ‘Yetayeh’, 250, ‘Finland’, ‘Helsinki’)
print(p.firstname)
print(p.lastname)
print(p.age)
print(p.country)
print(p.city)
p = Person ( ‘Asabeneh’ , ‘Yetayeh’ , 250 , ‘Finland’ , ‘Helsinki’ )
print ( p . firstname )
print ( p . lastname )
print ( p . age )
print ( p . country )
print ( p .city)
#输出
Asabeneh
Yetayeh
250
Finland
Helsinki
### 21.4对象方法


对象可以有方法。方法是属于对象的函数。


**例子:**
class Person:
def __init__(self, firstname, lastname, age, country, city):
self.firstname = firstname
self.lastname = lastname
self.age = age
self.country = country
self.city = city
def person_info(self):
return f’{self.firstname} {self.lastname} is {self.age} years old. He lives in {self.city}, {self.country}’
p = Person(‘Asabeneh’, ‘Yetayeh’, 250, ‘Finland’, ‘Helsinki’)
print(p.person_info())
#输出
Asabeneh Yetayeh is 250 years old. He lives in Helsinki, Finland
### 21.5对象默认方法


有时,您可能希望为对象方法设置默认值。如果我们在构造函数中给参数赋予默认值,就可以避免在不带参数的情况下调用或实例化我们的类时出错。让我们看看它的外观:


**例子:**
class Person:
def __init__(self, firstname=‘Asabeneh’, lastname=‘Yetayeh’, age=250, country=‘Finland’, city=‘Helsinki’):
self.firstname = firstname
self.lastname = lastname
self.age = age
self.country = country
self.city = city
  def person\_info(self):
    return f'{self.firstname} {self.lastname} is {self.age} years old. He lives in {self.city}, {self.country}.'
p1 = Person()
print(p1.person_info())
p2 = Person(‘John’, ‘Doe’, 30, ‘Nomanland’, ‘Noman city’)
print(p2.person_info())
#输出
Asabeneh Yetayeh is 250 years old. He lives in Helsinki, Finland.
John Doe is 30 years old. He lives in Noman city, Nomanland.
### 21.6修改类默认值的方法


在下面的例子中,person 类,所有的构造函数参数都有默认值。除此之外,我们还有技能参数,我们可以使用方法访问它。让我们创建 add\_skill 方法来将技能添加到技能列表中。
class Person:
def __init__(self, firstname=‘Asabeneh’, lastname=‘Yetayeh’, age=250, country=‘Finland’, city=‘Helsinki’):
self.firstname = firstname
self.lastname = lastname
self.age = age
self.country = country
self.city = city
self.skills = []
  def person\_info(self):
    return f'{self.firstname} {self.lastname} is {self.age} years old. He lives in {self.city}, {self.country}.'
  def add\_skill(self, skill):
      self.skills.append(skill)
p1 = Person()
print(p1.person_info())
p1.add_skill(‘HTML’)
p1.add_skill(‘CSS’)
p1.add_skill(‘JavaScript’)
p2 = Person(‘John’, ‘Doe’, 30, ‘Nomanland’, ‘Noman city’)
print(p2.person_info())
print(p1.skills)
print(p2.skills)
#输出
Asabeneh Yetayeh is 250 years old. He lives in Helsinki, Finland.
John Doe is 30 years old. He lives in Noman city, Nomanland.
[‘HTML’, ‘CSS’, ‘JavaScript’]
[]
### 21.7继承


使用继承,我们可以重用父类代码。继承允许我们定义一个继承父类的所有方法和属性的类。父类或超类或基类是提供所有方法和属性的类。子类是从另一个类或父类继承的类。让我们通过继承person类来创建一个student类。


班级 学生(人):
 通过
class Student(Person):
pass
s1 = Student(‘Eyob’, ‘Yetayeh’, 30, ‘Finland’, ‘Helsinki’)
s2 = Student(‘Lidiya’, ‘Teklemariam’, 28, ‘Finland’, ‘Espoo’)
print(s1.person_info())
s1.add_skill(‘JavaScript’)
s1.add_skill(‘React’)
s1.add_skill(‘Python’)
print(s1.skills)
print(s2.person_info())
s2.add_skill(‘Organizing’)
s2.add_skill(‘Marketing’)
s2.add_skill(‘Digital Marketing’)
print(s2.skills)
输出
Eyob Yetayeh is 30 years old. He lives in Helsinki, Finland.
[‘JavaScript’, ‘React’, ‘Python’]
Lidiya Teklemariam is 28 years old. He lives in Espoo, Finland.
[‘Organizing’, ‘Marketing’, ‘Digital Marketing’]
我们没有在子类中调用init ()构造函数。如果我们没有调用它,那么我们仍然可以从父级访问所有属性。但是如果我们确实调用了构造函数,我们就可以通过调用super来访问父属性。
 我们可以向子类添加新方法,也可以通过在子类中创建相同的方法名称来覆盖父类方法。当我们添加init ()函数时,子类将不再继承父类的init ()函数。


### 21.8Overriding parent method
class Student(Person):
def __init__ (self, firstname=‘Asabeneh’, lastname=‘Yetayeh’,age=250, country=‘Finland’, city=‘Helsinki’, gender=‘male’):
self.gender = gender
super().init(firstname, lastname,age, country, city)
def person_info(self):
gender = ‘He’ if self.gender ==‘male’ else ‘She’
return f’{self.firstname} {self.lastname} is {self.age} years old. {gender} lives in {self.city}, {self.country}.’
s1 = Student(‘Eyob’, ‘Yetayeh’, 30, ‘Finland’, ‘Helsinki’,‘male’)
s2 = Student(‘Lidiya’, ‘Teklemariam’, 28, ‘Finland’, ‘Espoo’, ‘female’)
print(s1.person_info())
s1.add_skill(‘JavaScript’)
s1.add_skill(‘React’)
s1.add_skill(‘Python’)
print(s1.skills)
print(s2.person_info())
s2.add_skill(‘Organizing’)
s2.add_skill(‘Marketing’)
s2.add_skill(‘Digital Marketing’)
print(s2.skills)
Eyob Yetayeh is 30 years old. He lives in Helsinki, Finland.
[‘JavaScript’, ‘React’, ‘Python’]
Lidiya Teklemariam is 28 years old. She lives in Espoo, Finland.
[‘Organizing’, ‘Marketing’, ‘Digital Marketing’]
我们可以使用 super() 内置函数或父名 Person 来自动继承其父级的方法和属性。在上面的例子中,我们Overriding parent method的方法。child 方法有一个不同的特点,它可以识别性别是男性还是女性并指定适当的代词(他/她)


## 第 22 天 - 网页抓取


### 22.1什么是网页抓取


互联网充满了可用于不同目的的大量数据。为了收集这些数据,我们需要知道如何从网站上抓取数据。


网页抓取是从网站中提取和收集数据并将其存储在本地机器或数据库中的过程。


在本节中,我们将使用 beautifulsoup 和 requests 包来抓取数据。我们使用的包版本是beautifulsoup 4。


要开始抓取网站,您需要请求、beautifoulSoup4和网站。
pip install requests
pip install beautifulsoup4
要从网站抓取数据,需要对 HTML 标签和 CSS 选择器有基本的了解。我们使用 HTML 标签、类或/和 ID 定位来自网站的内容。让我们导入 requests 和 BeautifulSoup 模块
import requests
from bs4 import BeautifulSoup
让我们为要抓取的网站声明 url 变量。
import requests
from bs4 import BeautifulSoup
url = ‘https://archive.ics.uci.edu/ml/datasets.php’
让我们使用 requests 的 get 方法从 url 中获取数据
response = requests.get(url)
让我们检查状态
status = response.status_code
print(status) # 200 means the fetching was successful
200
使用beautifulSoup解析页面内容
import requests
from bs4 import BeautifulSoup
url = ‘https://archive.ics.uci.edu/ml/datasets.php’
response = requests.get(url)
content = response.content # 我们从网站上获取所有内容
soup = BeautifulSoup(content, ‘html.parser’) # beautiful soup will give a chance to parse
print(soup.title) #
print(soup.title.get_text()) #UCI机器学习库:数据集
print(soup.body) # 给网站上的整个页面
print(response.status_code)
tables = soup.find_all(‘table’, {‘cellpadding’:‘3’})
我们的目标是 cellpadding 属性值为 3 的表格
我们可以选择使用 id、class 或 HTML 标签,更多信息请查看beautifulsoup doc beautifulsoup doc
table = tables[0] # the result is a list, we are taking out data from it
for td in table.find(‘tr’).find_all(‘td’):
print(td.text)
如果你运行这段代码,你可以看到提取已经完成了一半。


🌕你很特别,每天都在进步。您距离通往伟大的道路只剩下八天了。
 🎉 恭喜! 🎉


## 第 23 天 - 虚拟环境


### 23.1设置虚拟环境


从项目开始,最好有一个虚拟环境。虚拟环境可以帮助我们创建一个孤立或分离的环境。这将帮助我们避免跨项目的依赖冲突。如果您在终端上编写 pip freeze ,您将在计算机上看到所有已安装的软件包。如果我们使用 virtualenv,我们将只访问特定于该项目的包。打开终端并安装 virtualenv


>
> asabeneh@Asabeneh: ~ $ pip install virtualenv
>
>
>


在 30DaysOfPython 文件夹中创建一个 flask\_project 文件夹。


安装 virtualenv 包后,转到您的项目文件夹并通过编写以下内容创建一个虚拟环境:


对于 Mac/Linux:
asabeneh@Asabeneh: ~ /Desktop/30DaysOfPython/flask_project $ virtualenv venv
对于 Windows:
C:\Ú SERS \Ú SER \ d ocuments \ 3 0DaysOfPython \˚F lask_project >python-m VENV VENV
我更喜欢将新项目称为 venv,但可以随意使用不同的名称。让我们检查 venv 是否是通过使用 ls(或 dir 用于 Windows 命令提示符)命令创建的。
asabeneh@Asabeneh:~ /Desktop/30DaysOfPython/flask_project$ ls
venv/
让我们通过在我们的项目文件夹中编写以下命令来激活虚拟环境。


对于 Mac/Linux:
asabeneh@Asabeneh: ~ /Desktop/30DaysOfPython/flask_project$ source venv/bin/activate
在 Windows 中激活虚拟环境可能非常依赖于 Windows Power shell 和 git bash。


对于 Windows 电源外壳:
C:\Ú SERS \Ú SER \ d ocuments \ 3 0DaysOfPython \˚F lask_project > VENV \ S cripts \一个ctivate
对于 Windows Git bash:
C:\Ú SERS \Ú SER \ d ocuments \ 3 0DaysOfPython \˚F lask_project > VENV \ S cripts \。启用
编写激活命令后,您的项目目录将以 venv 开头。请参阅下面的示例。


(venv) asabeneh@Asabeneh: ~ /Desktop/30DaysOfPython/flask\_project$
 现在,让我们通过编写 pip freeze 来检查这个项目中的可用包。您将看不到任何包。


我们将要做一个Flask小项目,所以让我们将Flask包安装到这个项目中。
(venv) asabeneh@Asabeneh: ~ /Desktop/30DaysOfPython/flask_project$ pip install Flask
现在,让我们编写 pip freeze 来查看项目中已安装包的列表:
(venv) asabeneh@Asabeneh:~/Desktop/30DaysOfPython/flask_project$ pip freeze
Click7.0
Flask1.1.1
itsdangerous1.1.0
Jinja22.10.3
MarkupSafe1.1.1
Werkzeug0.16.0
完成后,您应该使用deactivate 停用活动项目。
(venv) asabeneh@Asabeneh: ~ /Desktop/30DaysOfPython$ 停用
安装了使用Flask的必要模块。现在,您的项目目录已准备好用于Flask项目。
 🎉 恭喜! 🎉


## 第 24 天 - 统计


### 24.1统计数据


统计学是研究数据的收集、组织、显示、分析、解释和呈现的学科。统计学是数学的一个分支,建议作为数据科学和机器学习的先决条件。统计学是一个非常广泛的领域,但我们将在本节中只关注最相关的部分。完成此挑战后,您可以进入 Web 开发、数据分析、机器学习和数据科学路径。无论您走哪条路,在您职业生涯的某个阶段,您都会获得可以处理的数据。拥有一些统计知识将帮助您根据数据做出决策,数据如他们所说。


### 24.2什么是数据?


数据是为某种目的(通常是分析)收集和翻译的任何字符集。它可以是任何字符,包括文本和数字、图片、声音或视频。如果数据没有放在上下文中,它对人或计算机没有任何意义。为了让数据有意义,我们需要使用不同的工具处理数据。


数据分析、数据科学或机器学习的工作流程始于数据。可以从某个数据源提供数据,也可以创建数据。有结构化和非结构化数据。


可以以小格式或大格式找到数据。我们将获得的大多数数据类型已在文件处理部分中介绍。


### 24.3统计模块


Python统计模块提供了计算数值数据的数理统计的函数。该模块无意成为第三方库(如 NumPy、SciPy)或面向专业统计学家(如 Minitab、SAS 和 Matlab)的专有全功能统计软件包的竞争对手。它针对图形和科学计算器的级别。


### 24.4NumPy


在第一部分中,我们将 Python 本身定义为一种出色的通用编程语言,但在其他流行库(numpy、scipy、matplotlib、pandas 等)的帮助下,它成为了一个强大的科学计算环境。


NumPy 是 Python 科学计算的核心库。它提供了一个高性能的多维数组对象,以及用于处理数组的工具。


到目前为止,我们一直在使用 vscode,但从现在开始我会推荐使用 Jupyter Notebook。要访问 jupyter notebook,让我们安装anaconda。如果您使用的是 anaconda,则大多数常用软件包都已包含在内,如果您安装了 anaconda,则您没有安装软件包。
asabeneh@Asabeneh: ~ /Desktop/30DaysOfPython$ pip install numpy
### 24.5导入 NumPy


如果您支持 jupyter notebook,则可以使用Jupyter notebook
如何导入 numpy
import numpy as np
# 如何检查 numpy 包的版本
print(‘numpy:’, np.version)
# 检查可用方法
print(dir(np))
### 24.6使用创建 numpy 数组


**创建 int numpy 数组**
创建 python 列表
python_list = [1,2,3,4,5]

 # 检查数据类型
print('Type:', type (python_list)) # <class 'list'>

print(python_list) # [1, 2, 3, 4, 5]

two_dimensional_list = [[0,1,2], [3,4,5], [6,7,8]]

print(two_dimensional_list)  # [[0, 1, 2], [3, 4, 5], [6, 7, 8]]

# 从 python 列表创建 Numpy(Numerical Python) 数组

numpy_array_from_list = np.array(python_list)
print(type (numpy_array_from_list))   # <class 'numpy.ndarray'>
print(numpy_array_from_list) # array([1, 2, 3, 4, 5])
### 24.7创建 float numpy 数组


使用浮点数据类型参数从列表创建浮点 numpy 数组
Python 列表
python_list = [1,2,3,4,5]

numy_array_from_list2 = np.array(python_list, dtype=float)
print(numy_array_from_list2) # array([1., 2., 3., 4., 5.])
### 24.8创建布尔 numpy 数组


从列表创建一个布尔值 numpy 数组
numpy_bool_array = np.array([0, 1, -1, 0, 0], dtype=bool)
print(numpy_bool_array) # 数组([假, 真, 真, 假, 假])
### 24.9使用numpy创建多维数组


一个 numpy 数组可能有一个或多个行和列
two_dimensional_list = [[0,1,2], [3,4,5], [6,7,8]]
numpy_two_dimensional_list = np.array(two_dimensional_list)
print(type (numpy_two_dimensional_list))
print(numpy_two_dimensional_list)
<class ‘numpy.ndarray’>
[[0 1 2]
[3 4 5]
[6 7 8]]
### 24.10将 numpy 数组转换为列表
我们总是可以使用 tolist() 将数组转换回 Python 列表。
np_to_list = numpy_array_from_list.tolist()
print(type (np_to_list))
print(‘one dimensional array:’, np_to_list)
print('two dimensional array: ', numpy_two_dimensional_list.tolist())
<class ‘list’>
one dimensional array: [1, 2, 3, 4, 5]
two dimensional array: [[0, 1, 2], [3, 4, 5], [6, 7, 8]]
### 24.11从元组创建numpy数组
Numpy array from tuple
在 Python 中创建元组
python_tuple = (1,2,3,4,5)
print(type (python_tuple)) # <class ‘tuple’>
print('python_tuple: ', python_tuple) # python_tuple: (1, 2, 3, 4, 5)
numpy_array_from_tuple = np.array(python_tuple)
print(type (numpy_array_from_tuple)) # <class ‘numpy.ndarray’>
print('numpy_array_from_tuple: ', numpy_array_from_tuple) # numpy_array_from_tuple: [1 2 3 4 5]
### 24.12numpy 数组的形状


shape 方法以元组的形式提供数组的形状。第一个是行,第二个是列。如果数组只是一维,则返回数组的大小。
nums = np.array([1, 2, 3, 4, 5])
print(nums)
print('shape of nums: ', nums.shape)
print(numpy_two_dimensional_list)
print('shape of numpy_two_dimensional_list: ', numpy_two_dimensional_list.shape)
three_by_four_array = np.array([[0, 1, 2, 3],
[4,5,6,7],
[8,9,10, 11]])
print(three_by_four_array.shape)
[1 2 3 4 5]
shape of nums: (5,)
[[0 1 2]
[3 4 5]
[6 7 8]]
shape of numpy_two_dimensional_list: (3, 3)
(3, 4)
### 24.13numpy数组的数据类型


数据类型类型:str、int、float、complex、bool、list、None
int_lists = [-3, -2, -1, 0, 1, 2,3]
int_array = np.array(int_lists)
float_array = np.array(int_lists, dtype=float)
print(int_array)
print(int_array.dtype)
print(float_array)
print(float_array.dtype)
[-3 -2 -1 0 1 2 3]
int64
[-3. -2. -1. 0. 1. 2. 3.]
float64
### 24.14numpy 数组的大小


在 numpy 中要知道 numpy 数组列表中的项目数,我们使用 size
numpy_array_from_list = np.array([1, 2, 3, 4, 5])
two_dimensional_list = np.array([[0, 1, 2],
[3, 4, 5],
[6, 7, 8]])
print(‘The size:’, numpy_array_from_list.size) # 5
print(‘The size:’, two_dimensional_list.size) # 3
The size: 5
The size: 9
### 24.15使用numpy进行数学运算


NumPy 数组并不完全像 python 列表。要在 Python 列表中进行数学运算,我们必须遍历项目,但 numpy 可以允许在不循环的情况下进行任何数学运算。数学运算:


1. 加法 (+)
2. 减法 (-)
3. 乘法 (\*)
4. 分配 (/)
5. 模块 (%)
6. 楼层划分(//)
7. 指数(\*\*)


### 24.16添加
数学运算
加法
numpy_array_from_list = np.array([1, 2, 3, 4, 5])
print('original array: ', numpy_array_from_list)
ten_plus_original = numpy_array_from_list + 10
print(ten_plus_original)
original array: [1 2 3 4 5]
[11 12 13 14 15]
### 24.17减法
减法
numpy_array_from_list = np.array([1, 2, 3, 4, 5])
print('original array: ', numpy_array_from_list)
ten_minus_original = numpy_array_from_list - 10
print(ten_minus_original)
original array: [1 2 3 4 5]
[-9 -8 -7 -6 -5]
### 24.18乘法
乘法
numpy_array_from_list = np.array([1, 2, 3, 4, 5])
print('original array: ', numpy_array_from_list)
ten_times_original = numpy_array_from_list * 10
print(ten_times_original)
original array: [1 2 3 4 5]
[10 20 30 40 50]
### 24.19分配
除法
numpy_array_from_list = np.array([1, 2, 3, 4, 5])
print('original array: ', numpy_array_from_list)
ten_times_original = numpy_array_from_list / 10
print(ten_times_original)
original array: [1 2 3 4 5]
[0.1 0.2 0.3 0.4 0.5]
### 24.20模数;找到余数
numpy_array_from_list = np.array([1, 2, 3, 4, 5])
print('original array: ', numpy_array_from_list)
ten_times_original = numpy_array_from_list % 3
print(ten_times_original)
original array: [1 2 3 4 5]
[1 2 0 1 2]
### 24.21楼层划分
楼层除法:没有余数的除法结果
numpy_array_from_list = np.array([1, 2, 3, 4, 5])
print('original array: ', numpy_array_from_list)
ten_times_original = numpy_array_from_list // 10
print(ten_times_original)
### 24.22指数
Exponential 是找到某个数字的另一个幂:
numpy_array_from_list = np.array([1, 2, 3, 4, 5])
print('original array: ', numpy_array_from_list)
ten_times_original = numpy_array_from_list ** 2
print(ten_times_original)
original array:  [1 2 3 4 5]
[ 1  4  9 16 25]
### 24.23检查数据类型
#Int, 浮点数
numpy_int_arr = np.array([1,2,3,4])
numpy_float_arr = np.array([1.1, 2.0,3.2])
numpy_bool_arr = np.array([-3, -2, 0, 1,2,3], dtype=‘bool’)
print(numpy_int_arr.dtype)
print(numpy_float_arr.dtype)
print(numpy_bool_arr.dtype)
int64
float64
bool
### 24.24转换类型


我们可以转换numpy数组的数据类型


1.整数到浮动
numpy_int_arr = np.array([1,2,3,4], dtype = ‘float’)
numpy_int_arr
array([1., 2., 3., 4.])
2.浮动到整数
numpy_int_arr = np.array([1., 2., 3., 4.], dtype = ‘int’)
numpy_int_arr
array([1, 2, 3, 4])
3.整数或布尔值
np.array([-3, -2, 0, 1,2,3], dtype=‘bool’)
array([ True, True, False, True, True, True])
4.整数到 str
numpy_float_list.astype(‘int’).astype(‘str’)
array([‘1’, ‘2’, ‘3’], dtype=‘<U21’)
### 24.25多维数组
2 维数组
two_dimension_array = np.array([(1,2,3),(4,5,6), (7,8,9)])
print(type (two_dimension_array))
print(two_dimension_array)
print('Shape: ', two_dimension_array.shape)
print(‘Size:’, two_dimension_array.size)
print(‘Data type:’, two_dimension_array.dtype)
<class ‘numpy.ndarray’>
[[1 2 3]
[4 5 6]
[7 8 9]]
Shape: (3, 3)
Size: 9
Data type: int64
### 24.26从 numpy 数组中获取项目
2 维数组
two_dimension_array = np.array([[1,2,3],[4,5,6], [7,8,9]])
first_row = two_dimension_array[0]
second_row = two_dimension_array[1]
third_row = two_dimension_array[2]
print(‘First row:’, first_row)
print(‘Second row:’, second_row)
print('Third row: ', third_row)
First row: [1 2 3]
Second row: [4 5 6]
Third row: [7 8 9]
first_column= two_dimension_array[:,0]
second_column = two_dimension_array[:,1]
third_column = two_dimension_array[:,2]
print(‘First column:’, first_column)
print(‘Second column:’, second_column)
print('Third column: ', third_column)
print(two_dimension_array)
First column: [1 4 7]
Second column: [2 5 8]
Third column: [3 6 9]
[[1 2 3]
[4 5 6]
[7 8 9]]
### 24.27切片 Numpy 数组


在 numpy 中切片类似于在 python list 中切片
two_dimension_array = np.array([[1,2,3],[4,5,6], [7,8,9]])
first_two_rows_and_columns = two_dimension_array[0:2, 0:2]
print(first_two_rows_and_columns)
[[1 2]
[4 5]]
### 24.28如何反转行和整个数组?
two_dimension_array[::]
array([[1, 2, 3],
[4, 5, 6],
[7, 8, 9]])
### 24.29反转行列位置
two_dimension_array = np.array([[1,2,3],[4,5,6], [7,8,9]])
two_dimension_array[::-1,::-1]
array([[9, 8, 7],
[6, 5, 4],
[3, 2, 1]])
### 24.30如何表示缺失值?
print(two_dimension_array)
two_dimension_array[1,1] = 55
two_dimension_array[1,2] =44
print(two_dimension_array)
Numpy Zeroes
# numpy.zeros(shape, dtype=float, order='C')
numpy_zeroes = np.zeros((3,3),dtype=int,order='C')
numpy_zeroes
array([[0, 0, 0],
[0, 0, 0],
[0, 0, 0]])
Numpy Zeroes
numpy_ones = np.ones((3,3),dtype=int,order=‘C’)
print(numpy_ones)
[[1 1 1]
[1 1 1]
[1 1 1]]
twoes = numpy_ones * 2```python
重塑
numpy.reshape(), numpy.flatten()
first_shape = np.array([(1,2,3), (4,5,6)])
print(first_shape)
reshaped = first_shape.reshape(3,2)
print(reshaped)
[[1 2 3]
[4 5 6]]
[[1 2]
[3 4]
[5 6]]
flattened = reshaped.flatten()
flattened
array([1, 2, 3, 4, 5, 6])
水平堆栈
np_list_one = np.array([1,2,3])
np_list_two = np.array([4,5,6])
print(np_list_one + np_list_two)

print('Horizontal Append:', np.hstack((np_list_one, np_list_two)))
[5 7 9]
Horizontal Append: [1 2 3 4 5 6]
##垂直叠
print(‘Vertical Append:’, np.vstack((np_list_one, np_list_two)))
Vertical Append: [[1 2 3]
[4 5 6]]
### 24.31生成随机数
生成一个随机浮点数
random_float = np.random.random()
random_float
0.018929887384753874
# 生成一个随机浮点数
random_floats = np.random.random(5)
random_floats
array([0.26392192, 0.35842215, 0.87908478, 0.41902195, 0.78926418])
# 生成 0 到 10 之间的随机整数

random_int = np.random.randint(0, 11)
random_int
4
# 生成一个 2 到 11 之间的随机整数,并创建一个
random_int = np.random.randint(2,10, size=4)
random_int
 array([8, 8, 8, 2])
# 生成 0 到 10 之间的随机整数
random_int = np.random.randint(2,10, size=(3,3))
random_int
array([[3, 5, 3],
       [7, 3, 6],
       [2, 3, 3]])
### 24.32生成随机数
np.random.normal(mu, sigma, size)
normal_array = np.random.normal(79, 15, 80)
normal_array
array([ 89.49990595, 82.06056961, 107.21445842, 38.69307086,
47.85259157、93.07381061、76.40724259、78.55675184、
72.17358173、47.9888899、65.10370622、76.29696568、
95.58234254、68.14897213、38.75862686、122.5587927、
67.0762565、95.73990864、81.97454563、92.54264805、
59.37035153、77.76828101、52.30752166、64.43109931、
62.63695351、90.04616138、75.70009094、49.87586877、
80.22002414、68.56708848、76.27791052、67.24343975、
81.86363935、78.22703433、102.85737041、65.15700341、
84.87033426、76.7569997、64.61321853、67.37244562、
74.4068773、58.65119655、71.66488727、53.42458179、
70.26872028、60.96588544、83.56129414、72.14255326、
81.00787609、71.81264853、72.64168853、86.56608717、
94.94667321、82.32676973、70.5165446、85.43061003、
72.45526212、87.34681775、87.69911217、103.02831489、
75.28598596、67.17806893、92.41274447、101.06662611、
87.70013935、70.73980645、46.40368207、50.17947092、
61.75618542、90.26191397、78.63968639、70.84550744、
88.91826581、103.91474733、66.3064638、79.49726264、
70.81087439, 83.90130623, 87.58555972, 59.95462521])
### 24.33Numpy 和统计
import matplotlib.pyplot as plt
import seaborn as sns
sns.set()
plt.hist(normal_array, color=“grey”, bins=50)
( array([2., 0., 0., 0., 1., 2., 2., 0., 2., 0., 0., 1., 2., 2., 1., 4 ., 3.,
4., 2., 7., 2., 2., 5., 4., 2., 4., 3., 2., 1., 5., 3., 0., 3., 2. ,
1., 0., 0., 1., 3., 0., 1., 0., 0., 0., 0., 0., 0., 0., 0., 1.]),
array([ 38.69307086, 40.37038529, 42.04769973, 43.72501417,
45.4023286、47.07964304、48.75695748、50.43427191、
52.11158635、53.78890079、55.46621523、57.14352966、
58.8208441、60.49815854、62.17547297、63.85278741、
65.53010185、67.20741628、68.88473072、70.56204516、
72.23935959、73.91667403、75.59398847、77.27130291、
78.94861734、80.62593178、82.30324622、83.98056065、
85.65787509、87.33518953、89.01250396、90.6898184、
92.36713284、94.04444727、95.72176171、97.39907615、
99.07639058、100.75370502、102.43101946、104.1083339、
105.78564833、107.46296277、109.14027721、110.81759164、
112.49490608、114.17222052、115.84953495、117.52684939、
119.20416383, 120.88147826, 122.5587927 ]),
< a list of 50 Patch objects> )
### 24.34numpy中的矩阵
four_by_four_matrix = np.matrix(np.ones((4,4), dtype=float))
four_by_four_matrix
matrix([[1., 1., 1., 1.],
[1., 1., 1., 1.],
[1., 1., 1., 1.],
[1., 1., 1., 1.]])
np.asarray(four_by_four_matrix)[2] = 2
four_by_four_matrix
matrix([[1., 1., 1., 1.],
[1., 1., 1., 1.],
[2., 2., 2., 2.],
[1., 1., 1., 1.]])
### 24.35numpy numpy.arange()


有时,您希望创建在定义的间隔内均匀分布的值。例如,您想创建从 1 到 10 的值;你可以使用 numpy.arange() 函数
使用 range(starting, stop, step) 创建列表
lst = range(0, 11, 2)
lst
range(0, 11, 2)
for l in lst:
print(l)
2
4
6
8
10
类似于范围 arange numpy.arange(start, stop, step)
whole_numbers = np.arange(0, 20, 1)
whole_numbers
array([ 0, 1, 2, 3, 4, 5, 6, 7, 8, 9, 10, 11, 12, 13, 14, 15, 16,
17, 18, 19])
natural_numbers = np.arange(1, 20, 1)
natural_numbers
odd_numbers = np.arange(1, 20, 2)
odd_numbers
array([ 1, 3, 5, 7, 9, 11, 13, 15, 17, 19])
even_numbers = np.arange(2, 20, 2)
even_numbers
array([ 2, 4, 6, 8, 10, 12, 14, 16, 18])
### 24.36使用 linspace 创建数字序列
numpy.linspace()
numpy.logspace() in Python with Example
例如,它可以用来创建从 1 到 5 的 10 个均匀间隔的值。
np.linspace(1.0, 5.0, num=10)
array([1. , 1.44444444, 1.88888889, 2.33333333, 2.77777778,
3.22222222, 3.66666667, 4.11111111, 4.55555556, 5. ])
不包括区间
np.linspace(1.0, 5.0, num=5, endpoint=False)
array([1. , 1.8, 2.6, 3.4, 4.2])
LogSpace
LogSpace 返回对数刻度上的偶数间隔数。Logspace 具有与 np.linspace 相同的参数。
# 句法:
numpy.logspace(开始,停止,数量,端点)
np.logspace(2, 4.0, num=4)
array([ 100. , 464.15888336, 2154.43469003, 10000. ])
检查数组的大小
x = np.array([1,2,3], dtype=np.complex128)
x
array([1.+0.j, 2.+0.j, 3.+0.j])
x.itemsize
16
在 Python 中索引和切片 NumPy 数组
np_list = np.array([(1,2,3), (4,5,6)])
np_list
array([[1, 2, 3],
[4, 5, 6]])
print('First row: ', np_list[0])
print('Second row: ', np_list[1])
First row: [1 2 3]
Second row: [4 5 6]
print('First column: ', np_list[:,0])
print('Second column: ', np_list[:,1])
print('Third column: ', np_list[:,2])
First column: [1 4]
Second column: [2 5]
Third column: [3 6]
### 24.37NumPy 统计函数与示例


NumPy 具有非常有用的统计函数,用于从数组中的给定元素中查找最小值、最大值、平均值、中位数、百分位数、标准偏差和方差等。函数解释如下 - 统计函数 Numpy 配备了如下所列的稳健统计函数


* Numpy 函数


* 最小 np.min()
* 最大 np.max()
* 平均 np.mean()
* 中位数 np.median()
* 差异
* 百分位
* 标准差 np.std()
np_normal_dis = np.random.normal(5, 0.5, 100)
np_normal_dis
##最小值,最大值,平均值,中位数,SD
print('min: ', two_dimension_array.min())
print('max: ', two_dimension_array.max())
print('mean: ',two_dimension_array.mean())
print('median: ', two_dimension_array.median())
print('sd: ', two_dimension_array.std())
min: 1
max: 55
mean: 14.777777777777779
sd: 18.913709183069525
min: 1
max: 55
mean: 14.777777777777779
sd: 18.913709183069525
print(two_dimension_array)
print('Column with minimum: ', np.amin(two_dimension_array,axis=0))
print(‘Column with maximum: ‘, np.amax(two_dimension_array,axis=0))
print(’=== Row ==’)
print('Row with minimum: ', np.amin(two_dimension_array,axis=1))
print('Row with maximum: ', np.amax(two_dimension_array,axis=1))
最后
🍅 硬核资料:关注即可领取PPT模板、简历模板、行业经典书籍PDF。
🍅 技术互助:技术群大佬指点迷津,你的问题可能不是问题,求资源在群里喊一声。
🍅 面试题库:由技术群里的小伙伴们共同投稿,热乎的大厂面试真题,持续更新中。
🍅 知识体系:含编程语言、算法、大数据生态圈组件(Mysql、Hive、Spark、Flink)、数据仓库、Python、前端等等。
网上学习资料一大堆,但如果学到的知识不成体系,遇到问题时只是浅尝辄止,不再深入研究,那么很难做到真正的技术提升。
一个人可以走的很快,但一群人才能走的更远!不论你是正从事IT行业的老鸟或是对IT行业感兴趣的新人,都欢迎加入我们的的圈子(技术交流、学习资源、职场吐槽、大厂内推、面试辅导),让我们一起学习成长!


 773
773


 被折叠的 条评论
为什么被折叠?
被折叠的 条评论
为什么被折叠?
 到【灌水乐园】发言


