


@Override
2 publicvoid onCreate(Bundle savedInstanceState) {
3 super.onCreate(savedInstanceState);
4 setContentView(R.layout.main);
5 //初始化 CameraManager
6 CameraManager.init(getApplication());
7
8 viewfinderView = (ViewfinderView) findViewById(R.id.viewfinder_view);
9 txtResult = (TextView) findViewById(R.id.txtResult);
10 hasSurface =false;
11 inactivityTimer =new InactivityTimer(this);
12 }
这里调用到的 CameraManager 类是控制摄像头的包里的类。新建一个camera包把:com.google.zxing.client.android.camera 里面的类全部拷入,另外我把PlanarYUVLuminanceSource也拷入到这个包里面。根据错误的提示来修正代码,主要是修改正包结构。(整个简化的流程都是如此:“根据错误提示,修改代码”)。

在修改的过程中,有很多是关于R 资源的问题,在此我们需要将Values 里面的两个xml资源文件拷入项目中:colos.xml 和ids.xml 。 ctrl+b 一下看看error 是不是少了很多。在CameraManager中有些地方需要用到项目的配置,这里需要把配置直接写入代码中:
// SharedPreferences prefs = PreferenceManager.getDefaultSharedPreferences(context);
//是否使用前灯
// if (prefs.getBoolean(PreferencesActivity.KEY_FRONT_LIGHT, false)) {
// FlashlightManager.enableFlashlight();
// }
FlashlightManager.enableFlashlight();
使用摄像头需要加入相应的权限:
当View 和 camera 包里的错误修正完成后,我们继续来看CaptureActivity。
覆盖onResume方法初始化摄像头:
@Override
protectedvoid onResume() {
super.onResume();
SurfaceView surfaceView = (SurfaceView) findViewById(R.id.preview_view);
SurfaceHolder surfaceHolder = surfaceView.getHolder();
if (hasSurface) {
initCamera(surfaceHolder);
} else {
surfaceHolder.addCallback(this);
surfaceHolder.setType(SurfaceHolder.SURFACE_TYPE_PUSH_BUFFERS);
}
decodeFormats =null;
characterSet =null;
playBeep =true;
AudioManager audioService = (AudioManager) getSystemService(AUDIO_SERVICE);
if (audioService.getRingerMode() != AudioManager.RINGER_MODE_NORMAL) {
playBeep =false;
}
initBeepSound();
vibrate =true;
}
SurfaceHolder接口实现
initCamera () 方法用于初始化摄像头,如果排除了所有的error ,运行项目时就可以看到大致扫描界面了。 surfaceHolder.addCallback(this);表示让CaptureActivity实现其callback接口。
handler = new CaptureActivityHandler(this, decodeFormats,characterSet) 用于进行扫描解码处理。
解码
上面的步骤主要都是用于对摄像头的控制,而解码的真正工作入口是在CaptureActivityHandler 里面的。新建一个Decoding包把以下文件拷入包中:
- CaptureActivityHandler
- DecodeFormatManager
- DecodeHandler
- DecodeThread
- FinishListener
- InactivityTimer
- Intents
由于我们的包结构和Zxing 项目的有所不同所以需要注意一下类的可访问性
同样开始ctrl+B 编译一下,然后开始修正错误。
在CaptureActivityHandler 里 把 handleMessage 里的部分方法先注释掉如:“decode_succeeded ”分支,这是解码成功时调用 CaptureActivity 展示解码的结果。
在DecodeThread 类里,修改部分涉及Preference配置的代码:
DecodeThread(CaptureActivity activity,
Vector decodeFormats,
String characterSet,
ResultPointCallback resultPointCallback) {
this.activity = activity;
handlerInitLatch =new CountDownLatch(1);
hints =new Hashtable<DecodeHintType, Object>(3);
The prefs can’t change while the thread is running, so pick them up once here.
// if (decodeFormats == null || decodeFormats.isEmpty()) {
// SharedPreferences prefs = PreferenceManager.getDefaultSharedPreferences(activity);
// decodeFormats = new Vector();
// if (prefs.getBoolean(PreferencesActivity.KEY_DECODE_1D, true)) {
// decodeFormats.addAll(DecodeFormatManager.ONE_D_FORMATS);
// }
// if (prefs.getBoolean(PreferencesActivity.KEY_DECODE_QR, true)) {
// decodeFormats.addAll(DecodeFormatManager.QR_CODE_FORMATS);
// }
// if (prefs.getBoolean(PreferencesActivity.KEY_DECODE_DATA_MATRIX, true)) {
// decodeFormats.addAll(DecodeFormatManager.DATA_MATRIX_FORMATS);
// }
// }
if (decodeFormats ==null|| decodeFormats.isEmpty()) {
decodeFormats =new Vector();
decodeFormats.addAll(DecodeFormatManager.ONE_D_FORMATS);
decodeFormats.addAll(DecodeFormatManager.QR_CODE_FORMATS);
decodeFormats.addAll(DecodeFormatManager.DATA_MATRIX_FORMATS);
}
hints.put(DecodeHintType.POSSIBLE_FORMATS, decodeFormats);
if (characterSet !=null) {
hints.put(DecodeHintType.CHARACTER_SET, characterSet);
}
hints.put(DecodeHintType.NEED_RESULT_POINT_CALLBACK, resultPointCallback);
}
这里是设置 解码的类型,我们现在默认将所有类型都加入。
错误类型基本上都是:包结构、PreferencesActivity 的配置 、类可访问性的问题。根据错误提示耐心把错误解决。
返回解码结果
自我介绍一下,小编13年上海交大毕业,曾经在小公司待过,也去过华为、OPPO等大厂,18年进入阿里一直到现在。
深知大多数Android工程师,想要提升技能,往往是自己摸索成长或者是报班学习,但对于培训机构动则几千的学费,着实压力不小。自己不成体系的自学效果低效又漫长,而且极易碰到天花板技术停滞不前!
因此收集整理了一份《2024年Android移动开发全套学习资料》,初衷也很简单,就是希望能够帮助到想自学提升又不知道该从何学起的朋友,同时减轻大家的负担。

既有适合小白学习的零基础资料,也有适合3年以上经验的小伙伴深入学习提升的进阶课程,基本涵盖了95%以上Android开发知识点,真正体系化!
由于文件比较大,这里只是将部分目录大纲截图出来,每个节点里面都包含大厂面经、学习笔记、源码讲义、实战项目、讲解视频,并且后续会持续更新
如果你觉得这些内容对你有帮助,可以添加V获取:vip204888 (备注Android)

总结
其实要轻松掌握很简单,要点就两个:
- 找到一套好的视频资料,紧跟大牛梳理好的知识框架进行学习。
- 多练。 (视频优势是互动感强,容易集中注意力)
你不需要是天才,也不需要具备强悍的天赋,只要做到这两点,短期内成功的概率是非常高的。
对于很多初中级Android工程师而言,想要提升技能,往往是自己摸索成长,不成体系的学习效果低效漫长且无助。
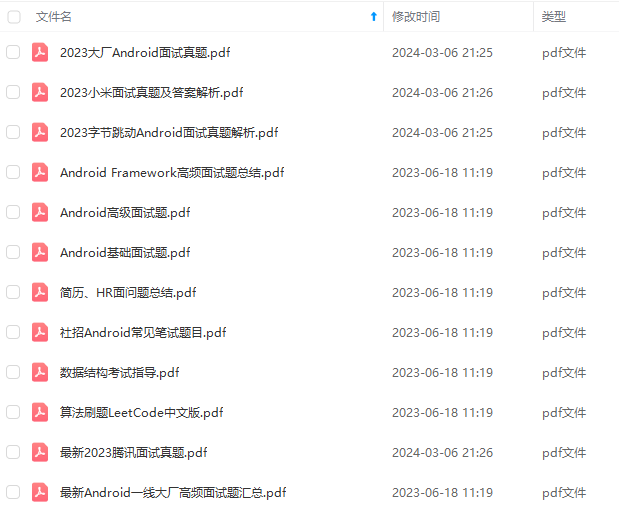
以上就是总结的关于在面试的一些总结,希望对大家能有些帮助,除了这些面试中需要注意的问题,当然最重要的就是刷题了,这里放上我之前整理的一份超全的面试专题PDF
还有 高级架构技术进阶脑图、Android开发面试专题资料,高级进阶架构资料 帮助大家学习提升进阶,也节省大家在网上搜索资料的时间来学习,也可以分享给身边好友一起学习。
【Android核心高级技术PDF文档,BAT大厂面试真题解析】

这里只是整理出来的部分面试题,后续会持续更新,希望通过这些高级面试题能够降低面试Android岗位的门槛,让更多的Android工程师理解Android系统,掌握Android系统。喜欢的话麻烦点击一个喜欢在关注一下~
心高级技术PDF文档,BAT大厂面试真题解析】**
[外链图片转存中…(img-XI9JmpMF-1712005987818)]
这里只是整理出来的部分面试题,后续会持续更新,希望通过这些高级面试题能够降低面试Android岗位的门槛,让更多的Android工程师理解Android系统,掌握Android系统。喜欢的话麻烦点击一个喜欢在关注一下~


 431
431


 被折叠的 条评论
为什么被折叠?
被折叠的 条评论
为什么被折叠?
 到【灌水乐园】发言


