


@Autowired

private PasswordEncoder passwordEncoder;


/**

 * 根据用户名查找用户信息

 * @param username

 * @return

 * @throws UsernameNotFoundException

 */

@Override

public UserDetails loadUserByUsername(String username) throws UsernameNotFoundException {

    log.info("根据用户名查找用户信息:{}",username);

    return new User(username,passwordEncoder.encode("123456"),

            true,true,true,true,

            AuthorityUtils.commaSeparatedStringToAuthorityList("admin"));

}
}
为了避免每次重启输入的clientid的繁琐,这里在配置文件中配置一下clientid和clientsecret
security.oauth2.client.clientId=selfclientid
security.oauth2.client.clientSecret=selfclientsecret
[](https://gitee.com/vip204888/java-p7)实现认证服务器

---------------------------------------------------------------------


回想一下社交登录中认证服务器的功能(以授权码登录为例),需要基于OAuth2协议生成授权码,并将授权码附在第三方应用配置的回调地址之后,之后第三方应用根据得到的授权码换取token,最后再根据token获取对应的用户信息。


基于spring security oauth,这个不难,几个配置搞定。
/**
-
autor:liman
-
createtime:2021/7/22
-
comment: app的认证服务器配置类
*/
@Configuration
@EnableAuthorizationServer
public class AppAuthorizationServerConfig {
}
### [](https://gitee.com/vip204888/java-p7)获取授权码
这个时候,我们应用就具备了认证服务器的功能。在项目启动的时候,我们会发现spring security oauth为我们加入了几个oauth开头的请求路径,如下所示:

这些请求路径就是对应的OAuth访问路径,我们可以根据OAuth2的相关协议参数,访问`oauth/authorize`,关于OAuth2的协议请求参数,可以参考OAuth2官网的第四章——[OAuth2 协议官网](https://gitee.com/vip204888/java-p7)。
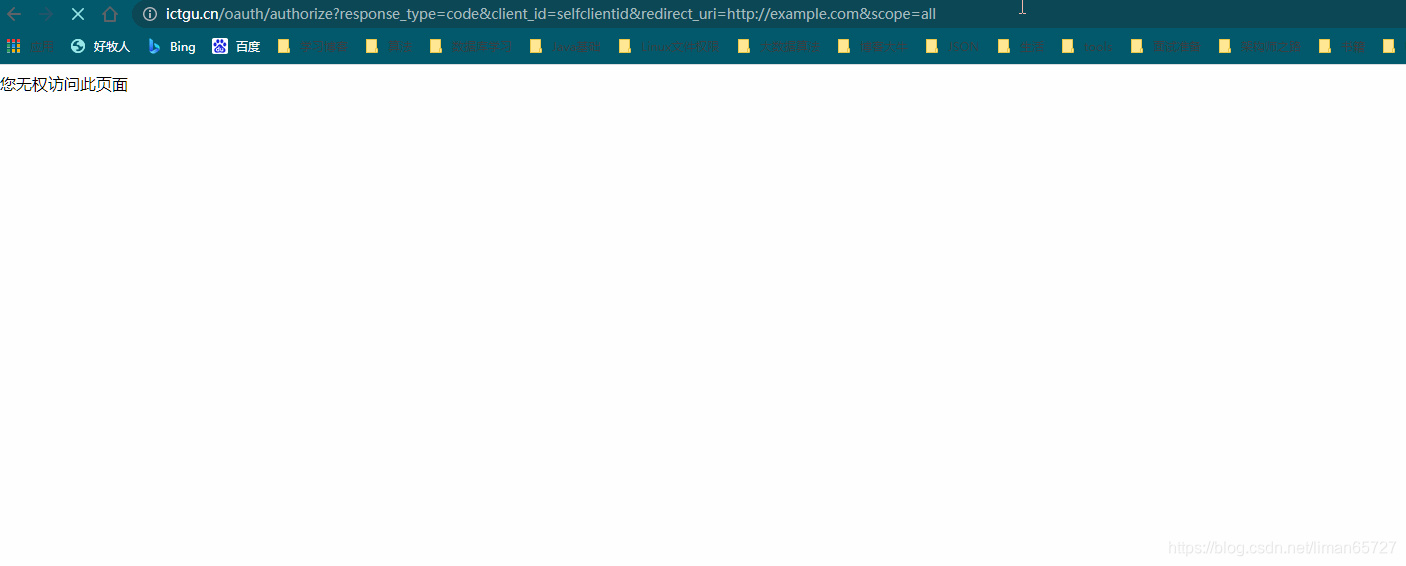
在浏览器中输入如下路径
http://localhost:8090/oauth/authorize?response_type=code&client_id=selfclientid&redirect_uri=http://example.com&scope=all
这里配置的回调路径是http://expample.com,client\_id就是我们准备工作中配置的clientid,这个其实标示的是第三方应用编号,response\_type我们固定为code,scope我们指定的是all,这些都是在OAuth2官网中有详细说明。
浏览器中输入上述地址之后,会弹出认证对话框
为什么会弹出认证对话框呢?因为这里我们认证服务器要确定是第三方应用中的那一个用户在进行授权,因此我们需要输入相关用户信息,用户信息的认证,就是我们之前自定义的`MyUserDetailService`,这里我们的实例里头只需要保证用户密码是123456即可,正常情况下,在输入完用户名和密码之后,会跳到授权页面。但是……

翻车了,这是因为这个访问授权页面,需要有"`ROLE_USER`“的角色(关于角色权限,在spring-security的最后一章会学习总结),因此我们需要给用户赋予”`ROLE_USER`"角色才行
@Override
public UserDetails loadUserByUsername(String username) throws UsernameNotFoundException {
log.info("根据用户名查找用户信息:{}",username);

return new User(username,passwordEncoder.encode("123456"),

        true,true,true,true,

        AuthorityUtils.commaSeparatedStringToAuthorityList("admin,ROLE_USER"));
}
之后重启系统(如有必要会重新输入用户名和密码)就可看到授权页面,如以下动图所示
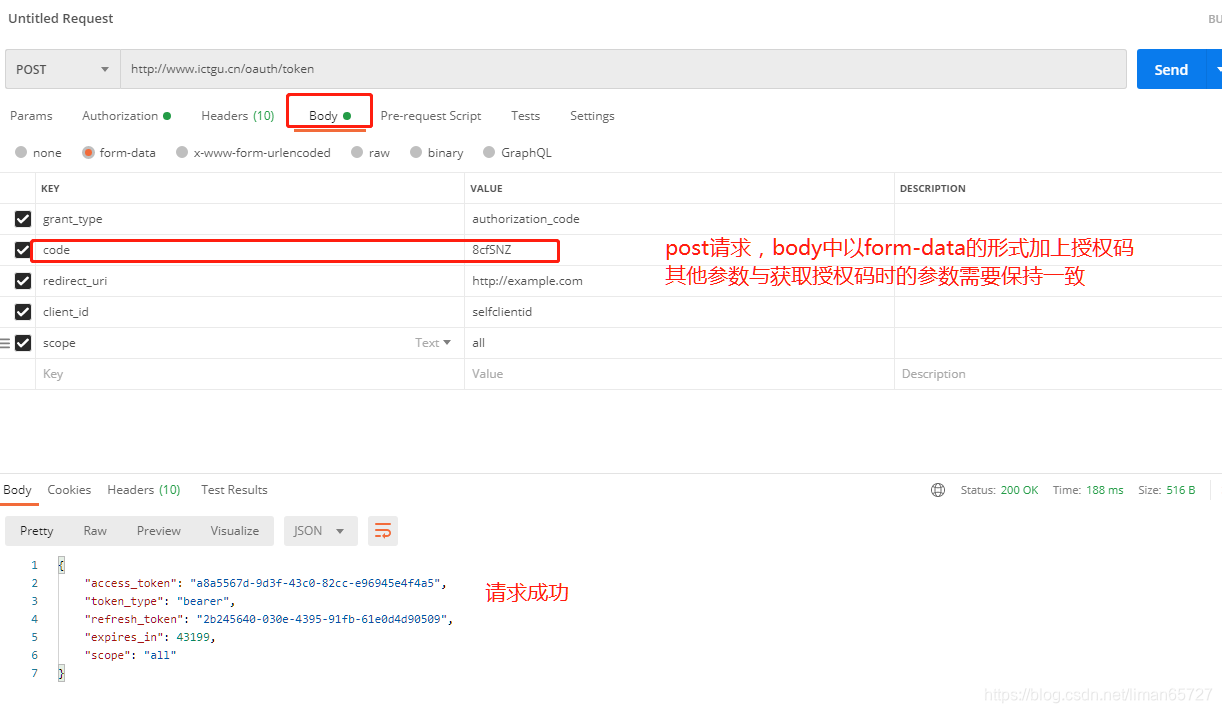
在授权页面点击Approval(同意)之后,就会看到浏览器显示回调的url,并且附上了授权码。之后既可以根据这个授权码去获取token
### [](https://gitee.com/vip204888/java-p7)根据授权码获取token
这一步可以用postman完成,指定请求路径为`/oauth/token`(我配置了相关的host文件,因此不需要输入ip和端口)
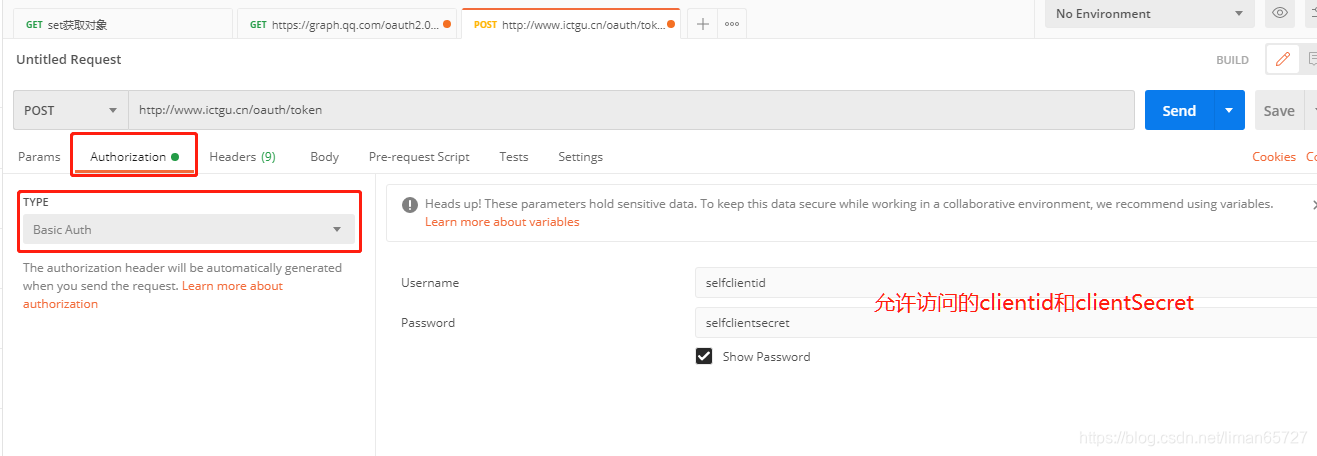
需要在Basic Auth认证信息中加上我们配置的clientid和clientSecret,还需要在body中加上授权码
[](https://gitee.com/vip204888/java-p7)实现资源服务器
---------------------------------------------------------------------
上面其实已经完成认证服务器的所有工作,资源服务器其实也是个配置
/**
-
autor:liman
-
createtime:2021/7/23
-
comment:
*/
@Configuration
@EnableResourceServer
public class ResourceServerConfig {
}
有了资源服务器,就可以验证token并访问指定的业务接口了 。
### [](https://gitee.com/vip204888/java-p7)根据token调用业务接口
请求头中需要在Authorization中带上我们上一步获取的token。

[](https://gitee.com/vip204888/java-p7)总结
================================================================
简单的spring security oauth的实例,后面会简单介绍一下其中的源码,并在此基础上完成自定义短信登录,表单登录,社交登录的token认证方式。
# 本次面试答案,以及收集到的大厂必问面试题分享:
tee.com/vip204888/java-p7)总结
================================================================
简单的spring security oauth的实例,后面会简单介绍一下其中的源码,并在此基础上完成自定义短信登录,表单登录,社交登录的token认证方式。
# 本次面试答案,以及收集到的大厂必问面试题分享:
[外链图片转存中...(img-SSuBmkbG-1628418612806)]
**[资料领取方式:戳这里即可免费下载](https://gitee.com/vip204888/java-p7)**


 168
168


 被折叠的 条评论
为什么被折叠?
被折叠的 条评论
为什么被折叠?
 到【灌水乐园】发言


