


在最新的axios封装中,可能会出现,以下两个问题:
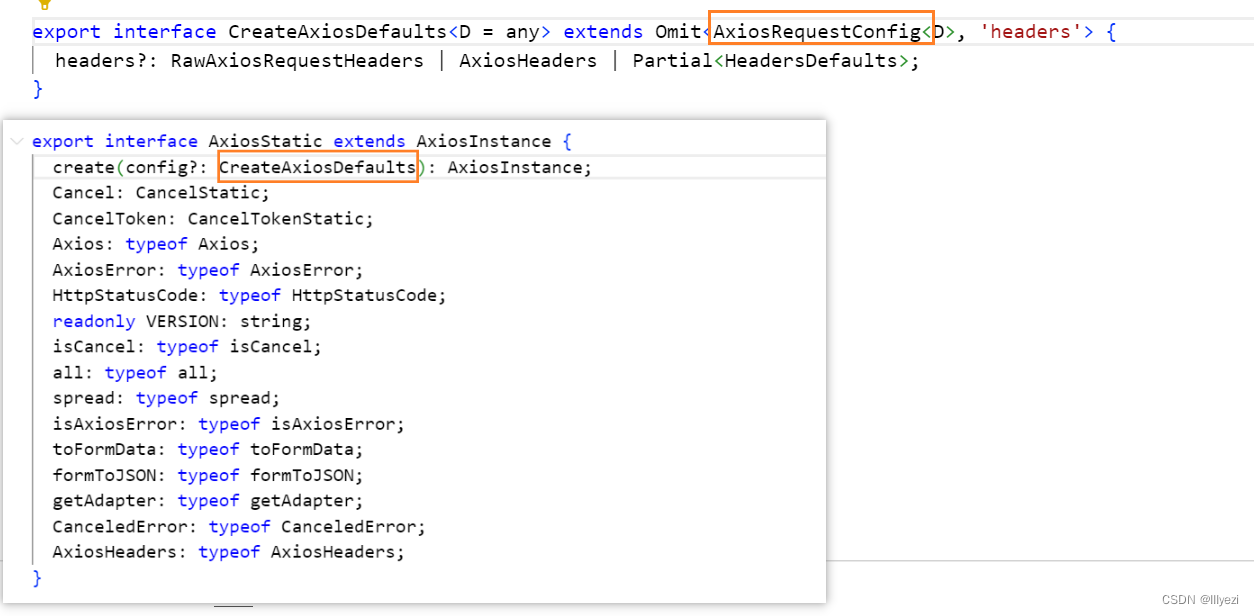
① 类型CreateAxiosDefaults不能赋值给AxiosRequestConfig
类型"CreateAxiosDefaults<any>'的参数不能赋给类型“AxiosRequestConfig<any>”的参数。
属性headers'的类型不兼容。
不能将类型"AxiosHeaders|Partial<HeadersDefaults>|Partial<RawAxiosHeaders&{Accept:
AxiosHeaderValue;"Content-Length":AxiosHeaderValue;"User-Agent":AxiosHeaderValue;"Content-
Encoding'":AxiosHeaderValue;Authorization:AxiosHeaderValue;}&{..;}>|undefined'分配给类型
"AxiosHeaders (Partial<RawAxiosHeaders Accept:AxiosHeaderValue;"Content-Length":
AxiosHeaderValue;"User-Agent":AxiosHeaderValue;"Content-Encoding":AxiosHeaderValue;
Authorization:AxiosHeaderValue;}{...;}>Partial<...>)undefined".
不能将类型Partial<HeadersDefaults>P分配给类型“AxiosHeaders|(Partial<RawAxiosHeaders&{
Accept:AxiosHeaderValue;"Content-Length":AxiosHeaderValue;"User-Agent":AxiosHeaderValue;
"Content-Encoding":AxiosHeaderValue;Authorization:AxiosHeaderValue;}{...;}>
Partial<...>)undefined”。
不能将类型Partial<HeadersDefaults>”分配给类型Partial<RawAxiosHeaders&{Accept:
通过查看源码我们可以发现 ,原来的类型AxiosRequestConfig已变成了CreateAxiosDefaults。但CreateAxiosDefaults又继承了AxiosRequestConfig。
② 类型AxiosRequestConfig不能赋值给InternalAxiosRequestConfig
类型“(config:AxiosRequestConfig<any>)=>AxiosRequestConfig<any>'的参数不能赋给类型“(value:
InternalAxiosRequestConfig<any>)=>InternalAxiosRequestConfig<any>
Promise<InternalAxiosRequestConfig<any>>'的参数。
不能将类型"AxiosRequestConfig<any>'分配给类型"InternalAxiosRequestConfig<any>
Promise<InternalAxiosRequestConfig<any>>".
不能将类型“AxiosRequestConfig<any>”分配给类型"InternalAxiosRequestConfig<any>”。
属性headers的类型不兼容。
不能将类型"AxiosHeaders|(Partial<RawAxiosHeaders&{Accept:AxiosHeaderValue;"Content-
Length":AxiosHeaderValue;"User-Agent":AxiosHeaderValue;"Content-Encoding":AxiosHeaderValue;
Authorization:AxiosHeaderValue;}&{...;}>&Partial<...>)|undefined分配给类型
"AxiosRequestHeaders”。
不能将类型undefined'分配给类型“AxiosRequestHeaders”。
不能将类型undefined'分配给类型"Partial<RawAxiosHeaders&{Accept:AxiosHeaderValue;
同理查看源码,可以发现request的最新类型为InternalAxiosRequestConfig,InternalAxiosRequestConfig又继承于AxiosRequestConfig。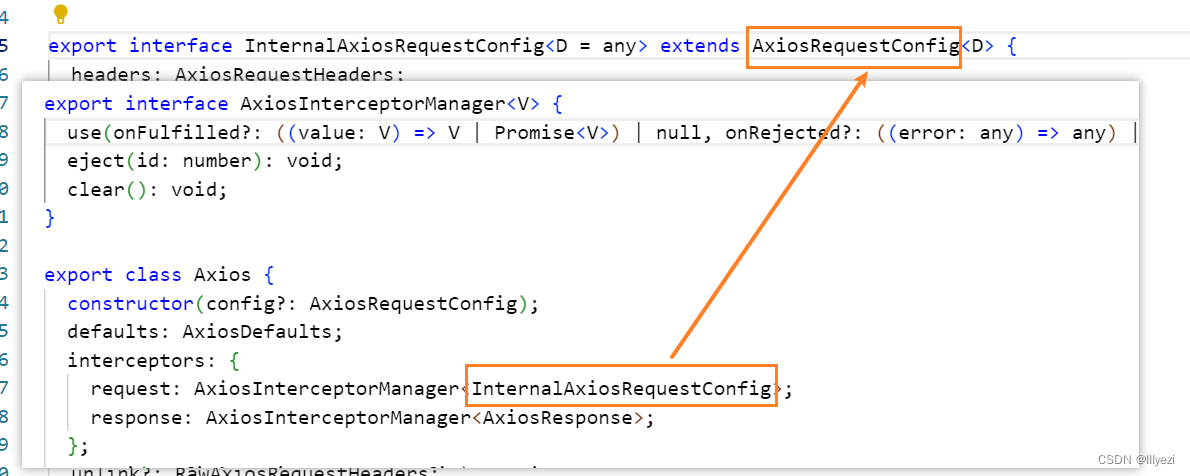
以上两种继承,父类的作用范围是小于子类的
解决方法:
原先axios.create中CreateAxiosDefaults类型的改变影响不大,继续使用它的父类AxiosRequestConfig。
改变的地方:在使用拦截器时,使用InternalAxiosRequestConfig而不使用AxiosRequestConfig
完整代码如下:
import axios from 'axios'
import type {
  AxiosInstance,
  AxiosRequestConfig,
  InternalAxiosRequestConfig,
  AxiosResponse
} from 'axios'

interface HYRequestInterceptors {
  requestInterceptor?: (
    config: InternalAxiosRequestConfig
  ) => InternalAxiosRequestConfig
  requestInterceptorCatch?: (error: any) => any
  responseInterceptor?: (res: AxiosResponse) => AxiosResponse
  responseInterceptorCatch?: (error: any) => any
}

interface HYRequestConfig extends AxiosRequestConfig {
  interceptors?: HYRequestInterceptors
}

class HYRequest {
  instance: AxiosInstance
  interceptors?: HYRequestInterceptors

  constructor(config: HYRequestConfig) {
    this.instance = axios.create(config)
    this.interceptors = config.interceptors

    this.instance.interceptors.request.use(
      this.interceptors?.requestInterceptor,
      this.interceptors?.requestInterceptorCatch
    )

    this.instance.interceptors.response.use(
      this.interceptors?.responseInterceptor,
      this.interceptors?.responseInterceptorCatch
    )
  }

  request(config: AxiosRequestConfig) {
    this.instance.request(config).then((res) => {
      console.log(res)
    })
  }
}

export default HYRequest
进行模块化处理后:
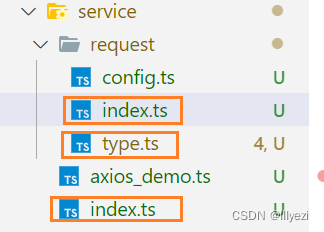
request/type.ts
import {
  InternalAxiosRequestConfig,
  AxiosResponse,
  AxiosRequestConfig
} from 'axios'
export interface HYRequestInterceptors {
  requestInterceptor?: (
    config: InternalAxiosRequestConfig
  ) => InternalAxiosRequestConfig
  requestInterceptorCatch?: (error: any) => any
  responseInterceptor?: (res: AxiosResponse) => AxiosResponse
  responseInterceptorCatch?: (error: any) => any
}

export interface HYRequestConfig extends AxiosRequestConfig {
  interceptors?: HYRequestInterceptors
}
request/index.ts
import axios from 'axios'
import type { AxiosInstance, AxiosRequestConfig } from 'axios'
import type { HYRequestInterceptors, HYRequestConfig } from './type'

class HYRequest {
  instance: AxiosInstance
  interceptors?: HYRequestInterceptors

  constructor(config: HYRequestConfig) {
    this.instance = axios.create(config)
    this.interceptors = config.interceptors

    this.instance.interceptors.request.use(
      this.interceptors?.requestInterceptor,
      this.interceptors?.requestInterceptorCatch
    )

    this.instance.interceptors.response.use(
      this.interceptors?.responseInterceptor,
      this.interceptors?.responseInterceptorCatch
    )
  }

  request(config: AxiosRequestConfig) {
    this.instance.request(config).then((res) => {
      console.log(res)
    })
  }
}

export default HYRequest
使用:
index.ts
// service统一出口
import HYRequest from './request'
import { BASE_URL, TIME_OUT } from './request/config'

const hyRequest = new HYRequest({
  baseURL: BASE_URL,
  timeout: TIME_OUT,
  interceptors: {
    requestInterceptor: (config) => {
      console.log('请求成功的拦截')

      return config
    },
    requestInterceptorCatch: (err) => {
      console.log('请求失败的拦截')

      return err
    },
    responseInterceptor: (res) => {
      console.log('请求成功的拦截')

      return res
    },
    responseInterceptorCatch: (err) => {
      console.log('响应成功的拦截')

      return err
    }
  }
})

export default hyRequest


 2260
2260


 被折叠的 条评论
为什么被折叠?
被折叠的 条评论
为什么被折叠?
 到【灌水乐园】发言


