


1、正常安装系统,
2、检查并关闭防火墙和 selinux 后重启
sudo ufw disable
修改 /etc/selinux/config 文件中设置
SELINUX=disabled然后重启服务器
3、检查防火墙状态
sudo ufw status

4、安装zabbix
# wget https://repo.zabbix.com/zabbix/5.4/ubuntu/pool/main/z/zabbix-release/zabbix-release_5.4-1+ubuntu20.04_all.deb
# dpkg -i zabbix-release_5.4-1+ubuntu20.04_all.deb
# apt update
5、安装Zabbix server,Web前端,agent
apt install zabbix-server-mysql zabbix-frontend-php zabbix-apache-conf zabbix-sql-scripts zabbix-agent
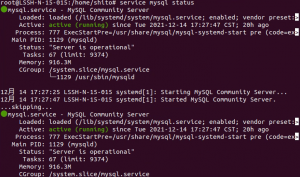
6、检查并安装Mysql

mysql -V(显示数据库版本)
如上图代表已经安装好Mysql,跳过安装mysql直接建立数据库
sudo apt-get install mysql-server
安装MYSQL
service mysql status(查看数据库状态)
sudo mysql_secure_installation(初始化数据库)
#1
VALIDATE PASSWORD PLUGIN can be used to test passwords...
Press y|Y for Yes, any other key for No: N (我选的)
#2
Please set the password for root here...
New password: (创建root密码)
Re-enter new password: (重复输入)
#3
By default, a MySQL installation has an anonymous user,
allowing anyone to log into MySQL without having to have
a user account created for them...
Remove anonymous users? (Press y|Y for Yes, any other key for No) : N (我选的)
#4
Normally, root should only be allowed to connect from
'localhost'. This ensures that someone cannot guess at
the root password from the network...
Disallow root login remotely? (Press y|Y for Yes, any other key for No) : Y (我选的)
#5
By default, MySQL comes with a database named 'test' that
anyone can access...
Remove test database and access to it? (Press y|Y for Yes, any other key for No) : N (我选的)
#6
Reloading the privilege tables will ensure that all changes
made so far will take effect immediately.
Reload privilege tables now? (Press y|Y for Yes, any other key for No) : Y (我选的)
7、创建初始数据库
mysql -uroot -p
password(输入root密码)
mysql> create database zabbix character set utf8 collate utf8_bin; (创建zabbix数据库)
mysql> create user zabbix@localhost identified by 'password';(创建zabbix用户名与密码)
mysql> grant all privileges on zabbix.* to zabbix@localhost;
mysql> flush privileges;
mysql> quit;
8、导入初始架构和数据,系统将提示您输入新创建的密码。
zcat /usr/share/doc/zabbix-sql-scripts/mysql/create.sql.gz | mysql -uzabbix -p zabbix
9、Zabbix server配置数据库
编辑配置文件 /etc/zabbix/zabbix_server.conf(可以用VIM,如没有,可以自行安装)
DBPassword=password(zabbix数据库密码)
10、
启动Zabbix server和agent进程
启动Zabbix server和agent进程,并为它们设置开机自启:
systemctl restart zabbix-server zabbix-agent apache2
systemctl enable zabbix-server zabbix-agent apache2
11、通过浏览器进行页面设置zabbix
http://ip或者主机名/zabbix
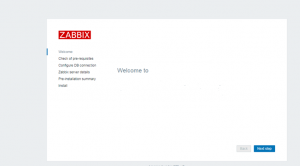
后续可以选择中文,根据中文意思,完成各项参数的填写。
默认用户名:Admin 密码:zabbix


 1820
1820


 被折叠的 条评论
为什么被折叠?
被折叠的 条评论
为什么被折叠?
 到【灌水乐园】发言


