然后在刚才attach方法中通过先祖NestedScrollViewInnerScrollPositionKeyWidget
@override

  void attach(ScrollPosition position) {

    assert(position is _NestedScrollPosition);


    super.attach(position);

    attachScrollPositionKey(position as _NestedScrollPosition);

    coordinator.updateParent();

    coordinator.updateCanDrag();

    position.addListener(_scheduleUpdateShadow);

    _scheduleUpdateShadow();

  }


  @override

  void detach(ScrollPosition position) {

    assert(position is _NestedScrollPosition);

    position.removeListener(_scheduleUpdateShadow);

    super.detach(position);

    detachScrollPositionKey(position as _NestedScrollPosition);

    _scheduleUpdateShadow();

  }


  void attachScrollPositionKey(_NestedScrollPosition position) {

    if (position != null && scrollPositionKeyMap != null) {

      var key = position.setScrollPositionKey();

      if (key != null) {

        if (!scrollPositionKeyMap.containsKey(key)) {

          scrollPositionKeyMap[key] = position;

        } else if (scrollPositionKeyMap[key] != position) {

          //in demo ,when tab to tab03, the tab02 key will be tab00 at first

          //then it become tab02.

          //this is not a good solution


          position.clearScrollPositionKey();

          Future.delayed(Duration(milliseconds: 500), () {

            attachScrollPositionKey(position);

          });

        }

      }

    }

  }


  void detachScrollPositionKey(_NestedScrollPosition position) {

    if (position != null &&

        scrollPositionKeyMap != null &&

        position.key != null &&

        scrollPositionKeyMap.containsKey(position.key)) {

      scrollPositionKeyMap.remove(position.key);

      position.clearScrollPositionKey();

    }

  }
获取先祖NestedScrollViewInnerScrollPositionKeyWidget方法
Key setScrollPositionKey() {

    //if (haveDimensions) {

    final type = _typeOf<NestedScrollViewInnerScrollPositionKeyWidget>();


    NestedScrollViewInnerScrollPositionKeyWidget keyWidget =

    (this.context as ScrollableState)

        ?.context

        ?.ancestorWidgetOfExactType(type);

    _key = keyWidget?.scrollPositionKey;

    return _key;

  }
找到这个_NestedScrollCoordinator 的applyUserOffset方法中我们现在要替换掉 _innerPositions为_currentInnerPositions
Iterable<_NestedScrollPosition> get _innerPositions {

    //return _currentPositions;

    return _innerController.nestedPositions;

  }


  Iterable<_NestedScrollPosition> get _currentInnerPositions {

    return _innerController

        .getCurrentNestedPositions(innerScrollPositionKeyBuilder);

  }
getCurrentNestedPositions里面的代码
  Iterable<_NestedScrollPosition> getCurrentNestedPositions(

      NestedScrollViewInnerScrollPositionKeyBuilder

      innerScrollPositionKeyBuilder) {

    if (innerScrollPositionKeyBuilder != null &&

        scrollPositionKeyMap.length > 1) {

      var key = innerScrollPositionKeyBuilder();

      if (scrollPositionKeyMap.containsKey(key)) {

        return <_NestedScrollPosition>[scrollPositionKeyMap[key]];

      } else {

        return nestedPositions;

      }

    }


    return nestedPositions;

  }
=================================================================================
extended.NestedScrollView(

        headerSliverBuilder: (c, f) {

          return _buildSliverHeader(primaryTabBar);

        },

        //

        pinnedHeaderSliverHeightBuilder: () {

          return pinnedHeaderHeight;

        },

        innerScrollPositionKeyBuilder: () {

          var index = "Tab";

          if (primaryTC.index == 0) {

            index +=

                (primaryTC.index.toString() + secondaryTC.index.toString());

          } else {

            index += primaryTC.index.toString();

          }

          return Key(index);

        },
这里由你自己协定tab key。。我这里是一级tab+二级tab的index。。比如 Tab00代表一级tab第一个下面的二级tab的第一个。
定义tab里面的列表的时候如下,比如第一个tab下面的二级tab的第一个列表,那么它的key 为Tab00.
return extended.NestedScrollViewInnerScrollPositionKeyWidget(
Key("Tab00"),
// myRefresh.RefreshIndicator(
// child:
ListView.builder(
itemBuilder: (c, i) {
return Container(
//decoration: BoxDecoration(border: Border.all(color: Colors.orange,width: 1.0)),
alignment: Alignment.center,
height: 60.0,
child: Text(widget.tabKey.toString() + ": List$i"),
);
},
itemCount: 100)
//,
//onRefresh: onRefresh,
// )
);
**自我介绍一下,小编13年上海交大毕业,曾经在小公司待过,也去过华为、OPPO等大厂,18年进入阿里一直到现在。**
**深知大多数Android工程师,想要提升技能,往往是自己摸索成长或者是报班学习,但对于培训机构动则几千的学费,着实压力不小。自己不成体系的自学效果低效又漫长,而且极易碰到天花板技术停滞不前!**
**因此收集整理了一份《2024年Android移动开发全套学习资料》,初衷也很简单,就是希望能够帮助到想自学提升又不知道该从何学起的朋友,同时减轻大家的负担。**


**既有适合小白学习的零基础资料,也有适合3年以上经验的小伙伴深入学习提升的进阶课程,基本涵盖了95%以上Android开发知识点,真正体系化!**
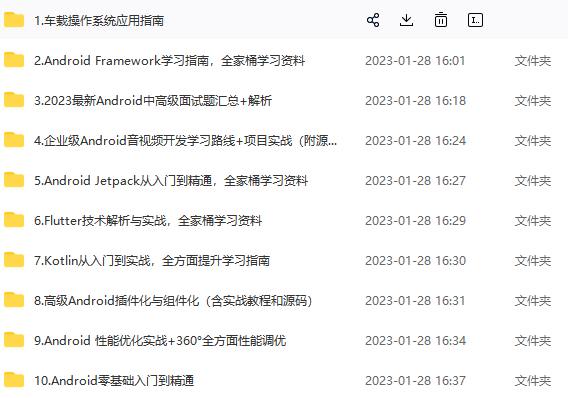
**由于文件比较大,这里只是将部分目录大纲截图出来,每个节点里面都包含大厂面经、学习笔记、源码讲义、实战项目、讲解视频,并且后续会持续更新**
**如果你觉得这些内容对你有帮助,可以添加V获取:vip204888 (备注Android)**

## 最后
都说三年是程序员的一个坎,能否晋升或者提高自己的核心竞争力,这几年就十分关键。
**技术发展的这么快,从哪些方面开始学习,才能达到高级工程师水平,最后进阶到Android架构师/技术专家?我总结了这 5大块;**
> 我搜集整理过这几年阿里,以及腾讯,字节跳动,华为,小米等公司的面试题,把面试的要求和技术点梳理成一份大而全的“ Android架构师”面试 PDF(实际上比预期多花了不少精力),包含知识脉络 + 分支细节。
>
**Java语言与原理;**
大厂,小厂。Android面试先看你熟不熟悉Java语言
> 
**高级UI与自定义view;**
自定义view,Android开发的基本功。
> 
**性能调优;**
数据结构算法,设计模式。都是这里面的关键基础和重点需要熟练的。
> 
**NDK开发;**
未来的方向,高薪必会。
> 
**前沿技术;**
组件化,热升级,热修复,框架设计
> 
> 网上学习 Android的资料一大堆,但如果学到的知识不成体系,遇到问题时只是浅尝辄止,不再深入研究,那么很难做到真正的技术提升。希望这份系统化的技术体系对大家有一个方向参考。
我在搭建这些技术框架的时候,还整理了系统的高级进阶教程,会比自己碎片化学习效果强太多
当然,想要深入学习并掌握这些能力,并不简单。关于如何学习,做程序员这一行什么工作强度大家都懂,但是不管工作多忙,每周也要雷打不动的抽出 2 小时用来学习。
**不出半年,你就能看出变化!**
发;**
未来的方向,高薪必会。
> [外链图片转存中...(img-UlrTJZ3T-1711886080316)]
**前沿技术;**
组件化,热升级,热修复,框架设计
> [外链图片转存中...(img-CT7rm9Vu-1711886080317)]
> 网上学习 Android的资料一大堆,但如果学到的知识不成体系,遇到问题时只是浅尝辄止,不再深入研究,那么很难做到真正的技术提升。希望这份系统化的技术体系对大家有一个方向参考。
我在搭建这些技术框架的时候,还整理了系统的高级进阶教程,会比自己碎片化学习效果强太多
当然,想要深入学习并掌握这些能力,并不简单。关于如何学习,做程序员这一行什么工作强度大家都懂,但是不管工作多忙,每周也要雷打不动的抽出 2 小时用来学习。
**不出半年,你就能看出变化!**
> **本文已被[CODING开源项目:《Android学习笔记总结+移动架构视频+大厂面试真题+项目实战源码》]( )收录**


 970
970


 被折叠的 条评论
为什么被折叠?


