


下面就可以运行了。

下面就是点击视频item打开视频的播放地址了。
这里首先要修改视频列表适配器中的内容,打开VideoAdapter,在里面增加如下代码:
public static class ClickBinding {
public void itemClick(@NotNull VideoResponse.ResultBean resultBean, View view) {
if (resultBean.getShare_url() != null) {
view.getContext().startActivity(new Intent(Intent.ACTION_VIEW, Uri.parse(resultBean.getShare_url())));
} else {
Toast.makeText(view.getContext(), “视频地址为空”, Toast.LENGTH_SHORT).show();
}
}
}
然后convert方法中设置进去。

再修改item_video.xml的代码,如下图所示:

这里的视频链接地址实际上是抖音的视频地址,只不过聚合采集了数据,因此如果你的手机上有抖音,你点击之后会打开抖音播放这个视频,没有抖音会打开浏览器去播放这个视频,这里就不做演示了,自行去尝试。
为了充分利用我们的屏幕控件,一些个人信息和设置是可以放到抽屉菜单里面的,就像QQ那样。那么怎么样做一个抽屉菜单呢?其实很简单。首先在layout下创建一个nav_header.xml布局,里面的代码如下:
<?xml version="1.0" encoding="utf-8"?><LinearLayout xmlns:android=“http://schemas.android.com/apk/res/android”
xmlns:app=“http://schemas.android.com/apk/res-auto”
android:layout_width=“match_parent”
android:layout_height=“wrap_content”
android:orientation=“vertical”>
<RelativeLayout
android:layout_width=“match_parent”
android:layout_height=“120dp”
android:background=“@color/purple_500”>
<com.google.android.material.imageview.ShapeableImageView
android:id=“@+id/iv_avatar”
android:layout_width=“80dp”
android:layout_height=“80dp”
android:layout_centerVertical=“true”
android:layout_marginStart=“24dp”
android:layout_marginEnd=“24dp”
android:padding=“1dp”
android:scaleType=“centerCrop”
android:src=“@drawable/logo”
app:shapeAppearanceOverlay=“@style/circleImageStyle”
app:strokeColor=“@color/white”
app:strokeWidth=“2dp” />
<TextView
android:id=“@+id/tv_name”
android:layout_width=“wrap_content”
android:layout_height=“wrap_content”
android:layout_alignTop=“@+id/iv_avatar”
android:layout_marginTop=“16dp”
android:layout_toEndOf=“@+id/iv_avatar”
android:text=“初学者-Study”
android:textColor=“#FFF”
android:textSize=“16sp” />
<TextView
android:id=“@+id/tv_tip”
android:layout_width=“wrap_content”
android:layout_height=“wrap_content”
android:layout_below=“@+id/tv_name”
android:layout_marginTop=“8dp”
android:layout_toEndOf=“@+id/iv_avatar”
android:text=“Android | Java”
android:textColor=“#FFF”
android:textSize=“14sp” />
这里的图标就是我的博客头像,你可以到我的源码中去找,也可以用自己的图片。
然后在menu下创建一个nav_menu.xml,里面的代码如下:
<?xml version="1.0" encoding="utf-8"?><item
android:id=“@+id/item_setting”
android:icon=“@drawable/icon_settings”
android:title=“设置” />
<item
android:id=“@+id/item_logout”
android:icon=“@drawable/icon_logout”
android:title=“退出” />
然后修改activity_home.xml,将根布局改成DrawerLayout,里面的代码如下:
<?xml version="1.0" encoding="utf-8"?><layout xmlns:android=“http://schemas.android.com/apk/res/android”
xmlns:app=“http://schemas.android.com/apk/res-auto”
xmlns:tools=“http://schemas.android.com/tools”>
<androidx.drawerlayout.widget.DrawerLayout
android:id=“@+id/drawer_layout”
android:layout_width=“match_parent”
android:layout_height=“match_parent”>
<RelativeLayout
android:layout_width=“match_parent”
android:layout_height=“match_parent”
android:fitsSystemWindows=“true”
tools:context=“.ui.activity.HomeActivity”>
<com.google.android.material.appbar.MaterialToolbar
android:id=“@+id/toolbar”
android:layout_width=“match_parent”
android:layout_height=“?attr/actionBarSize”
android:background=“@color/purple_500”>
<com.google.android.material.imageview.ShapeableImageView
android:id=“@+id/iv_avatar”
android:layout_width=“36dp”
android:layout_height=“36dp”
android:padding=“0.5dp”
android:scaleType=“centerCrop”
android:src=“@drawable/logo”
app:shapeAppearanceOverlay=“@style/circleImageStyle”
app:strokeColor=“@color/white”
app:strokeWidth=“1dp” />
<TextView
android:id=“@+id/tv_title”
android:layout_width=“wrap_content”
android:layout_height=“wrap_content”
android:layout_gravity=“center”
android:text=“头条新闻”
android:textColor=“@color/white”
android:textSize=“18sp”
android:textStyle=“bold” />
</com.google.android.material.appbar.MaterialToolbar>
<fragment
android:id=“@+id/nav_host_fragment”
android:name=“androidx.navigation.fragment.NavHostFragment”
android:layout_width=“match_parent”
android:layout_height=“match_parent”
android:layout_above=“@+id/bottom_navigation”
android:layout_below=“@+id/toolbar”
app:navGraph=“@navigation/nav_graph” />
<com.google.android.material.bottomnavigation.BottomNavigationView
android:id=“@+id/bottom_navigation”
android:layout_width=“match_parent”
android:layout_height=“?attr/actionBarSize”
android:layout_alignParentBottom=“true”
android:background=“#FFF”
app:menu=“@menu/navigation_menu” />
<com.google.android.material.navigation.NavigationView
android:id=“@+id/nav_view”
android:layout_width=“match_parent”
android:layout_height=“match_parent”
android:layout_gravity=“start”
app:headerLayout=“@layout/nav_header”
app:itemIconSize=“24dp”
app:itemIconTint=“#000”
app:itemTextColor=“#000”
app:menu=“@menu/nav_menu” />
</androidx.drawerlayout.widget.DrawerLayout>
这里主要就是通过NavigationView去加载刚才的两个布局xml,一个作为头部一个作为菜单。同时我在Toolbar上放了一个Image,当点击的时候就可以打开抽屉。
<com.google.android.material.navigation.NavigationView
android:id=“@+id/nav_view”
android:layout_width=“match_parent”
android:layout_height=“match_parent”
android:layout_gravity=“start”
app:headerLayout=“@layout/nav_header”
app:itemIconSize=“24dp”
app:itemIconTint=“#000”
app:itemTextColor=“#000”
app:menu=“@menu/nav_menu” />
下面我们修改HomeActivity中的代码,在initView中增加如下代码:

然后运行一下:

嗯,这里我们的侧滑抽屉就完成了,当然后面还会对这个部分增加更多的功能使用,现在里面只有一个设置和一个退出。既然说到退出了,那么就来写一下退出这个功能吧。
退出这是一个需要小心的功能,因为涉及到Activity的栈,当我们从一个Activity跳转到另一个Activity时,如果之前的Activity没有销毁掉,则它就在栈里,当前跳转的Activity在栈顶。而不可能每一次跳转页面都需要销毁之前的页面。因此当应用需要退出时,首先我们应该销毁掉所有的Activity,然后再去关掉进程,这样你的程序才算是完整退出了。这里我们需要一个ActivityManager,在activity包下新建一个ActivityManager类,里面的代码如下:
public class ActivityManager {
//保存所有创建的Activity
private final List activityList = new ArrayList<>();
public static ActivityManager mInstance;
public static ActivityManager getInstance() {
if (mInstance == null) {
synchronized (ActivityManager.class) {
if (mInstance == null) {
mInstance = new ActivityManager();
}
}
}
return mInstance;
}
/**
-
添加Activity
-
@param activity
*/
public void addActivity(Activity activity){
if(activity != null){
activityList.add(activity);
}
}
/**
-
移除Activity
-
@param activity
*/
public void removeActivity(Activity activity){
if(activity != null){
activityList.remove(activity);
}
}
/**
- 关闭所有Activity
*/
public void finishAllActivity(){
for (Activity activity : activityList) {
activity.finish();
}
}
}
然后要使我们的每一个Activity在创建的时候都添加到ActivityManager中,我们需要现在BaseApplication中添加如下代码:
public static ActivityManager getActivityManager() {
return ActivityManager.getInstance();
}
然后在BaseActivity中的onCreate中增加如下代码即可。
BaseApplication.getActivityManager().addActivity(this);
然后这样有一个前提,就是你所有的Activity都要继承自BaseActivity。然后我们在HomeActivity中新增一个退出登录方法。
/**
- 退出登录
*/
private void logout() {
showMsg(“退出登录”);
MVUtils.put(Constant.IS_LOGIN,false);
jumpActivityFinish(LoginActivity.class);
}
在点击菜单的时候调用它。

然后我们会回到登录页面,在登录页面中增加一个两次返回表示退出应用的功能,在LoginActivity中增加如下代码:
private long timeMillis;
/**
- Add a prompt to exit the application
*/
@Override
public boolean onKeyDown(int keyCode, KeyEvent event) {
if (keyCode == KeyEvent.KEYCODE_BACK && event.getAction() == KeyEvent.ACTION_DOWN) {
if ((System.currentTimeMillis() - timeMillis) > 2000) {
showMsg(“再次按下退出应用程序”);
timeMillis = System.currentTimeMillis();
} else {
exitTheProgram();
}
return false;
}
return super.onKeyDown(keyCode, event);
}
这里的exitTheProgram()方法,要写在BaseAcctivity中,方法如下:
protected void exitTheProgram() {
BaseApplication.getActivityManager().finishAllActivity();
}
那么我们再运行一下,看看效果。

你可能会很疑惑,不是已经有一个登录了吗?为啥还有登录注册?等会儿,注册?注册到哪里去?又没有服务器数据库,这里我是都使用本地数据库,也从本地数据库去做校验。也就是说,后面你使用这个软件你需要先手动去注册一个用户,然后再去登录这个用户,我这么做的目的是希望更接近实际开发中的需求设计。写代码就讲究一个真听真看真实现。所以我们先来完成一个注册的功能,只不过我们的注册只是本地有效,请注意这一点。
① 建表
既然是保存用户信息到本地数据库里,则我们需要有一个表来操作,在bean包下新建一个User类,代码如下:
@Entity(tableName = “user”)
public class User extends BaseObservable {
@PrimaryKey
private int uid;
private String account;
private String pwd;
@Ignore
private String confirmPwd;
private String nickname;
private String introduction;
public int getUid() {
return uid;
}
public void setUid(int uid) {
this.uid = uid;
}
@Bindable
public String getAccount() {
return account;
}
public void setAccount(String account) {
this.account = account;
notifyPropertyChanged(BR.account);
}
@Bindable
public String getPwd() {
return pwd;
}
public void setPwd(String pwd) {
this.pwd = pwd;
notifyPropertyChanged(BR.pwd);
}
@Bindable
public String getConfirmPwd() {
return confirmPwd;
}
public void setConfirmPwd(String confirmPwd) {
this.confirmPwd = confirmPwd;
notifyPropertyChanged(BR.confirmPwd);
}
@Bindable
public String getNickname() {
return nickname;
}
public void setNickname(String nickname) {
this.nickname = nickname;
notifyPropertyChanged(BR.nickname);
}
@Bindable
public String getIntroduction() {
return introduction;
}
public void setIntroduction(String introduction) {
this.introduction = introduction;
notifyPropertyChanged(BR.introduction);
}
public User() {}
@Ignore
public User(int uid, String account, String pwd, String confirmPwd, String nickname, String introduction) {
this.uid = uid;
this.account = account;
this.pwd = pwd;
this.confirmPwd = confirmPwd;
this.nickname = nickname;
this.introduction = introduction;
}
}
这里是一个User表,它里面有6个属性,uid可以不用管它,依次看下来就是账号,密码,确认密码,昵称,简介,其中确认密码这个字段只是用作校验的,因此不需要放入数据表中,所以我用@Ignore注解了,下面创建相关的Dao类。
② 表操作接口
在dao包下新建一个UserDao接口,里面的代码如下:
@Dao
public interface UserDao {
@Query(“SELECT * FROM user”)
Flowable<List> getAll();
@Update
Completable update(User user);
@Insert(onConflict = OnConflictStrategy.REPLACE)
Completable insert(User user);
@Query(“DELETE FROM user”)
Completable deleteAll();
}
这里没啥好说的,就是操作用户表的方法。
③ 数据库升级
之前的数据库版本是3,现在我新增了用户表,则需要对数据库进行一个升级迁移,在AppDatabase中增加如下代码:
/**
- 版本升级迁移到4 新增用户表
*/
static final Migration MIGRATION_3_4 = new Migration(3, 4) {
@Override
public void migrate(SupportSQLiteDatabase database) {
//创建用户表
database.execSQL("CREATE TABLE user " +
"(uid INTEGER NOT NULL, " +
"account TEXT, " +
"pwd TEXT, " +
“nickname TEXT,” +
“introduction TEXT,” +
“PRIMARY KEY(uid))”);
}
};
新增一个抽象方法。
public abstract UserDao userDao();
然后如下图所示修改一下,数据库的升级迁移就完成了。

④ 数据储存库
现在关于数据库的部分就已经弄完了,接下来就是涉及到数据的保存和操作了,因为我们的用户表涉及到的页面可能不止一个,所以用户的存储库就不以页面所命名,因此在repository包下新建一个UserRepository,里面的代码如下:
public class UserRepository {
private static final String TAG = UserRepository.class.getSimpleName();
private final MutableLiveData userMutableLiveData = new MutableLiveData<>();
public final MutableLiveData failed = new MutableLiveData<>();
public MutableLiveData getUser() {
Flowable<List> listFlowable = BaseApplication.getDb().userDao().getAll();
CustomDisposable.addDisposable(listFlowable, users -> {
if (users.size() > 0) {
for (User user : users) {
if (user.getUid() == 1) {
userMutableLiveData.postValue(user);
break;
}
}
} else {
failed.postValue(“你还没有注册过吧,去注册吧!”);
}
});
return userMutableLiveData;
}
/**
-
更新用户信息
-
@param user
*/
public void updateUser(User user) {
Completable update = BaseApplication.getDb().userDao().update(user);
CustomDisposable.addDisposable(update, () -> {
failed.postValue(“200”);
});
}
/**
- 保存热门壁纸数据
*/
public void saveUser(User user) {
Completable deleteAll = BaseApplication.getDb().userDao().deleteAll();
CustomDisposable.addDisposable(deleteAll, () -> {
//保存到数据库
Completable insertAll = BaseApplication.getDb().userDao().insert(user);
//RxJava处理Room数据存储
CustomDisposable.addDisposable(insertAll, () -> failed.postValue(“200”));
});
}
}
这里有三个方法,这是我目前所想到的,后续可能会对方法已经修改,首先我们要完成用户的注册和登录,则就会用到获取用户和保存用户。
⑤ RegisterViewModel
这里我先写对应注册页面的ViewModel,然后再去写注册页面的代码,在viewmodels包下新建一个RegisterViewModel类,代码如下:
public class RegisterViewModel extends BaseViewModel {
public MutableLiveData user;
public MutableLiveData getUser(){
if(user == null){
user = new MutableLiveData<>();
}
return user;
}
/**
- 注册
*/
public void register() {
UserRepository userRepository = new UserRepository();
failed = userRepository.failed;
user.getValue().setUid(1);
Log.d(“TAG”, "register: "+new Gson().toJson(user.getValue()));
userRepository.saveUser(user.getValue());
}
}
这里的核心功能就是注册了,这里的注册我只写了一个id,其他的数据需要从页面上去获取。
⑥ 注册页面
在activity包下新建一个RegisterActivity,对应的布局是activity_register.xml,布局的代码如下:
<?xml version="1.0" encoding="utf-8"?><layout xmlns:android=“http://schemas.android.com/apk/res/android”
xmlns:app=“http://schemas.android.com/apk/res-auto”
xmlns:tools=“http://schemas.android.com/tools”>
<variable
name=“register”
type=“com.llw.mvvm.viewmodels.RegisterViewModel” />
<LinearLayout
android:layout_width=“match_parent”
android:layout_height=“match_parent”
android:orientation=“vertical”>
<com.google.android.material.appbar.MaterialToolbar
android:id=“@+id/toolbar”
android:layout_width=“match_parent”
android:layout_height=“?attr/actionBarSize”
android:background=“@color/purple_500”
app:navigationIcon=“@drawable/ic_back_white”>
<TextView
android:layout_width=“wrap_content”
android:layout_height=“wrap_content”
android:layout_gravity=“center”
android:text=“注册”
android:textColor=“@color/white”
android:textSize=“18sp”
android:textStyle=“bold” />
</com.google.android.material.appbar.MaterialToolbar>
<TextView
android:layout_width=“match_parent”
android:layout_height=“wrap_content”
android:gravity=“center”
android:padding=“24dp”
android:text=“MVVM”
android:textColor=“@color/purple_500”
android:textSize=“48sp”
android:textStyle=“bold” />
<RelativeLayout
android:layout_width=“match_parent”
android:layout_height=“match_parent”
android:orientation=“vertical”
android:padding=“32dp”>
<com.google.android.material.textfield.TextInputLayout
android:id=“@+id/et_account_lay”
android:layout_width=“match_parent”
android:layout_height=“wrap_content”>
<com.google.android.material.textfield.TextInputEditText
android:id=“@+id/et_account”
android:layout_width=“match_parent”
android:layout_height=“wrap_content”
android:background=“@color/white”
android:hint=“账号”
android:text=“@={register.user.account}” />
</com.google.android.material.textfield.TextInputLayout>
<TextView
android:layout_width=“wrap_content”
android:layout_height=“wrap_content”
android:layout_alignTop=“@+id/et_account_lay”
android:layout_alignEnd=“@+id/et_account_lay”
android:layout_alignBottom=“@+id/et_account_lay”
android:gravity=“center”
android:text=“*”
android:textColor=“@color/purple_500”
android:textSize=“24sp” />
<com.google.android.material.textfield.TextInputLayout
android:id=“@+id/et_pwd_lay”
android:layout_width=“match_parent”
android:layout_height=“wrap_content”
android:layout_below=“@+id/et_account_lay”
android:layout_marginTop=“12dp”>
<com.google.android.material.textfield.TextInputEditText
android:id=“@+id/et_pwd”
android:layout_width=“match_parent”
android:layout_height=“wrap_content”
android:background=“@color/white”
android:hint=“密码”
android:inputType=“textPassword”
android:text=“@={register.user.pwd}” />
</com.google.android.material.textfield.TextInputLayout>
<TextView
android:layout_width=“wrap_content”
android:layout_height=“wrap_content”
android:layout_alignTop=“@+id/et_pwd_lay”
android:layout_alignEnd=“@+id/et_pwd_lay”
android:layout_alignBottom=“@+id/et_pwd_lay”
android:gravity=“center”
android:text=“*”
android:textColor=“@color/purple_500”
android:textSize=“24sp” />
<com.google.android.material.textfield.TextInputLayout
android:id=“@+id/et_confirm_pwd_lay”
android:layout_width=“match_parent”
android:layout_height=“wrap_content”
android:layout_below=“@+id/et_pwd_lay”
android:layout_marginTop=“12dp”>
<com.google.android.material.textfield.TextInputEditText
android:id=“@+id/et_confirm_pwd”
android:layout_width=“match_parent”
android:layout_height=“wrap_content”
android:background=“@color/white”
android:hint=“确认密码”
android:inputType=“textPassword”
android:text=“@={register.user.confirmPwd}” />
</com.google.android.material.textfield.TextInputLayout>
<com.google.android.material.textfield.TextInputLayout
android:id=“@+id/et_nickname_lay”
android:layout_width=“match_parent”
android:layout_height=“wrap_content”
android:layout_below=“@+id/et_confirm_pwd_lay”
android:layout_marginTop=“12dp”>
<com.google.android.material.textfield.TextInputEditText
android:id=“@+id/et_nickname_pwd”
android:layout_width=“match_parent”
android:layout_height=“wrap_content”
android:background=“@color/white”
android:hint=“用户昵称”
android:text=“@={register.user.nickname}” />
</com.google.android.material.textfield.TextInputLayout>
<com.google.android.material.textfield.TextInputLayout
android:id=“@+id/et_introduction_lay”
android:layout_width=“match_parent”
android:layout_height=“wrap_content”
android:layout_below=“@+id/et_nickname_lay”
android:layout_marginTop=“12dp”>
<com.google.android.material.textfield.TextInputEditText
android:id=“@+id/et_introduction”
android:layout_width=“match_parent”
android:layout_height=“wrap_content”
android:background=“@color/white”
android:hint=“用户简介”
android:text=“@={register.user.introduction}” />
</com.google.android.material.textfield.TextInputLayout>
<TextView
android:layout_width=“wrap_content”
android:layout_height=“wrap_content”
android:layout_alignTop=“@+id/et_confirm_pwd_lay”
android:layout_alignEnd=“@+id/et_confirm_pwd_lay”
android:layout_alignBottom=“@+id/et_confirm_pwd_lay”
android:gravity=“center”
android:text=“*”
android:textColor=“@color/purple_500”
android:textSize=“24sp” />
<com.google.android.material.button.MaterialButton
android:id=“@+id/btn_register”
android:layout_width=“match_parent”
android:layout_height=“48dp”
android:layout_below=“@+id/et_introduction_lay”
android:layout_margin=“48dp”
android:insetTop=“0dp”
android:insetBottom=“0dp”
android:text=“注 册”
app:cornerRadius=“12dp” />
<TextView
android:layout_width=“wrap_content”
android:layout_height=“wrap_content”
android:layout_alignParentBottom=“true”
android:layout_centerHorizontal=“true”
android:text=“注册信息中 * 为必填项” />
这里的布局里面就是五个输入框一个按钮,其中有一些信息是必须要输入的,有一些信息不是必须的。下面我们修改RegisterActivity的代码,如下所示:
public class RegisterActivity extends BaseActivity {
private static final String TAG = RegisterActivity.class.getSimpleName();
private ActivityRegisterBinding binding;
private RegisterViewModel registerViewModel;
@Override
protected void onCreate(Bundle savedInstanceState) {
super.onCreate(savedInstanceState);
binding = DataBindingUtil.setContentView(this, R.layout.activity_register);
registerViewModel = new ViewModelProvider(this).get(RegisterViewModel.class);
registerViewModel.getUser().setValue(new User(0, “”, “”, “”, “”, “”));
binding.setRegister(registerViewModel);
initView();
}
private void initView() {
back(binding.toolbar);
binding.btnRegister.setOnClickListener(v -> {
if (registerViewModel.user.getValue().getAccount().isEmpty()) {
showMsg(“请输入账号”);
return;
}
if (registerViewModel.user.getValue().getPwd().isEmpty()) {
showMsg(“请输入密码”);
return;
}
if (registerViewModel.user.getValue().getConfirmPwd().isEmpty()) {
showMsg(“请确认密码”);
return;
}
if (!registerViewModel.user.getValue().getPwd().equals(registerViewModel.user.getValue().getConfirmPwd())) {
showMsg(“两次输入密码不一致”);
return;
}
registerViewModel.register();
registerViewModel.failed.observe(this, failed -> {
showMsg(“200”.equals(failed) ? “注册成功” : failed);
if (“200”.equals(failed)) {
finish();
}
});
});
}
}
这里我们可以利用failed返回的内容作为注册成功和失败的标准,注册成功则返回之前的登录页面,虽然我们还没有在登录页面中写跳转到注册页面的代码。下面我们就来修改登录页面的代码。
⑦ 修改登录页面
首先是从布局上修改,修改activity_login.xml的代码如下:
<?xml version="1.0" encoding="utf-8"?><layout xmlns:android=“http://schemas.android.com/apk/res/android”
xmlns:app=“http://schemas.android.com/apk/res-auto”
xmlns:tools=“http://schemas.android.com/tools”>
<variable
name=“viewModel”
type=“com.llw.mvvm.viewmodels.LoginViewModel” />
<LinearLayout
android:layout_width=“match_parent”
android:layout_height=“match_parent”
android:orientation=“vertical”>
<com.google.android.material.appbar.MaterialToolbar
android:layout_width=“match_parent”
android:layout_height=“?attr/actionBarSize”
android:background=“@color/purple_500”>
<TextView
android:layout_width=“wrap_content”
android:layout_height=“wrap_content”
android:layout_gravity=“center”
android:text=“登录”
android:textColor=“@color/white”
android:textSize=“18sp”
android:textStyle=“bold” />
</com.google.android.material.appbar.MaterialToolbar>
<LinearLayout
android:layout_width=“match_parent”
android:layout_height=“match_parent”
android:gravity=“center”
android:orientation=“vertical”
android:padding=“32dp”>
<TextView
android:layout_width=“match_parent”
android:layout_height=“wrap_content”
android:gravity=“center”
android:padding=“24dp”
android:text=“MVVM”
android:textColor=“@color/purple_500”
android:textSize=“48sp”
android:textStyle=“bold” />
<TextView
android:id=“@+id/tv_account”
android:layout_width=“wrap_content”
android:layout_height=“wrap_content”
android:text=“@{viewModel.user.account}”
android:visibility=“gone” />
<TextView
android:id=“@+id/tv_pwd”
android:layout_width=“wrap_content”
android:layout_height=“wrap_content”
android:layout_marginBottom=“24dp”
android:text=“@{viewModel.user.pwd}”
android:visibility=“gone” />
<com.google.android.material.textfield.TextInputLayout
android:layout_width=“match_parent”
android:layout_height=“wrap_content”>
<com.google.android.material.textfield.TextInputEditText
android:id=“@+id/et_account”
android:layout_width=“match_parent”
android:layout_height=“wrap_content”
android:background=“@color/white”
android:hint=“账号”
android:text=“@={viewModel.user.account}” />
</com.google.android.material.textfield.TextInputLayout>
<com.google.android.material.textfield.TextInputLayout
自我介绍一下,小编13年上海交大毕业,曾经在小公司待过,也去过华为、OPPO等大厂,18年进入阿里一直到现在。
深知大多数Android工程师,想要提升技能,往往是自己摸索成长或者是报班学习,但对于培训机构动则几千的学费,着实压力不小。自己不成体系的自学效果低效又漫长,而且极易碰到天花板技术停滞不前!
因此收集整理了一份《2024年Android移动开发全套学习资料》,初衷也很简单,就是希望能够帮助到想自学提升又不知道该从何学起的朋友,同时减轻大家的负担。

既有适合小白学习的零基础资料,也有适合3年以上经验的小伙伴深入学习提升的进阶课程,基本涵盖了95%以上Android开发知识点,真正体系化!
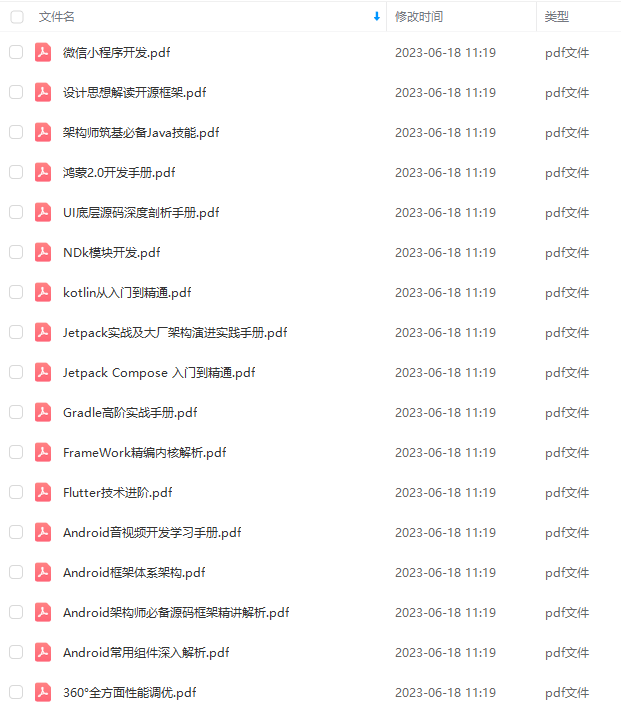
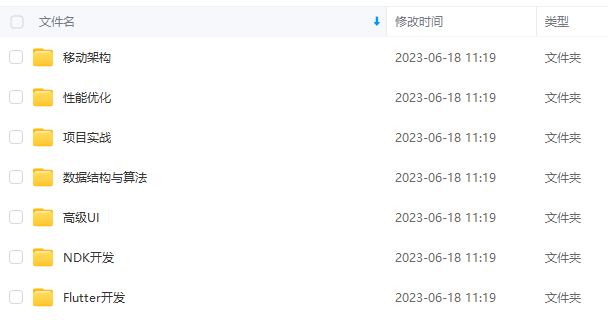
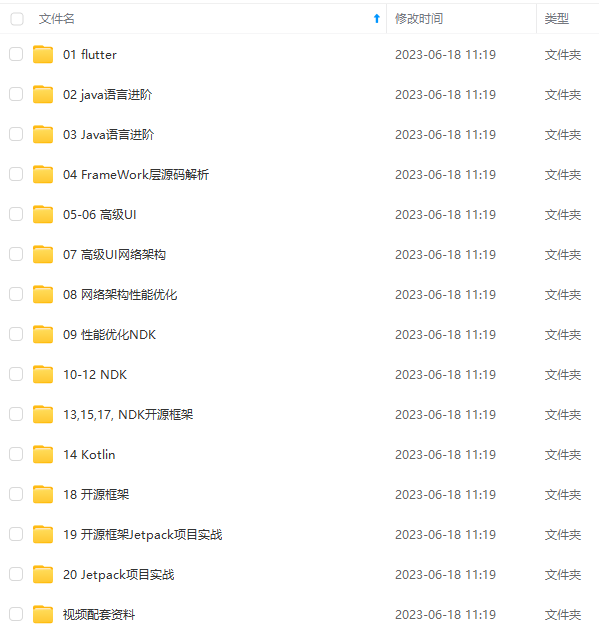
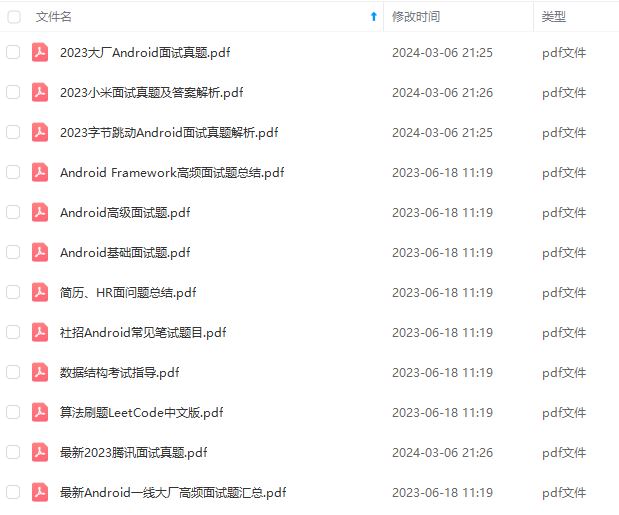
由于文件比较大,这里只是将部分目录大纲截图出来,每个节点里面都包含大厂面经、学习笔记、源码讲义、实战项目、讲解视频,并且后续会持续更新
如果你觉得这些内容对你有帮助,可以添加V获取:vip204888 (备注Android)

结语
- 现在随着短视频,抖音,快手的流行NDK模块开发也显得越发重要,需要这块人才的企业也越来越多,随之学习这块的人也变多了,音视频的开发,往往是比较难的,而这个比较难的技术就是NDK里面的技术。
- 音视频/高清大图片/人工智能/直播/抖音等等这年与用户最紧密,与我们生活最相关的技术一直都在寻找最终的技术落地平台,以前是windows系统,而现在则是移动系统了,移动系统中又是以Android占比绝大部分为前提,所以AndroidNDK技术已经是我们必备技能了。
- 要学习好NDK,其中的关于C/C++,jni,Linux基础都是需要学习的,除此之外,音视频的编解码技术,流媒体协议,ffmpeg这些都是音视频开发必备技能,而且
- OpenCV/OpenGl/这些又是图像处理必备知识,下面这些我都是当年自己搜集的资料和做的一些图,因为当年我就感觉视频这块会是一个大的趋势。所以提前做了一些准备。现在拿出来分享给大家。


.textfield.TextInputLayout
android:layout_width=“match_parent”
android:layout_height=“wrap_content”>
<com.google.android.material.textfield.TextInputEditText
android:id=“@+id/et_account”
android:layout_width=“match_parent”
android:layout_height=“wrap_content”
android:background=“@color/white”
android:hint=“账号”
android:text=“@={viewModel.user.account}” />
</com.google.android.material.textfield.TextInputLayout>
<com.google.android.material.textfield.TextInputLayout
自我介绍一下,小编13年上海交大毕业,曾经在小公司待过,也去过华为、OPPO等大厂,18年进入阿里一直到现在。
深知大多数Android工程师,想要提升技能,往往是自己摸索成长或者是报班学习,但对于培训机构动则几千的学费,着实压力不小。自己不成体系的自学效果低效又漫长,而且极易碰到天花板技术停滞不前!
因此收集整理了一份《2024年Android移动开发全套学习资料》,初衷也很简单,就是希望能够帮助到想自学提升又不知道该从何学起的朋友,同时减轻大家的负担。
[外链图片转存中…(img-CYdW4Bqb-1711908809678)]
[外链图片转存中…(img-ur1QQDjL-1711908809679)]
[外链图片转存中…(img-xOWtXZYG-1711908809681)]
[外链图片转存中…(img-mHHZz4Cs-1711908809681)]
[外链图片转存中…(img-OMBMhzLW-1711908809681)]
[外链图片转存中…(img-jmjJxGbE-1711908809682)]
既有适合小白学习的零基础资料,也有适合3年以上经验的小伙伴深入学习提升的进阶课程,基本涵盖了95%以上Android开发知识点,真正体系化!
由于文件比较大,这里只是将部分目录大纲截图出来,每个节点里面都包含大厂面经、学习笔记、源码讲义、实战项目、讲解视频,并且后续会持续更新
如果你觉得这些内容对你有帮助,可以添加V获取:vip204888 (备注Android)
[外链图片转存中…(img-1glTDyBd-1711908809682)]
结语
- 现在随着短视频,抖音,快手的流行NDK模块开发也显得越发重要,需要这块人才的企业也越来越多,随之学习这块的人也变多了,音视频的开发,往往是比较难的,而这个比较难的技术就是NDK里面的技术。
- 音视频/高清大图片/人工智能/直播/抖音等等这年与用户最紧密,与我们生活最相关的技术一直都在寻找最终的技术落地平台,以前是windows系统,而现在则是移动系统了,移动系统中又是以Android占比绝大部分为前提,所以AndroidNDK技术已经是我们必备技能了。
- 要学习好NDK,其中的关于C/C++,jni,Linux基础都是需要学习的,除此之外,音视频的编解码技术,流媒体协议,ffmpeg这些都是音视频开发必备技能,而且
- OpenCV/OpenGl/这些又是图像处理必备知识,下面这些我都是当年自己搜集的资料和做的一些图,因为当年我就感觉视频这块会是一个大的趋势。所以提前做了一些准备。现在拿出来分享给大家。
[外链图片转存中…(img-0UcoeKM9-1711908809682)]
[外链图片转存中…(img-z87fw4ky-1711908809682)]


 1万+
1万+


 被折叠的 条评论
为什么被折叠?
被折叠的 条评论
为什么被折叠?
 到【灌水乐园】发言


