


try:
    # 使用Sphinx进行语音识别
    text = r.recognize_sphinx(audio)
    return text
except sr.UnknownValueError:
    print("抱歉,无法识别您的语音")
except sr.RequestError as e:
    print("出现错误: {0}".format(e))
def process_speech(text):
# 在这里处理语音输入并执行相应的操作
if “菜单” in text:
print(“选择菜单选项”)
elif “查询” in text:
print(“查询信息”)
elif “操作” in text:
print(“执行特定操作”)
else:
print(“无法理解您的请求”)
主循环
while True:
speech = listen_for_speech()
if speech:
process_speech(speech)
这是一个简单的示例代码,用于演示如何使用Sphinx进行语音识别和处理用户的语音输入。在代码中,我们使用`speech_recognition`库来实现语音识别,并使用Sphinx作为识别引擎。
代码的主要部分是`listen_for_speech`函数,它使用麦克风监听用户的语音输入,并将其转换为文本。然后,`process_speech`函数根据用户的语音输入执行相应的操作。在示例中,我们简单地检查输入中是否包含特定关键词(例如"菜单"、“查询”、“操作”),并打印相应的操作。
请注意,此示例仅展示了如何使用Sphinx进行语音识别和处理简单的语音输入。实际的自动电话系统可能需要更复杂的逻辑和交互设计,以满足特定的需求。
### 二、扩展思路介绍
当构建自动电话系统(IVR)时,可以考虑以下扩展思路来增强系统的功能和用户体验:
1. Sphinx多语言支持:通过集成多种语言模型和语音识别引擎,使系统能够支持多种语言的语音输入和输出。这样可以更好地满足不同语言用户的需求。
2. Sphinx与语音合成库集成:除了语音识别外,将语音合成引擎集成到系统中,使系统能够以语音形式回复用户。这样用户可以通过语音与系统进行交互,提升用户体验。
3. Sphinx语音识别前自然语言预处理(NLP):使用NLP技术对用户的语音输入进行处理和理解,以更准确地识别用户意图。通过构建意图识别和槽填充模型,系统可以更智能地回应用户的请求,并提供更准确的信息和服务。
4. Sphinx语音识别自动电话系统多级菜单:如果系统具有复杂的功能和选项,可以设计多级菜单结构,使用户能够通过语音输入选择不同的菜单选项。这样可以提高系统的可用性和用户导航的效率。
5. Sphinx语音识别自动电话系统个性化交互:通过集成用户个人信息和历史记录,系统可以提供个性化的服务和建议。例如,根据用户的偏好和历史记录,推荐相关的产品或服务。
6. Sphinx语音识别自动电话系统错误处理和重试机制:在语音识别过程中,可能会出现识别错误或无法理解用户的语音输入。为了提高系统的容错性,可以实现错误处理和重试机制,例如提示用户重新输入或提供备选选项。
7. Sphinx语音识别自动电话系统集成外部系统和数据源:自动电话系统可以与其他系统和数据源进行集成,以提供更丰富的功能和信息。例如,与客户关系管理(CRM)系统集成,根据用户的身份和历史记录提供个性化的服务。
8. Sphinx语音识别自动电话系统实时语音分析:除了语音识别外,可以使用实时语音分析技术来分析用户的语音特征,如情感、语调和语速。这样可以更好地理解用户的情绪和意图,并提供相应的回应和支持。
9. Sphinx语音识别自动电话系统呼叫路由和排队:在多用户同时使用系统时,可以实现呼叫路由和排队机制,以确保用户能够按顺序获得服务。这样可以提高系统的可扩展性和服务质量。
10. Sphinx语音识别自动电话系统用户反馈和评价:为了改进系统和了解用户的满意度,可以设计用户反馈和评价机制。通过收集用户的意见和建议,系统可以不断优化和改进。
这些扩展思路可以根据具体的需求和场景进行选择和实现。通过结合多种技术和功能,可以构建更强大、智能和用户友好的自动电话系统。
### 三、Sphinx多语言支持示例代码

在使用Sphinx进行多语言支持时,你可以通过以下示例代码来实现:
from pocketsphinx import LiveSpeech, get_model_path
设置语言模型和字典路径
model_path = get_model_path()
设置要支持的语言列表
supported_languages = [“en”, “es”, “fr”] # 支持的语言:英语、西班牙语、法语
初始化语音识别引擎
speech = LiveSpeech(
verbose=False,
sampling_rate=16000,
buffer_size=2048,
no_search=False,
full_utt=False,
hmm=os.path.join(model_path, “en-us”),
lm=os.path.join(model_path, “en-us.lm.bin”),
dic=os.path.join(model_path, “cmudict-en-us.dict”),
)
循环接收用户语音输入并进行识别
for phrase in speech:
# 获取识别结果
hypothesis = phrase.hypothesis()
# 检查识别结果的语言是否在支持的语言列表中
if hypothesis.language in supported_languages:
    # 处理识别结果
    print("识别结果:", hypothesis.hypstr)
else:
    print("不支持的语言:", hypothesis.language)
上述示例代码使用了PocketSphinx库,该库是Sphinx的Python接口。你需要安装pocketsphinx库和Sphinx语言模型,可以使用pip进行安装。在示例代码中,我们设置了支持的语言列表为英语、西班牙语和法语,你可以根据你的需求修改这个列表。
请注意,这只是一个简单的示例代码,你可能需要根据你的具体需求进行更多的定制和配置。此外,你还需要准备相应的语言模型和字典文件来支持不同的语言。你可以从Sphinx官方网站下载已经训练好的语言模型和字典,或者自行训练定制的语言模型和字典。
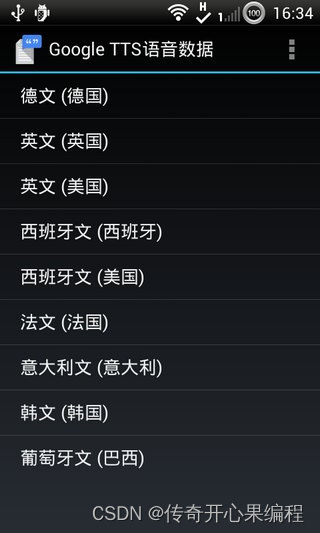
另外,对于语音输出的多语言支持,你可以使用相应的文本转语音引擎,如Google Text-to-Speech、Microsoft Speech SDK等,根据识别结果生成对应语言的语音输出。具体的实现方式会依赖于你选择的文本转语音引擎。
### 四、Sphinx和语音合成库集成示例代码

当使用Sphinx进行语音识别后,你可以将识别结果传递给语音合成库,以生成相应的语音回复。以下是一个示例代码,展示了如何将Sphinx和语音合成库(这里使用`pyttsx3`)进行集成:
import speech_recognition as sr
import pyttsx3
初始化语音识别引擎
r = sr.Recognizer()
初始化语音合成引擎
engine = pyttsx3.init()
设置要使用的语音合成声音
voices = engine.getProperty(‘voices’)
根据需要选择合适的声音
engine.setProperty(‘voice’, voices[0].id)
定义回复用户的函数
def reply_with_voice(message):
# 使用语音合成引擎将文本转换为语音
engine.say(message)
engine.runAndWait()
录音并进行语音识别
with sr.Microphone() as source:
print(“请说话…”)
audio = r.listen(source)
try:
    # 使用Sphinx进行语音识别
    text = r.recognize_sphinx(audio)
    print("识别结果:", text)

    # 根据识别结果生成回复
    if text == "你好":
        reply_with_voice("你好,很高兴与你交流。")
    else:
        reply_with_voice("抱歉,我没有理解你的意思。")

except sr.UnknownValueError:
    print("无法识别语音")
except sr.RequestError as e:
    print("请求语音识别服务出错:", str(e))
在上述示例代码中,我们首先初始化了语音识别引擎和语音合成引擎。然后,通过`sr.Microphone()`创建一个麦克风对象,用于录制用户的语音输入。接着,我们使用Sphinx进行语音识别,将识别结果存储在`text`变量中。
根据识别结果,我们通过调用`reply_with_voice`函数生成相应的语音回复。在这个示例中,如果识别结果是"你好",则回复"你好,很高兴与你交流。",否则回复"抱歉,我没有理解你的意思。"。
请注意,示例代码中使用的是`speech_recognition`库进行语音识别,你也可以选择其他的语音识别库,如Google Cloud Speech-to-Text、Microsoft Azure Speech等,具体的实现方式会依赖于你选择的库。同样地,你可以根据需要进行适当的定制和配置,如选择合适的声音、调整语速、音量等。
这个示例代码只是一个简单的演示,你可以根据你的具体需求进行更多的定制和扩展。
### 五、Sphinx语音识别前自然语言预处理示例代码

要在Sphinx语音识别之前使用NLP技术进行预处理,你可以使用自然语言处理库(如NLTK、SpaCy、Transformers等)来构建意图识别和槽填充模型。以下是一个示例代码,展示了如何使用NLTK库进行简单的意图识别和槽填充:
import speech_recognition as sr
import nltk
from nltk.tokenize import word_tokenize
from nltk.corpus import stopwords
初始化语音识别引擎
r = sr.Recognizer()
初始化NLTK
nltk.download(‘punkt’)
nltk.download(‘stopwords’)
定义意图识别和槽填充函数
def process_input(input_text):
# 分词
tokens = word_tokenize(input_text)
# 去除停用词
stop_words = set(stopwords.words('english'))
filtered_tokens = [token for token in tokens if token.lower() not in stop_words]

# 意图识别
intent = None
if 'weather' in filtered_tokens:
    intent = 'weather'
elif 'news' in filtered_tokens:
    intent = 'news'

# 槽填充
slots = {}
if 'city' in filtered_tokens:
    city_index = filtered_tokens.index('city')
    if city_index + 1 < len(filtered_tokens):
        slots['city'] = filtered_tokens[city_index + 1]

return intent, slots
录音并进行语音识别
with sr.Microphone() as source:
print(“请说话…”)
audio = r.listen(source)
try:
    # 使用Sphinx进行语音识别
    text = r.recognize_sphinx(audio)
    print("识别结果:", text)

    # 进行意图识别和槽填充
    intent, slots = process_input(text)
    print("意图:", intent)
    print("槽:", slots)

    # 根据意图和槽生成回复
    if intent == 'weather':
        if 'city' in slots:
            city = slots['city']
            reply = f"查询天气:{city}"
        else:
            reply = "请提供城市名称。"
    elif intent == 'news':
        reply = "正在获取最新新闻。"
    else:
        reply = "抱歉,我没有理解你的意思。"

    print("回复:", reply)

except sr.UnknownValueError:
    print("无法识别语音")
except sr.RequestError as e:
    print("请求语音识别服务出错:", str(e))
在上述示例代码中,我们首先初始化了语音识别引擎和NLTK库。然后,定义了一个`process_input`函数,用于对输入文本进行意图识别和槽填充。在这个示例中,我们使用NLTK库进行简单的分词和停用词去除,并根据关键词来判断意图和提取槽信息。
在录音并进行语音识别后,我们调用`process_input`函数对识别结果进行意图识别和槽填充。根据意图和槽信息,我们生成相应的回复。
请注意,这只是一个简单的示例,你可以根据你的具体需求使用更复杂的NLP技术和模型。例如,你可以使用更强大的NLP库(如SpaCy、Transformers等),使用预训练的语言模型进行意图识别和槽填充。你还可以根据需要进行适当的定制和扩展,以满足你的系统需求。
另外,你可以将这个NLP预处理过程与语音识别和语音合成的代码进行集成,以构建一个完整的语音交互系统。
### 六、Sphinx语音识别自动电话系统多级菜单示例代码在这里插入图片描述
以下是一个示例代码,展示了如何使用Sphinx语音识别和槽填充来实现一个多级菜单的自动电话系统:
import speech_recognition as sr
import nltk
from nltk.tokenize import word_tokenize
from nltk.corpus import stopwords
初始化语音识别引擎
r = sr.Recognizer()
初始化NLTK
nltk.download(‘punkt’)
nltk.download(‘stopwords’)
定义意图识别和槽填充函数
def process_input(input_text):
# 分词
tokens = word_tokenize(input_text)
# 去除停用词
stop_words = set(stopwords.words('english'))
filtered_tokens = [token for token in tokens if token.lower() not in stop_words]

# 意图识别
intent = None
if 'main' in filtered_tokens:
    intent = 'main\_menu'
elif 'products' in filtered_tokens:
    intent = 'products\_menu'
elif 'support' in filtered_tokens:
    intent = 'support\_menu'
elif 'exit' in filtered_tokens:
    intent = 'exit\_menu'

# 槽填充
slots = {}
if 'option' in filtered_tokens:
    option_index = filtered_tokens.index('option')
    if option_index + 1 < len(filtered_tokens):
        slots['option'] = filtered_tokens[option_index + 1]

return intent, slots
定义菜单处理函数
def process_menu(intent, slots):
if intent == ‘main_menu’:
return “欢迎来到主菜单,请选择您想要的操作:产品菜单、支持菜单或退出。”
elif intent == ‘products_menu’:
return “这是产品菜单,请选择您想要的产品:产品A、产品B或返回主菜单。”
elif intent == ‘support_menu’:
return “这是支持菜单,请选择您需要的支持:技术支持、售后服务或返回主菜单。”
elif intent == ‘exit_menu’:
return “感谢您的使用,再见!”
else:
return “抱歉,我没有理解您的意思。”
录音并进行语音识别
with sr.Microphone() as source:
print(“请说话…”)
audio = r.listen(source)
try:
    # 使用Sphinx进行语音识别
    text = r.recognize_sphinx(audio)
    print("识别结果:", text)

    # 进行意图识别和槽填充
    intent, slots = process_input(text)
    print("意图:", intent)
    print("槽:", slots)

    # 处理菜单
    menu_response = process_menu(intent, slots)
    print("回复:", menu_response)

except sr.UnknownValueError:
    print("无法识别语音")
except sr.RequestError as e:
    print("请求语音识别服务出错:", str(e))
在上述示例代码中,我们定义了一个`process_input`函数来进行意图识别和槽填充,根据关键词来判断用户的意图,并提取相关的槽信息。然后,我们定义了一个`process_menu`函数来根据意图和槽信息生成相应的菜单回复。
在录音并进行语音识别后,我们调用`process_input`函数对识别结果进行意图识别和槽填充。然后,我们调用`process_menu`函数来处理菜单,并生成相应的回复。
在这个示例中,我们假设用户可以说出关键词(如"main"、“products”、“support”、“exit”)来选择菜单选项,并使用"option"关键词后面跟随具体选项来选择子菜单选项。你可以根据你的实际需求进行适当的定制和扩展。
请注意,这只是一个简单的示例,你可以根据你的具体需求使用更复杂的NLP技术和模型进行意图识别和槽填充。你还可以根据需要进行适当的定制和扩展,以满足你的自动电话系统的需求。
### 七、Sphinx语音识别自动电话系统个性化交互示例代码
要实现一个能够根据用户个人信息和历史记录提供个性化服务和建议的自动电话系统,你需要将个人信息和历史记录与意图识别和槽填充的过程进行集成。以下是一个示例代码,展示了如何使用Sphinx语音识别和NLTK库来实现这个功能:
import speech_recognition as sr
import nltk
from nltk.tokenize import word_tokenize
from nltk.corpus import stopwords
初始化语音识别引擎
r = sr.Recognizer()
初始化NLTK
nltk.download(‘punkt’)
nltk.download(‘stopwords’)
用户个人信息和历史记录
user_profile = {
‘name’: ‘John’,
‘age’: 30,
‘preferences’: [‘product A’, ‘service B’],
‘history’: [‘product A’, ‘product C’, ‘service B’]
}
定义意图识别和槽填充函数
def process_input(input_text):
# 分词
tokens = word_tokenize(input_text)
# 去除停用词
stop_words = set(stopwords.words('english'))
filtered_tokens = [token for token in tokens if token.lower() not in stop_words]

# 意图识别
intent = None
if 'recommend' in filtered_tokens:
    intent = 'recommendation'
elif 'history' in filtered_tokens:
    intent = 'history'
elif 'preferences' in filtered_tokens:
    intent = 'preferences'

# 槽填充
slots = {}
if 'product' in filtered_tokens:
    product_index = filtered_tokens.index('product')
    if product_index + 1 < len(filtered_tokens):
        slots['product'] = filtered_tokens[product_index + 1]

return intent, slots
定义个性化处理函数
def process_personalized(intent, slots):
if intent == ‘recommendation’:
if ‘product’ in slots:
product = slots[‘product’]
if product in user_profile[‘preferences’]:
return f"根据您的偏好,我推荐您尝试{product}。"
else:
return f"很抱歉,根据您的偏好,我无法为您推荐{product}。"
else:
return “请提供产品名称。”
elif intent == ‘history’:
return f"您的历史记录包括:{', ‘.join(user_profile[‘history’])}。"
elif intent == ‘preferences’:
return f"您的偏好包括:{’, '.join(user_profile[‘preferences’])}。"
else:
return “抱歉,我没有理解您的意思。”
录音并进行语音识别
with sr.Microphone() as source:
print(“请说话…”)
audio = r.listen(source)
try:
    # 使用Sphinx进行语音识别
    text = r.recognize_sphinx(audio)
    print("识别结果:", text)

    # 进行意图识别和槽填充
    intent, slots = process_input(text)
    print("意图:", intent)
    print("槽:", slots)

    # 处理个性化请求
    personalized_response = process_personalized(intent, slots)
    print("回复:", personalized_response)

except sr.UnknownValueError:
    print("无法识别语音")
except sr.RequestError as e:
    print("请求语音识别服务出错:", str(e))
在上述示例代码中,我们首先定义了一个`user_profile`字典,包含了用户的个人信息和历史记录。然后,我们定义了一个`process_input`函数来进行意图识别和槽填充,根据关键词来判断用户的意图,并提取相关的槽信息。接下来,我们定义了一个`process_personalized`函数来根据用户个人信息和意图槽信息生成个性化的回复。
在录音并进行语音识别后,我们调用`process_input`函数对识别结果进行意图识别和槽填充。然后,我们调用`process_personalized`函数来处理个性化请求,并生成相应的回复。
在这个示例中,我们假设用户可以说出关键词(如"recommend"、“history”、“preferences”)来请求个性化的服务和建议,并使用"product"关键词后面跟随具体产品来指定相关操作。根据用户的个人信息和历史记录,我们可以根据用户的偏好和历史记录来推荐相关的产品或服务,或者展示用户的历史记录和偏好。
请注意,这只是一个简单的示例,你可以根据你的具体需求使用更复杂的NLP技术和模型进行意图识别和槽填充。你还可以根据需要进行适当的定制和扩展,以满足你的自动电话系统的个性化交互需求。
### 八、Sphinx语音识别自动电话系统错误处理和重试机制示例代码
要实现Sphinx语音识别自动电话系统的错误处理和重试机制,你可以在识别错误或无法理解用户语音输入时,提示用户重新输入或提供备选选项。以下是一个示例代码,展示了如何实现这个功能:
import speech_recognition as sr
import nltk
from nltk.tokenize import word_tokenize
from nltk.corpus import stopwords
初始化语音识别引擎
r = sr.Recognizer()
初始化NLTK
nltk.download(‘punkt’)
nltk.download(‘stopwords’)
定义意图识别和槽填充函数
def process_input(input_text):
# 分词
tokens = word_tokenize(input_text)
# 去除停用词
stop_words = set(stopwords.words('english'))
filtered_tokens = [token for token in tokens if token.lower() not in stop_words]

# 意图识别
intent = None
if 'recommend' in filtered_tokens:
    intent = 'recommendation'
elif 'retry' in filtered_tokens:
    intent = 'retry'
elif 'exit' in filtered_tokens:
    intent = 'exit'

# 槽填充
slots = {}
if 'product' in filtered_tokens:
    product_index = filtered_tokens.index('product')
    if product_index + 1 < len(filtered_tokens):
        slots['product'] = filtered_tokens[product_index + 1]

return intent, slots
录音并进行语音识别
def recognize_speech():
with sr.Microphone() as source:
print(“请说话…”)
audio = r.listen(source)
    try:
        # 使用Sphinx进行语音识别
        text = r.recognize_sphinx(audio)
        print("识别结果:", text)

        # 进行意图识别和槽填充
        intent, slots = process_input(text)
        print("意图:", intent)
        print("槽:", slots)

        return intent, slots

    except sr.UnknownValueError:
        print("无法识别语音")
        return 'retry', {}
    except sr.RequestError as e:
        print("请求语音识别服务出错:", str(e))
        return 'retry', {}
定义错误处理和重试机制
def handle_error(intent, slots):
if intent == ‘retry’:
print(“抱歉,我没有理解您的意思,请重新说话。”)
return recognize_speech()
elif intent == ‘exit’:
print(“感谢您的使用,再见!”)
return intent, slots
else:
print(“抱歉,我没有理解您的意思。”)
return recognize_speech()
主循环
def main_loop():
while True:
intent, slots = recognize_speech()
if intent == ‘exit’:
break
intent, slots = handle_error(intent, slots)
    # 处理其他意图
    # ...
启动主循环
main_loop()
在上述示例代码中,我们定义了一个`recognize_speech`函数,用于录音并进行语音识别。在识别错误或无法理解用户语音输入时,我们返回一个特定的意图(“retry”)来触发错误处理和重试机制。
在`handle_error`函数中,我们根据意图来处理错误情况。如果意图是"retry",我们会提示用户重新说话,并调用`recognize_speech`函数再次进行语音识别。如果意图是"exit",表示用户选择退出,我们会结束循环。对于其他意图,你可以根据实际需求进行相应的处理。
在主循环中,我们不断调用`recognize_speech`函数来进行语音识别,并根据返回的意图和槽信息进行处理。如果用户选择退出,则结束循环。
请注意,这只是一个简单的示例,你可以根据你的具体需求和业务逻辑进行适当的定制和扩展。你可以根据需要添加其他意图的处理逻辑,并进一步改进错误处理和重试机制,以提高系统的容错性和用户体验。
### 九、Sphinx语音识别自动电话系统与客户关系管理(CRM)系统的集成示例代码
要实现Sphinx语音识别自动电话系统与客户关系管理(CRM)系统的集成,你可以使用适当的CRM API来获取用户的身份和历史记录,并根据这些信息提供个性化的服务。以下是一个示例代码,展示了如何实现这个功能:
import speech_recognition as sr
import requests
初始化语音识别引擎
r = sr.Recognizer()
CRM系统的API地址
crm_api_url = “https://your-crm-api-url.com”
录音并进行语音识别
def recognize_speech():
with sr.Microphone() as source:
print(“请说话…”)
audio = r.listen(source)
    try:
        # 使用Sphinx进行语音识别
        text = r.recognize_sphinx(audio)
        print("识别结果:", text)

        # 调用CRM API获取用户信息
        user_info = get_user_info(text)
        print("用户信息:", user_info)

        # 根据用户信息提供个性化服务
        provide_personalized_service(user_info)

    except sr.UnknownValueError:
        print("无法识别语音")
    except sr.RequestError as e:
        print("请求语音识别服务出错:", str(e))
调用CRM API获取用户信息
def get_user_info(text):
# 发送请求到CRM系统的API
response = requests.get(crm_api_url + “/user”, params={“text”: text})
# 解析API响应
if response.status_code == 200:
    user_info = response.json()
    return user_info
else:
    print("获取用户信息失败:", response.text)
    return {}
根据用户信息提供个性化服务
def provide_personalized_service(user_info):
if “name” in user_info:
print(“欢迎您,”, user_info[“name”])
# 提供个性化服务
# …
主循环
def main_loop():
while True:
recognize_speech()
启动主循环
main_loop()
在上述示例代码中,我们定义了一个`recognize_speech`函数,用于录音并进行语音识别。在识别完成后,我们调用`get_user_info`函数来获取用户信息。该函数会发送一个HTTP GET请求到CRM系统的API,并传递识别结果作为参数。CRM系统的API会返回与用户相关的信息,例如用户的姓名、历史记录等。
然后,我们调用`provide_personalized_service`函数来提供个性化的服务。在这个函数中,你可以根据用户的信息和历史记录来实现相应的个性化逻辑。例如,根据用户的姓名进行欢迎,或者根据用户的历史记录提供相关的推荐或建议。
在主循环中,我们不断调用`recognize_speech`函数来进行语音识别和CRM集成。你可以根据实际需求和业务逻辑进行适当的定制和扩展。请确保在使用CRM API时,提供正确的API地址和参数,并处理API响应的错误情况。
需要注意的是,上述示例代码仅展示了与CRM系统的集成部分,你可能还需要根据具体需求实现其他功能,例如语音合成来提供回复或提示信息,或者与其他系统进行集成以获取更多的功能和信息。
### 十、Sphinx语音识别自动电话系统的实时语音分析示例代码
要实现Sphinx语音识别自动电话系统的实时语音分析,你可以结合使用Sphinx和其他语音处理库,如pyAudioAnalysis,来提取用户的语音特征。以下是一个示例代码,演示了如何实现实时语音分析:
import speech_recognition as sr
from pyAudioAnalysis import audioBasicIO
from pyAudioAnalysis import audioFeatureExtraction
初始化语音识别引擎
r = sr.Recognizer()
录音并进行实时语音分析
def analyze_speech():
with sr.Microphone() as source:
print(“请说话…”)
audio = r.listen(source)
    try:
        # 使用Sphinx进行语音识别
        text = r.recognize_sphinx(audio)
        print("识别结果:", text)

        # 提取语音特征
        features = extract_audio_features(audio)

        # 分析语音特征
        analyze_audio_features(features)

    except sr.UnknownValueError:
        print("无法识别语音")
    except sr.RequestError as e:

感谢每一个认真阅读我文章的人,看着粉丝一路的上涨和关注,礼尚往来总是要有的:
① 2000多本Python电子书(主流和经典的书籍应该都有了)
② Python标准库资料(最全中文版)
③ 项目源码(四五十个有趣且经典的练手项目及源码)
④ Python基础入门、爬虫、web开发、大数据分析方面的视频(适合小白学习)
⑤ Python学习路线图(告别不入流的学习)
网上学习资料一大堆,但如果学到的知识不成体系,遇到问题时只是浅尝辄止,不再深入研究,那么很难做到真正的技术提升。
一个人可以走的很快,但一群人才能走的更远!不论你是正从事IT行业的老鸟或是对IT行业感兴趣的新人,都欢迎加入我们的的圈子(技术交流、学习资源、职场吐槽、大厂内推、面试辅导),让我们一起学习成长!


 被折叠的 条评论
为什么被折叠?
被折叠的 条评论
为什么被折叠?
 到【灌水乐园】发言


