


day-06
Hooks 进阶
今日目标
✔ 掌握 useEffect 清理副作用。
✔ 掌握 useRef 操作 DOM。
✔ 掌握 useContext 组件通讯。
useEffect 清理副作用
目标
掌握 useEffect 清理副作用的写法。
内容
-
useEffect 可以返回一个函数
这个函数称为清理函数,在此函数内用来执行清理相关的操作(例如事件解绑、清除定时器等)。
-
清理函数的执行时机
a,useEffect 的第 2 个参数不写,清理函数会在下一次副作用回调函数调用时以及组件卸载时执行,用于清除上一次或卸载前的副作用。
b,useEffect 的第 2 个参数为空数组,那么只会在组件卸载时会执行,相当于组件的
componetWillUnmount。 -
建议:一个 useEffect 只用来处理一个功能,有多个功能时,可以使用多个 useEffect。
执行时机演示
App.js
import React, { useState } from 'react'
import Test from './Test'

export default function App() {
    const [flag, setFlag] = useState(true)
    return (
        <div>
            {flag && <Test />}
            <button onClick={() => setFlag(!flag)}>销毁/创建</button>
        </div>
    )
}
Test.js
import React, { useEffect, useState } from 'react'

export default function Test() {
    const [count, setCount] = useState(0)

    useEffect(() => {
        console.log('effect')
        return () => {
            // 一般用来清理上一次的副作用
            console.log('clear effect')
        }
    })
    const handleClick = () => {
        setCount(count + 1)
    }
    return (
        <div>
            {count}
            <button onClick={handleClick}>click</button>
        </div>
    )
}
清理定时器演示
优化昨天的倒计时案例:组件销毁时清除定时器,Test.js
import React, { useState, useEffect } from 'react'

export default function Test() {
    const [count, setCount] = useState(10)
    useEffect(() => {
        const timer = setInterval(() => {
            console.log(1)
            setCount((count) => count - 1)
        }, 1000)
        return () => {
            clearInterval(timer)
        }
    }, [])
    return (
        <div>
            <h3>{count}</h3>
        </div>
    )
}
小结
useEffect 清理函数的执行时机是什么?
- useEffect 的第二个参数不写时,清理函数会在下一次副作用函数执行的时候(不包括初始化)和当前组件卸载的时候执行,用于清除上一次或者组件卸载前的副作用。
- useEffect 的第二个参数为为空数组时,清理函数会在当前组件卸载时执行,相当于组件的componentWillUnmount
- useEffect 的第二个参数包含了依赖项时,当前依赖项状态发生改变时和当前组件卸载时执行。
如何拿到实时变化后的count
import React, { useState, useEffect } from 'react'

export default function Test() {
  const [count, setCount] = useState(10)
  useEffect(() => {
    const timer = setInterval(() => {
      console.log(1)
      setCount((count) => {
        return count - 1
      })
    }, 1000)
    // console.log('执行了副作用函数')
    return () => {
      // console.log('执行了清理副作用的函数')
      clearInterval(timer)
    }
  }, [])

  useEffect(() => {
    return () => {
      console.log('count', count)
    }
  }, [count])
  return (
    <div>
      <h2>{count}</h2>
    </div>
  )
}
跟随鼠标的天使 📝
目标
能够完成让图片跟随鼠标移动的效果。
步骤
- 通过 useState 提供状态。
- 通过 useEffect 给 document 注册鼠标移动事件
- 在事件回调里面修改状态为鼠标的坐标。
- 组件销毁的时候记得清理副作用(解绑事件)。
代码
App.js
import React, { useState, useEffect } from 'react'
import img from './images/11.jpg'

export default function Test() {
  const [pos, setPos] = useState({ x: 0, y: 0 })
  useEffect(() => {
    const move = (e) => {
      console.log(1)
      setPos({
        x: e.pageX,
        y: e.pageY,
      })
    }
    document.addEventListener('mousemove', move)
    return () => {
      document.removeEventListener('mousemove', move)
    }
  }, [])
  return (
    <div>
      <img
        src={img}
        alt="img"
        style={{
          width: 100,
          position: 'absolute',
          left: pos.x,
          top: pos.y + 50,
        }}
      ></img>
    </div>
  )
}
自定义 Hook
目标
能够使用自定义的 Hook 实现状态逻辑的复用。
内容
- 目的:复用状态逻辑。
- 自定义 Hook 是一个函数,规定函数名称必须以 use 开头,格式是
useXxx,React 内部会据此来区分是否是一个 Hook。 - 自定义 Hook 只能在函数组件或其他自定义 Hook 中使用,否则,会报错!
案例
封装一个获取鼠标位置的 Hook,hooks.js
import { useState, useEffect } from 'react'
export const useMouse = () => {
    const [pos, setPos] = useState({
        x: 0,
        y: 0,
    })
    useEffect(() => {
        const move = (e) => {
            setPos({
                x: e.pageX,
                y: e.pageY,
            })
        }
        document.addEventListener('mousemove', move)
        return () => {
            document.removeEventListener('mousemove', move)
        }
    }, [])
    return pos
}
App.js
import React from 'react'
import avatar from './images/avatar.png'
import { useMouse } from './hooks'
export default function App() {
    const pos = useMouse()
    return (
        <div>
            <img src={avatar} alt='头像' style={{ position: 'absolute', top: pos.y, left: pos.x }} />
        </div>
    )
}
封装记录滚动位置的 Hook
export const useScroll = () => {
    const [scroll, setScroll] = useState({
        scrollLeft: 0,
        scrollTop: 0,
    })
    useEffect(() => {
        const scroll = (e) => {
            setScroll({
                scrollLeft: window.pageXOffset,
                scrollTop: window.pageYOffset,
            })
        }
        window.addEventListener('scroll', scroll)
        return () => {
            window.removeEventListener('scroll', scroll)
        }
    }, [])
    return scroll
}
小结
自定义 Hook 的作用/目的是什么?
复用状态逻辑。
useEffect 发送请求
目标
能够在函数组件中通过 useEffect 发送 AJAX 请求。
内容
- useEffect 是专门用来处理副作用的,所以发送请求这个副作用可以在 useEffect 回调内进行处理。
- 注意:useEffect 的回调只能是一个同步函数,即不能使用 async 进行修饰。
- 原因:如果 useEffect 的回调是异步的,此时返回值会被 Promise 化,这样的话就无法保证清理函数被立即调用。
- 若需要使用 async/await 语法,可以在 useEffect 回调内部再次创建 async 函数并调用。
错误演示
// 发请求是没问题,但涉及清理副作用的操作就出事了
useEffect(async () => {
    const res = await xxx()
    return () => {}
}, [])
正确使用
useEffect(() => {
    async function fetchMyAPI() {
        let url = 'http://something/' + productId
        const response = await myFetch(url)
    }

    fetchMyAPI()
}, [productId])
演示发请求

- 准备初始状态 list 和修改状态的方法 setList。
- 在 useEffect 内部定义自己的请求函数。
- 函数内部通过 axios 发送请求并把返回的数据通过 setList 设置到 list 中。
- 调用请求函数。
- 渲染 list。
import React, { useState, useEffect } from 'react'
import axios from 'axios'

export default function App() {
    const [list, setList] = useState([])
    useEffect(() => {
        const getData = async () => {
            const res = await axios.get('http://geek.itheima.net/v1_0/user/channels')
            setList(res.data.data.channels)
        }
        getData()
    }, [])
    return (
        <ul>
            {list.map((item) => (
                <li key={item.id}>{item.name}</li>
            ))}
        </ul>
    )
}
小结
useEffect 的回调函数不能是异步的,那么如何使用 async/await 语法来简化代码。
在useEffect内新建一个发送请求的函数,在函数前面使用async,函数内使用await。
useRef 操作 DOM
目标
能够使用 useRef 操作 DOM。
内容
使用场景:DOM 操作或获取类组件的实例。
使用
- 参数:在获取 DOM 时,一般都设置为 null。
- 返回值:返回一个带有 current 属性的对象,通过该对象就可以得到 DOM 对象或类组件实例。
useRef 获取 DOM
- 使用 useRef 创建一个有 current 属性的 ref 对象,
{ current: null }。
const xxxRef = useRef(null)
- 通过 DOM 的 ref 属性和上面创建的对象进行关联。
<div ref={xxxRef}></div>
- 通过 xxxRef.current 就可以访问到对应的 DOM 啦。
import React, { useRef } from 'react'

const App = () => {
    const inputRef = useRef(null)
    const add = () => {
        console.log(inputRef.current.value)
    }
    return (
        <section>
            <input placeholder='请输入内容' ref={inputRef} />
            <button onClick={add}>添加</button>
        </section>
    )
}

export default App
🤔 而 useRef 每次都会返回相同的引用,而 createRef 每次渲染都会返回一个新的引用。
useRef 获取类组件
App.js
import React, { useRef } from 'react'
import Test from './Test'

const App = () => {
    const testClassCmp = useRef(null)
    const add = () => {
        testClassCmp.current.handleClick()
    }
    return (
        <section>
            <Test ref={testClassCmp} />
            <button onClick={add}>添加</button>
        </section>
    )
}

export default App
Test.js
import React, { Component } from 'react'

export default class Test extends Component {
    handleClick() {
        console.log(1)
    }
    render() {
        return <div>类组件</div>
    }
}
useRef 共享数据
目标
掌握 useRef 共享数据的写法。
内容
useRef 创建的引用可以实现多次渲染之间进行共享。
案例
📝 需求:点击清除定时器。
错误写法
import React, { useState, useEffect } from 'react'

export default function App() {
    const [count, setCount] = useState(10)
    let timer
    useEffect(() => {
        timer = setInterval(() => {
            setCount((count) => count - 1)
        }, 1000)
    }, [])
    const handleStop = () => {
        clearInterval(timer)
    }
    return (
        <div>
            <h3>{count}</h3>
            <button onClick={handleStop}>停止定时器</button>
        </div>
    )
}
全局变量
import React, { useState, useEffect } from 'react'

let timer
export default function App() {
    const [count, setCount] = useState(10)
    useEffect(() => {
        timer = setInterval(() => {
            setCount((count) => count - 1)
        }, 1000)
    }, [])
    const handleStop = () => {
        clearInterval(timer)
    }
    return (
        <div>
            <h3>{count}</h3>
            <button onClick={handleStop}>停止定时器</button>
        </div>
    )
}
❗ 全局变量的问题:多个组件实例之间会相互影响,可以通过以下代码验证。
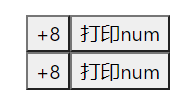
import React from 'react'

let num = 0
export default function Test() {
    return (
        <div>
            <button onClick={() => (num += 8)}>+8</button>
            <button onClick={() => console.log(num)}>打印num</button>
        </div>
    )
}
解决方案
useRef:保证更新期间共用同一个 ref 对象(可以先理解为是一个全局变量)的同时,多个组件实例之间又不会相互影响(因为它是在组件内部的)。
import React, { useState, useEffect, useRef } from 'react'

export default function App() {
    const [count, setCount] = useState(10)
    const ref = useRef(null) // 通过 ref.current 可以拿到初始值
    useEffect(() => {
        // 也可以对 ref.current 进行赋值
        ref.current = setInterval(() => {
            setCount((count) => count - 1)
        }, 1000)
    }, [])
    const handleStop = () => {
        clearInterval(ref.current)
    }
    return (
        <div>
            <h3>{count}</h3>
            <button onClick={handleStop}>停止定时器</button>
        </div>
    )
}
createContext
目标
回顾 Context 跨级组件通讯的使用。
内容
- 使用场景:跨组件共享数据。
- Context 作用:实现跨组件传递数据,而不必在每一个组件传递 props,简化组件之间数据传递的过程。

<Context.Provider value>:通过 value 属性提供数据。<Context.Consumer>:在 JSX 中获取 Context 中提供的数据。- 使用 Provider 组件,如果传递了 value,Consumer 获取到的是 Provider 中的 value 属性值。
- 如果祖先组件没有使用 Provider,那么 Consumer 获取到的是 createContext(defaultValue) 的 defaultValue 值。
步骤
需求:App 根组件经过 Parent 组件把数据传递到 Child 组件。
- 新建
countContext.js,通过 createContext 方法创建 Context 对象。 App.js根组件通过Context.Provider提供数据。Child.js孙组件通过Context.Consumer消费数据。
代码
countContext.js
import { createContext } from 'react'
export const Context = createContext()
App.js
import React from 'react'
import { Context } from './countContext'
import Parent from './Parent'

export default function App() {
    return (
        <Context.Provider value={{ count: 0 }}>
            App
            <hr />
            <Parent />
        </Context.Provider>
    )
}
Parent.js
import Child from './Child'
export default function Parent() {
    return (
        <div>
            Parent
            <hr />
            <Child />
        </div>
    )
}
Child.js
import { context } from './countContext'

export default function Child() {
    return (
        <Context.Consumer>
            {(value) => {
                return (
                    <div>
                        Child
                        <h3>{value.count}</h3>
                    </div>
                )
            }}
        </Context.Consumer>
    )
}
小结
useRef 的使用步骤是什么?
- 导入
createContext方法 - 父级组件使用
Context.Provider配合value提供数据 - 子级组件使用
Context.Consumer消费数据
useContext 使用
目标
能够通过 useContext 实现跨级组件通讯。
内容
- 作用:在函数组件中,获取 Context.Provider 提供的数据。
- 参数:Context 对象,即通过 createContext 函数创建的对象。
- 返回值:Context.Provider 提供的 value 数据。
import { useContext } from 'react'
import { Context } from './countContext'

export default function Child() {
    const value = useContext(Context)
    return (
        <div>
            Child
            <h3>{value.count}</h3>
        </div>
    )
}
购物车案例
获取列表数据
目标
发送请求,获取到购物车数据。
内容
需求:本地有,就用本地的,本地没有,从远端获取。
- 在新的 useEffect 中,获取本地数据。
- 如果本地有,就把获取到的数据设置到 list 数组。
- 如果本地没有,发送请求获取远端数据,并把结果设置到 list 数组。
App.js
// 初始的 state 也就没有必要这样写了
/* const [list, setList] = useState(() => {
    return JSON.parse(localStorage.getItem('list')) || arr
}) */
// 建议
const [list, setList] = useState([])

useEffect(() => {
    // 判断本地是否有数据
    const arr = JSON.parse(localStorage.getItem('list')) || []
    if (arr.length) {
        return setList(arr)
    }
    // 本地没有数据,发送请求,获取数据
    const getList = async () => {
        const res = await axios.get('https://www.escook.cn/api/cart')
        setList(res.data.list)
    }
    getList()
}, [])
MyCount 组件的封装
components/MyCount/index.js
import React from 'react'
import './index.scss'
export default function MyCount() {
    return (
        <div className='my-counter'>
            <button type='button' className='btn btn-light'>
                -
            </button>
            <input type='number' className='form-control inp' value='1' />
            <button type='button' className='btn btn-light'>
                +
            </button>
        </div>
    )
}
components/MyCount/index.scss
.my-counter {
    display: flex;
    .inp {
        width: 45px;
        text-align: center;
        margin: 0 10px;
    }
}
components/GoodItem/index.js
import MyCount from '../MyCount'
;<div className='right'>
    <div className='top'>{goods_name}</div>
    <div className='bottom'>
        <span className='price'>¥ {goods_price}</span>
        <MyCount />
    </div>
</div>
数量控制 props
- 设置初始值
- GoodsItem 中传递
count={goods_count}给 MyCount 组件。 - MyCount 组件接收并绑定给 input 的 value。
- 点击按钮修改数据
App.js中准备 changeCount(修改数据的方法),并传递给 GoodsItem。- GoodsItem 中进行接收,并继续传递
changeCount={(count) => changeCount(id, count)}到 MyCount。 - 给 MyCount 中的加减按钮绑定点击事件,调用传递过来的 changeCount 并传递期望的 count。
App.js
export default function App() {
    const changeCount = (id, count) => {
        setList(
            list.map((item) => {
                if (item.id === id) {
                    return {
                        ...item,
                        goods_count: count,
                    }
                } else {
                    return item
                }
            })
        )
    }

    return (
        <div className='app'>
            <MyHeader>购物车</MyHeader>
            {list.map((item) => (
                <GoodsItem key={item.id} {...item} changeState={changeState} changeCount={changeCount}></GoodsItem>
            ))}
        </div>
    )
}
components/GoodsItem/index.js
export default function GoodsItem({ goods_count, goods_img, goods_name, goods_price, goods_state, id, changeState, changeCount }) {
    return (
        <div className='my-goods-item'>
            <div className='right'>
                <div className='top'>{goods_name}</div>
                <div className='bottom'>
                    <span className='price'>¥ {goods_price}</span>
                    <MyCount count={goods_count} changeCount={(count) => changeCount(id, count)} />
                </div>
            </div>
        </div>
    )
}
components/MyCount/index.js
export default function MyCount({ count, changeCount }) {
    const plus = () => {
        changeCount(count + 1)
    }
    const minus = () => {
        if (count <= 1) return
        changeCount(count - 1)
    }
    return (
        <div className='my-counter'>
            <button type='button' className='btn btn-light' onClick={minus}>
                -
            </button>
            <input type='number' className='form-control inp' value={count} />
            <button type='button' className='btn btn-light' onClick={plus}>
                +
            </button>
        </div>
    )
}
数量控制 useContext
- 在 App.js 中创建 Context 对象,并且导出
export const Context = createContext()
- 在 App.js 中,通过 Provider 提供方法
<Context.Provider value={{ changeCount }}>
    <div className='app'>
        <MyHeader>购物车</MyHeader>

        {list.map((item) => (
            <GoodsItem key={item.id} {...item} changeState={changeState}></GoodsItem>
        ))}

        <MyFooter list={list} changeAll={changeAll}></MyFooter>
    </div>
</Context.Provider>
- 在
components/GoodsItem/index.js中把 id 传递过去
<div className='right'>
    <div className='top'>{goods_name}</div>
    <div className='bottom'>
        <span className='price'>¥ {goods_price}</span>
        <MyCount count={goods_count} id={id} />
    </div>
</div>
- 在 myCount 组件中,使用 useContext 获取数据
import React, { useContext } from 'react'
import { Context } from '../../App'
import './index.scss'

export default function MyCount({ count, id }) {
    const { changeCount } = useContext(Context)
    const plus = () => {
        changeCount(id, count + 1)
    }
    const minus = () => {
        if (count <= 1) return
        changeCount(id, count - 1)
    }
    return (
        <div className='my-counter'>
            <button type='button' className='btn btn-light' onClick={minus}>
                -
            </button>
            <input type='number' className='form-control inp' value={count} />
            <button type='button' className='btn btn-light' onClick={plus}>
                +
            </button>
        </div>
    )
}


 900
900


 被折叠的 条评论
为什么被折叠?
被折叠的 条评论
为什么被折叠?
 到【灌水乐园】发言


