


上面第一行冒号前面的部分,叫做"目标"(target),冒号后面的部分叫做"前置条件"(prerequisites);第二行必须由一个tab键起首,后面跟着"命令"(commands)。
"目标"是必需的,不可省略;"前置条件"和"命令"都是可选的,但是两者之中必须至少存在一个。
每条规则就明确两件事:构建目标的前置条件是什么,以及如何构建。下面就详细讲解,每条规则的这三个组成部分。
2.2 目标(target)
一个目标(target)就构成一条规则。目标通常是文件名,指明Make命令所要构建的对象,比如上文的 a.txt 。目标可以是一个文件名,也可以是多个文件名,之间用空格分隔。
除了文件名,目标还可以是某个操作的名字,这称为"伪目标"(phony target)。
clean:
rm <span class="token operator" style="margin: 0px; padding: 0px; list-style-type: none; border: none; color: rgb(166, 127, 89);">\*</span><span class="token punctuation" style="margin: 0px; padding: 0px; list-style-type: none; border: none; color: rgb(153, 153, 153);">.</span>o
上面代码的目标是clean,它不是文件名,而是一个操作的名字,属于"伪目标 ",作用是删除对象文件。
$ make clean
但是,如果当前目录中,正好有一个文件叫做clean,那么这个命令不会执行。因为Make发现clean文件已经存在,就认为没有必要重新构建了,就不会执行指定的rm命令。
为了避免这种情况,可以明确声明clean是"伪目标",写法如下。
.PHONY: clean
clean:
rm <span class="token operator" style="margin: 0px; padding: 0px; list-style-type: none; border: none; color: rgb(166, 127, 89);">\*</span><span class="token punctuation" style="margin: 0px; padding: 0px; list-style-type: none; border: none; color: rgb(153, 153, 153);">.</span>o temp
声明clean是"伪目标"之后,make就不会去检查是否存在一个叫做clean的文件,而是每次运行都执行对应的命令。像.PHONY这样的内置目标名还有不少,可以查看手册。
如果Make命令运行时没有指定目标,默认会执行Makefile文件的第一个目标。
$ make
上面代码执行Makefile文件的第一个目标。
2.3 前置条件(prerequisites)
前置条件通常是一组文件名,之间用空格分隔。它指定了"目标"是否重新构建的判断标准:只要有一个前置文件不存在,或者有过更新(前置文件的last-modification时间戳比目标的时间戳新),"目标"就需要重新构建。
result.txt: source.txt
cp source<span class="token punctuation" style="margin: 0px; padding: 0px; list-style-type: none; border: none; color: rgb(153, 153, 153);">.</span>txt result<span class="token punctuation" style="margin: 0px; padding: 0px; list-style-type: none; border: none; color: rgb(153, 153, 153);">.</span>txt
上面代码中,构建 result.txt 的前置条件是 source.txt 。如果当前目录中,source.txt 已经存在,那么make result.txt可以正常运行,否则必须再写一条规则,来生成 source.txt 。
source.txt:
<span class="token keyword" style="margin: 0px; padding: 0px; list-style-type: none; border: none; color: rgb(0, 119, 170);">echo</span> <span class="token string" style="margin: 0px; padding: 0px; list-style-type: none; border: none; color: rgb(102, 153, 0);">"this is the source"</span> <span class="token operator" style="margin: 0px; padding: 0px; list-style-type: none; border: none; color: rgb(166, 127, 89);">></span> source<span class="token punctuation" style="margin: 0px; padding: 0px; list-style-type: none; border: none; color: rgb(153, 153, 153);">.</span>txt
上面代码中,source.txt后面没有前置条件,就意味着它跟其他文件都无关,只要这个文件还不存在,每次调用make source.txt,它都会生成。
$ make result.txt
$ make result.txt
上面命令连续执行两次make result.txt。第一次执行会先新建 source.txt,然后再新建 result.txt。第二次执行,Make发现 source.txt 没有变动(时间戳晚于 result.txt),就不会执行任何操作,result.txt 也不会重新生成。
如果需要生成多个文件,往往采用下面的写法。
source: file1 file2 file3
上面代码中,source 是一个伪目标,只有三个前置文件,没有任何对应的命令。
$ make source
执行make source命令后,就会一次性生成 file1,file2,file3 三个文件。这比下面的写法要方便很多。
$ make file1
$ make file2
$ make file3
2.4 命令(commands)
命令(commands)表示如何更新目标文件,由一行或多行的Shell命令组成。它是构建"目标"的具体指令,它的运行结果通常就是生成目标文件。
每行命令之前必须有一个tab键。如果想用其他键,可以用内置变量.RECIPEPREFIX声明。
.RECIPEPREFIX = >
all:
> echo Hello, world
上面代码用.RECIPEPREFIX指定,大于号(>)替代tab键。所以,每一行命令的起首变成了大于号,而不是tab键。
需要注意的是,每行命令在一个单独的shell中执行。这些Shell之间没有继承关系。
var-lost:
export foo<span class="token operator" style="margin: 0px; padding: 0px; list-style-type: none; border: none; color: rgb(166, 127, 89);">=</span>bar
<span class="token keyword" style="margin: 0px; padding: 0px; list-style-type: none; border: none; color: rgb(0, 119, 170);">echo</span> <span class="token string" style="margin: 0px; padding: 0px; list-style-type: none; border: none; color: rgb(102, 153, 0);">"foo=\[$<span class="token property" style="margin: 0px; padding: 0px; list-style-type: none; border: none; color: rgb(153, 0, 85);">$foo</span>\]"</span>
上面代码执行后(make var-lost),取不到foo的值。因为两行命令在两个不同的进程执行。一个解决办法是将两行命令写在一行,中间用分号分隔。
var-kept:
export foo<span class="token operator" style="margin: 0px; padding: 0px; list-style-type: none; border: none; color: rgb(166, 127, 89);">=</span>bar<span class="token punctuation" style="margin: 0px; padding: 0px; list-style-type: none; border: none; color: rgb(153, 153, 153);">;</span> <span class="token keyword" style="margin: 0px; padding: 0px; list-style-type: none; border: none; color: rgb(0, 119, 170);">echo</span> <span class="token string" style="margin: 0px; padding: 0px; list-style-type: none; border: none; color: rgb(102, 153, 0);">"foo=\[$<span class="token property" style="margin: 0px; padding: 0px; list-style-type: none; border: none; color: rgb(153, 0, 85);">$foo</span>\]"</span>
另一个解决办法是在换行符前加反斜杠转义。
var-kept:
export foo<span class="token operator" style="margin: 0px; padding: 0px; list-style-type: none; border: none; color: rgb(166, 127, 89);">=</span>bar<span class="token punctuation" style="margin: 0px; padding: 0px; list-style-type: none; border: none; color: rgb(153, 153, 153);">;</span> \\
<span class="token keyword" style="margin: 0px; padding: 0px; list-style-type: none; border: none; color: rgb(0, 119, 170);">echo</span> <span class="token string" style="margin: 0px; padding: 0px; list-style-type: none; border: none; color: rgb(102, 153, 0);">"foo=\[$<span class="token property" style="margin: 0px; padding: 0px; list-style-type: none; border: none; color: rgb(153, 0, 85);">$foo</span>\]"</span>
最后一个方法是加上.ONESHELL:命令。
.ONESHELL:
var-kept:
export foo<span class="token operator" style="margin: 0px; padding: 0px; list-style-type: none; border: none; color: rgb(166, 127, 89);">=</span>bar<span class="token punctuation" style="margin: 0px; padding: 0px; list-style-type: none; border: none; color: rgb(153, 153, 153);">;</span>
<span class="token keyword" style="margin: 0px; padding: 0px; list-style-type: none; border: none; color: rgb(0, 119, 170);">echo</span> <span class="token string" style="margin: 0px; padding: 0px; list-style-type: none; border: none; color: rgb(102, 153, 0);">"foo=\[$<span class="token property" style="margin: 0px; padding: 0px; list-style-type: none; border: none; color: rgb(153, 0, 85);">$foo</span>\]"</span>
3.1 注释
井号(#)在Makefile中表示注释。
# 这是注释
result.txt: source.txt
<span class="token comment" style="margin: 0px; padding: 0px; list-style-type: none; border: none; color: rgb(112, 128, 144);"># 这是注释
cp source.txt result.txt # 这也是注释
3.2 回声(echoing)
正常情况下,make会打印每条命令,然后再执行,这就叫做回声(echoing)。
test:
<span class="token comment" style="margin: 0px; padding: 0px; list-style-type: none; border: none; color: rgb(112, 128, 144);"># 这是测试
执行上面的规则,会得到下面的结果。
$ make test
# 这是测试
在命令的前面加上@,就可以关闭回声。
test:
@<span class="token comment" style="margin: 0px; padding: 0px; list-style-type: none; border: none; color: rgb(112, 128, 144);"># 这是测试
现在再执行make test,就不会有任何输出。
由于在构建过程中,需要了解当前在执行哪条命令,所以通常只在注释和纯显示的echo命令前面加上@。
test:
@<span class="token comment" style="margin: 0px; padding: 0px; list-style-type: none; border: none; color: rgb(112, 128, 144);"># 这是测试
@echo TODO
3.3 通配符
通配符(wildcard)用来指定一组符合条件的文件名。Makefile 的通配符与 Bash 一致,主要有星号(*)、问号(?)和 […] 。比如, *.o 表示所有后缀名为o的文件。
clean:
rm <span class="token operator" style="margin: 0px; padding: 0px; list-style-type: none; border: none; color: rgb(166, 127, 89);">-</span>f <span class="token operator" style="margin: 0px; padding: 0px; list-style-type: none; border: none; color: rgb(166, 127, 89);">\*</span><span class="token punctuation" style="margin: 0px; padding: 0px; list-style-type: none; border: none; color: rgb(153, 153, 153);">.</span>o
3.4 模式匹配
Make命令允许对文件名,进行类似正则运算的匹配,主要用到的匹配符是%。比如,假定当前目录下有 f1.c 和 f2.c 两个源码文件,需要将它们编译为对应的对象文件。
%.o: %.c
等同于下面的写法。
f1.o: f1.c
f2.o: f2.c
使用匹配符%,可以将大量同类型的文件,只用一条规则就完成构建。
3.5 变量和赋值符
Makefile 允许使用等号自定义变量。
txt = Hello World
test:
@<span class="token keyword" style="margin: 0px; padding: 0px; list-style-type: none; border: none; color: rgb(0, 119, 170);">echo</span> $<span class="token punctuation" style="margin: 0px; padding: 0px; list-style-type: none; border: none; color: rgb(153, 153, 153);">(</span>txt<span class="token punctuation" style="margin: 0px; padding: 0px; list-style-type: none; border: none; color: rgb(153, 153, 153);">)</span>
上面代码中,变量 txt 等于 Hello World。调用时,变量需要放在 $( ) 之中。
调用Shell变量,需要在美元符号前,再加一个美元符号,这是因为Make命令会对美元符号转义。
test:
@<span class="token keyword" style="margin: 0px; padding: 0px; list-style-type: none; border: none; color: rgb(0, 119, 170);">echo</span> $<span class="token property" style="margin: 0px; padding: 0px; list-style-type: none; border: none; color: rgb(153, 0, 85);">$HOME</span>
有时,变量的值可能指向另一个变量。
v1 = $(v2)
上面代码中,变量 v1 的值是另一个变量 v2。这时会产生一个问题,v1 的值到底在定义时扩展(静态扩展),还是在运行时扩展(动态扩展)?如果 v2 的值是动态的,这两种扩展方式的结果可能会差异很大。
为了解决类似问题,Makefile一共提供了四个赋值运算符 (=、:=、?=、+=),它们的区别请看StackOverflow。
VARIABLE = value
# 在执行时扩展,允许递归扩展。
VARIABLE := value
# 在定义时扩展。
VARIABLE ?= value
# 只有在该变量为空时才设置值。
VARIABLE += value
# 将值追加到变量的尾端。
3.6 内置变量(Implicit Variables)
Make命令提供一系列内置变量,比如, ( C C ) 指向当前使用的编译器, (CC) 指向当前使用的编译器, (CC)指向当前使用的编译器,(MAKE) 指向当前使用的Make工具。这主要是为了跨平台的兼容性,详细的内置变量清单见手册。
output:
$<span class="token punctuation" style="margin: 0px; padding: 0px; list-style-type: none; border: none; color: rgb(153, 153, 153);">(</span>CC<span class="token punctuation" style="margin: 0px; padding: 0px; list-style-type: none; border: none; color: rgb(153, 153, 153);">)</span> <span class="token operator" style="margin: 0px; padding: 0px; list-style-type: none; border: none; color: rgb(166, 127, 89);">-</span>o output input<span class="token punctuation" style="margin: 0px; padding: 0px; list-style-type: none; border: none; color: rgb(153, 153, 153);">.</span>c
3.7 自动变量(Automatic Variables)
自我介绍一下,小编13年上海交大毕业,曾经在小公司待过,也去过华为、OPPO等大厂,18年进入阿里一直到现在。
深知大多数Linux运维工程师,想要提升技能,往往是自己摸索成长或者是报班学习,但对于培训机构动则几千的学费,着实压力不小。自己不成体系的自学效果低效又漫长,而且极易碰到天花板技术停滞不前!
因此收集整理了一份《2024年Linux运维全套学习资料》,初衷也很简单,就是希望能够帮助到想自学提升又不知道该从何学起的朋友,同时减轻大家的负担。


既有适合小白学习的零基础资料,也有适合3年以上经验的小伙伴深入学习提升的进阶课程,基本涵盖了95%以上Linux运维知识点,真正体系化!
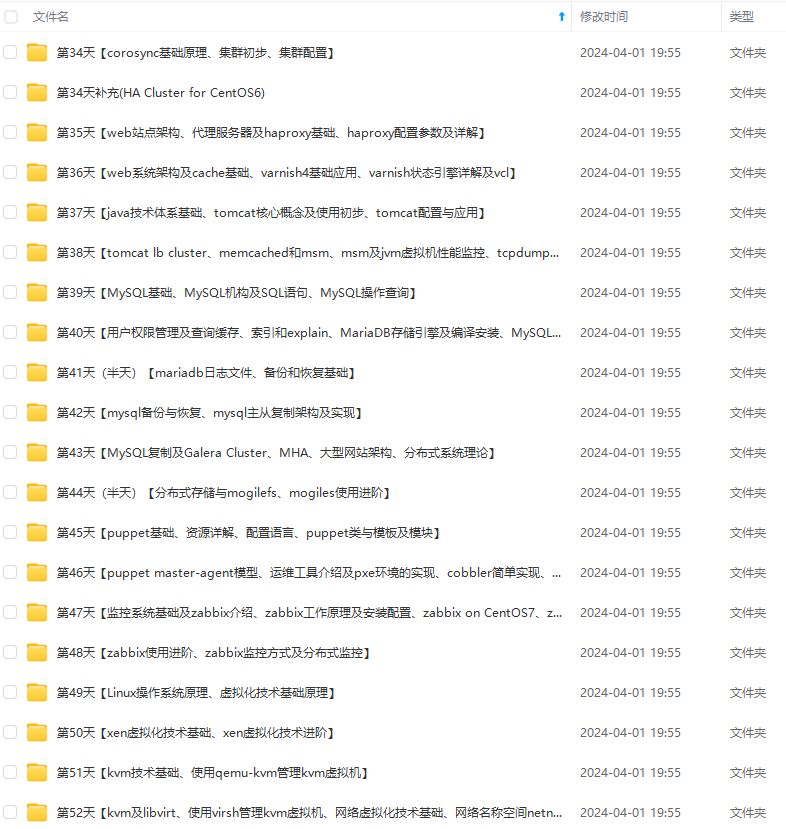
由于文件比较大,这里只是将部分目录大纲截图出来,每个节点里面都包含大厂面经、学习笔记、源码讲义、实战项目、讲解视频,并且后续会持续更新
如果你觉得这些内容对你有帮助,可以添加VX:vip1024b (备注Linux运维获取)

一个人可以走的很快,但一群人才能走的更远。如果你从事以下工作或对以下感兴趣,欢迎戳这里加入程序员的圈子,让我们一起学习成长!
AI人工智能、Android移动开发、AIGC大模型、C C#、Go语言、Java、Linux运维、云计算、MySQL、PMP、网络安全、Python爬虫、UE5、UI设计、Unity3D、Web前端开发、产品经理、车载开发、大数据、鸿蒙、计算机网络、嵌入式物联网、软件测试、数据结构与算法、音视频开发、Flutter、IOS开发、PHP开发、.NET、安卓逆向、云计算
73)]
[外链图片转存中…(img-mbhZyb0O-1712307469973)]
[外链图片转存中…(img-nAfQeAO5-1712307469973)]
既有适合小白学习的零基础资料,也有适合3年以上经验的小伙伴深入学习提升的进阶课程,基本涵盖了95%以上Linux运维知识点,真正体系化!
由于文件比较大,这里只是将部分目录大纲截图出来,每个节点里面都包含大厂面经、学习笔记、源码讲义、实战项目、讲解视频,并且后续会持续更新
如果你觉得这些内容对你有帮助,可以添加VX:vip1024b (备注Linux运维获取)
[外链图片转存中…(img-w1Vqh6xr-1712307469974)]
一个人可以走的很快,但一群人才能走的更远。如果你从事以下工作或对以下感兴趣,欢迎戳这里加入程序员的圈子,让我们一起学习成长!
AI人工智能、Android移动开发、AIGC大模型、C C#、Go语言、Java、Linux运维、云计算、MySQL、PMP、网络安全、Python爬虫、UE5、UI设计、Unity3D、Web前端开发、产品经理、车载开发、大数据、鸿蒙、计算机网络、嵌入式物联网、软件测试、数据结构与算法、音视频开发、Flutter、IOS开发、PHP开发、.NET、安卓逆向、云计算


 1560
1560


 被折叠的 条评论
为什么被折叠?
被折叠的 条评论
为什么被折叠?
 到【灌水乐园】发言


