


1.将静态HTML渲染为DataGrid样式
<!-- 方式一:将静态HTML渲染为datagrid样式 -->
	<table class="easyui-datagrid">
		<thead>
			<tr>
				<th data-options="field:'id'">编号</th>
				<th data-options="field:'name'">姓名</th>
				<th data-options="field:'age'">年龄</th>
			</tr>
		</thead>
		<tbody>
			<tr>
				<td>001</td>
				<td>小明</td>
				<td>90</td>
			</tr>
			<tr>
				<td>002</td>
				<td>老王</td>
				<td>3</td>
			</tr>
		</tbody>
	</table>
2、发送ajax请求获取json数据创建datagrid 提供json文件
<!-- 方式二:发送ajax请求获取json数据创建datagrid -->
<table data-options="url:'${pageContext.request.contextPath }/json/datagrid_data.json'"
class="easyui-datagrid">
<thead>
<tr>
<th data-options="field:'id'">编号</th>
<th data-options="field:'name'">姓名</th>
<th data-options="field:'age'">年龄</th>
</tr>
</thead>
</table>
2、使用easyUI提供的API创建datagrid(掌握)
<!-- 方式三:使用easyUI提供的API创建datagrid -->
<script type="text/javascript">
$(function(){
//页面加载完成后,创建数据表格datagrid
$("#mytable").datagrid({
//定义标题行所有的列
columns:[[
{title:'编号',field:'id',checkbox:true},
{title:'姓名',field:'name'},
{title:'年龄',field:'age'},
{title:'地址',field:'address'}
]],
//指定数据表格发送ajax请求的地址
url:'${pageContext.request.contextPath }/json/datagrid_data.json',
rownumbers:true,
singleSelect:true,
//定义工具栏
toolbar:[
{text:'添加',iconCls:'icon-add',
//为按钮绑定单击事件
handler:function(){
alert('add...');
}
},
{text:'删除',iconCls:'icon-remove'},
{text:'修改',iconCls:'icon-edit'},
{text:'查询',iconCls:'icon-search'}
],
//显示分页条
pagination:true
});
});
</script>
如果数据表格中使用了分页条,要求服务端响应的json变为:
请求

响应:

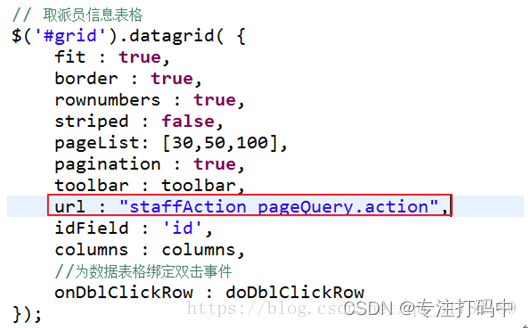
3、案例:取派员分页查询
(1)页面调整
修改页面中datagrid的URL地址
(2)服务端实现
分装分页相关属性

在BaseDao中扩展通用分页查询方法
| 1 2 3 4 5 6 7 8 9 10 11 12 13 14 15 |
|
(3)detachedCriteria.setProjection(null);//指定hibernate框架发出sql的形式----》select * from bc_staff
| 1 2 3 4 5 |
|
在StffAction中提供分页查询方法
| 1 2 3 4 5 6 7 8 9 10 11 12 13 14 15 16 17 18 19 20 21 22 23 24 25 26 27 28 |
|
取派员的批量删除
在取派员表中存在一个删除标识位deltag,1表示已删除,0表示未删除
(1)页面调整
| 1 2 3 4 5 6 7 8 9 10 11 12 13 14 15 16 17 18 19 20 21 22 23 24 25 26 |
|
(2)服务端实现第一步:在StaffAction中创建deleteBatch批量删除方法
| 1 2 3 4 5 6 7 8 9 10 |
|
第二步:在Service中提供批量删除方法
| 1 2 3 4 5 6 7 8 9 10 11 12 |
|
第三步:在Staff.hbm.xml中提供HQL语句,用于逻辑删除取派员
| 1 2 3 4 |
|
取派员修改功能
(1)页面调整 第一步:为数据表格绑定双击事件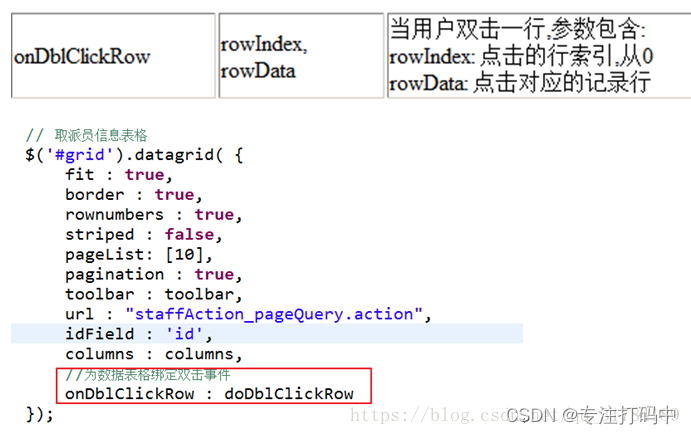
第二步:复制页面中添加取派员窗口,获得修改取派员窗口
第三步:定义function
| 1 2 3 4 5 6 7 |
|
(2)服务端实现 在StaffAction中创建edit方法,修改取派员信息
| 1 2 3 4 5 6 7 8 9 10 11 12 13 14 15 |
|


 464
464


 被折叠的 条评论
为什么被折叠?
被折叠的 条评论
为什么被折叠?
 到【灌水乐园】发言


